How to Install a Culvert Pipe: Step-by-Step Guide for DIY Success
To install a culvert pipe successfully, follow these key steps:
- Select the Right Culvert: Choose the appropriate material, size, and alignment based on factors like water flow, soil type, and load capacity.
- Obtain Necessary Permits: Ensure you have all required permits before beginning the project.
- Mark Utilities: Clearly mark any existing utilities to avoid damaging them during excavation.
- Excavate Properly: Dig to a firm subgrade to create a stable foundation for the culvert.
- Prepare the Base: Create a shaped granular cradle for the culvert to rest on.
- Install the Pipe: Align the pipe sections and connect them securely using sealed connections.
- Backfill with Care: Use controlled backfill techniques and compact the soil to protect the integrity of the pipe.
- Armor the Inlet and Outlet: Protect these areas against erosion by using appropriate materials.
- Restore Surrounding Slopes: Ensure that slopes are restored to prevent future erosion.
- Consider Sizing and Winterproofing: Pay attention to the sizing requirements and take steps for winterproofing if necessary.
- Plan for Maintenance: Regular maintenance checks will help prolong the lifespan of your culvert.
By following these steps, you’ll effectively install a culvert pipe to manage stormwater and prevent erosion.
What a Culvert Does and When to Install One
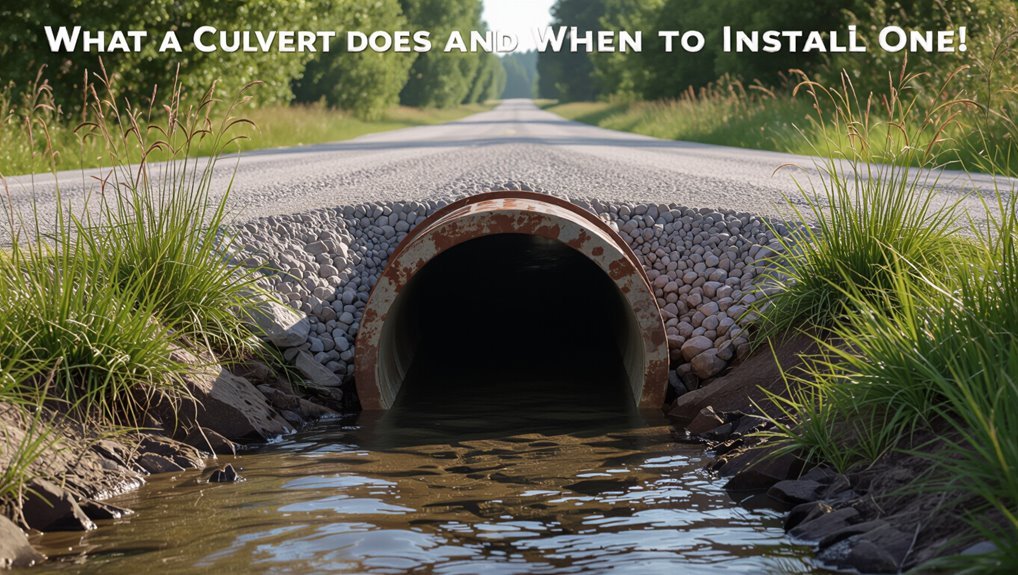
A culvert channels water beneath roads, driveways, or embankments to prevent erosion and flooding; it is installed where surface runoff must cross a built or compacted surface without disrupting traffic or drainage patterns.
The structure conveys flow, maintains grade, and protects subgrade from scour.
Selection depends on flow rate, watershed size, soil type, expected loads, and longevity.
Common materials include corrugated metal, concrete, and plastic; shapes vary (pipe, box, arch).
Install when persistent pooling, overtopping, roadway undermining, or frequent washouts occur, or when a new crossing will alter natural drainage and require controlled conveyance.
Permits and Utility Locates for Culvert Work
Because culvert installation alters drainage and may disturb public right-of-way or regulated waters, obtaining the proper permits and completing utility locates is essential before excavation begins. The homeowner should research local permitting agencies, submit site plans, and allow time for review. Call-before-you-dig services will mark buried utilities; respect marks and adjust plans accordingly. Failure to secure permits or locates risks fines, project delays, or unsafe conditions. Documentation of approvals and locate tickets should be kept on site. Coordinate inspections and follow permit conditions throughout installation to assure compliance and protect infrastructure and safety.
| Permit Type | Agency | Typical Requirement |
|---|---|---|
| ROW permit | Local public works | Traffic control plan |
| Drainage permit | County/state | Drainage calculations |
| Wetlands permit | Environmental agency | Mitigation plan |
| Driveway permit | Municipal | Curb cut approval |
| Locate ticket | Utility locator | Marked utilities on site |
Culvert Materials: Pros, Cons, and Selection
Choose culvert material based on site conditions, hydraulic needs, load requirements, longevity, and budget. Common options include corrugated metal, concrete, HDPE (plastic), and aluminized or coated steel.
Corrugated metal is economical and easy to install but corrodes over time in acidic soils. Concrete offers durability and high load capacity yet is heavy and costly to handle. HDPE is lightweight, flexible, resistant to corrosion, and suited for low-to-moderate loads but may deform under heavy traffic. Coated steels add corrosion resistance.
Selection balances expected lifespan, soil chemistry, traffic loading, installation equipment, and maintenance access; consider warranties and local availability.
Culvert Sizing: Diameter, Length, and Flow Calculations
When sizing a culvert, engineers assess expected peak flow, allowable headwater, and site constraints to determine appropriate diameter, length, and slope that will convey design discharges without causing upstream flooding or downstream erosion.
They calculate peak discharge using runoff coefficients, rainfall intensity, and drainage area or by applying regional regression or unit hydrograph methods.
Manning’s equation or energy balance yields required diameter for open and pressurized flow, considering roughness and slope.
Length follows channel alignment and crossing width; inlet and outlet controls influence headwater and tailwater relationships.
Safety factors and debris allowance guarantee reliable performance under variable conditions.
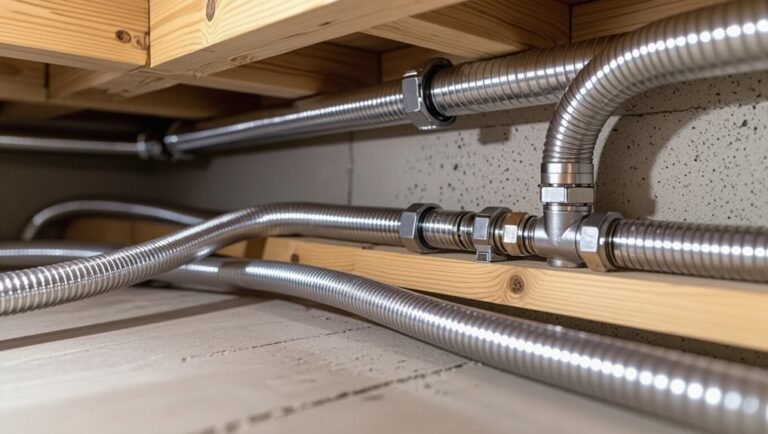
Tools and Materials for DIY Culvert Install
The section lists the essential tools and equipment required for a DIY culvert install, from excavation gear to compaction and safety items.
It then outlines material options—CMP, HDPE, concrete—and the sizing considerations that affect durability and hydraulic capacity.
Practical guidance on matching materials and tools to site conditions and project scale follows.
Tools and Equipment Needed
Several essential tools and materials are required to install a culvert pipe safely and effectively. A concise list prioritizes safety, excavation, pipe handling, and bedding preparation. Personal protective equipment, shovels, a compact excavator or backhoe, tampers, levels, and wheelbarrows streamline work. Pipe lifting straps and saws/ bolt tools assist fitting. Geotextile fabric and measured aggregate for bedding are noted but sizing choices are not discussed here.
| Task | Typical Tools |
|---|---|
| Safety | Gloves, hard hat, eye protection |
| Excavation & handling | Shovel, excavator, lifting straps |
| Bedding & compaction | Tamper, wheelbarrow, level |
Materials And Sizing Choices
For a DIY culvert installation, selecting appropriate pipe materials and diameters is critical to guarantee longevity, hydraulic capacity, and ease of installation.
The installer evaluates common materials: corrugated metal (durable, rust-prone without galvanization), high-density polyethylene (HDPE — flexible, corrosion-resistant), and reinforced concrete (rigid, heavy).
Diameter selection depends on peak flow, watershed size, and local regulations; engineers often use Manning’s equation or local tables.
Wall thickness, structural classification, and end treatments affect performance.
Include bedding and backfill specs matched to pipe type.
Proper material and size choices reduce maintenance, prevent washouts, and secure regulatory compliance.
Site Marking and Work-Sequence Plan
Before ground disturbance begins, a clear site marking and work-sequence plan must be established to define pipe alignment, excavation limits, traffic controls, and inspection points.
The plan documents stake locations, stationing, and reference offsets using durable flags, paint, or stakes.
It sequences tasks: utility clearance, erosion-control placement, staging of pipe and bedding, and coordinated inspections.
Traffic and pedestrian controls are mapped with signage, detours, and flagging schedules.
Responsibilities and contact information for crew leads and inspectors are recorded.
A contingency section addresses weather delays, material shortages, and unforeseen obstructions, with triggers for reassessment and plan revision.
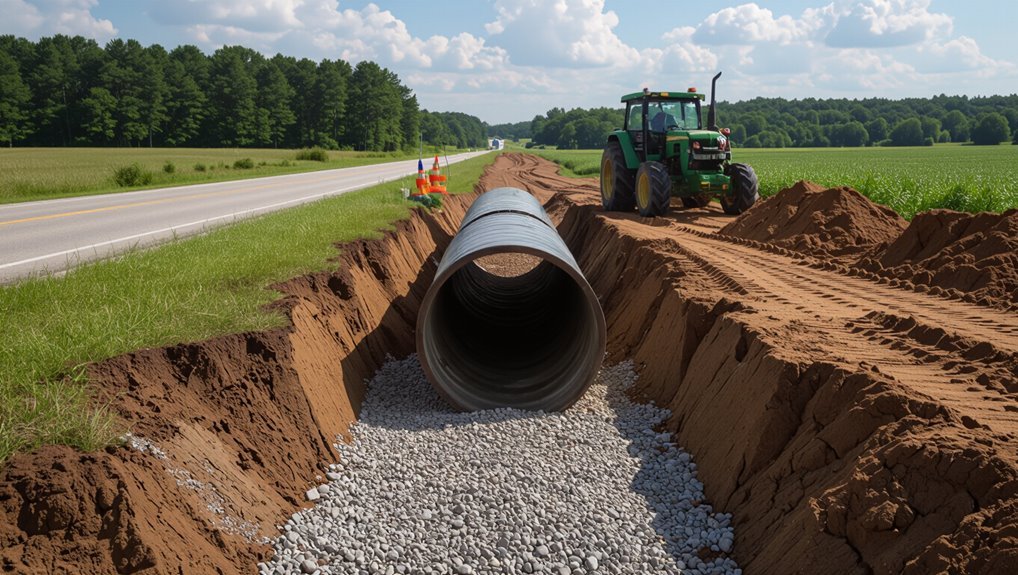
Excavating the Trench: Depth and Profile
When excavating the trench for a culvert pipe, the crew must establish and maintain the specified depth and profile to guarantee hydraulic performance, structural support, and long-term stability.
The trench should be excavated to the engineered dimensions, providing uniform bedding and sidewall angles that prevent collapse.
Remove organic material and soft spots to reach competent subgrade; replace unsuitable soils with compacted granular fill.
Maintain a consistent bottom width and profile to accommodate pipe and bedding.
Use stringlines, grade poles, and laser levels to control excavation.
Keep spoil clear of edges and protect adjacent surfaces from undermining during work.
Setting Invert Elevation and Verifying Slope
Establish the culvert invert elevation precisely to guarantee designed flow capacity and prevent ponding or excessive velocity; surveyors set reference benchmarks and transfer elevations into the trench so the pipe slope matches project plans.
Verify slope using a level, transit, or laser and check multiple points along the trench to confirm uniform fall.
Mark control elevations at inlet, midpoint, and outlet; adjust excavation or fill until measurements align with plan gradients.
Re-check after any soil disturbance.
Record final invert elevations and slope readings for contractor and inspector reference. Accurate verification prevents hydraulic issues and reduces rework.
Preparing Culvert Bedding: Gravel, Sand, Concrete
Prepare the culvert bedding to provide uniform support, protect the pipe from point loads, and guarantee proper alignment and drainage. The installer selects material based on soil conditions and load: compactible gravel for drainage and bearing, washed sand for fine leveling, or lean concrete for high-load sections.
Bedding depth and compaction must meet design; avoid voids beneath the pipe. Edge support and sidefill staging reduce settlement risk.
Visualize the finished bed:
- Layered gravel compacted in 4–6 inch lifts.
- Smooth sand bedding shaped to cradle the barrel.
- Shallow concrete pad cured before placement.
Placing and Aligning Pipe Sections
With the bedding completed to design depth and compacted to specification, pipe sections are moved into the trench and set on the prepared cradle so each barrel bears uniformly. Sections are aligned longitudinally and laterally, grade checked with a string line or laser, and adjusted with shims or lifting gear. Elevation, slope, and centerline conformity are verified before backfill. Care is taken to avoid point loads and to maintain manufacturer clearances. Inspectors confirm alignment tolerances and note deviations for correction.
| Check | Action |
|---|---|
| Centerline | Align to stakes |
| Grade | Verify with level |
| Lateral | Adjust for plumb |
| Support | Add shims |
| Visual | Inspect gaps |
Connecting Pipes and Sealing Joints
When joining culvert sections, crews make certain each pipe end seats fully against its mate and that joint faces are clean and free of debris.
They inspect surfaces, fit gaskets or apply approved sealant, and maintain alignment to prevent offsets.
Connections are tightened or locked per manufacturer specs, avoiding overcompression of seals.
After sealing, crews test by running water or visual inspection for leaks, adjusting as needed.
Common practices include:
- Press gasket evenly into groove, check continuous contact.
- Smear compatible sealant around circumference, avoiding excess.
- Verify alignment with straightedge and recheck fasteners for torque.
Backfilling to Protect the Pipe and Prevent Settlement
Attention to proper bedding preparation sets the foundation for long-term culvert performance by ensuring uniform support beneath the pipe.
Layered compaction techniques are then applied in controlled lifts to achieve specified density without damaging the pipe or disturbing alignment.
Together these measures minimize settlement and protect the structure from deformation and infiltration.
Proper Bedding Preparation
To guarantee long-term performance and prevent settlement, proper bedding preparation requires a uniformly graded, compacted foundation that fully supports the culvert’s haunches and invert.
The installer places clean, granular material to form a stable cradle, shaping the bed to match the pipe profile and prevent point loads.
Material selection excludes fines that retain water.
Compaction is controlled to specified depth and uniformity without overworking the soil near the pipe.
Visual checks confirm continuous contact beneath the invert before backfill begins.
- Smooth, contoured cradle matching pipe profile
- Even, granular material free of organics
- Continuous support beneath haunches
Layered Compaction Techniques
Following the placement of the bedding, layered compaction proceeds by placing backfill in controlled lifts and compacting each layer to specified density to protect the pipe and minimize future settlement. The installer places 6–12 inch lifts, guarantees even distribution around the haunches, and uses appropriate compaction equipment. Moisture is adjusted to achieve peak density; testing verifies compliance. Attention to compaction near the pipe prevents distortion and differential settlement. Recordkeeping of lift thickness and test results supports quality control. Proper sequencing from haunches outward and alternating sides maintains pipe alignment and long-term performance.
| Lift Thickness | Equipment | Target Density |
|---|---|---|
| 6–12 in | Plate compactor | 95% |
| Haunch zone | Hand tamper | 98% |
Headwalls, Wingwalls, and Erosion End Treatments
In installing a culvert, properly designed headwalls, wingwalls, and erosion end treatments provide essential structural support and control water flow at the inlet and outlet.
Headwalls anchor the pipe, resist soil pressure, and focus flow; wingwalls convert embankments into the inlet, guiding water and preventing scour; end treatments such as riprap, aprons, or gabions dissipate energy and stabilize the toe.
Consider material, slope, and hydraulic forces when sizing and locating these features.
Typical installations evoke clear forms:
- Solid concrete headwall with wingwalls flaring outward.
- Stone riprap apron cushioning the outlet.
- Terraced gabions protecting a steep discharge face.
Restore Driveway or Roadside After Culvert Install
With headwalls, wingwalls, and end treatments in place to control flow and prevent scour, attention shifts to restoring the driveway or roadside disturbed during culvert installation. Compact backfill in layers, matching native soil and achieving proper crown for runoff. Replace subbase and gravel, grading toward shoulders to maintain drainage. Reinstall pavement or gravel surface, compacting to avoid future settlement.
Reseed or hydroseed disturbed banks with appropriate native grasses and apply erosion control matting where slope is vulnerable. Reconnect any culvert aprons, gutters, or roadside ditches. Inspect final grades and surface transitions to guarantee smooth, safe vehicle passage and positive drainage.
Freeze/Thaw Drainage Considerations and Winterproofing
The guide addresses measures to reduce frost heave around the culvert by controlling soil moisture and using appropriate backfill and insulation.
It also highlights strategies to maintain winter flow, such as ensuring slope, protecting inlet/outlet from ice blockage, and providing adequate grate or wingwall protection.
Practical winterproofing reduces freeze-related damage and preserves drainage capacity through thaw cycles.
Preventing Frost Heave
When ground moisture repeatedly freezes and thaws around a culvert, the resulting expansion and contraction can lift pipe sections, displace bedding, and compromise alignment, so designers must address freeze/thaw cycles through drainage design and winterproofing measures.
Preventing frost heave relies on controlling water and insulating vulnerable zones. Key tactics include proper subgrade compaction, granular drainage layers, and thermal separation.
Visualize these measures:
- A trench with coarse drain rock channeling water away.
- A compacted sand/gravel bedding forming a stable base under the pipe.
- Rigid insulation or geotextile separating frost-prone soil from the culvert.
Winter Flow Maintenance
Considering freeze/thaw dynamics, winter flow maintenance focuses on ensuring continuous conveyance and preventing ice-related blockages that compromise culvert performance. Inspection before freeze identifies debris, sediment, and damaged liners; prompt removal reduces ice dams. Grade and outlet reinforcement guide flow away from foundations; riprap or armored aprons limit erosive undercutting. Where freezing is severe, install flow diverters, heat tape selectively, or insulation to keep critical throat areas thawed. Monitor after thaw cycles and after storms. Record observations to adjust maintenance frequency.
| Task | Frequency | Priority |
|---|---|---|
| Debris removal | Pre-winter | High |
| Outlet repair | Post-event | Medium |
| Ice mitigation | As needed | High |
Common Installation Mistakes and How to Avoid Them
Frequently, installers make predictable errors that compromise culvert performance and longevity. Attention to alignment, bedding, and outlet protection prevents common failures. Typical mistakes include improper slope, inadequate bedding, and poor erosion control; each has straightforward remedies.
- Misaligned pipe: imagine a bent flow path—use stringlines and level to maintain centerline and gradient.
- Weak bedding: picture voids under the barrel—install compacted granular bedding to full support.
- Unprotected outlet: see scour carving away soil—install riprap or energy dissipators and extend headwalls as needed.
Applying these fixes yields a durable, well-functioning culvert installation.
Inspecting and Maintaining Your Culvert
After correcting alignment, bedding, and outlet protection, regular inspections keep the culvert performing as designed.
Periodic checks—after storms and seasonally—identify blockages, sediment buildup, corrosion, deformation, and erosion at inlets/outlets.
Remove debris and accumulated sediment; clear vegetation that restricts flow.
Tighten or replace fasteners, and patch small holes or localized rust with suitable materials.
Regrade undermined approaches and restore bedding where washout occurred.
Document inspection dates, findings, and repairs for trend tracking.
Small repairs prevent failures; ongoing maintenance preserves hydraulic capacity and roadway integrity.
Schedule more frequent checks when upstream land use or flow patterns change.
When to Call a Pro: Complex Sites and Safety Red Flags
For complex sites or any situation involving structural uncertainty, unusual hydraulics, confined spaces, or known utility crossings, a qualified professional should be engaged.
A pro assesses risks, performs precise surveys, obtains permits, and guarantees compliance.
Signs that demand expert involvement include unstable banks, high flow volumes, and nearby buried services.
Immediate consultation is advised when erosion exposes foundations or when heavy equipment access is restricted.
Visualize scenarios to decide:
- Deep trench with vertical walls and standing water.
- Fast-moving stream near roads or structures.
- Dense utility networks under the proposed alignment.
Safety and liability concerns outweigh DIY savings.
Conclusion
To summarize, installing a culvert transforms a soggy problem into reliable drainage when done correctly. The guide emphasizes permits, proper sizing, material choice, winterproofing, and routine inspection to avoid common mistakes. DIYers are urged to use the right tools, heed utility locates, and recognize when conditions demand a professional. With careful planning and maintenance, a culvert can perform like a tiny miracle—steadfastly channeling water away for years to come.