Hide Pipes on Wall: 12 Stylish DIY Ideas to Conceal Exposed Pipes
Exposed pipes can be stylishly concealed with various DIY methods. Here are some effective options to consider:
- Paint the Pipes: Match the pipes to your wall color for a seamless look.
- Add Decorative Trim or Floating Shelves: Incorporate trim or shelves around the pipes for added flair.
- Hang Fabric Panels: Use fabric to create a soft barrier that hides the pipes.
- Build Removable Boxes: Construct plywood boxes or cabinets for easy access to shutoffs and ventilation.
- Use Magnetic Snap-On Panels: These panels allow tool-free access and can be easily removed.
- Create Living Walls: Incorporate greenery to distract from the pipes.
- Install Trunking or Faux Millwork: These options add style while covering the pipes.
Remember to consider materials and code requirements for your chosen method. More detailed step-by-step guides and cost estimates are available for those interested in specific projects.
Assess Your Pipes: Route, Material & Access Needs

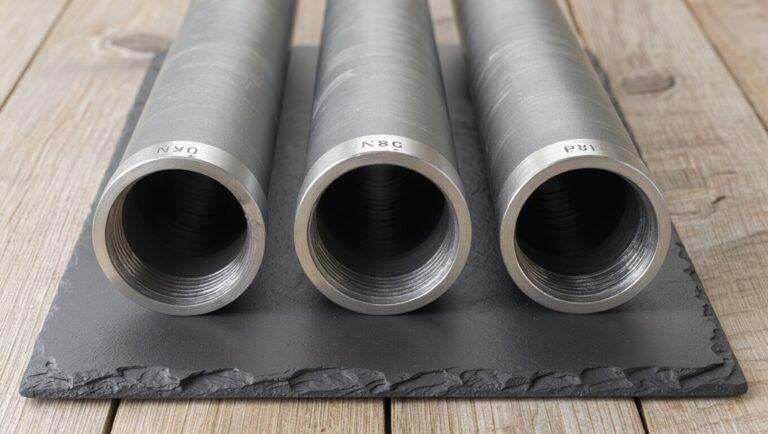
Begin by mapping the existing plumbing: note the pipe routes, types of materials (copper, PEX, PVC, galvanized), connection points, and any visible joints or fittings. The inspector records wall proximity, runs to fixtures, and elevations, marking shutoffs and access panels. Material dictates clipping, fastening, and concealment options; fragile or corroded sections need preservation. Measure clearances for future coverings and identify thermal or vibration issues requiring isolation. Confirm which segments require continued access for maintenance. Photographs and scaled sketches support design decisions. Prioritize safety: avoid hiding active leaks or compromised supports that demand repair before concealment.
Choose a Strategy: Temporary vs Permanent, Budget, and Code
With the pipe mapping and access needs established, the next step is selecting a concealment strategy that balances permanence, budget, and code compliance.
Homeowners should decide between temporary covers—removable panels, fabric wraps, freestanding boxing—and permanent solutions like built-in chase walls or drywall enclosures.
Budget dictates materials and labor: vinyl or MDF is cheaper; custom carpentry or tile costs more.
Code and maintenance override aesthetics: allow shutoff access, maintain required clearances, and make certain venting or inspection points remain reachable.
Consult local regulations for fire resistance and plumbing access requirements; when in doubt, seek a licensed plumber or inspector.
Quick Fixes to Conceal Pipes (Paint, Trim, and Tape)
Often a few straightforward tricks—paint, trim, and adhesive tape—can dramatically reduce the visual impact of exposed pipes without major work.
Painting pipes to match the wall or trim color is economical; use metal‑appropriate primer and high‑adhesion satin or gloss for easy cleaning.
Decorative trim or moulding can disguise runs, creating a purposeful architectural line; secure trim to the wall, not the pipe, for service access.
Adhesive fabric or vinyl tape offers a quick, low‑profile option to unify finishes or create a faux metal wrap.
Each method prioritizes reversibility, minimal tools, and preserving access for maintenance.
Build a Simple Box Frame to Hide Pipes (Plywood One‑Day DIY)
A straightforward plywood box frame offers a quick, sturdy way to conceal wall pipes using common materials and basic tools.
Measurements and careful cutting guarantee the box fits snugly around the runs, while simple assembly with screws and glue keeps the project to a single day.
Final sanding, paint or trim finish the piece so it blends with the room and allows future access if needed.
Materials And Tools
Essential materials and tools for building a simple plywood box frame to hide wall pipes include a sheet of 1/2″ or 3/4″ plywood, lumber for cleats or a basic stud frame, wood screws, construction adhesive, a measuring tape, a circular saw or table saw, a drill/driver, a level, sandpaper, and paint or trim to finish the box.
Additional useful items are a stud finder, a speed square, wood glue, pocket hole jig or countersink bit, clamps, and safety gear (goggles, ear protection, dust mask).
Fasteners and finish choices should match wall material and planned access points for maintenance.
Measuring And Cutting
With materials and tools gathered, measurements must be accurate before any cuts are made to guarantee the box fits cleanly around pipes and against the wall.
Measure height from floor to underside of obstructions, account for baseboard and pipe clearance, and record width and depth including gap for insulation or access.
Transfer dimensions to plywood, marking straight lines with a square and pencil. Double-check each mark before cutting.
Use a circular saw with guide or a jigsaw for openings around pipes; cut slightly outside lines if sanding is planned.
Label pieces for front, sides, top and bottom to prevent assembly errors.
Assembly And Finishing
After cutting and labeling the panels, the assembly and finishing stage brings the pieces together into a rigid, serviceable box: sides and back are fastened first to establish the frame, the top and bottom are fitted next, and front access panels or doors are left for the final step.
Using glue and screws, corners are squared and temporary clamps hold joints while fastening. Internal clearances for pipes and valves are confirmed before final attachment.
Sanding removes mill marks and fills seams with wood filler for a seamless appearance. Finish options—paint, stain, or trim—are applied after priming; hardware is installed last.
Install Slim Cabinet Doors or Hinged Access Panels
The article considers slim cabinet doors as a low‑profile option for concealing pipe enclosures, noting material and hinge styles that keep the frontage minimal.
It also outlines hinged access panel placement to guarantee full reach to valves and couplings without removing the entire cover.
Practical spacing and hinge orientation recommendations are given to balance aesthetics with serviceability.
Slim Cabinet Door Options
Consider slim cabinet doors or hinged access panels when concealment and occasional access to wall-mounted pipes are required.
Slim cabinet doors come in flush, louvered, or shaker styles to match décor; materials include MDF, plywood, or lightweight aluminum for moisture resistance.
Magnetic catches or soft-close hinges keep doors discreet while providing frequent access.
Ventilation options prevent condensation when pipes carry hot water.
Custom-width panels accommodate narrow chase spaces; paint or veneer finishes allow seamless blending with surrounding walls.
Installation focuses on secure framing and removable hinge plates to enable future maintenance without damaging drywall or surrounding trim.
Hinged Access Panel Placement
When placing hinged access panels, prioritize alignment with pipe runs and service points so doors open directly to valves, joints, and shutoffs without requiring removal of fixtures or trim.
Panels should be sized to allow clear working space for tools and hands, with edges flush to surrounding surfaces to blend discreetly.
Mount hinges that permit full swing or removable pins for tight spots.
Position locks or magnetic catches for easy single-handed access while preventing accidental openings.
Consider future maintenance: access panels near floor drains or water heaters benefit from raised thresholds.
Mark concealed pipe locations on the panel interior for quick reference during repairs.
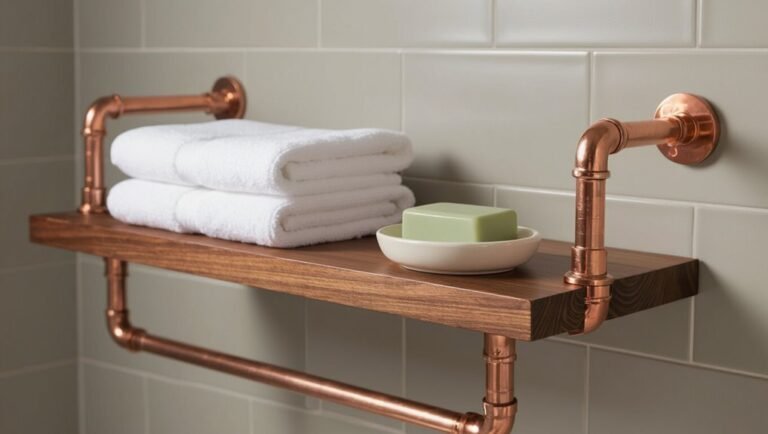
Use Floating Shelves to Hide and Make Use of Pipe Runs
Along a pipe run, floating shelves can be mounted to both conceal exposed plumbing and create functional storage without bulky framing. The shelves sit slightly in front of pipes, hiding them while offering display or practical space; careful spacing preserves access and ventilation. Materials and finish set tone—warm wood soothes, metal feels industrial. Installation emphasizes level supports and anchored brackets sized for load and pipe clearance.
- Warm wood shelves that soften the room
- Slim black metal shelves that highlight structure
- Painted shelves that blend seamlessly
- Open shelving that keeps access simple and reassuring
Hide Pipes With Decorative Trunking or Molding‑Style Raceways
Using decorative trunking or molding‑style raceways transforms exposed pipes into a finished architectural detail that conceals plumbing while echoing room trim.
Prefabricated raceways clip over pipes, offering straight runs or corner profiles that match baseboards, chair rails, or crown moldings.
Materials range from painted MDF and PVC to metal profiles; selection depends on moisture exposure and desired period style.
Installation is typically reversible and minimally invasive: measure, cut to length, secure with screws or adhesive, then paint or stain to blend.
This approach keeps access for maintenance, unifies visual lines, and suits both historic and contemporary interiors.
Wrap Pipes With Faux Beams, Columns, or Architectural Trim
By encasing exposed plumbing within faux beams, columns, or tailored architectural trim, a room gains structural cohesion while hiding unsightly pipes.
This approach transforms functional necessity into deliberate design, matching millwork to style and scale. Lightweight materials like MDF or hollow timber mimic solid elements without heavy construction.
Precision cutting and paint unify the insertion, while removable panels allow access for maintenance. Proper sealing and ventilation prevent moisture issues.
The result reads as intentional architecture rather than a retrofit, elevating the room’s character and perceived value.
- Warmth: wood-like profiles soften industrial lines
- Elegance: columns add classical dignity
- Harmony: consistent trim ties elements together
- Confidence: conceals plumbing with craft and purpose
Soft Covers: Fabric Curtains and Removable Wraps
Soft textile solutions offer a quick, nonpermanent way to soften the look of exposed pipes.
Fabric curtain panels can be hung to conceal runs or create an attractive backdrop, while removable pipe wraps provide tailored coverage for individual sections.
Both options prioritize easy installation and future access for maintenance.
Fabric Curtain Panels
Framed like a simple stage, fabric curtain panels provide a flexible, low-cost solution for concealing exposed pipes along walls. They hang from a slim rod or wire, creating instant softness and hiding utilitarian lines without permanent alteration. Choices in color, texture, and pattern influence mood—calm neutrals soothe, bold prints energize. Installation is reversible and accommodates valves or access points with tiebacks or overlapping panels.
- Warm linen tones that soothe a cluttered space
- Dramatic velvet for a sense of luxury
- Lightweight sheers offering gentle diffusion
- Patterned cottons that inject personality
Removable Pipe Wraps
Offering a practical, nonpermanent way to conceal exposed plumbing, removable pipe wraps combine soft fabric sleeves and tailored covers that slip over or fasten around pipes. They provide a tidy appearance without tools or permanent alterations.
Materials range from neoprene and felt to decorative textiles, chosen for heat tolerance and moisture resistance. Fastening methods include Velcro, snaps, ties, or hidden zippers for easy removal and laundering.
Installation accommodates bends and valves with segmented or stretch designs. Removable wraps suit rentals, seasonal changes, or quick updates, offering protection against scratches while enhancing room aesthetics with minimal effort and cost.
Magnetic or Snap‑On Panels for Tool‑Free Maintenance Access
Magnetic and snap‑on panels provide a fast, tool‑free way to conceal pipes while keeping them accessible for maintenance. They attach quickly to metal frames or magnetic strips, offering clean lines and instant removal for inspections or repairs. Lightweight materials resist moisture and can be painted or finished to match décor.
Panels reduce visual clutter without permanent alteration, ideal for renters and minimalists. Consider panel size, magnetic strength, and edge sealing to prevent rattling and dust ingress.
- Relief: instant concealment so stress melts away
- Pride: a polished finish elevates the room
- Ease: maintenance becomes simple and quick
- Confidence: nonpermanent solution preserves options
Living Walls & Planters That Conceal Pipes Safely
Beyond quick-removal panels, a more organic option uses living walls and planters to hide pipes while improving air quality and aesthetics.
Modular planter systems mount to frames that leave inspection gaps and allow easy plant changeouts. Shallow troughs or pocket pockets accommodate trailing and compact species without stressing plumbing.
Irrigation should be drip-based with moisture barriers and removable trays to prevent leaks or corrosion. Lightweight climbing supports can guide foliage without touching hot or insulated pipes.
Removable sections align with valves and service points so access is straightforward. Proper placement balances concealment, ventilation, and routine maintenance for long-term safety and appearance.
Materials, Finishes, Costs & Code Considerations for Concealment
When selecting materials and finishes for concealing pipes, durability, fire resistance, and serviceability determine appropriate choices; common options include non-combustible backings (cement board or metal lath), moisture-resistant panels (PVC or composite cladding), and ventilated metal or wood furring to maintain clearance.
Costs vary: DIY drywall or trim runs low, custom metal or acoustic enclosures cost more; expect $20–$150 per linear foot depending on finish and access panels.
Code considerations mandate access to shutoffs, proper clearances for insulation, and firestopping.
Aesthetic finishes influence upkeep and value.
- Relief: hidden lines, quieter rooms
- Pride: clean, professional look
- Comfort: perceived warmth and safety
- Caution: respect codes and access
Conclusion
Concealing exposed pipes can be approached practically and creatively, and a short investigation into available methods clarifies choices. A visual synthesis of quick fixes, framed boxes, hinged panels, soft covers, magnetic solutions and living walls reveals trade‑offs in cost, permanence and access. By mapping routes, materials and code needs, one gains a clear, accurate picture of feasible designs. The result is a usable visual framework that guides selection of the best concealment strategy.