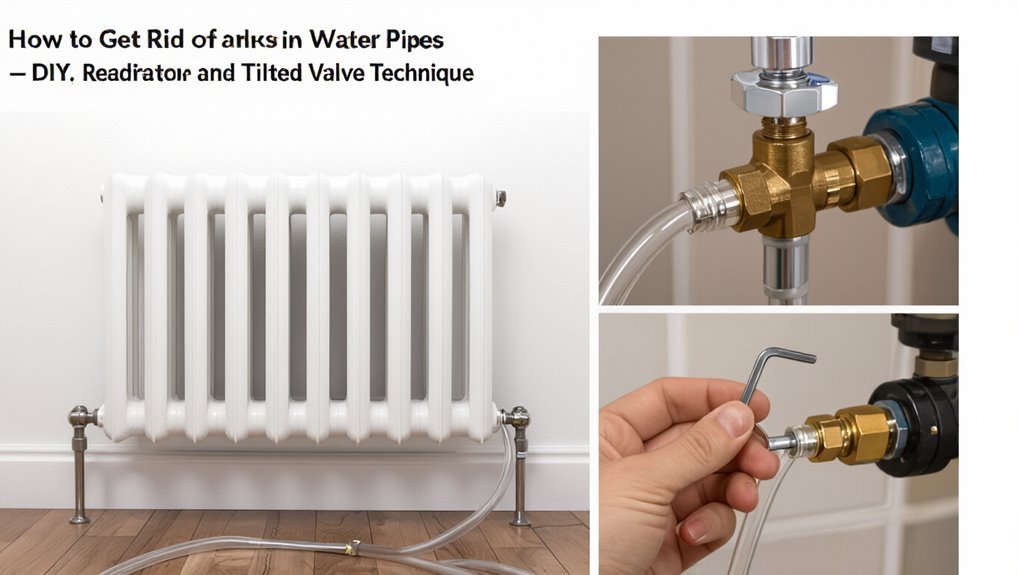
How to Get Rid of Airlocks in Water Pipes Fast €” DIY Fixes
Key Takeaway: To quickly eliminate airlocks in water pipes, isolate the affected section, open the highest tap until water flows steadily, or use a garden hose to connect a working faucet and force water through the blockage.
Airlocks can lead to sputtering, uneven water flow, and gurgling sounds at specific taps. Here’s how to fix them fast:
- Isolate the Affected Run: Identify the section of the pipe with the airlock.
- Open the Highest Tap: Open the tap located at the highest point in the system and let it run until the water flows steadily.
- Use a Garden Hose: Connect a garden hose between a working faucet and the blocked one to push water through the air pocket.
- Tap the Pipes: Lightly tap on exposed pipe bends while performing short open/close cycles on the taps.
For more stubborn air pockets, especially in heating systems, utilize radiator or appliance bleed valves. Follow these steps for effective diagnosis, prevention, and safer mechanical solutions.
What an Airlock in a Water Pipe Looks Like

An airlock in a water pipe presents as weak or no flow from faucets and intermittent sputtering when taps are opened; pipes may emit gurgling noises as trapped air shifts.
Observers note uneven pressure between outlets: one tap may run while another barely dribbles. Flow can start strong after prolonged running then diminish suddenly. Hot and cold lines can behave differently.
Fixtures farthest from the supply often show worse symptoms. Showerheads produce inconsistent spray patterns.
Turning valves or briefly opening multiple taps can change behavior, indicating movable pockets rather than permanent blockages. Visual leaks or corrosion are typically absent when airlocks are the cause.
Why Airlocks Form in Household Pipes
Having observed the telltale weak flow, sputtering, and uneven pressure that indicate trapped air, the explanation turns to how those pockets form inside household plumbing.
Airlocks occur when air becomes isolated and cannot escape, interrupting continuous water columns. Common formation mechanisms include installation and maintenance actions, system design, and sudden pressure changes.
- Pipe draining during repairs or replacements lets air enter.
- Incomplete filling after shutdown traps air in high points.
- Leaks introduce air under low-pressure conditions.
- Fast pump starts or stops create vapor pockets.
- Poorly sloped or kinked runs collect persistent air.
Airlock vs Low Pressure vs Valve Problem
A quick comparison helps distinguish an airlock from other flow issues by focusing on specific signs.
Airlocks typically cause sudden intermittent stoppages or sputtering at a single outlet, whereas low water pressure affects multiple taps and feels consistently weak.
Faulty or closed valves can mimic either symptom, so checking valve positions and operation is an essential diagnostic step.
Airlock Signs Only
Identify the telltale signs that distinguish an airlock from low water pressure or a faulty valve: sputtering taps that clear briefly when multiple outlets are opened, uneven flow that improves after running cold and hot separately, and intermittent gurgling noises localized to specific fixtures point toward trapped air.
Observation focuses on patterns rather than constant weakness. Visual and auditory cues confirm air presence. Check for sudden changes when pumps or appliances cycle.
Typical indicators include:
- Rapid fluctuation in flow when adjacent taps are used
- Brief restoration of pressure after vigorous flushing
- Localized gurgling or rumbling
- Air expelled from vents or drains
- No permanent pressure loss
Low Water Pressure
Often the homeowner faces low water pressure and must distinguish whether trapped air, a true supply shortfall, or a partly closed/faulty valve is to blame.
Low pressure from an airlock often fluctuates with intermittent sputtering and improves after cycling taps; supply shortfalls affect multiple fixtures uniformly and persist despite attempts to purge air.
To diagnose, isolate a single fixture, open full, then run other taps sequentially to see if flow changes.
Check municipal notices or neighbors for area-wide drops.
If pressure improves after bleeding or pumping, an air pocket was likely; otherwise, the issue is systemic and needs professional assessment.
Faulty Or Closed Valves
Check valves and service shutoffs can mimic or mask airlocks and supply problems, so homeowners should inspect valve positions and operation before concluding the cause of poor flow.
A closed, partially closed, or seized valve often reduces pressure or stops flow, resembling an airlock. Diagnostic steps distinguish causes: operate accessible valves, listen for trapped air, and compare fixtures.
If valves are stiff or leaking, replace or lubricate per code. When utility-side shutoffs are involved, contact the supplier.
Consider these checks:
- Verify main shutoff fully open
- Cycle gate or ball valves slowly
- Inspect for valve corrosion
- Test fixture pressure against others
- Replace faulty valves promptly
Why You Should Fix an Airlock Quickly
Because trapped air restricts flow and can cause sudden pressure changes, an airlock in a water pipe should be remedied promptly to prevent lowered water delivery, noisy pipes, and added strain on pumps and fixtures.
Prompt removal restores consistent pressure and avoids performance loss in appliances relying on steady supply.
Left untreated, airlocks can cause cavitation, vibration, and accelerated wear in valves and pump seals, increasing maintenance costs.
Persistent air pockets also promote corrosion by exposing metal surfaces to oxygenated water.
Quickly addressing airlocks preserves system efficiency, reduces repair frequency, and prevents minor issues from escalating into more extensive plumbing failures.
Safety Checks Before Any DIY Plumbing
After removing an airlock, a homeowner must run a brief set of safety checks before attempting any further DIY plumbing work. The homeowner inspects for leaks, water pressure anomalies, and electrical proximity, guaranteeing conditions are stable and safe.
Verify shutoff valves function and label them if unclear. Confirm gas appliances are unaffected and vents remain clear. If uncertainty exists, professional help is advised.
- Check visible joints and fittings for dampness or drips.
- Test shutoff valves for full closure and reopening.
- Observe water pressure for surges or weak flow.
- Guarantee electrical outlets and fixtures stay dry.
- Look for corrosion or loose pipe supports.
Tools for Clearing an Airlock
Gather basic and specialized tools before attempting to clear an airlock so the procedure proceeds efficiently and safely.
Essential items include an adjustable wrench, screwdrivers, pliers, and a flashlight to access valves and fittings.
A hosepipe with a firm connector or a mains-pressure hose aids in flushing trapped air.
A manual pump or a bicycle pump with appropriate adapters can push air or water through stubborn pockets.
Towels, a bucket, and solvent-safe gloves control leaks and protect hands.
PTFE tape, replacement washers, and a pressure gauge help guarantee fittings reseal correctly and system pressure is monitored during the fix.
Isolate the Affected Fixture First
Before attempting any intervention, the affected fixture should be isolated from the rest of the system to prevent water flow and limit pressure changes elsewhere. The person must shut the fixture’s shutoff valve, verify adjacent valves remain open for other appliances, and relieve residual pressure cautiously. Isolation reduces risk of pushing air into other lines and confines any necessary draining. Record valve positions before changing them to restore normal service afterward.
- Locate the fixture shutoff valve
- Turn off supply slowly
- Check for secondary isolation points
- Open a drain or tap to relieve pressure
- Note original valve positions
Fast Steps to Clear an Airlock Now
The technician first locates the airlock by identifying the fixture with sputtering or no flow.
Next, they bleed the highest tap in the system to let trapped air escape.
If needed, a hose loop between a working tap and the blocked one is used to force water through and dislodge the obstruction.
Locate The Airlock
In order to clear an airlock quickly, the technician first identifies which fixtures are affected and whether multiple taps or just one show reduced or no flow. They trace the system layout, noting upstairs versus downstairs, hot and cold lines, and recent work that could introduce air.
Visual and auditory cues—gurgling, sputtering, or dry sections—help narrow the location. Pressure checks confirm where flow ceases. Tools and access points are planned before intervention to avoid unnecessary disturbance.
- Check all taps systematically
- Listen for trapped air sounds
- Inspect exposed pipe runs
- Note recent repairs or shutoffs
- Map valves and branch points
Bleed The Highest Tap
Open the highest tap in the affected hot or cold run and let it run full to release trapped air; doing so creates the path of least resistance upward, allowing pressurized water to push pockets of air toward the outlet. The practitioner should leave the tap fully open while adjacent taps remain closed to prevent backflow paths. Listen for sputtering as air evacuates; steady flow indicates clearance.
If flow does not stabilize within a minute, briefly shut off downstream fittings then reopen the highest tap to re-establish pressure. Repeat until continuous water runs. Afterward close the tap slowly and check other fixtures for restored flow.
Use A Hose Loop
If bleeding the highest tap fails to clear the airlock quickly, a hose loop offers a fast, hands-on alternative.
The method forces water through trapped air by creating a temporary pressure difference between a working tap and the blocked line.
One person connects a garden hose between the working and blocked taps, forming a loop that lets higher-pressure flow dislodge the pocket.
Steps must be quick and controlled to avoid leaks or backflow.
Safety and valve isolation are essential.
Typical steps include:
- Verify shutoffs and turn off appliances
- Attach hose securely to both taps
- Open working tap fully
- Open blocked tap briefly
- Close taps and remove hose
Tap‑Thump Trick (How to Do It Safely)
Tap the offending section of pipe with a wooden handled tool, then briskly thump the adjacent fitting to dislodge trapped air and restore flow while minimizing shock to the plumbing.
The operator should wear gloves and eye protection, strike gently at first, and increase force incrementally only if necessary.
Target short, controlled taps near bends and joints where air accumulates.
Avoid metal hammers or direct hits on fragile fixtures.
After taps, check for steady water flow and listen for escaping air.
If flow does not resume, stop to prevent damage and consider alternative methods or professional assistance.
Open and Close Taps to Force Air Out
After attempting gentle taps, the next simple method is to operate the taps themselves to push trapped air out of the lines. One or two faucets are opened fully, then closed; repeating cycles coax air pockets toward an outlet.
Begin with the highest faucet and work downward if multiple fixtures exist. Watch for sputtering and steady flow as indicators of success. If pressure spikes occur, stop and reassess.
- Open and close fully for short bursts
- Start at highest point in the system
- Use a second person to observe flow
- Listen for sputtering and abrupt changes
- Repeat until flow stabilizes
Use a Hose Between High and Low Taps to Purge Air
Using a garden hose to connect a higher faucet to a lower one creates a controlled gravity-fed bypass that forces trapped air down and out of the system.
The installer attaches one end to the higher tap, the other to the lower tap or a nearby drain fitting, then opens the upper tap fully and the lower tap slightly.
Water flows from high to low, pushing air pockets ahead into the drain or lower outlet.
Monitor flow until sputtering stops and steady water runs.
Close taps in reverse order, remove the hose, and test affected fixtures.
This method is quick, simple, and minimizes pipe disassembly.
Purge an Airlock With a Bucket and Gravity
If a hose is not available or the fixtures are inaccessible, a simple bucket-and-gravity technique can clear an airlock by creating a temporary downflow. The method uses height and weight of water to force trapped air toward a drain or lower fitting.
Prepare by isolating the affected circuit and protecting surfaces from spills. Pour steadily to avoid splashing; listen for gurgles indicating movement. After completion, restore supply and test flow.
- Use a large, clean bucket for volume
- Elevate the bucket for pressure head
- Pour into the highest accessible point
- Direct outflow to a lower tap or drain
- Repeat until steady flow resumes
Bleed Radiators to Remove Trapped Air
Bleed radiators by releasing trapped air at the high points to restore even heat and consistent circulation.
A radiator key or flat screwdriver opens the bleed valve slightly until hissing stops and water appears; close promptly.
Work from the highest to lowest radiators and make certain the boiler is off and cooled to avoid scalding.
Monitor system pressure and top up the expansion tank or mains feed if pressure falls below the manufacturer’s recommended level.
Repeat after the system re-warms to confirm efficiency.
If persistent cold spots or pressure loss occur, consult a qualified heating engineer for further diagnosis.
Use an Inline Water Pump to Remove Air (When to, Which)
An inline water pump is recommended when persistent airlocks resist manual bleeding or affect multiple fixtures across a system.
Selection should match system flow rate, head pressure, and compatibility with potable or heating circuits to guarantee effective air displacement.
Proper sizing and a pump with adjustable speed or a priming feature are typically advised.
When To Use
When should an inline water pump be used to remove air from a piping system? An inline pump is appropriate when simple venting fails or when air pockets recur, causing reduced flow or noisy operation. It suits longer runs, pressured circuits, and systems where manual bleeding is impractical. Consider safety and isolation procedures before installation.
- Persistent flow reduction after conventional bleeding
- Repeated air entrainment in long or elevated pipe runs
- Inaccessible sections where manual venting is unsafe
- Systems with sensitive appliances affected by trapped air
- Temporary use during commissioning or post-repair flushing
Choosing The Pump
For selecting an inline water pump to eliminate airlocks, prioritize pump capacity, compatibility with system pressure, and the ability to handle entrained air without cavitation.
Choose pumps rated for intermittent air handling or with self-priming features.
Match flow rate to pipe diameter and fixture demand to avoid overpressurizing.
Confirm inlet/outlet connections fit existing piping or use appropriate adapters.
Prefer corrosion-resistant materials and motors with thermal protection.
Check noise, power requirements, and installation orientation.
For residential systems, compact centrifugal or diaphragm pumps often suffice; for larger or mixed systems, consider booster pumps with air separation capabilities.
Use a Garden Pump or Pressure Washer Safely
Using a garden pump or pressure washer can quickly purge airlocks from household water lines, but safe procedures are essential to prevent equipment damage and personal injury. The operator should isolate the affected run, relieve downstream pressure, and use low initial pressure to avoid burst fittings.
Protective eyewear and gloves are recommended. Confirm compatible hoses, fittings, and backflow prevention before connecting. Never direct spray at people or fragile fixtures.
- Verify pump pressure ratings match pipe specifications.
- Secure all hose connections with clamps.
- Open a downstream tap slowly during pressurization.
- Monitor for leaks and temperature rise.
- Shut down immediately if unusual noises occur.
Locate the High Points Where Air Pockets Collect
The reader should begin by identifying elevated pipe runs where water slows and air can collect.
Attention should also be paid to high points on appliances and fixtures, such as near water heaters, boilers, and ceiling-mounted taps.
Marking these locations makes targeted bleeding or venting more efficient.
Identify Elevated Pipe Runs
At higher elevations along a plumbing route, air naturally collects where pipes rise and change direction; identifying these high points is the first step in locating air pockets that cause flow restriction.
A systematic visual and tactile survey traces runs from the main supply to fixtures, noting vertical climbs, offsets, and rooftop sections.
Mark potential traps for targeted bleeding or installation of automatic air vents. Focus on exposed and attic piping before moving to concealed sections. Consider pipe pitch, recent work, and nearby shutoffs when prioritizing checks.
- Vertical rises above fixture level
- Horizontal runs with upward gradients
- Changes in pipe diameter
- Elbows and offsets
- Attic and crawlspace routes
Check Appliance High Points
Appliance high points—small vertical sections near water-using devices where pipes rise or change direction—are common seats for trapped air and should be inspected early. A technician or homeowner scans near washers, dishwashers, water heaters and sinks, feeling for elevated pipe runs and listening for gurgles. Mark suspected peaks and check for nearby shutoffs or bleeds. If present, open bleed valves or loosen a connection slightly to release air, then retighten. Repeat until steady flow returns. Record locations to prevent recurrence. Safety: shut off power to appliances before working on connected plumbing.
| Location | Action |
|---|---|
| Dishwasher high loop | Open valve/bleed |
| Washer inlet rise | Loosen connection |
| Water heater outlet | Use drain/bleed |
| Sink trap rise | Inspect and vent |
Find and Open Manual Air Vents and Bleed Valves
Before opening any valves, one should locate the manual air vents and bleed valves on the system’s high points—typically near radiators, baseboard runs, or on the boiler manifold—so trapped air can be released safely and efficiently.
The technician identifies valve types, gathers a cloth and container, and makes certain minimal system disturbance.
Gradual opening prevents water spurt and allows steady air escape.
If resistance occurs, a gentle wrench turn is advised; persistent stiffness signals professional service.
After bleeding, the system is inspected for leaks and correct pressure restored.
- Identify vents visually
- Prepare collection container
- Open slowly
- Listen for hissing
- Inspect for leaks
Check and Reset Your Mains Stopcock
The homeowner locates the mains stopcock valve, typically near the property boundary or inside a utility cupboard.
They briefly turn off the incoming supply to relieve pressure and then fully open the valve before closing it again to reseat the mechanism.
This reset can dislodge trapped air and restore normal flow.
Locate The Stopcock Valve
Often found near the water meter, under sinks, or where the service pipe enters the property, the mains stopcock is a quarter-turn or wheel valve that controls the building’s incoming water supply.
Locating it quickly aids diagnosis of airlocks and prepares for any necessary isolation. The search follows clear steps:
- Inspect visible pipe runs from the street inward.
- Check meter boxes, exterior walls, and under kitchen sinks.
- Look for a round wheel or flat lever near the point of entry.
- Refer to property plans or ask the water supplier if unclear.
- Mark the stopcock location for future access and emergency use.
Turn Off Incoming Supply
Isolate the property’s water supply by closing the mains stopcock firmly to stop flow into the plumbing system.
Confirm the valve has fully turned to the closed position; some stopcocks require a quarter-turn, others a full turn.
Note the stopcock location and orientation before adjusting so it can be returned precisely.
After closing, open a tap to verify mains isolation—no incoming pressure should be felt.
Inspect the stopcock for leaks or corrosion and reset gently if stiff.
If the stopcock will not close or leaks persist, contact a qualified plumber to avoid damage or incomplete isolation.
Fully Open Then Close
Carefully open the mains stopcock fully, then turn it back to the closed position to confirm smooth operation and correct seating. The aim is to dislodge trapped air and verify the valve functions without leaks.
One observer notes any stiffness, grinding, or resistance; another checks downstream taps for pressure changes. If operation is problematic, stop and contact a professional.
- Confirm isolation before working on appliances
- Listen for rushing or irregular flow when reopening
- Observe any drips indicating seal wear
- Operate the valve slowly to avoid water hammer
- Record valve condition for future maintenance
Clear Airlocks in Boilers and Central Heating
Air trapped in a central heating system can cause cold radiators, noisy pipes, and reduced boiler efficiency, so prompt removal is important.
Technicians or competent DIYers should isolate and turn off the boiler, allow cooling, then bleed radiators using a key or screwdriver from lowest to highest to expel air.
Check system pressure and repressurise to the manufacturer’s specification after bleeding.
For persistent pockets, use the boiler’s pump isolation valves to flush and force air toward bleeds, or employ a powerflush service.
Always follow safety guidance, consult the boiler manual, and call a Gas Safe engineer for gas appliance faults or complex issues.
Clear Airlocks in Shower and Mixer Valves
A check of the shower valve cartridge is recommended to make certain passages are clear and seals are intact.
If trapped air persists, bleeding the mixer valve lines at accessible points can release pockets and restore flow.
A controlled high-pressure flush through the valve assembly often dislodges remaining air and debris.
Check Shower Valve Cartridge
Inspect the shower valve cartridge as a likely source of trapped air affecting flow. A stuck or partially blocked cartridge can create pressure imbalances that mimic airlocks. The technician examines, isolates, and inspects without opening mixer supply lines.
- Turn off water at supply and relieve pressure
- Remove trim and access cartridge per manufacturer guide
- Inspect for debris, corrosion, or damaged seals
- Operate cartridge manually to check movement and seating
- Reassemble and test at low then full pressure
If movement is restricted or debris is present, clean or replace the cartridge to restore steady flow and eliminate air-related symptoms.
Bleed Mixer Valve Lines
After confirming the cartridge moves freely and is free of debris, attention shifts to bleeding the mixer valve lines to expel trapped air that can still impede flow.
Isolate hot and cold supplies, then open both service ports or inlet stops slowly while the outlet is open to atmosphere.
Allow water to run until steady, bubble-free flow appears from the showerhead or spout.
Close ports in reverse order, checking for leaks at joints.
If accessible, repeat with individual supply shutoffs to make certain each side is purged.
Reassemble trim and test handle operation; persistent sputtering signals a deeper blockage or trapped pocket.
Use High-Pressure Flush
Flush the lines vigorously using a high-pressure source to dislodge stubborn air pockets in shower and mixer valves. The method applies focused bursts to force trapped air through outlets; it is effective when simple bleeding fails.
Caution and proper fittings prevent damage. Recommended steps and considerations include:
- Use a pressure-rated hose or pump compatible with domestic plumbing.
- Isolate the shower or mixer, then attach the high-pressure source securely.
- Apply short, controlled bursts while monitoring valve response.
- Release pressure slowly and check for steady, uninterrupted flow.
- Repeat if necessary, then inspect seals and fixtures for leaks.
Clear Airlocks in Outdoor Taps and Garden Hoses
For outdoor taps and garden hoses, airlocks typically form when water drains back into the line or when a hose remains empty between uses, leaving trapped pockets of air that block flow.
To clear them, close the tap, disconnect the hose, then flush the tap to expel air. Reconnect and slowly open the tap fully while uncoiling the hose to allow a steady stream to push remaining air out.
For stubborn pockets, raise the hose end and squeeze it toward the tap to force air ahead. Inspect hose washers and fittings for leaks or damage that can reintroduce air.
When a One‑Way/Check Valve Causes an Airlock
One-way or check valves can trap air upstream or downstream, creating an airlock that prevents normal flow even when supply pressure is present. Technicians inspect valve orientation, seating, and chambering to locate trapped pockets. Remedies prioritize isolation, safe depressurization, and controlled venting or temporary bypass.
If accessible, slightly opening a downstream bleed point lets air escape while preventing backflow. Persistent issues may require valve service or replacement with an air-tolerant model.
- Confirm valve direction and operation
- Isolate and relieve system pressure first
- Open a high-point vent or downstream bleed
- Install a temporary bypass to flush air
- Replace faulty or poorly seated check valve
Diagnose Hidden Leaks That Mimic Airlocks
When hidden leaks occur, they can produce symptoms identical to airlocks—reduced flow, sputtering, or intermittent pressure—by allowing trapped air to enter or system pressure to drop.
Inspect visible joints, appliances, and exposed piping for dampness, corrosion, or mineral traces. Monitor the water meter with all fixtures off; a steady tick indicates a leak. Listen near walls and ceilings for running water or use a moisture meter. Isolate sections by shutting valves to narrow the leak zone. Temporary sealing tape or clamp patches can confirm location by stopping symptoms; document findings and plan permanent repair or professional assessment.
When DIY Isn’t Enough: Call a Plumber
Persistent or worsening loss of water pressure, repeated airlock recurrence, visible leaks, or signs of pipe damage indicate it is time to call a plumber.
A professional can accurately diagnose underlying causes, perform pressure tests or leak detection, and safely clear or repair pipes.
Expect licensed plumbers to offer permanent solutions such as venting, pipe replacement, or corrective re-routing.
When To Call
Call a licensed plumber if basic troubleshooting fails or the problem recurs shortly after bleeding attempts. A professional assessment prevents recurring airlocks and uncovers underlying causes that DIY steps might miss.
Consider scheduling help when persistent pressure loss, unexplained pipe noises, or localized cold spots continue despite attempts to purge lines. Emergency situations or inaccessible pipe layouts also warrant expert intervention.
Typical reasons to call include:
- Complex or hidden plumbing configurations
- Repeated airlock recurrence after correct bleeding
- Suspected valve or pump failure
- Structural leaks or corrosion revealed during inspection
- Safety concerns with mains or pressure systems
Signs You Need
Frequently, homeowners can resolve minor airlocks themselves, but certain clear signs indicate professional help is needed: ongoing weak or fluctuating water pressure after bleeding, loud banging or gurgling noises in pipes, cold spots at radiators or faucets despite correct venting, visible leaks or corrosion discovered during inspection, or malfunctioning valves or pumps.
If airlock symptoms persist despite standard DIY steps, if multiple fixtures are affected, or if attempts to clear the blockage cause unpredictable system behavior, these are strong indicators to stop and seek expertise.
Safety concerns, unfamiliar controls, or evidence of structural pipe damage also warrant contacting a qualified plumber promptly.
What Plumbers Do
A professional plumber will first assess the system to identify the airlock’s location and root cause, using pressure gauges, flow tests, and visual inspection where accessible.
They then choose targeted remedies, prioritize safety, and document findings for the owner. Typical plumber actions include:
- Isolating affected sections and relieving trapped air via valves or bleeders
- Flushing lines at designed flow rates to purge air pockets
- Repairing faulty vents, pumps, or pressure regulators causing recurrence
- Reconfiguring pipe slopes or adding air-release valves where needed
- Performing leak detection and pressure stabilization post-service
If issues persist, they recommend follow-up diagnostics or component replacement.
Cost and Time for Common Airlock Fixes
Typically, costs for fixing airlocks range from negligible (DIY fixes) to several hundred dollars for professional service.
Quick DIY methods—opening high and low taps, using a hose to force water through, or tapping pipes—usually require only time and basic tools, taking 10–45 minutes.
More involved DIY tasks like isolating and bleeding sections can take one to two hours and may require inexpensive fittings.
Hiring a plumber for diagnosis and repair, pressure-bleeding, or replacing valves commonly costs $75–$300 plus parts and can take one to three hours.
Emergency callouts and complex repairs raise both price and duration.
Common Mistakes That Make Airlocks Worse
Homeowners and DIYers can unintentionally worsen airlocks by over-tightening shutoff valves, which restricts flow and traps pockets of air.
Following an incorrect bleeding sequence can also force air deeper into the system or leave sections unvented.
Identifying and avoiding these errors speeds restoration of normal water flow.
Over-Tightening Shutoff Valves
Over-tightening shutoff valves can restrict flow, trap pockets of air, and make existing airlocks harder to clear. It creates narrow passages where pressure changes isolate air, complicating venting efforts. Technicians and DIYers should loosen overly tight valves slightly to restore proper flow without causing leaks. Inspection and gentle operation prevent damage to valve seats and seals.
Signs of over-tightening include stiff handles, reduced downstream pressure, and persistent sputtering fixtures.
- Stiff valve handle indicates excess torque
- Reduced flow increases air pocket formation
- Minor loosening can re-establish steady flow
- Avoid using excessive tools on valve stems
- Replace damaged valves rather than over-tighten
Incorrect Bleeding Sequence
Start bleeding at the wrong point or in the wrong order and the trapped air can simply move to another section of the system, making the problem worse.
A proper sequence vents highest and furthest outlets first, then progresses toward the mains.
Beginning at a low fixture or near the supply can push pockets deeper into loops and upstairs lines.
Technicians should follow a mapped route, open fixtures one at a time, and close them only after continuous flow.
Skipping vents or closing taps prematurely traps residual air.
Clear labeling and a consistent procedure prevent repeated attempts and reduce pressure spikes that reintroduce air.
How to Prevent Airlocks After Plumbing Repairs
After completing plumbing repairs, ensuring pipes are flushed and vents are clear minimizes the chance of airlocks forming. The technician confirms valves are fully open, runs water through fixtures sequentially, and vents trapped air where accessible.
Attention focuses on low points, appliance connections, and newly fitted sections to prevent pockets of air.
- Open upstream and downstream valves slowly to allow steady flow
- Flush each fixture until flow is smooth and sputtering stops
- Check and clear air admittance valves or mechanical vents
- Inspect joints for leaks that invite air entry
- Re-pressurize system gradually and retest fixtures
How to Prevent Airlocks After Supply Interruptions
Following post-repair checks, attention turns to interruptive supply events—planned shutdowns, meter replacements, or temporary outages—that can introduce air into otherwise stable systems.
To prevent airlocks, the homeowner or technician should isolate affected branches, open highest and lowest outlets to vent trapped air, and refill slowly to allow gradual pressure equalization. Installing automatic air-release valves near mains entry and at high points speeds evacuation.
After supply restoration, run taps sequentially from nearest to farthest until steady flow resumes.
Record shutdowns and map valve locations to reduce response time on future interruptions and minimize air entrapment risk.
Why Pipe Slope and Routing Trap Air (And Fixes)
In systems where pipes run level or form high loops, air naturally migrates to and collects at the highest points, creating pockets that block flow and reduce effective pipe capacity. The text explains how slope and routing foster entrapment and practical fixes that avoid major remodeling. Gentle continuous slope, venting, and localized drains aid removal; access points let trapped air escape without pressure cycling. Strategic component placement minimizes stagnation. Materials and fittings that encourage micro‑bubbles settling are noted. Typical remedies focus on operational adjustments rather than structural changes.
- Level runs create horizontal reservoirs for air
- High loops act as natural traps
- Poorly pitched branches retain pockets
- Vents and air releases evacuate accumulations
- Accessible drains simplify manual bleeding
How to Modify Piping to Reduce Air Traps
Start by reshaping the layout to eliminate high points and level runs where air can accumulate.
Re-route straight runs to introduce continuous downhill gradients toward drains or outlets.
Replace sagging sections and low-support spans with properly pitched piping.
Add short risers with bleed valves at unavoidable high points to provide controlled venting.
Where runs converge, install gradual junctions rather than trap-forming elbows.
Use larger-diameter vertical vents above fixtures to allow trapped air to escape.
Consider relocating fixtures or pumps to reduce vertical lifts.
All modifications should prioritize access for future adjustments and comply with local plumbing codes.
Routine Maintenance to Keep Pipes Air‑Free
Regularly scheduled inspections and simple upkeep prevent airlocks before they form by keeping pipe slopes, vents, and valves functioning as planned.
A concise maintenance routine reduces trapped air risk, preserves flow, and extends system life.
Tasks target common failure points and are repeatable by homeowners or technicians.
- Check and clear vent terminations for blockages
- Verify and adjust valve positions; exercise them periodically
- Inspect visible piping for sag, low spots, or loose supports
- Flush lines occasionally to purge accumulated air and debris
- Replace worn washers and seals to prevent air ingress
Documenting dates and actions guarantees consistent coverage.
How to Document the Problem for a Plumber
When routine checks reveal recurrent airlocks or unclear causes, homeowners should compile a concise report for the plumber that highlights symptoms, timing, and any maintenance performed.
Include dates and times of occurrences, fixtures affected, water flow descriptions (gurgling, sputtering, reduced pressure), and any temporary remedies tried.
Note recent plumbing work, heating changes, or cold-weather events.
Photograph visible issues, label images with locations, and record noisy or vibrating pipe sections.
List shutoff valve positions and accessible access points.
Provide a simple diagram of the house showing pipe runs and affected areas to speed diagnosis and reduce site investigation time.
How to Confirm the Airlock Is Permanently Gone
Verify stability by observing system behavior over a representative period and under varied usage conditions. The homeowner monitors flow at fixtures, listens for noise, and checks pressure readings to make certain consistent performance. Persistent symptoms suggest remaining pockets or other faults. Use simple tests and record results; if stable, no further action is needed.
- Run full-demand tests on multiple fixtures sequentially and simultaneously
- Log water pressure at intervals and during peak use
- Inspect for gurgling, sputtering, or irregular flow after tests
- Re-check affected branches and traps for returning air
- Confirm absence of symptoms over 48–72 hours
Conclusion
Like a trapped sigh released from a hidden pipe, resolving an airlock restores the household’s steady heartbeat. With swift, safe checks, simple DIY strokes and mindful re‑routing, the ghost of trapped air is coaxed out of the system. Regular maintenance keeps the silence from returning; when complexities remain, a plumber’s trained hands finish the cure. By documenting steps taken, one seals the victory — water runs clear and confident again.