Quick DIY Fix: How to Repair a Hole in a Plastic Water Pipe Fast
Key Takeaway: Quick DIY Fix for Plastic Water Pipe Holes
To swiftly repair a hole in a plastic water pipe, follow these steps:
1. Safety First: Shut off the water supply, drain the line, and protect any nearby electrical components.
2. For Small Punctures:
- Dry and sand the area around the hole.
- Knead epoxy putty and press it over the hole, or wrap the area tightly with self-fusing silicone tape, ensuring generous overlap.
3. For Larger Tears:
- Wrap a piece of rubber (like from an inner tube) around the tear and secure it with stainless hose clamps.
- Alternatively, use a rubber-lined repair clamp.
4. Final Check: Test the repair under low pressure and plan for a permanent fix later.
This quick guide provides essential steps to effectively address the issue, ensuring your water pipe is restored quickly and safely.
Quick Answer: Stop a Hole in a Plastic Water Pipe Now
Shut off the water supply immediately and contain the leak to prevent further damage.
A temporary patch halts flow: wrap clean, dry pipe with rubber (from a tube or glove) over the hole, secure tightly with hose clamps or strong tape.
For small punctures, self-fusing silicone tape or epoxy putty offers quick sealing; follow curing times before restoring pressure.
After stabilizing, inspect surrounding fittings and measure the damaged section.
Schedule a proper repair or replacement promptly to avoid recurrence.
Wear gloves and protect nearby surfaces.
If unsure about system pressure or joint condition, consult a professional plumber without delay.
Which Plastic Pipes This Guide Covers (PVC, CPVC, PEX)
After stabilizing the leak, the guide turns to the common plastic piping types that homeowners and DIYers are most likely to encounter: PVC, CPVC, and PEX.
PVC (rigid, white or gray) is common for cold water and drainage; repairs often use solvent cement and mechanical clamps.
CPVC resembles PVC but tolerates higher temperatures, requiring CPVC-specific adhesives and fittings.
PEX is flexible tubing used for water distribution; repairs favor crimp rings, push-fit fittings, or repair couplings designed for PEX.
The guide addresses material-specific repair methods, compatible adhesives and fittings, and basic precautions to guarantee a proper, code-conscious temporary or permanent fix.
Why a Hole in a Plastic Pipe Is a Problem
In a domestic plumbing system, a hole in a plastic pipe creates an immediate pathway for pressurized water to escape, compromising water delivery and raising the risk of property damage.
Leakage wastes water and increases utility costs while promoting mold, rot, and corrosion of nearby materials.
Pressure fluctuations can impair appliance performance and reduce hot-water availability.
Small holes may widen under stress, causing sudden failure and flooding.
Contaminants can enter the system if backflow occurs, threatening water quality.
Even brief leaks complicate insulation and structural integrity, increasing repair scope and costs.
Prompt attention limits escalation and conserves resources.
When to Repair vs. When to Replace the Pipe
The decision to repair or replace a plastic water pipe depends primarily on the size and location of the hole and the pipe’s overall age and condition.
Small, accessible holes in otherwise sound piping often warrant a focused repair, while large breaches, hidden damage, or failures in old, brittle pipes typically justify replacement.
Evaluating these factors together guides a cost-effective and durable choice.
Size And Location
When evaluating whether to repair or replace a plastic water pipe, the size of the hole and its location along the run are the primary determinants of a viable fix.
Small punctures or hairline cracks under low pressure typically suit patching or epoxy, especially on straight, accessible sections.
Larger breaches exceeding a couple of millimeters, splits that gape under pressure, or holes near joints, bends, or tee fittings often require section replacement because stresses concentrate there and seals may fail.
Holes inside walls, beneath slabs, or in hidden runs favor replacement for reliability and code compliance rather than temporary surface repairs.
Age And Condition
Evaluating age and overall condition builds on size and location to determine whether repair is practical or replacement is wiser.
The inspector notes pipe material, installation date, and visible wear: brittleness, thinning, multiple stress cracks, or previous repairs reduce confidence in longevity.
For newer, intact sections with a single small hole, a patch or clamp offers a reliable short- to medium-term solution.
For aged piping showing widespread degradation, mineral buildup, or recurring leaks, full replacement prevents future failures and hidden damage.
Cost, accessibility, and water pressure influence the decision; prioritize replacement when failure risks or cumulative repair costs exceed replacement.
Safety First: Shutoff, Electricity, and PPE
Before beginning any repair, the water supply to the affected pipe must be shut off to prevent further leakage and reduce pressure in the line.
The person performing the work should wear appropriate personal protective equipment—gloves, eye protection, and waterproof clothing—to guard against contamination and sharp edges.
If electrical fixtures or wiring are nearby, power to those circuits should be turned off or treated as live until the area is confirmed safe.
Shut Off Water Supply
At the outset of any repair on a plastic water pipe, the main water supply must be shut off and residual pressure relieved to prevent sudden bursts or leaks; turn the house shutoff valve and open nearby faucets to drain lines. The technician confirms isolation by checking a downstream faucet for flow and notes the meter remains stationary. If valves are stiff, use proper tools to avoid damage. Verify any electrical devices near the work area are off to prevent hazards from water. Monitor the drain-down; do not proceed until lines are visibly empty and pressure gauges read zero.
| Step | Action | Check |
|---|---|---|
| 1 | Close main valve | Meter still |
| 2 | Open faucets | Water drains |
| 3 | Confirm zero pressure | Proceed |
Use Proper Personal Protective Equipment
With the supply shut off and lines depressurized, attention shifts to personal protective equipment to keep the technician safe from residual hazards.
Safety glasses protect against pressurized sprays and debris when cutting or sanding plastic.
Nitrile gloves shield skin from cleaners, adhesives, and sharp edges while offering tactile control.
A dust mask or respirator prevents inhalation of plastic particles and fumes from solvents or primers.
Nonconductive footwear and insulated tools reduce electrical risk near wiring.
Long sleeves and knee protection guard against abrasions in tight spaces.
PPE should be inspected, fitted, and used consistently until repairs conclude.
Tools & Materials for Temporary and Permanent Fixes
For a reliable repair, distinguishing the tools and materials needed for temporary patching versus permanent replacement is essential. The temporary kit includes rubber tape, hose clamps, epoxy putty, a utility knife and sandpaper for quick containment. Permanent repair requires replacement pipe, solvent cement or appropriate adhesive, pipe cutter, primer, and proper fittings. Safety gloves and eye protection remain common. Selection depends on leak severity and expected service life; temporary fixes prioritize speed, permanents prioritize durability. The table below echoes urgency versus reassurance.
| Temporary | Permanent |
|---|---|
| Quick relief | Long-term confidence |
| Improvised closure | Professional-grade parts |
| Immediate calm | Lasting security |
| Short-term hope | Durable certainty |
How to Shut Off and Drain the Affected Plumbing Section
Locate and close the appropriate shutoff valves to isolate the damaged section before any repair begins.
The person should identify the nearest isolation valves—individual fixture valves, branch valves, or the main shutoff—and turn them clockwise until fully closed.
Open nearby faucets and spigots downstream to relieve pressure and confirm isolation; watch for steady drips that indicate remaining pressure.
For systems with an anti-siphon or check valve, open a high faucet as well.
Use a bucket to catch residual water and a towel to protect flooring.
If isolation is uncertain, shut off the main supply and notify household members before proceeding.
How to Locate the Hole and Inspect Pipe Damage
Using visible leaks, stains, or dampness as starting clues, the person should trace the pipe along its run, inspecting joints, bends, clamps, and any areas where the pipe contacts other materials.
They should look for hairline cracks, softened plastic, bulges, mineral deposits, or fresh moisture.
Sound and touch help: a steady drip, hissing, or a cool, damp area narrows the location.
Note pipe type and size, nearby valves, and accessibility for repair.
Photograph or mark problem spots for reference and future work.
- Hairline cracks
- Bulging or softened sections
- Mineral deposits or white residue
- Damp or cooling on touch
- Proximity to fittings and supports
Quick Temporary Fixes to Stop a Hole in Plastic Pipe
After identifying the leak and noting pipe type, size, and accessibility, attention shifts to halting water loss quickly with temporary measures until a permanent repair can be completed.
First, shut off water and drain the line.
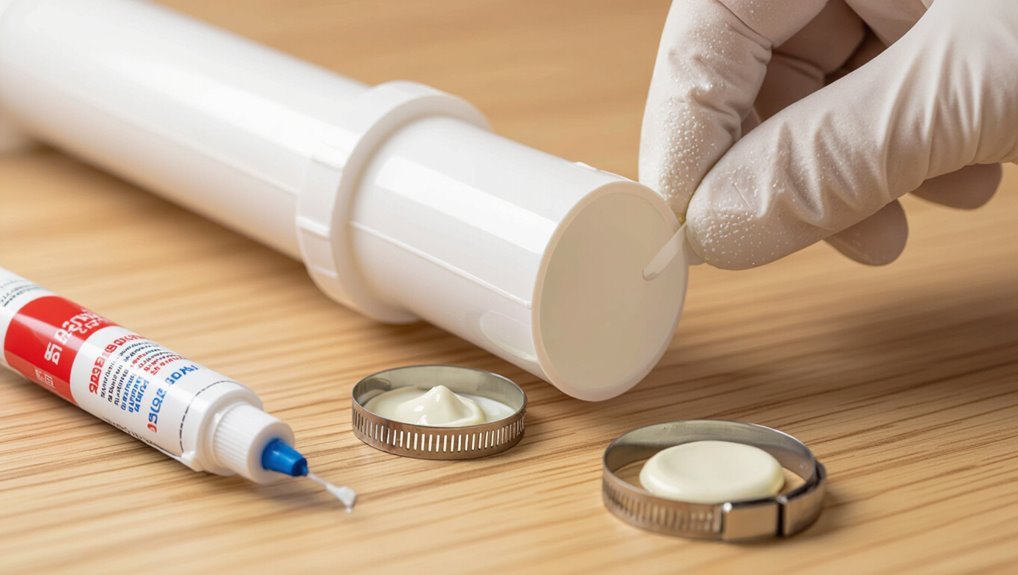
For small pinholes, apply epoxy putty formulated for plumbing: knead, press over the hole, and allow cure.
For larger tears, wrap a rubber patch (cut from an inner tube or hose) over the breach and secure tightly with hose clamps or heavy-duty zip ties.
Alternatively, clamp a rubber-lined pipe repair clamp if available.
Verify the temporary seal under low pressure and monitor until permanent repair is performed.
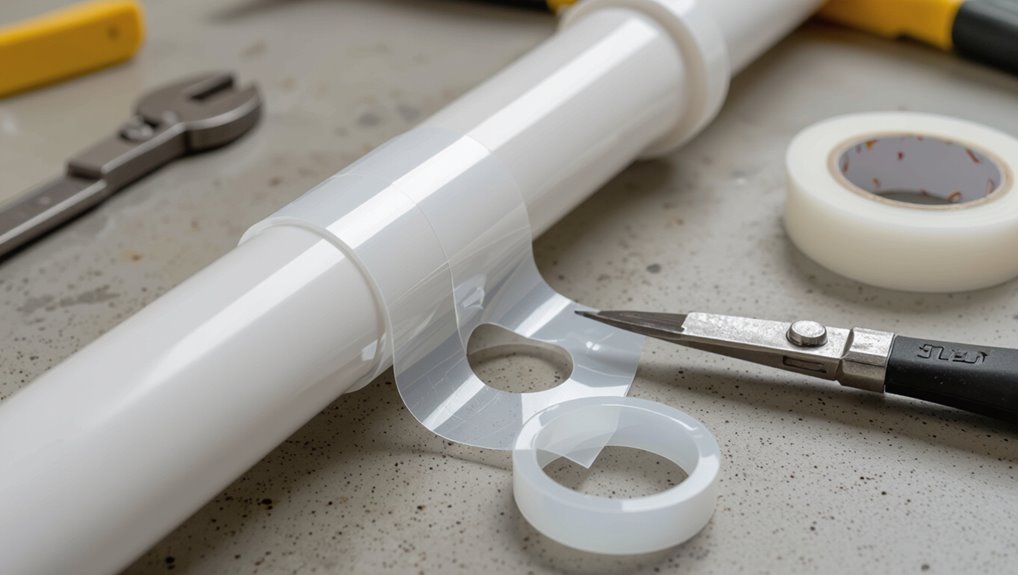
Using Silicone (Self-Fusing) Tape for Immediate Sealing
Often chosen for quick, waterproof emergency seals, silicone self-fusing tape bonds to itself to form a tight, flexible sleeve around a plastic pipe breach.
It requires clean, dry surfaces; stretching activates fusion, creating a durable, pressure-resistant wrap that conforms to irregular shapes.
Users should overlap generously and extend beyond the damaged area.
Removal is straightforward when permanent repair is possible.
This method is a fast stopgap, not a long-term replacement for pipe repair or replacement.
Benefits include speed, no tools, and compatibility with many plastics, but check manufacturer pressure ratings before relying on the seal for high-pressure systems.
- Clean and dry the pipe first
- Stretch tape while wrapping
- Overlap by at least 50%
- Extend beyond the leak zone
- Verify pressure rating before use
Plugging Small Holes With Epoxy Putty
Epoxy putty provides a quick, durable option for sealing small holes in plastic water pipes by chemically bonding and curing into a solid patch.
The surface must be clean, dry, and free of grease; sanding roughens smooth plastic for better adhesion.
Knead equal portions until color is uniform, then press firmly into and over the hole, molding a tapering fillet to overlap pipe edges.
Allow full cure per manufacturer instructions before testing under low pressure.
Epoxy works best on pinholes and hairline cracks; it is not suitable for large breaches or high-pressure sections and should be considered a semi-permanent repair.
Rubber Patch + Hose Clamp: A Durable Temporary Fix
For a reliable temporary repair of a small to moderate leak in a plastic water pipe, a piece of durable rubber secured with a hose clamp provides a watertight seal that withstands moderate pressure and movement.
The method requires clean, dry pipe surface, a rubber patch sized to cover the damage with overlap, and a stainless steel clamp tightened evenly to compress the rubber without cutting it.
It suits irregular holes and can be applied quickly with basic tools.
Check alignment and retighten after initial pressurization.
Replace the section permanently when convenient.
- Clean surface thoroughly
- Cut rubber to fit
- Position clamp evenly
- Tighten gradually
- Test under pressure
How Long Temporary Fixes Usually Last
Temporary fixes on plastic water pipes typically last from a few days to several months, depending on materials and conditions.
Factors that shorten their lifespan include high water pressure, temperature fluctuations, chemical exposure, and movement at the joint.
Visible dripping, expanding wet spots, pressure loss, or clamp slippage are clear signs the repair is failing and needs replacement.
Expected Short-Term Lifespan
When a quick repair is applied to a plastic water pipe, its expected short-term lifespan depends on the method used, water pressure, temperature, and the quality of surface preparation.
Typical temporary fixes last from a few days to several months: tape or clamp patches often endure days to weeks; epoxy putty typically holds for weeks to a few months; rubber sleeve clamps may last weeks; hose clamps with rubber can remain effective for months under low pressure; and adhesive-backed patches vary widely.
Regular inspection is advised to monitor seepage and deterioration until a permanent repair is made.
- Tape or clamp: days–weeks
- Epoxy putty: weeks–months
- Rubber sleeve clamp: weeks
- Hose clamp with rubber: months
- Adhesive patch: variable
Factors That Shorten Duration
Frequently, several controllable and uncontrollable factors shorten the lifespan of a temporary repair on a plastic water pipe.
Material type and age affect bonding; brittle or UV-degraded plastic holds patches poorly.
Water pressure and pressure fluctuations force seams and adhesives to fail sooner.
Chemical exposure—cleaners, solvents, or hard water minerals—erodes tapes, glues, and epoxies.
Temperature extremes cause expansion and contraction, stressing patches.
Mechanical stress from vibration, movement, or nearby construction undermines integrity.
Poor surface preparation or improper application reduces adhesion immediately.
Finally, installation quality and patch selection determine whether a fix lasts days, weeks, or only hours.
Signs It’s Failing
Given the factors that can shorten a repair’s life, specific indicators will reveal when a patch is beginning to fail and how long it might hold. Observation and simple tests give a practical lifespan estimate: minutes to hours for poor seals, days to weeks for taped or clamped fixes, and several months for well-executed epoxy or resin repairs under low pressure.
Environmental stress, water pressure spikes, and UV exposure accelerate failure. Regular checks are essential; temporary fixes are interim measures, not permanent solutions.
- Visible seepage or wetness around the patch
- Increasing drip frequency or flow rate
- Softening or loosening of tape/clamp
- Cracks or separation at the repair edge
- Corrosion or residue indicating chemical breakdown
When to Cut Out a Damaged Section
Assess the extent of visible damage before deciding to cut out a section of plastic water pipe. The decision hinges on leak size, crack length, material deformation, and proximity to fittings. Small punctures or surface abrasions may suit clamps or patching; long cracks, splits under stress, or bulging indicate structural failure requiring removal.
Consider water pressure, frequency of use, and age of the run—widespread brittleness suggests replacement rather than localized repair. If damage spans a joint, affects multiple planes, or compromises support, cutting out and replacing that segment prevents recurring leaks and potential collateral damage to surrounding structures.
How to Cut Out the Damaged Pipe Safely
Once the decision to remove a damaged segment has been made, cutting it out safely requires planning, proper tools, and isolation of the water supply.
The technician confirms the shutoff, drains remaining water, and marks clear cut lines beyond visible damage.
Protective gear is worn and surrounding materials are protected.
A suitable cutter is chosen for the pipe type; cuts are square and deburred.
Waste is contained and removed.
- Verify main shutoff and relieve pressure
- Measure and mark straight cut lines past damage
- Use appropriate pipe cutter or fine-tooth saw
- Wear gloves and eye protection
- Deburr and clean cut ends before proceeding
Choosing a Replacement Coupling or Repair Sleeve
Select a coupling or sleeve that matches the pipe material, diameter, and pressure requirements to guarantee a durable repair. The choice depends on pipe type (PVC, CPVC, PEX), measured outer diameter, and system pressure; verify ratings on packaging.
For temporary fixes, rubber repair sleeves with stainless clamps offer quick sealing but check temperature and chemical compatibility. For permanent repairs, use matching-material couplings (solvent-weld for PVC/CPVC, crimp or push-fit for PEX) sized precisely.
Consider access space: low-profile sleeves fit cramped areas. Prioritize certified products and confirm corrosion resistance and gasket quality to prevent leaks or premature failure.
Installing a Slip Coupling Step by Step
Before beginning work, confirm water supply is shut off and the pipe is drained; wearing safety glasses and gloves, the installer verifies the replacement coupling matches the pipe material and diameter.
The damaged section is cut squarely, burrs removed, and pipe ends cleaned and dried.
Primer and solvent cement are applied if required for the material; the slip coupling is pushed fully onto one pipe, then aligned and seated over the opposite end.
Holding briefly to cure, excess adhesive is wiped away.
After cure time, supply is restored and joints inspected for leaks.
- Cut square and deburr
- Clean and dry surfaces
- Apply primer/solvent as specified
- Seat coupling fully and align
- Inspect after curing
Using Mechanical (Compression) Couplings for Plastic Pipe
Mechanical compression couplings provide a fast, reliable option for repairing sections of plastic water pipe.
Selection should match pipe material, diameter, and operating pressure, while ensuring compatible gasket and body materials to prevent leaks and corrosion.
Proper installation requires square pipe cuts, full insertion, and even tightening to the manufacturer’s torque specifications to form a watertight seal.
Choosing The Right Coupling
Compression couplings provide a quick, reliable way to join or repair plastic water pipe without heat or solvent. Selection depends on pipe material, diameter, pressure rating and environmental exposure. Appropriate choice reduces leaks and future failures.
- Confirm compatibility with PVC, CPVC, or PEX material
- Match nominal pipe diameter and wall thickness (SDR/IPS)
- Verify working pressure and temperature limits
- Prefer stainless steel bands and EPDM or compatible seals
- Consider service access, space constraints, and code approvals
Proper sizing and material choices assure a durable repair while minimizing risk; documentation and labeling aid future maintenance.
Installing And Tightening
Begin by confirming the pipe is clean, cut square, and free of burrs, then position the coupling so seals and sleeves sit correctly over the joint.
Seat pipes fully into the coupling body to engage stops or depth marks.
Hand-tighten nuts or compression rings evenly, alternating sides to maintain concentric alignment.
Use a torque wrench or spanner to tighten to manufacturer-specified values; avoid over-tightening which can distort seals or crack the pipe.
After tightening, inspect for visible gaps and guarantee the gasket compresses uniformly.
Restore system pressure gradually and check for leaks, re-torquing if necessary per instructions.
Solvent-Welding PVC/CPVC: When and How to Do It
Solvent-welding joins PVC and CPVC pipes by chemically softening their surfaces and fusing them into a single, continuous piece.
It suits rigid pipe repairs where fittings and clean cuts are possible; it is not for flexible plastics or pressurized quick patches.
Preparation includes cutting squarely, deburring, and cleaning with recommended primer.
Apply solvent evenly, push parts together with slight twist, and hold briefly until set.
Allow full cure per manufacturer before pressurizing.
- Use correct solvent for PVC vs CPVC
- Work in ventilated area
- Match socket or schedule size
- Wear gloves and eye protection
- Test joints after cure
Using Push-to-Connect Fittings for the Fastest Permanent Fix
When time and simplicity matter most, push-to-connect fittings offer a fast, reliable permanent repair for many plastic water pipes by creating a watertight seal without glue, solder, or specialized tools. The damaged section is cut square, deburred, and cleaned; insertions are pushed until the retention ring seats.
These fittings suit PVC, CPVC, and certain other rigid plastics—verify compatibility and pressure ratings. They eliminate curing wait times and permit immediate pressurization.
For longer runs, a coupling or elbow replaces the damaged segment; threaded models handle conversions. Properly sized and installed, push-to-connect fittings restore service quickly and durably with minimal skill required.
Repairing PEX Pipe: Crimp, Clamp, and Push-Fit Options
Several common methods exist for repairing PEX pipe—crimp rings, stainless-steel cinch clamps, and push-fit fittings—each with distinct tools, fittings, and inspection needs. The choice depends on access, permanence, and available tools. Crimp rings require a PEX crimper and gauge to guarantee seal integrity.
Stainless-steel cinch (squeeze) clamps use a ratchet tool and are forgiving for tight spaces. Push-fit fittings offer fastest installation without special tools but add bulk. All methods require cutting out damaged section, deburring, and confirming proper tubing insertion depth before finalizing the connection.
- Crimp rings: durable, tool-dependent
- Cinch clamps: flexible, accessible
- Push-fit: fastest, tool-free
- Preparation: cut, deburr, measure
- Inspection: visual depth, fit
How to Pressure-Test Your Repair for Leaks
After completing the mechanical connections and verifying proper tubing insertion, the next step is to pressure-test the repair to confirm a watertight seal.
Isolate the section using shutoff valves, then slowly restore water to pressurize the line. Observe the repair under normal household pressure and, if safe, temporarily increase pressure slightly using a pressure pump or by opening higher-elevation fixtures to simulate demand.
Inspect joints, fittings, and the patched area for drips, seepage, or dampness for several minutes. Tighten or re-seat fittings if small leaks appear.
Finalize by cycling the system and rechecking; document pressure readings and observations.
If the Leak Returns: Troubleshooting and Escalation
If the leak returns, the technician should treat it as a diagnostic signal rather than a simple nuisance and methodically reassess the repair and surrounding system.
The technician documents leak location, inspects for secondary damage, verifies repair materials and technique, and isolates variables by repeating a controlled pressure test.
If uncertainty remains, escalation includes temporary containment, supplier consultation, and scheduling professional plumbing assessment.
Decisions hinge on safety, permanence of fix, and cost-benefit.
- Reinspect clamp, patch, or coupling for integrity
- Repeat pressure test with monitored duration
- Check adjacent fittings and joints for stress
- Consult manufacturer or technical support
- Arrange licensed plumber evaluation and repair
Preventing Future Holes: Common Causes and Fixes
Findings from a returned leak should prompt a systematic look at root causes to prevent recurrence.
Investigators check mechanical abrasion, pressure surges, improper fittings, and nearby tools or fasteners that abrade plastic.
Routine inspection of supports and clamps prevents chafing; replacing loose or sharp brackets reduces wear.
Installing pressure regulators, surge arrestors, or simple expansion loops mitigates stress from spikes.
Use compatible fittings and correct adhesives or heat-fusion techniques to avoid weak joints.
Keep pipes clear of chemicals and UV exposure when possible.
Document repairs and schedule periodic checks so early deterioration is caught before holes develop.
When Freezing, UV, or Corrosion Mean Full Replacement
When freezing, prolonged UV exposure, or advanced corrosion are present, replacement rather than repair is often the only safe option.
The decision rests on identifying irreversible damage such as cracking, brittleness, or wall thinning beyond repairable limits.
Selecting durable replacement materials—UV-stabilized plastics, thicker-walled piping, or corrosion-resistant alternatives—reduces recurrence.
When Replacement Is Mandatory
Several circumstances leave a damaged plastic water pipe beyond economical repair, requiring full replacement rather than patching. When structural compromise, widespread brittleness, repeated failures, or environmental degradation are present, replacement guarantees system integrity and safety. Inspection should prioritize long-term reliability over temporary fixes.
- Extensive UV-induced embrittlement across long runs
- Freeze-split sections with internal cracking and loss of flexibility
- Corrosion or chemical attack where material composition is altered
- Multiple prior repairs indicating systemic failure
- Visible deformation, collapsing, or wall thinning over large areas
A full replacement restores service life and prevents recurrent leaks and collateral damage.
Recognizing Irreversible Damage
Recognizing irreversible damage requires evaluating both visible signs and material behavior to determine whether a plastic water pipe can be reliably repaired or must be replaced.
Cracking from freezing, extensive crazing, or fragmentation indicates brittle failure beyond patching.
UV exposure often produces surface chalking, embrittlement, and loss of flexibility; when bending or compression causes cracks, replacement is needed.
Chemical corrosion or pitting that thins walls, compromises joint integrity, or creates irregular breach patterns signals internal degradation.
Repaired sections adjacent to degraded material risk repeat failure.
If damage is widespread, unpredictable, or involves fittings, full replacement guarantees long-term system integrity and safety.
Choosing Durable Replacement Materials
Any replacement must prioritize materials and fittings that resist the specific failure modes identified—freeze-thaw cycling, UV degradation, or chemical attack—so the new installation restores durability rather than repeating past weaknesses.
Selection favors pipe types and insulation suited to the environment: cross-linked polyethylene (PEX) for freeze resilience with proper insulation, UV-stabilized PVC for exposed runs, and chemically resistant HDPE or CPVC where contaminants exist.
Joints should use compatible solvent or fusion welding rather than mechanical clamps.
Proper burial depth and protective sleeves reduce risk.
Consider long-term maintenance access and manufacturer-rated lifespan when specifying components.
- PEX with foam insulation
- UV-stabilized PVC
- HDPE or CPVC for chemicals
- Solvent/fusion joints
- Protective sleeves and depth
DIY Cost vs. Hire a Plumber: A Quick Comparison
How much does fixing a small hole in a plastic water pipe actually cost when done by a homeowner versus a professional? A concise comparison highlights time, material, and risk trade-offs. Homeowners pay about $10–$50 for parts and maybe an hour, but may risk improper sealing or missed damage. Plumbers charge $100–$300 minimum, offering experience, tools, and warranty. Choice depends on confidence, complexity, and value of guaranteed work.
| Item | DIY | Plumber |
|---|---|---|
| Cost range | $10–$50 | $100–$300 |
| Time | ~1 hour | 1–2 hours including travel |
Checklist: What to Gather Before You Start a Pipe Repair
After deciding whether to tackle the repair personally or call a plumber, gather the right items so the job proceeds smoothly.
A concise checklist prevents delays and limits water damage. The writer recommends verifying pipe material and shutoff access, selecting the correct repair method, and ensuring workspace safety.
Prepare tools and materials, test fit parts dry, and keep a towel or bucket nearby for residual water.
Clear instructions and organized supplies reduce mistakes and speed repair.
- Pipe cutter or fine-tooth saw
- Sandpaper and cleaning solvent
- Repair coupling or epoxy putty
- Adjustable wrench and clamps
- Towels, bucket, gloves
Conclusion
A quick patch can feel like triumph and surrender at once: the immediate leak stilled, confidence restored, yet the repaired stretch quietly promises future attention. For PVC, CPVC or PEX, the DIY fix buys time; it is practical relief opposite to the persistent logic that some damage demands full replacement. With shutoffs observed and safety honored, the temporary mend underscores prudence — a small victory balanced against the patient, inevitable need for a more permanent solution.