How to Clear Blocked Water Pipes Fast: Easy DIY Home Fixes
Key Takeaway: Quick DIY Fixes for Blocked Water Pipes
If you encounter a blockage in your household water pipes, follow these steps for a fast resolution:
- Shut Off the Water: Begin by turning off the fixture valve to prevent further water flow.
- Clear Visible Debris: Remove any debris from strainers and traps that you can see.
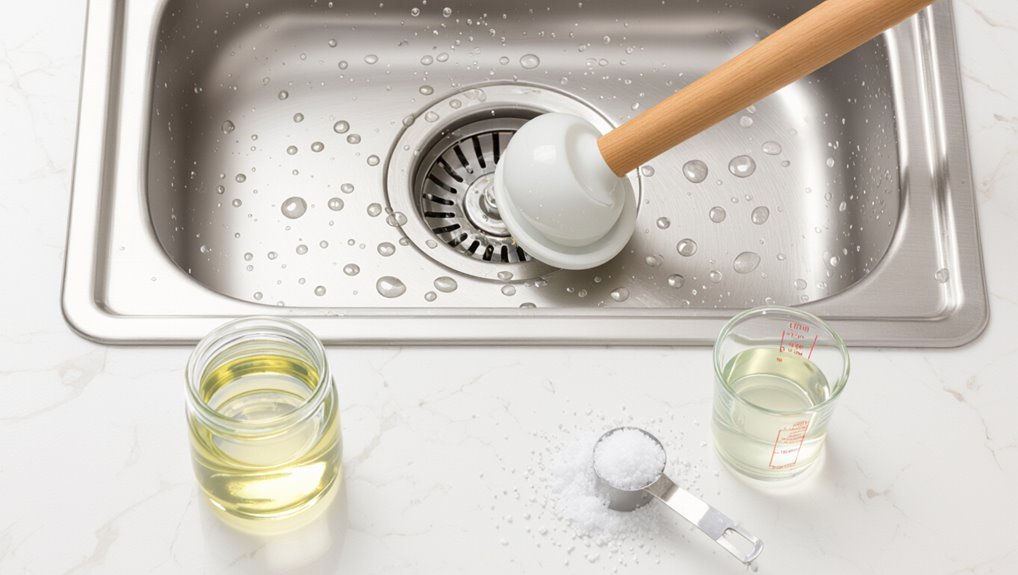
- Use a Plunger: Employ a cup or flange plunger with steady strokes to dislodge the blockage.
- Auger It Out: If the blockage persists, insert a short hand auger into the accessible tailpiece.
- Baking Soda and Vinegar: For mild buildups, pour baking soda followed by vinegar, then flush with hot water.
- Wet/Dry Vacuum: Use a wet/dry vacuum to remove standing water and help loosen soft obstructions.
If the blockage continues or if multiple fixtures are affected, it’s best to stop and call a plumber for assistance.
Immediate Fixes: Clear Most Blocked Pipes in 5–15 Minutes
Approaching common household clogs with a few simple tools can restore flow in 5–15 minutes. A plunger, plumber’s snake, and baking soda with vinegar address most obstructions near fixtures.
Start by removing visible debris from strainers and traps, then plunge firmly to dislodge compacted grime. When plunging fails, feed a short snake into the accessible tailpiece to break or retrieve the blockage.
For mild buildup, pour baking soda followed by vinegar, wait several minutes, then flush with hot water. Work carefully to avoid spills; if resistance persists or multiple fixtures back up, escalate to professional assessment.
Quick Diagnosis: Is It the Fixture or the Pipe?
How can one quickly tell whether a blockage is confined to a single fixture or lies deeper in the home’s pipes? The person checks multiple nearby fixtures: if only one is slow or backing up, the obstruction is likely in that fixture or its trap. If several fixtures on the same line are affected, the clog probably sits further in the branch or main sewer line.
Observing symptom patterns—gurgling, simultaneous backups, or slow drains after flushing—helps localize the problem. Temporary tests include running water in other fixtures and using a plunger on the suspect drain to see if flow restores.
Safety First: Shutoffs, PPE, and What to Avoid
Before attempting any repair, the water supply should be shut off at the appropriate valve to prevent flooding.
The responder should wear gloves, eye protection, and suitable clothing to guard against contaminants and splashes.
Chemical drain cleaners should be used sparingly or avoided entirely to prevent pipe damage and hazardous reactions.
Turn Off Water Supply
Shut the main water supply to prevent flooding and protect anyone working on the pipes.
Locate the shutoff valve—usually near the water meter, basement wall, or where the service line enters—and turn it clockwise until fully closed.
Verify closure by opening a nearby faucet; water should stop or drain to a trickle.
If individual fixture valves exist, close those first to isolate sections.
Know the location of the emergency water meter shutoff and any exterior curb stop.
After repairs, reopen valves slowly to avoid pressure surges and check for leaks.
If valves are stuck or leaking, call a plumber.
Wear Protective Gear
Always use appropriate personal protective equipment when working on blocked water pipes to reduce injury and contamination risks.
Gloves that resist punctures and water protect hands from bacteria, sharp debris, and hot water.
Safety glasses prevent splashes reaching eyes during plunging, snaking, or dismantling traps.
A mask limits inhalation of mold or sewer gases in confined spaces.
Wear sturdy, non-slip footwear and clothing that covers limbs.
Dispose of contaminated PPE safely and wash hands thoroughly after removal.
If tasks require confined-space entry or complex plumbing, consult a professional rather than proceeding without specialized protective equipment.
Avoid Chemical Overuse
Frequently, homeowners reach for chemical drain cleaners without considering risks or alternatives; before using them, the water supply to affected fixtures should be turned off and appropriate PPE donned to limit exposure.
The guidance emphasizes minimizing chemical use to protect pipes, plumbing joints, and occupants.
Mechanical clearing, enzyme-based products, or professional services are preferred when possible.
If chemicals are unavoidable, follow label instructions, ventilate the area, and avoid mixing products.
Long-term reliance can corrode pipes and harm septic systems.
Mindful judgment reduces accidents and environmental impact.
- Choose mechanical or enzymatic methods first
- Never mix different chemical cleaners
- Store chemicals safely away from heat
Tools to Have: Plunger, Snake, Wet/Dry Vac, and More
When tackling a blocked pipe, having the right basic tools on hand streamlines diagnosis and repair: a cup plunger for sinks and tubs, a closet plunger for toilets, a hand auger (snake) for trap and short-run clogs, and a wet/dry vacuum for suctioning standing water and loose debris.
Additional useful items include adjustable wrenches, channel-lock pliers, a pipe wrench, and basin wrench for disassembly. A flashlight and inspection mirror reveal hidden blockages; replacement washers and plumber’s tape prevent leaks after reassembly.
Rubber gloves, eye protection, and disposable towels maintain hygiene. A small bucket collects removed water and debris.
Household Remedies: Baking Soda, Hot Water, and Tensioned Tricks
For minor sink and tub clogs, household remedies like baking soda with hot water and simple tension-based tools often clear blockages without tools or chemicals.
A measured cup of baking soda followed by vinegar can loosen grime; wait, then flush with boiling or very hot water to dissolve greasy residues.
Tensioned methods — a wire hanger reshaped into a hook or a flexible brush — can extract hair and debris near the drain.
Use gloves and eye protection.
Repeat cautiously; avoid chemical mixes.
If flow remains poor, escalate to mechanical tools or professional help.
- Baking soda + hot water flush
- Wire hanger hook
- Flexible drain brush
How to Use a Plunger on Sinks, Tubs, and Toilets
Selecting the correct plunger—cup-style for sinks and tubs, flange-style for toilets—helps create an effective seal.
Proper technique requires forming an airtight fit, using steady plunges with pressure applied on both the push and pull strokes, and avoiding excessive force that might damage fixtures.
Attention to water level and repeated controlled attempts usually dislodge common clogs.
Choosing The Right Plunger
A plunger choice affects how effectively a sink, tub, or toilet clog can be cleared, so homeowners should match tool type to fixture.
The right plunger maximizes seal and force transfer; cup plungers suit flat surfaces like sinks and tubs, flange plungers fit toilets, and accordion or bellows models provide extra power for stubborn blockages.
Material, size, and handle length influence durability and reach. Consider rubber quality and a comfortable grip.
Keeping separate plungers for toilets and other fixtures prevents contamination. Proper selection reduces effort and risk of damage while improving the chance of a successful, quick clear.
- Cup plunger: sinks and tubs
- Flange plunger: toilets
- Bellows: extra power
Proper Plunging Technique
Having chosen the appropriate plunger, the next step is mastering the motion and seal needed to dislodge clogs without causing damage.
For sinks and tubs, create a tight seal around the drain or use a sink stopper to block overflow. Fill with enough water to cover the cup, then plunge vertically with firm, even strokes—push then pull—avoiding excessive force.
For toilets, position a flange plunger to seal the outlet, submerge the cup, and use controlled pumps to move water through the trap. After several minutes, remove the plunger quickly to let air and water clear the blockage; repeat if needed.
Use a Plumber’s Snake: When to Choose One and How to Feed It
When a blockage resists plunging or chemical treatments, a plumber’s snake becomes the appropriate next tool, offering reach and mechanical action to dislodge clogs deep in pipes.
The user selects a hand-crank snake for sinks and tubs or a power auger for long mains; choose diameter and length to match pipe size.
Feed the cable slowly into the drain, rotating clockwise to navigate bends and prevent kinking.
When resistance is felt, push gently while turning to break or hook the obstruction, then retract steadily to remove debris.
Clean and lubricate the cable after use to prevent corrosion.
- Choose correct snake size
- Rotate while feeding
- Retract and clean immediately
Using a Wet/Dry Vacuum to Remove Drain Blockages
Before using a wet/dry vacuum on a blocked drain, the unit should be checked for proper filters, a sealed hose, and appropriate wet-mode settings.
The hose and fittings must be attached securely and sealed around the drain opening to prevent air loss and guarantee suction.
Once connected, the vacuum can pull debris out and should be followed by a controlled flush of water to clear remaining residue.
Preparing The Vacuum
For effective wet/dry vacuum use, the machine must be configured and checked so it can handle liquids and debris safely. The operator inspects filters, selects the wet mode, and removes or fits the foam sleeve when required. Tank seals and hose connections are checked for leaks. Power cords and GFCI protection are verified to prevent electrical hazards. A suitable collection container is positioned, and the area is cleared of loose items.
The vacuum is run briefly to confirm suction and noise levels before use.
- Verify filter type and install foam sleeve for liquids
- Inspect hose, seals, and tank for damage
- Confirm GFCI protection and test power
Safe Attachment Techniques
With the vacuum verified and ready, attention shifts to making secure, leak-free connections between the hose, attachments, and the drain opening. The technician selects the correct nozzle—narrow for sinks, wider with rubber gasket for floor drains—and inspects seals for cracks.
A cloth or plumber’s tape pads uneven fittings; clamps lock hoses to maintain suction. For rigid connections, adapters bridge size differences without forcing parts. Positioning keeps the vacuum body lower than the drain to reduce backflow risk. Once sealed, a brief test run confirms steady suction and absence of leaks before proceeding to active blockage removal.
Clearing And Flushing
Beginning at the drain opening, the technician powers the wet/dry vacuum to create steady suction while alternating between short bursts and continuous pulls to dislodge soft obstructions and draw debris into the collection tank.
The operator checks seals, uses a narrow nozzle or hose adapter, and repeats cycles until water flows freely.
Solid clogs may require mechanical tools after vacuuming reduces standing water.
The unit is emptied and rinsed, and the pipe is flushed with hot water to remove residue.
Proper PPE and ventilation are observed to prevent contamination and odor buildup.
- Use correct nozzle and tight seal
- Empty tank frequently
- Follow with hot-water flush
Disassemble and Clean a Sink P‑Trap (Step‑by‑Step)
Before touching any plumbing fixtures, the area beneath the sink should be cleared of stored items and a bucket placed under the P‑trap to catch water; once prepared, the homeowner can proceed to loosen the slip nuts and remove the trap for inspection and cleaning.
Next, disconnect the trap by hand or with channel‑lock pliers, keeping parts oriented for reassembly.
Empty debris and sludge into the bucket, then inspect for hair, grease, or small objects.
Rinse and scrub the trap with a bottle brush and mild detergent.
Reassemble seals and nuts snugly, restore water, and check joints for leaks.
Clear Bathroom Shower and Tub Drains Without Chemicals
Attention shifts to nonchemical methods for clearing shower and tub drains, starting with common DIY tools like drain snakes, zip-it hooks, and plunger techniques.
The discussion then covers simple preventive maintenance—regular hair removal, strainers, and periodic hot-water flushes—to reduce future clogs.
Practical tips emphasize safe, repeatable steps homeowners can perform without harsh cleaners.
DIY Drain Clearing Tools
A few simple tools can clear most shower and tub drains without resorting to harsh chemicals. A hand auger, silicone-tipped drain snake, and flat hook remove hair and debris quickly.
A sink plunger creates pressure to dislodge soft clogs; use a firm seal and several steady pumps. A zip-it or disposable hair remover slides past the trap to extract tangles.
A wet/dry shop vacuum can pull out sludge when set to liquid and sealed to the drain. Together these tools offer safe, effective options for routine clogs, minimizing damage and avoiding corrosive cleaners.
- Hand auger / drain snake
- Zip-it hair remover
- Wet/dry shop vacuum
Preventive Maintenance Tips
Regularly performing simple preventive steps keeps shower and tub drains flowing and reduces the need for chemical treatments.
Homeowners should use a hair catcher and remove trapped debris weekly, rinse with hot water after each use to dissolve soap scum, and flush pipes monthly with a baking soda and vinegar cycle followed by hot water.
Avoid pouring grease, oils, or heavy particulate matter down the drain.
Inspect and clean overflow and pop-up stoppers quarterly.
For persistent slow drainage, employ a manual drain snake before problems escalate.
Schedule professional inspections yearly for older plumbing to catch hidden issues early.
Kitchen Clogs: Grease and Food Quick Fixes
In kitchen sinks, grease and food particles are the most common culprits of slow drains and sudden blockages, forming sticky deposits that trap debris and restrict flow. Proper response focuses on removing surface clogging and preventing reaccumulation.
Start with mechanical clearing: remove the strainer, fish out solids, and use a plunger to dislodge soft obstructions. For deeper buildup, detach the P-trap to clean trapped gunk and rinse parts thoroughly.
Routine habits—hot water after washing, collecting grease in a container, and using sink strainers—reduce recurrence. Small tools and consistent practices restore flow without harsh interventions.
- Plunger usage
- P-trap cleaning
- Preventive habits
Safe Chemical Drain Cleaners for Home Use (When to Try)
When mechanical clearing and preventive habits fail to remove persistent grease or food buildup, carefully selected chemical drain cleaners can be a practical next step for homeowners.
Choose enzyme-based or mild oxidizing formulas for organic clogs; they act slowly but reduce pipe damage and are safer for septic systems.
Reserve caustic or strong acidic products for clear, localized blockages when mechanical methods and gentler chemicals fail, and avoid mixing types.
Read labels, follow PPE guidance, ventilate the area, and use only recommended quantities and contact times.
If resistance persists, recurring clogs occur, or plumbing is old, consult a professional promptly.
How to Flush Branch Pipes and the Main Soil Stack Safely
Before beginning any flushing procedure, the homeowner should identify accessible branch cleanouts and the main soil stack cleanout location, confirm that seals and caps are intact, and gather appropriate protective gear and tools.
The process proceeds by opening branch cleanouts lowest to highest, flushing with controlled water flow or a garden hose, then testing downstream discharge at the soil stack cleanout.
Use short bursts of water to avoid pressure surges, monitor for leaks, and stop if backflow occurs.
Sanitize hands and tools afterward.
If obstruction persists, consult a licensed plumber to avoid damaging seals or municipal connections.
- Wear gloves and eye protection
- Use controlled short flushes
- Stop on any backflow or leaks
Signs a Blocked Pipe Is in the Sewer Line
After flushing branch cleanouts and confirming that local seals and caps remain intact, attention should shift to distinguishing signs that the blockage lies in the sewer main rather than a branch.
Persistent backups affecting multiple fixtures, especially lowest drains and toilets, suggest a main line obstruction. Gurgling sounds or bubbling from several drains, sewage odors near the property, and slow drainage throughout the house further indicate a shared sewer issue.
Water backing up outside at the yard cleanout, unusually lush patches of lawn, or sewage surfacing in basement drains are strong signals. Multiple affected fixtures simultaneously point away from isolated branch clogs.
Temporary Fixes to Keep Water Flowing Until Help Arrives
When immediate professional repair is not possible, a brief hot water flush can help soften grease and loosen minor blockages to restore partial flow.
In more severe cases, setting up a temporary bypass line around the obstruction can reroute water until permanent repairs are completed.
Both measures are stopgaps and should be used with caution while arranging proper plumbing service.
Hot Water Flush
A hot water flush can temporarily clear minor grease and sediment buildups by softening deposits and pushing them through open pipe sections.
It involves running the hottest safe water from the tap into affected fixtures for several minutes, then opening downstream drains to encourage flow.
This is a short-term measure to reduce immediate backup and should stop if pipes feel unusually hot or if leaks appear.
It is not a substitute for mechanical clearing or professional repair when blockages persist or are deep.
- Run hot water steadily for 5–10 minutes.
- Open downstream drains to promote flow.
- Monitor for leaks and heat buildup.
Temporary Bypass Line
For short-term restoration of water flow while awaiting professional repair, a temporary bypass line reroutes water around a blocked section using hose, flexible tubing, or readily available pipe fittings to bridge between upstream and downstream access points. It isolates the obstruction, restoring service without disturbing the blockage.
Selection depends on pressure, diameter, and material compatibility; use clamps, compression fittings, or hose barbs to guarantee secure connections. Test low pressure first, watch for leaks, and support the temporary run to prevent strain.
This is a stopgap only: shut off water and call a qualified plumber promptly to install permanent repairs and inspect for hidden damage.
When to Call a Plumber vs Continue DIY
Deciding whether to call a plumber or continue a DIY approach depends on the severity of the blockage, available tools, and the homeowner’s experience.
Minor clogs that respond to plunging, manual removal, or a hand auger suit DIY; persistent backups, recurring clogs, foul odors, or sewage smells indicate professional assessment.
Visible leaks, impaired water pressure, or risks of pipe damage demand immediate plumbing services.
If diagnostic equipment (camera) or permits might be needed, a plumber is appropriate.
Consider safety: chemical misuse and complex disassembly carry hazards.
- DIY: quick, low-cost, limited tools
- Call plumber: safety, diagnostics, warranty
- Middle ground: consult before major work
Long‑Term Fixes for Hair and Soap Scum Buildup
When hair and soap scum repeatedly narrow drains, long-term prevention focuses on reducing buildup at the source and making removal easier. Install strainers and brush them regularly; choose models with fine mesh that capture shorter hairs.
Replace bar soap with liquid or low-residue formulations to limit scum. Use enzyme drain treatments monthly to digest organic film without harming pipes.
For vulnerable fixtures, fit removable pop-up stoppers for straightforward cleanouts. Consider periodic professional descaling for persistent mineral and soap layers.
Document product choices and treatment intervals to evaluate effectiveness and avoid unnecessary or harmful chemical use.
Preventive Maintenance: Simple Habits to Avoid Clogs
Regularly practicing a few simple habits can markedly reduce the likelihood of future clogs.
A homeowner can adopt routine checks and small actions that keep debris out of drains and slow buildup.
Clearing visible hair, avoiding grease down sinks, and using strainers stop common blockages.
Monthly flushing with hot water and occasional vinegar-baking soda treatments help maintain flow without harsh chemicals.
Keeping records of soap and product changes identifies culprits early.
Promptly addressing slow drains prevents escalation.
Simple consistency saves time and effort, extending pipe life and lowering the chance of emergency repairs.
- Use sink and shower strainers
- Wipe grease into trash
- Flush monthly with hot water
Time and Cost: DIY Methods vs Professional Service
Preventive habits reduce the frequency of clogs, but homeowners still face choices about handling stubborn or recurring blockages. DIY fixes like plunging, snaking, or chemical cleaners take 15–90 minutes and cost $5–$50 in tools or supplies; effectiveness varies with severity. Professional service often resolves complex blockages in 1–3 hours but costs $150–$500 or more, including diagnostics. Consider frequency, risk, warranty needs, and personal skill when choosing. Lower cost favors simple, infrequent clogs; recurring or sewer-line issues warrant professionals to avoid damage and higher long-term expenses.
| Option | Time | Typical Cost |
|---|---|---|
| DIY basic | 15–90 min | $5–$50 |
| DIY advanced | 30–120 min | $50–$150 |
| Professional | 1–3 hrs | $150–$500 |
Conclusion
In a few brisk, practiced steps, the homeowner can often free a blocked pipe and restore flow, like a locksmith coaxing shut doors back to life. Quick diagnosis, sensible safety, and a small toolkit—plunger, snake, hot water—solve many troubles in minutes; household remedies and steady prevention keep them away. Yet stubborn clogs or recurring backups signal the wiser choice: call a professional, whose deeper knowledge and tools save time, cost, and stress.