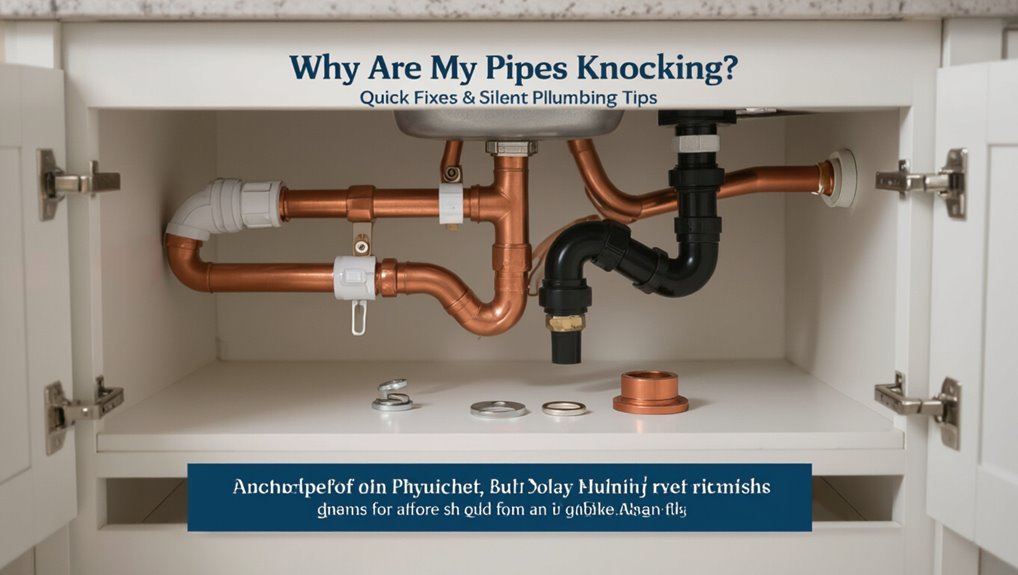
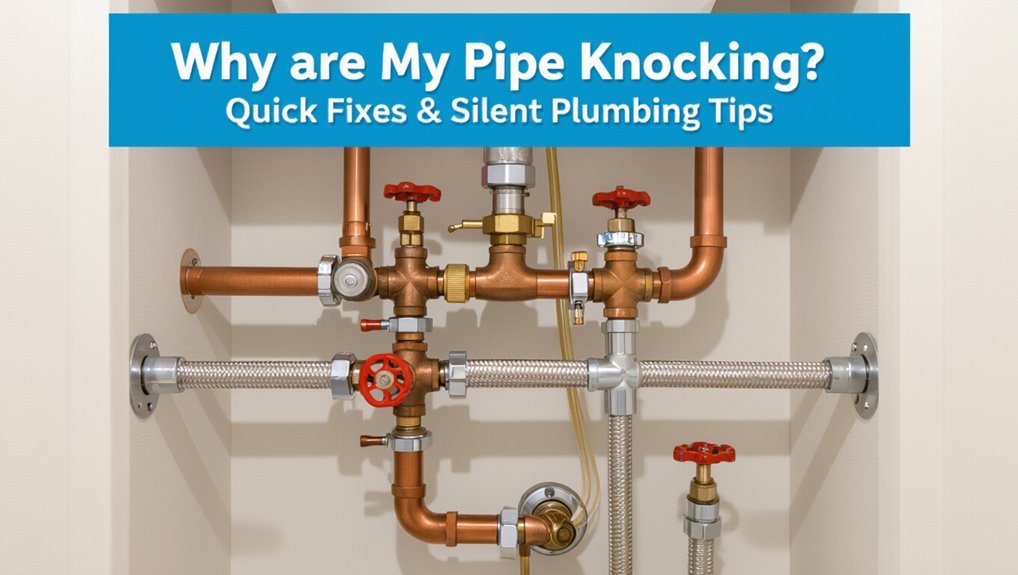
Why Are My Pipes Knocking? Quick Fixes & Silent Plumbing Tips
If your pipes are knocking, it’s likely due to water hammer, loose supports, trapped air, or high system pressure. To quickly address the issue, consider tightening or adding pipe straps, bleeding radiators or air pockets, installing or recharging arrestors, and lowering pressure with a pressure reducing valve (PRV) or regulator. Isolating fixtures can help identify the source, and using a pressure gauge at an exterior spigot can provide additional insights. Many of these problems can be resolved with simple DIY checks, and the following guidance will offer step-by-step fixes and advice on when to call a plumber.
Quick Checklist: Stop Pipe Knocking Now
Start by shutting off the main water supply and opening faucets to relieve pressure; then inspect visible pipes for loose straps, obvious contact points, and dripping joints.
Tighten or add hangers where pipes move, cushion contact points with foam or rubber, and secure expansion gaps near appliances.
Drain remaining water, test valves for proper closure, and replace failing washers or cartridges.
For water hammer, install or recharge arrestors at strategic locations.
Verify that fasteners are corrosion-free and that pipe routing avoids rubbing against framing.
If noise persists after these measures, consult a licensed plumber for diagnostic equipment and safe corrective action.
What Pipe Knocking Sounds Like and Where It Comes From
After performing the quick fixes to secure piping and relieve pressure, attention turns to identifying the characteristic sounds and their sources.
Knocking typically presents as sharp, rhythmic bangs or dull thuds when valves close or pumps cycle. High-pitched rattles indicate loose clamps or small fittings vibrating; deep thumps suggest water hammer from sudden flow stoppage. Intermittent ticking often reflects thermal expansion as metal warms and shifts against framing. Sounds originate in pipe runs, at joints, near valves, or where pipes pass through studs. Understanding tone, timing, and repetition helps distinguish mechanical vibration, pressure surges, and thermal movement as root causes.
How to Identify Which Pipe or Fixture Is Knocking
To identify the knocking source, the observer should follow the sound along exposed pipes, listening for changes in pitch or rhythm as faucets or appliances are operated.
Next, each nearby fixture and valve should be opened and closed briefly to see if the noise corresponds with a specific action.
Noting the location and conditions when the knock occurs helps pinpoint whether the problem is in a pipe run, a fitting, or a valve.
Trace The Sound Source
How can the origin of a knocking sound be pinpointed within a home’s plumbing? One methodical approach involves isolating and mapping noise moments.
Begin by having someone operate water briefly at different fixtures while another listens in relevant rooms and near exposed pipes. Note where sound is loudest and whether it travels with flow changes.
Tap pipe runs gently to compare resonance; dead spots indicate insulated or secured sections.
Use a mechanic’s stethoscope or a length of hose pressed to the ear to follow vibration paths to valves, joints, or straps.
Record findings before attempting repairs or consulting a plumber.
Check Fixtures And Valves
With the water off and the home quiet, a systematic check of fixtures and valves helps identify which component is producing the knocking.
The inspector taps each accessible pipe near sinks, toilets, tubs and exposed lines while listening for vibration. Valves are stroked open slightly to see if movement changes sound; ball, gate and angle stops often cause knocks when partially closed or worn.
Fixtures are isolated by shutting individual supply valves to determine whether noise persists downstream. In multi-story homes, checks include attic and basement valves.
Findings guide targeted repairs: tighten loose mounts, replace faulty valves, or call a plumber for stubborn cases.
Five Quick DIY Checks Before Calling a Plumber
Start by confirming the simplest causes before calling a professional: many knocking noises stem from easily checked issues such as loose straps, high water pressure, air in the lines, worn valve seats, or a faulty pressure-reducing valve.
First, inspect visible pipe supports and tighten loose straps.
Second, run multiple fixtures to flush trapped air.
Third, test pressure with a gauge at an outdoor spigot, aiming for 40–60 psi.
Fourth, cycle shutoff and fixture valves to seat components.
Fifth, listen while isolating sections to locate noise sources.
Document findings and perform only safe, noninvasive fixes before contacting a plumber.
Water Hammer: The Fast Explanation
Imagine a sudden, metallic bang when a faucet shuts off: that is water hammer, a pressure surge created when flowing water is abruptly stopped and its kinetic energy converts into a shock wave that travels through the pipes. It occurs when fast-moving water hits a closed valve, causing vibration and stress. Common in homes with quick-closing valves (dishwashers, washing machines), it can loosen fittings or damage fixtures over time. Solutions include installing arrestors, adding air chambers, or reducing water speed with pressure regulators. Quick diagnosis involves listening for bangs after appliance cycles and inspecting visible piping for movement or loose straps.
| Cause | Effect | Simple Fix |
|---|---|---|
| Sudden valve closure | Pressure surge | Arrestor |
| High pipe velocity | Vibration | Regulator |
| Loose supports | Noise | Secure straps |
Why Water Hammer Causes a Loud Knock
A fast-closing valve stops flowing water abruptly, causing the moving column to slam against a pipe end or fitting.
The sudden deceleration compresses any trapped air into a small cushion that then rebounds, producing a sharp, resonant knock.
The knock’s loudness depends on flow speed, pipe length, and how much air is present to absorb or transmit the shock.
Sudden Valve Closure
When a faucet or valve closes quickly, the moving column of water is forced to stop almost instantly, producing a pressure surge that travels back through the pipe as a shock wave; this phenomenon, known as water hammer, creates the sharp, loud knock heard in plumbing systems. Sudden valve closure causes abrupt momentum change; pipes rattle, joints strain, fittings loosen. The effect depends on pipe length, diameter, flow speed, and valve type. Mitigation focuses on slowing closure, installing arrestors, or adding restraints. Inspection after repeated knocks is advised to prevent damage.
| Cause | Effect | Mitigation |
|---|---|---|
| Fast closure | Shock wave | Slow valve |
| Long run | Amplified noise | Arrestor |
| Loose fittings | Leaks | Secure fittings |
Compressed Air Cushion
After a sudden valve closure sends a pressure surge through a water-filled pipe, trapped pockets of air compress between the moving water column and a closed end or obstruction. The compressed air acts like a spring, absorbing then releasing energy, causing the water column to slam back and forth. Each rebound produces a sharp, resonant knock as kinetic energy converts to sound and vibration transmitted along the piping.
Air cushions reduce peak pressures but can create unpredictable oscillations if unevenly distributed. Properly installed arrestors or bleeding the system restores stable damping and silences the impulsive impacts.
- Frustration
- Alarm
- Relief
Water Pressure Problems That Make Pipes Bang
Under high or rapidly changing water pressure, pipes can produce loud banging as water slams against closed valves and fittings, a phenomenon commonly known as water hammer.
Sudden flow stops create shock waves that travel through plumbing, jolting mounts and joints.
Long runs of rigid pipe amplify the force; loose straps and unsecured pipes convert pressure pulses into audible knocks.
Partially closed valves, fast-closing fixtures and rapid pump starts exacerbate impulses.
Typical responses include installing arrestors or air chambers, securing piping, and adjusting pump controls or valve operation to slow closure.
Diagnosing patterns—when and where knocks occur—helps pinpoint pressure-related causes.
Is Your Household Water Pressure Too High?
Excessively high household water pressure is a common cause of banging pipes, often originating from municipal supply fluctuations, a faulty pressure-reducing valve, or a malfunctioning well pump.
Identifying the source requires measuring system pressure with a gauge at an exterior hose bib or near the main shutoff. If readings exceed recommended levels (typically 50–60 psi), installing or adjusting a pressure-reducing valve and checking pump settings are standard corrective measures.
High Pressure Causes
When household water pressure rises above the typical 40–60 psi range, pipes can begin to knock as the increased force creates rapid valve and fixture movements and stronger pressure surges.
Causes include municipal supply fluctuations, thermal expansion in closed systems, and malfunctioning pressure regulators or check valves.
These sources amplify water hammer and stress fittings, risking leaks and burst joints.
Identifying the root cause often requires pressure measurement and inspection of expansion tanks, regulator settings, and recent plumbing changes.
Prompt diagnosis reduces noise and prevents damage.
- Municipal spikes evoke frustration and helplessness.
- Expansion stress triggers anxiety about leaks.
- Faulty regulators cause dread of failure.
Pressure Reduction Solutions
After confirming high supply pressure as a source of knocking, homeowners should consider practical ways to lower and control system pressure to protect pipes and fixtures. Installing a pressure-reducing valve (PRV) at the main supply provides adjustable, reliable regulation; set it to 50–60 psi to balance performance and protection.
For transient spikes, add a water hammer arrestor or small expansion tank near problem fixtures. Regularly test pressure with a gauge and inspect the PRV for wear. If pressure originates from utility mains, contact the supplier. For complex systems or persistent noise, consult a licensed plumber for diagnosis and permanent adjustment.
Loose Pipe Straps: Why Pipes Rattle and Knock
Loose or missing pipe straps allow plumbing lines to shift slightly with pressure changes, producing a sharp rattle or distinct knocking as pipes strike framing or hangers. The detached observer notes metal-on-wood impacts and vibrations travel through walls and fixtures, turning minor movement into alarming noise.
Corrosion, improper spacing, or aging supports increase risk; thermal expansion worsens motion. Attention to strap condition matters because persistent knocking signals wear and potential joint stress.
Emotional responses range from irritation to anxiety about unseen damage.
- Unease when night silence is broken.
- Frustration at recurring noise.
- Worry over hidden leaks or failures.
How to Safely Tighten Pipe Straps and Hangers
Having identified that worn or missing straps cause pipes to strike framing, the next step is to learn how to tighten straps and hangers safely to stop the noise and prevent further wear.
A technician inspects mounting points, replacing rusted or broken straps with appropriately sized metal or cushioned hangers.
Fasteners are checked and tightened to snug, not overtightened, preserving pipe alignment and insulation.
For plastic piping, padded clamps reduce point pressure.
Hangers are spaced per code and adjusted to prevent sagging.
After work, the system is visually rechecked and tested for movement during normal flow to confirm the knocking is resolved.
Thermal Expansion: Why Pipes Click and Knock
Thermal expansion occurs when heated water causes pipes to lengthen slightly, creating movement that can produce clicking or knocking sounds.
The amount of movement depends on the pipe material—copper, PVC, and PEX expand at different rates and transmit noise differently. Simple fixes like adding expansion loops, cushioned hangers, or allowing room for movement can greatly reduce or eliminate the noise.
Thermal Expansion Basics
When hot water flows through metal or plastic pipes, the material expands and can shift against brackets, joists, or structural cavities, producing the characteristic clicks and knocks homeowners hear. Thermal expansion is simple: heat raises molecular motion, lengthening pipe sections slightly. Small movements become audible where pipes contact hard surfaces or pass through tight holes. Expansion is reversible as water cools, so noises coincide with temperature changes and flow cycles. Recognizing timing and location helps diagnose whether noise stems from expansion rather than loose fittings.
- Alarm: sudden banging signals rapid temperature change.
- Annoyance: intermittent clicks disrupt quiet.
- Relief: predictable timing guides fixes.
Pipe Material Effects
Different pipe materials expand and contract at different rates, so the same temperature change can produce varied amounts of movement and noise.
Copper, steel, PVC and PEX each have distinct coefficients of thermal expansion; PEX and PVC move more for a given temperature shift, while metal pipes move less but transmit sound more efficiently.
Rigid mounts on metal can create sharp clicking, whereas plastic pipes may flex, producing duller thuds.
Length, wall thickness and temperature range influence total displacement.
Understanding material properties helps diagnose whether noises stem from expansion or from fittings, fasteners, or structural contact.
Preventing Expansion Noise
By addressing how pipes are supported, routed, and insulated, homeowners can markedly reduce expansion-related clicking and knocking. Thermal expansion causes metal and plastic pipes to lengthen when heated; restraint points, tight bends, and bare contact with framing amplify noise. Proper strategies isolate movement, absorb vibration, and control routing to prevent sudden, alarming sounds.
- Replace rigid clamps with cushioned hangers to let pipes glide quietly, reducing startled reactions.
- Add foam or rubber sleeve insulation at contact points to muffle clicks and calm nightly disturbances.
- Re-route long runs away from joists when possible to eliminate repetitive knocking that unnerves occupants.
When Heating Systems Cause Knocking Sounds
Heating systems can produce knocking sounds when trapped air, thermal expansion, or worn components disrupt normal operation.
Water hammer from abrupt valve closures, loose or misaligned pipe supports, and failing circulator pumps often create rhythmic bangs.
Intermittent knocking may signal trapped air pockets or sediment restricting flow; persistent noise suggests mechanical wear or improper flow rates.
Simple remedies include bleeding radiators, securing piping, and checking pump settings.
More complex causes—like faulty check valves or excessive pressure—warrant professional diagnosis.
Addressing these issues promptly reduces stress on plumbing, prevents further component damage, and restores quieter, more efficient heating system performance.
Boiler and Radiator Expansion Explained
Knocking from a boiler or radiator often stems from the metal components expanding and contracting as temperatures change. This thermal movement can shift pipes, rub against fittings, or momentarily separate joints, producing distinct bangs. Metal thickness, mounting tightness, and uneven heating exacerbate the effect. Regular inspections catch loose brackets or worn supports before noises intensify.
Professional servicing guarantees clearances and expansion allowances meet specifications, reducing repeated disturbances and anxiety over possible damage.
- Awareness: a sudden clank can startle and worry homeowners.
- Frustration: persistent noise erodes comfort and confidence.
- Relief: correction restores quiet and reassurance.
How to Bleed Radiators and Release Trapped Air
To release trapped air, one should first locate the bleed valve at the top corner of the radiator.
A radiator key is fitted onto the valve and turned slowly to open it.
The valve is closed again as soon as a steady stream of water appears.
Locate The Radiator Valve
Locate the bleed valve near the top edge of each radiator, usually on one end and often covered by a small square or slotted cap.
One-by-one inspection reveals a tiny protrusion or recessed fitting; it sits higher than inlet pipes and below the grille.
Visual identification prevents guessing and accidental force on other fittings.
A torch and gentle feel confirm position without tools.
Note corrosion, paint buildup, or dust that may hide the valve.
Prepare a cloth and container before opening to catch drips.
Clear access reduces hesitation and speeds safe air release.
- Relief
- Confidence
- Quiet
Use A Radiator Key
With the bleed valve identified and protected with a cloth, attention shifts to the radiator key—the simple tool that opens the valve to let trapped air escape.
The key fits square or slotted bleed valves; it should turn smoothly without force. Holding the cloth beneath the valve to catch drips, the key is inserted and turned counterclockwise a quarter to half turn until a hiss is heard.
Small, steady turns prevent damage. If resistance or corrosion is encountered, stop and apply penetrating oil or consult a professional.
After air release, the key is turned back clockwise to reseal the valve securely.
Bleed Until Water Appears
Open the bleed valve slowly and listen for a steady hiss as trapped air escapes; this sound indicates progress and warns when to stop.
The technician watches for a thin, steady stream of water, signaling the radiator is purged. Closing the valve promptly prevents spills and pressure loss.
Repeat across units, working from lowest to highest radiators to push air upward. Monitor boiler pressure, topping off if necessary.
Safety gloves and a cloth reduce mess. Proper bleeding restores heat balance and eliminates knocking caused by air pockets.
- Relief — the hiss means success.
- Confidence — water confirms completion.
- Calm — quiet radiators follow.
How Trapped Air and Air Chambers Interact With Water Hammer
When air becomes trapped in a plumbing system, it can form pockets or fill designated air chambers that alter how pressure pulses move through the pipes; these pockets compress and expand when flow is suddenly stopped, absorbing some shock but often behaving unpredictably as they dissolve or migrate, which can either reduce or exacerbate water hammer depending on their size, location, and the system’s pressure.
Trapped air near valves or bends can create localized cushioning, while dispersed bubbles may amplify vibrations by reflecting pressure waves. The net effect depends on dynamics: chamber volume, air compressibility, water velocity, and system geometry.
How to Install or Recharge an Air Chamber
How should an air chamber be installed or recharged to reliably reduce water hammer? A plumber should shut off water, drain the line, and fit a vertical capped stub near the offending valve; the chamber’s pocket traps compressible air.
To recharge, isolate the line, open the cap, and gently introduce air or allow refill so air re-enters above the water column. Make certain the chamber remains upright and accessible for future service.
Test by slowly restoring pressure and activating the valve to listen for reduced knocking.
- Install precisely to prevent leaks and loss of air.
- Recharge carefully to restore cushioning.
- Inspect regularly for waterlogged failure.
When to Fit a Water Hammer Arrestor (And Which Type)
Faced with regular banging or high-pressure shutoffs, homeowners should consider fitting a water hammer arrestor to prevent pipe damage and noisy plumbing.
Installation is warranted when quick-closing valves (dishwashers, washing machines, solenoid valves) cause repeated shocks, when air chambers have failed, or after pressure increases above recommended levels.
Placement near offending fixtures and at branch ends reduces shock transmission.
Consider local codes, system pressure, pipe material, and accessibility when deciding installation timing.
Professional assessment is advisable for complex systems, multi-story buildings, or recurring symptoms despite single-fixture arrestors.
Properly fitted arrestors extend pipe life and restore quiet operation.
Choosing the Right Water Hammer Arrestor
After deciding that an arrestor is needed, selecting the correct type and size determines effectiveness and longevity. A professional assesses pipe diameter, water pressure, and fixture frequency before choosing piston, diaphragm, or chamber arrestors. Materials and connection type matter: brass or stainless for durability, threaded or sweat fittings for compatibility. Placement near quick‑closing valves reduces shock; capacity must match expected surge to prevent repeated impacts. Properly sized arrestors quiet pipes and protect fittings, avoiding premature failure. Cost and warranty influence choice, but performance and correct installation remain paramount for lasting silence.
- Fear of recurrence
- Relief at silence
- Confidence in protection
How Failing Pressure-Reducing Valves Produce Noise
A failing pressure-reducing valve often shows a worn diaphragm through intermittent hissing, short bursts of water flow, or a faint tapping that coincides with fixture use.
Those diaphragm symptoms indicate the valve cannot hold steady set pressure, allowing rapid swings as downstream demand changes.
Such pressure fluctuations transmit as noise and knocking throughout the piping system.
Worn Diaphragm Symptoms
Frequently, a worn diaphragm inside a pressure-reducing valve is the source of intermittent knocking and hammering in household pipes. The diaphragm’s loss of elasticity or small tears lets the valve chatter as flow changes, producing sharp impacts and rattling that echo through fixtures. Homeowners may notice noise worsened when faucets start or stop, or a recurring bang after brief water use.
Other signs include uneven water flow, slight leaks at the valve body, and a faint metallic vibration felt near the main shutoff. Prompt inspection prevents escalation and restores steady, quiet operation.
- Sudden alarm at night
- Frustration over disruption
- Urgency to fix
Pressure Fluctuation Causes
Several mechanical issues within a failing pressure-reducing valve cause rapid pressure fluctuations that translate into audible pipe noise.
Internal wear, debris buildup, or a weakened spring can allow the valve to chatter, opening and closing intermittently instead of holding a steady downstream pressure. These oscillations send pressure waves through rigid piping, producing knocking, banging, or rattling sounds, especially when fixtures cycle.
Inconsistent downstream pressure also stresses fittings and creates transient water hammer effects.
Diagnosing involves measuring inlet and outlet pressure while operating fixtures; common remedies include cleaning, spring replacement, valve rebuilding, or installing a new pressure-reducing valve.
How to Test and Adjust Household Water Pressure
Begin by measuring the system pressure with a pressure gauge at an outdoor spigot or a washing machine hose bib to establish a baseline reading; normal household water pressure typically falls between 40 and 60 psi.
If pressure exceeds this, the pressure-reducing valve (PRV) at the main should be located and adjusted downward a quarter-turn at a time, retesting after each change. If pressure is low, check the main shutoff and any partially closed valves, then slowly open the PRV. If uncertain, consult a licensed plumber to avoid damage.
- Relief — regain quiet confidence.
- Control — reduce anxious surprises.
- Safety — prevent costly failures.
How Sediment and Mineral Buildup Change Pipe Noise
Sediment and mineral deposits accumulating inside pipes change how water flows and how the plumbing vibrates. Layers of scale narrow passages, increasing flow velocity and turbulence; uneven deposits create chaotic eddies that strike pipe walls. Hard, crusty buildups act as rigid nodules, altering resonance and amplifying knocks when pressure changes. Loose grit can shift with flow, producing intermittent clanks. Over time, deposits reduce damping, so normal pulses become louder. Different minerals produce different textures and sounds: calcium carbonate yields hard, sharp impacts; silty sediment causes rasping noises. Detecting these acoustic signatures helps distinguish buildup from loose fittings or air.
How to Flush Supply Lines to Remove Sediment
When mineral grit or scale impairs water flow, flushing supply lines is a direct, effective way to clear deposits and restore normal hydraulics.
The procedure isolates the line, shuts off isolation valves, opens downstream fixtures and a drain, then briefly reopens the main to force a high-velocity purge.
Clear water and reduced noise indicate success; persistent turbidity or blockage suggests deeper buildup or corroded pipe requiring professional evaluation.
Safety includes wearing eye protection and avoiding chemical mixes.
Regular periodic flushing prevents accumulation and preserves flow, reducing sudden pressure changes that can trigger knocking.
- Relief: sudden clear flow feels reassuring.
- Confidence: visible results validate action.
- Calm: quieter pipes restore home peace.
Why Washers and Valves in Fixtures Can Create Knocking
Loose or worn washers and the internal parts of fixture valves can cause knocking by intermittently interrupting or releasing water flow, producing sharp pressure pulses that travel through the pipe network. Aging rubber, mineral buildup, or misaligned stems can create intermittent seals that snap open or closed under pressure. The result is brief, loud impacts felt as pipe knocks. Identifying affected fixtures narrows the source; testing taps and isolating supply lines helps confirm valve-related noise. Temporary cushioning or tightening may reduce sound, but persistent issues suggest component attention. Quick inspection prevents escalation to wider plumbing stress.
| Component | Effect |
|---|---|
| Washer | Snaps, pulses |
| Valve seat | Uneven seal |
| Stem | Vibration |
| Mineral buildup | Restricted flow |
| Misalignment | Intermittent closure |
Replacing Worn Faucet Cartridges and Supply Valves to Stop Knocks
Replace worn faucet cartridges and supply valves promptly to guarantee knocks originating at fixtures are eliminated; these components control flow and pressure pulses, so degraded seals or damaged cartridges often cause the intermittent slaps described earlier.
Inspection reveals mineral buildup, torn O-rings, or loose retaining clips. Replacing parts restores smooth flow and prevents sudden jolts that echo through piping.
Use manufacturer-matched cartridges and shutoff-quality supply valves for reliable sealing. Simple swaps take minutes for experienced DIYers; otherwise, a plumber ensures correct sizing and pressure compatibility.
Proper replacement reduces noise, protects fittings, and extends fixture life.
- Relief
- Confidence
- Quiet
How Closed Valves and Closed-Loop Systems Cause Pressure Pulses
Describing how closed valves and closed-loop systems produce pressure pulses begins with recognizing that trapped flow and sudden valve actions create rapid changes in momentum, sending shock waves through the piping.
In closed systems, pockets of moving water confined by shut valves or check devices cannot decelerate smoothly; kinetic energy converts to pressure spikes. These spikes travel as transient waves, reflecting at fittings, tees, and terminations, producing audible knocking where supports or pipe walls flex.
Repeated or resonant pulses amplify noise. System layout, fluid velocity, and valve actuation speed determine intensity; eliminating trapped flow paths and slowing valve closures reduce pulse magnitude.
How to Isolate a Noisy Section With Shutoff Valves
The technician first locates the shutoff valves that control the suspect run, including branch and appliance stops.
They close the appropriate valves to isolate the section and then operate fixtures or the pump to recreate the knocking while the rest of the system remains pressurized.
Observations during this test confirm whether the noise originates inside the isolated segment or elsewhere.
Locate Relevant Shutoff Valves
Before attempting repairs, locate the shutoff valves that control the section of piping producing the knocking so the noisy segment can be isolated safely.
The observer checks exposed lines, follows branch paths, and notes valve types: gate, ball, or angle.
Main house valves and appliance-specific shutoffs are prioritized.
Exterior meter valves and basement manifolds often control troublesome runs.
Labeling valves with durable tags speeds future work.
If valves are stiff or corroded, record condition for professional service.
Safety gear and a flashlight improve visibility.
Do not operate buried or unfamiliar valves without confirmation.
- Relief — reassurance from knowing control.
- Urgency — pressure to act safely.
- Confidence — clarity to proceed responsibly.
Isolate And Test Section
With the relevant shutoffs identified, the technician isolates the suspect run by closing valves upstream and downstream to confine flow to the noisy segment. They then open a nearby drain or faucet within the isolated section to relieve pressure and allow observation under controlled conditions.
If knocking stops, the issue lies elsewhere; if it continues, the isolated segment contains the source. The technician documents valve positions and reintroduces flow incrementally, checking for knocking at each stage.
Temporary padding or support can be applied to verify vibration reduction. Once diagnosed, valves are returned to normal and repair options are planned.
Temporary Tricks to Quiet Pipes Until You Fix Them
Occasionally, homeowners can quiet noisy pipes quickly with a few temporary fixes that reduce banging until a permanent repair is made. These short-term measures focus on cushioning, securing, and easing pressure to restore peace while arranging proper repairs. They are not permanent solutions but can prevent sleepless nights and frayed nerves.
- Wrap exposed pipes with foam insulation or towels to damp vibrations and soften impacts.
- Use pipe straps or clamps with rubber padding to secure loose sections and stop sudden movement.
- Partially bleed air from lines or reduce water hammer with a faucet trick to lower abrupt pressure spikes.
When Knocking Indicates a Plumbing Emergency
Sudden, loud banging known as water hammer can signal a serious pressure event that requires immediate attention.
Persistent knocking accompanied by damp spots, pooling water, or reduced water pressure may indicate a burst or leaking pipe. In such cases, shutting off the main water supply and contacting a plumber promptly is advised to prevent extensive damage.
Sudden Loud Water Hammer
A loud, abrupt bang from the pipes signals water hammer, a dangerous pressure surge caused when flowing water is forced to stop or change direction suddenly.
It can rattle fittings, loosen joints, and frighten occupants.
Immediate attention prevents escalation: check fast-closing valves, secure exposed piping, and make certain air chambers or arrestors function.
Persistent, violent bangs warrant shutting main supply and calling a professional to avoid hidden damage.
- Sudden shock: startling, may feel like structural impact.
- Repeated violent strikes: alarming, suggests failing restraints or absent arrestors.
- Acute single blow: jarring, could precede leaks or component failure.
Burst Or Leaking Pipe
Detecting persistent knocking accompanied by damp spots, unexplained drops in water pressure, or the sound of running water when fixtures are off can indicate a burst or leaking pipe requiring immediate attention.
The knocking may be caused by escaping water striking framing or cavity surfaces.
Immediate steps include shutting off the main water valve and inspecting accessible piping for visible leaks, stains, or bulging.
Temporary containment with buckets or towels limits damage, but professional assessment is essential to locate hidden failures, assess structural risk, and perform repairs or replacements.
Prompt action reduces water damage, mold growth, and costly structural repairs.
How to Describe the Problem to Your Plumber for Faster Service
When did the knocking start, and under what circumstances does it occur? A clear, concise report speeds diagnosis. Note timing, frequency, location, associated noises, and recent plumbing work or temperature changes. Mention water pressure sensations and whether fixtures or appliances coincide. Provide easy access details and photos or short videos if possible.
- Describe the sound: sharp bangs, dull thuds, rhythmic tapping.
- State when it happens: immediately after valve use, intermittently at night, or during heating cycles.
- List recent changes: new fixtures, repairs, or unusually high pressure.
This focused information helps the plumber prioritize tools and parts.
Cost Ranges: DIY vs Professional Fixes
Repair costs for knocking pipes span a wide range depending on cause, access difficulty, and whether the homeowner tackles the job or hires a pro.
Minor DIY fixes — tightening straps, adding simple cushioning, or adjusting water pressure — often cost under $50 in materials and an hour or two of labor. Intermediate DIY efforts, like replacing a valve or rerouting a small section, can reach $100–$300.
Professional service calls typically start around $100–$200, with repairs ranging $200–$800 for common issues. Complex jobs involving wall opening, pipe replacement, or extensive labor can exceed $1,000.
Decisions weigh time, skill, and risk.
Tools and Parts to Keep on Hand for Quiet Pipes
A small kit of basic plumbing tools—adjustable wrench, pipe wrench, pliers, and plumber’s tape—allows quick, safe interventions when noise appears.
Foam pipe cushions and metal clips can be installed to stop rattling against joists and framing.
Keeping a few common replacement valves and washers on hand speeds repairs for water-hammer and leaking that cause knocking.
Basic Plumbing Tools
Basic toolkits for quieting knocking pipes include a few versatile items that let a homeowner or technician diagnose and fix common causes quickly. Essential hand tools, a pressure gauge, and basic replacement parts reduce guesswork and restore calm.
A flashlight and inspection mirror reveal hidden faults; an adjustable wrench and channel-lock pliers loosen fittings without damage. Compression fittings, spare shutoff valves, and thread sealant allow fast, reliable repairs.
Proper labeling and a small parts tray keep everything accessible during stressful repairs. Confidence rises when the right tool is at hand, turning noisy urgency into manageable maintenance.
- Adjustable wrench
- Pressure gauge
- Spare fittings
Pipe Cushions And Clips
Clipped against joists and studs, foam cushions and rubber-lined pipe clips isolate plumbing runs from wood framing and metal brackets, stopping the vibrations that cause knocking.
Small, inexpensive, and easy to install, they prevent metal-on-wood contact and dampen movement from thermal expansion or water hammer.
Nylon or stainless clips suit copper, PEX, and PVC; cushioned straps fit irregular runs.
Spacing follows manufacturer guidance to support weight without overconstraining pipes.
Inspect cushions for wear and replace brittle or compressed pads.
For tight areas use adhesive-backed foam or split sleeves to retrofit without disassembling piping.
Replacement Valves And Washers
Several common replacement valves and a small stock of washers can quickly stop persistent knocking by fixing worn seals and loose fittings before they worsen.
Keeping a few ball valves, gate valves, and compression fittings on hand lets a homeowner address sudden hammering caused by abrupt shutoffs. Neoprene and rubber washers restore tight seals at faucets and hose bibs, reducing vibration.
Basic tools — adjustable wrench, pliers, and seat keys — speed swaps. Quick, confident replacement prevents water damage and the anxiety of overnight noise.
Preparedness saves time, expense, and sleeplessness.
- Ball valves
- Neoprene washers
- Compression fittings
Preventive Maintenance to Keep Pipes Silent Year‑Round
Taking a proactive approach, homeowners can prevent pipe knocking year‑round by scheduling regular inspections, maintaining proper water pressure, and addressing minor issues before they escalate.
A technician should check fastenings, pipe routing, and support straps to eliminate movement. Install or service pressure regulators and water hammer arrestors to moderate surges.
Flush sediment from water heaters and clean aerators to reduce turbulence. Insulate exposed pipes to damp vibration and prevent expansion noise without delving into seasonal temperature effects.
Keep valves exercised and accessible so small leaks or loosening can be corrected promptly, preserving quiet plumbing and preventing costly repairs.
How Seasonal Changes Affect Pipe Noise (And Fixes)
Seasonal temperature shifts and changing water usage patterns can introduce noises even in well-maintained systems, so homeowners who follow regular maintenance routines should also expect and address weather-related causes.
Cold causes pipes to contract, tightening supports and prompting knocks; insulating exposed lines and adding flexible hangers calms the shock.
Warm months increase water demand and pressure spikes, so installing a pressure regulator or shock absorbers reduces hammering.
Freeze–thaw cycles stress joints; check for leaks, relieve trapped air, and winterize outdoor faucets.
Emotional reassurance comes from proactive steps that preserve comfort and prevent surprise damage.
- Insulate to soothe tension
- Regulate pressure to regain control
- Winterize to protect peace
Energy and Water Efficiency Benefits of Fixing Knocking Pipes
Beyond reducing irritating noises, repairing knocking pipes delivers measurable energy and water savings: fixing loose or improperly supported lines prevents pressure surges and leaks that waste water.
Addressing knocking often uncovers worn valves, loose fittings, or corroded joints; replacing or tightening these reduces drip losses and maintains system pressure so heaters and pumps run less frequently.
Stable pressure improves appliance efficiency, lowering hot-water demand and energy consumption.
Over time, reduced leak-related loss and optimized flow cut utility bills and extend equipment lifespan.
Investing in prompt, targeted repairs yields predictable savings and conserves water without major system overhauls.
Quick Final Checklist: Find, Stop, and Prevent Pipe Knocking
For a quick, effective resolution to pipe knocking, follow a concise checklist that helps locate the source, apply targeted fixes, and implement simple preventive measures. The homeowner inspects visible runs, listens during different water uses, and notes loud spots.
They secure loose clamps, add cushioning, and bleed trapped air. If needed, isolation valves or water hammer arrestors are installed.
Regular maintenance, pressure checks, and avoiding abrupt valve closures reduce recurrence. Simple records of fixes and symptoms guide future action. Calm confidence replaces irritation when small, consistent steps stop the noise and protect piping.
- Locate and listen
- Fix and secure
- Maintain and prevent
Conclusion
Persistent pipe knocking isn’t just annoying; it signals wear that can lead to leaks. Studies indicate water hammer causes up to 20% of residential plumbing failures, underscoring the cost of ignoring noise. Homeowners who address knocking promptly reduce repair bills and conserve water. By using the quick checks and seasonal prevention steps outlined, they can silence pipes, extend system life, and avoid more costly disruptions down the line. Implement fixes early.