What Is a Vent Pipe? Easy Guide to Types, Purpose & DIY Tips
A vent pipe is a crucial plumbing component that helps maintain proper air pressure in drainage systems and safely directs sewer gases above the roofline. Its primary functions include preventing trap siphoning, facilitating smooth wastewater flow, and minimizing odors and hazardous gas accumulation. In residential settings, common types of vent pipes include soil stacks, individual fixture vents, and mechanical vents for layouts that require enhanced airflow. They can be made from various materials such as PVC, ABS, cast iron, or copper, and their placement is important for meeting building codes. For more information on the different types, inspection tips, and basic DIY guidance, continue reading.
What Is a Vent Pipe, and Why Does It Matter?
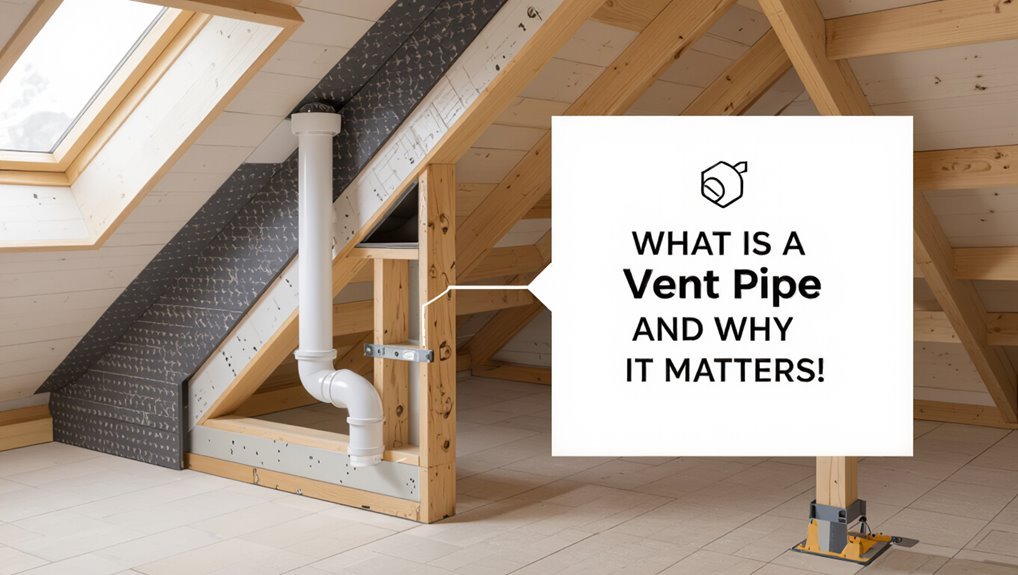
What is a vent pipe and why does it matter?
A vent pipe is a plumbing component that equalizes air pressure within drain systems and vents sewer gases outdoors. It prevents traps from siphoning, allows wastewater to flow freely, and reduces odors and hazardous buildup inside structures.
Vent pipes vary by material and configuration but share the role of maintaining system balance and safety. Proper placement and sizing affect fixture performance and code compliance; poorly designed or blocked vents lead to slow drains, gurgling, and toxic gas risks.
Regular inspection and prompt repair preserve function and occupant health.
How Vent Pipes Work
Having established their role in balancing pressure and venting gases, the explanation now turns to how vent pipes accomplish those functions.
Vent pipes connect fixtures to the plumbing stack and open above the roofline, permitting air to enter drains and gases to escape. They equalize pressure by allowing trapped air to flow, preventing siphoning of traps that block sewer odors.
Gravity, stack effect, and slight pressure differences drive airflow; water seals in traps remain intact when vents supply replacement air.
Proper slope and unobstructed passage guarantee waste moves smoothly while maintaining against backflow and maintaining sanitary conditions.
Vent Pipe Types, Materials, and Residential Uses
The article now reviews common vent pipe types such as soil stacks, stack vents, and air admittance valves.
It then explains material options — PVC, ABS, cast iron, and copper — and their suitability for various systems.
Finally, typical residential installation uses and placement considerations are summarized to guide homeowners and installers.
Common Vent Pipe Types
Vent-pipe types vary by material, diameter, and designed residential application, each offering different durability, cost, and installation requirements.
Common types include soil-stack vents that connect drain systems and route waste gases safely outdoors; stack vent extensions continuing a soil stack above roofline; individual fixture vents serving single fixtures where running a full stack is impractical; circuit vents sharing venting for multiple nearby traps; and combination waste-and-vent fittings simplifying layouts in tight spaces.
Mechanical or powered vents provide assisted airflow in unusual configurations.
Selection depends on local code, building layout, trap counts, and whether passive or active venting best mitigates siphoning and odors.
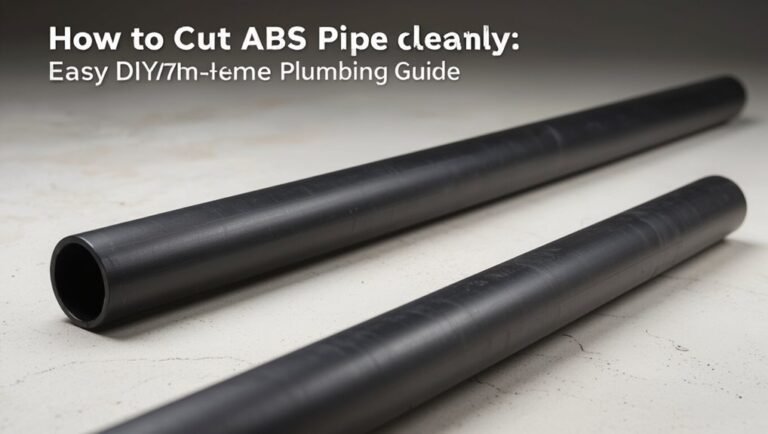
Material Options Explained
After outlining common vent configurations, attention turns to the materials used to fabricate those pipes, since choice of material affects longevity, cost, installation methods, and compatibility with local codes. Materials include PVC (lightweight, corrosion-resistant), ABS (impact-resistant, colder climates), cast iron (durable, sound-dampening), and copper (corrosion-resistant, higher cost). Selection depends on chemical resistance, temperature tolerance, joining methods, and local code allowances. Maintenance demands and expected service life also differ. The following summary contrasts typical options to clarify trade-offs for homeowners and contractors.
| Material | Key traits |
|---|---|
| PVC | Low cost, solvent-welded |
| ABS | Tough, cold-tolerant |
| Cast iron | Durable, quiet |
| Copper | Long-lasting, costly |
Residential Installation Uses
In residential settings, vent pipes connect fixtures to the plumbing stack and to outdoor termination points, and their type and material are chosen to match system layout, local codes, and budget.
Common configurations include individual fixture vents, common vents serving two fixtures, and wet venting where drain flow and venting combine.
Materials typically used are PVC for cold-water systems, ABS in some regions, cast iron in older homes, and copper rarely for specialty cases.
Installation emphasizes slope, support, and clearance through roofs.
Proper sizing prevents siphoning and odors; compliance with local codes guarantees safety, function, and longevity.
How Vent Pipes Differ in Roof, Sewer, and Appliance Systems
The discussion shifts to functional and installation differences among roof vents, sewer vents, and appliance vents.
Roof vents prioritize weatherproofing and attic airflow, while sewer vents focus on maintaining trap seals and venting gases.
Appliance vents are sized and routed for specific combustion or exhaust needs and must meet clearance and termination rules distinct from plumbing vents.
Roof Vent Differences
Vent pipes vary by function and installation: roof vents primarily equalize air pressure in plumbing drains and expel sewer gases above the roofline, while sewer mains and lateral vents handle larger waste-flow pressures and may require bigger diameters and different materials, and appliance-specific vents (for water heaters, furnaces, or exhaust fans) focus on safe combustion or moisture removal and often include draft hoods, mechanical fans, or insulated flues.
Roof vent differences include height above peak, cap type, flashing integration, and material choice (PVC, ABS, cast iron).
Placement avoids downdrafts, limits roof penetrations, and meets local code clearances.
Sewer Vs Appliance Vents
How do vents for sewers and appliances differ in purpose and construction? Sewer vents equalize pressure in the drainage system, preventing siphoning of traps and allowing gases to escape above the roof. Appliance vents serve specific equipment: combustion appliances need dedicated vents for exhaust and makeup air, while dryer vents expel lint and moisture.
Materials, diameter, termination, and routing vary: sewer vents are typically larger, connected to drain stacks, and extend through roofs; appliance vents follow manufacturer specs, often use metal ducts, and may terminate through walls.
- Purpose: pressure relief vs exhaust/makeup air
- Construction: size, materials, routing
- Codes: plumbing vs appliance standards
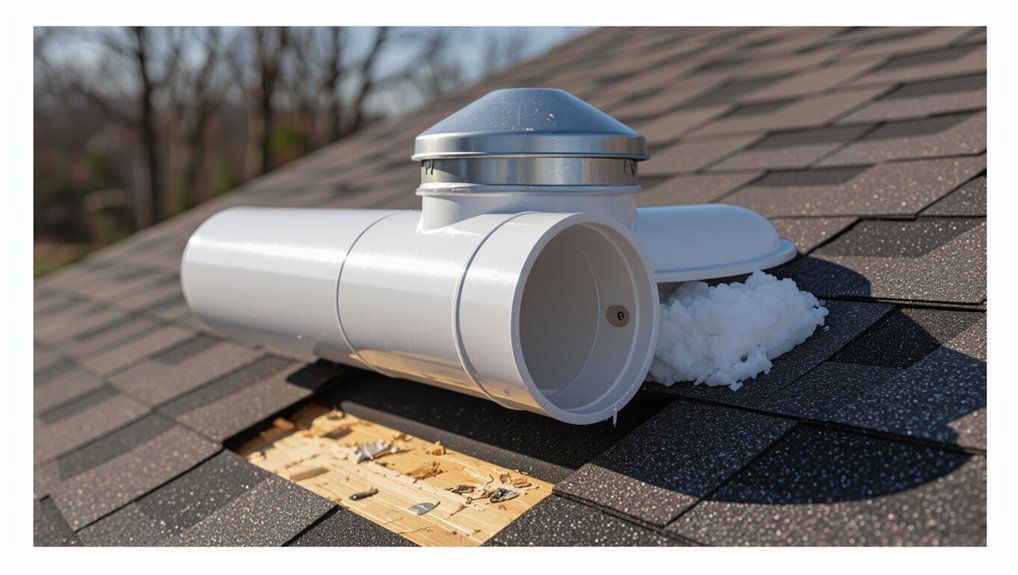
Signs a Vent Pipe Is Clogged or Failing
Occasionally a home will give subtle but clear signals when a vent pipe is clogged or failing, and recognizing these signs early prevents plumbing problems from worsening.
Noticeable symptoms include slow draining fixtures and frequent gurgling noises as air struggles through obstructed vents. Persistent sewer-like odors near drains or roof vents suggest trapped gases escaping where they shouldn’t.
Toilet flushing may become weak, or water levels in traps may fluctuate. Sudden pressure changes causing bubbling in sink basins or toilet bowls also indicate venting issues.
Visible roof vent blockages—leaves, nests, debris—correlate with the interior signs and warrant inspection.
Why Blocked Vent Pipes Are Dangerous
Blocked vent pipes create pressure imbalances and trap sewer gases, turning a normally harmless part of the plumbing system into a health and safety hazard.
When vents clog, fixtures drain slowly or gurgle, traps can siphon dry, and foul odors infiltrate living spaces.
Increased suction stresses seals and joints, raising leak and backflow risk.
In cold climates, trapped moisture can freeze, worsening blockages and causing burst pipes.
Prompt diagnosis and safe clearing prevent structural damage and exposure to hazardous gases like hydrogen sulfide and methane.
- Health risks: toxic gas exposure.
- Plumbing failure: leaks and backflow.
- Property damage: corrosion and freezing.
Quick Attic and Roof Checks for Vent Pipe Issues
A brief inspection of roof flashing around vent pipes can reveal gaps or rust that invite leaks.
The attic should be checked for obstructions like nests or debris that block airflow.
Any cracks, corrosion, or displaced pipe sections should be noted for prompt repair.
Inspect Roof Flashing
When checking roof flashing around vent pipes, attention focuses on seams, sealant condition, and any gaps where the flashing meets pipe collars or roof materials.
The inspector notes rust, cracked or missing sealant, lifted edges, and shingle overlap.
Small gaps allow water entry and rot; loose flashing shifts during wind.
Safely photographed evidence and measured gap sizes guide repair choices: reseal, tighten fasteners, or replace flashing.
Proper overlap and flashing contour to the pipe prevent leaks.
Temporary fixes should be documented and scheduled for permanent repair to protect attic insulation and structural sheathing.
- Corrosion or cracks
- Sealant integrity
- Edge and overlap fit
Check For Blockages
After examining flashing for gaps and sealant failure, the inspector should next check vent pipes for blockages that can impede airflow or trap moisture.
In the attic, look into pipe openings for nests, debris, or accumulated insulation fibers; use a flashlight and a mirror if access is limited.
On the roof, peer down each vent cap to spot leaves, bird nests, or tar buildup.
Gently probe with a long, flexible rod only if safe and accessible, avoiding force that could damage the pipe.
Clear minor obstructions and note severe clogs for professional removal to restore proper venting.
Look For Damage
Inspectors should scan vent pipes in both the attic and on the roof for cracks, corrosion, loose fittings, and deteriorated flashing that can allow leaks or pest entry.
They should note brittle rubber boots, rusted metal stacks, and collapsing seams.
Look for water stains, insulation dampness, or mold near pipe penetrations.
Check that caps and screens are intact and vents remain vertical.
Record locations and take photos for repair prioritization.
Immediate temporary sealing prevents further damage until professional replacement occurs.
Regular seasonal checks reduce hidden deterioration and prolong pipe and roof system service life.
- Inspect seals and flashing
- Photograph defects
- Schedule prompt repairs
How to Clear a Minor Vent Pipe Clog Safely (Step-by-Step)
Occasionally a minor vent pipe clog can be cleared without professional help by following a careful, methodical procedure that prioritizes safety and prevents damage to the plumbing system.
First, inspect the roof area for visible debris and wear protective gloves and eyewear.
Use a garden hose with moderate pressure to flush the vent from the top, watching for improved flow.
If water stalls, insert a flexible plumber’s snake gently to break obstructions, avoiding aggressive force.
Clear loosened material with the hose.
After flushing, check drainage fixtures for restored venting.
If resistance persists or damage appears, stop and consult a professional.
When to Repair vs Replace a Vent Pipe
Determine whether to repair or replace a vent pipe by evaluating the type and extent of damage, the pipe’s age and material, and the cost-effectiveness of each option.
Small cracks, isolated corrosion, or displaced flashing often warrant targeted repairs.
Widespread rust, multiple leaks, compromised joints, or brittle plastic in older systems usually justify replacement.
Consider access difficulty, code compliance, and expected remaining service life; replacement may prevent repeat issues.
Safety, long-term reliability, and compatibility with existing plumbing should guide the decision.
When unsure, a professional inspection clarifies structural integrity and the most durable path forward.
- Assess damage type and scope
- Check pipe age/material
- Weigh longevity versus repairability
Cost Guide: DIY Fixes, Repairs, and Full Replacement
Compare costs across three tiers—DIY fixes, professional repairs, and full replacement—by estimating materials, labor, access difficulty, and potential follow-up expenses.
DIY fixes cost least: sealants, pipe sleeves, flashing kits, and basic tools typically run $10–$150; time and safety risk increase with roof or attic access.
Professional repairs commonly range $150–$800 depending on diagnostic time, patching, and localized pipe sections; contractors factor travel and warranty.
Full replacement spans $500–$2,500+ for new vent stacks, flashing, roof penetration work, and disposal.
Unexpected issues—rotted decking, multiple penetrations, or interior water damage—raise final invoices.
Permits and Code Basics for Vent Pipes
After outlining cost differences between DIY patches, professional repairs, and full vent-stack replacement, attention turns to the regulatory framework that governs vent-pipe work.
Permits, code chapters, and inspection requirements vary by jurisdiction; local building departments determine when permits are required for vent relocation, replacement, or roof penetrations.
Materials and installation must meet plumbing codes (often IPC or UPC) and local amendments. Licensed plumbers usually secure permits and make certain compliance.
Failure to obtain required permits can lead to failed inspections, fines, or costly corrective work. Homeowners should consult local authorities before significant vent modifications.
- Verify local permit requirements
- Follow applicable plumbing codes
- Schedule required inspections
Simple Preventive Maintenance to Keep Vents Working
For routine upkeep, simple preventive maintenance keeps vent pipes clear, seals intact, and roof penetrations watertight, preventing small issues from becoming costly repairs.
Regular visual inspections identify cracks, rust, loose flashing, or sagging pipe collars.
Clearing debris and nests from vent tops preserves airflow; using a plumber’s snake can remove minor blockages inside.
Replace deteriorated rubber boots and re-seal flashing with appropriate roofing sealant.
Confirm vents remain vertical and unobstructed after storms.
Schedule checks seasonally and after extreme weather.
When corrosion, persistent odors, or chronic clogs appear, consult a licensed plumber to diagnose and repair.
Conclusion
A vent pipe, though often unseen, is the home’s breath—vital, quiet, and easily overlooked. Understanding its types, functions, and common problems empowers informed decisions about simple DIY fixes, timely repairs, or full replacement. Regular inspection and basic maintenance prevent small clogs from becoming costly failures. When in doubt, consult a professional to meet code and safety requirements. Treat vent care as routine stewardship to keep the house breathing freely and safely.