What Is a Flex Pipe for a Car? Easy Guide to Function & Fixes
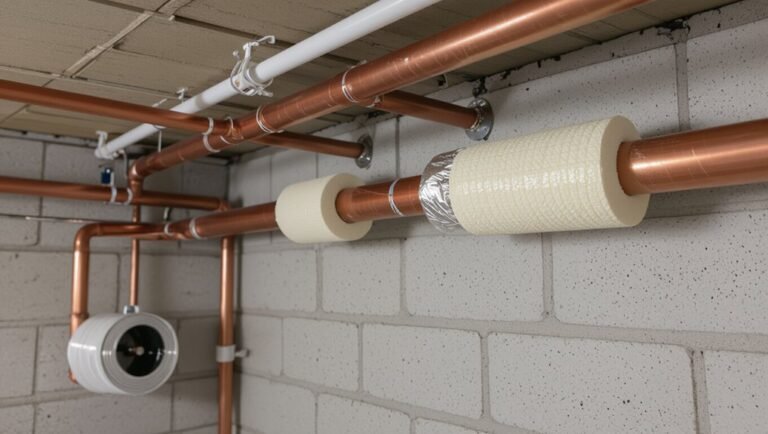
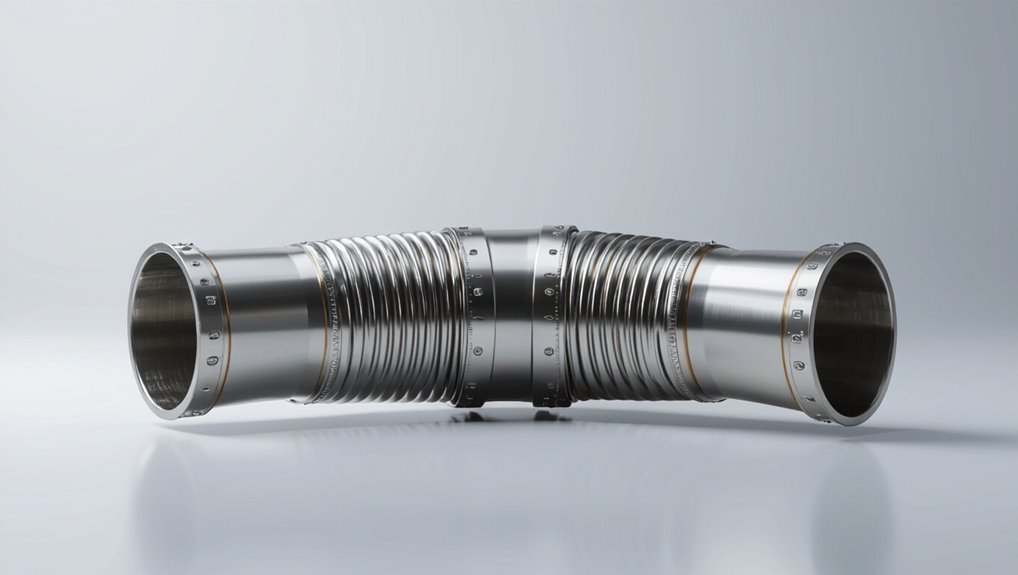
A flex pipe is a crucial component of a car’s exhaust system that absorbs engine movement, thermal expansion, and vibrations. It connects parts such as the manifolds and downpipes while allowing for smooth gas flow and protecting against heat and corrosion. Made with a flexible inner corrugated tube and an outer braided stainless layer, it accommodates various movements. Common issues include cracks or separations. Continue reading for practical fixes, placement tips, and guidance on replacement.
What Is a Flex Pipe on a Car
A flex pipe is a short, corrugated section of the exhaust system designed to absorb engine movement and reduce stress on rigid exhaust components. It connects exhaust manifolds, downpipes, or mid-pipes, allowing slight axial, lateral, and angular displacement.
Constructed from braided stainless steel or corrugated tubing, it resists heat, vibration, and corrosion while maintaining gas flow. Typical lengths vary to suit alignment and mounting tolerances.
Failure modes include cracks, separation at welds, or perforation from fatigue and road debris, causing exhaust leaks and noise. Replacement involves matching diameter, length, and material for compatibility and durability.
Why Manufacturers Use Flex Pipes in Exhaust Systems
Having described what a flex pipe is and how it functions within the exhaust layout, manufacturers incorporate these components to manage dynamic stresses and extend system longevity.
Flex pipes absorb engine movement, thermal expansion, and vibration that would otherwise transmit to rigid exhaust sections and joints. By isolating motion, they reduce fatigue at welds and hangers, lowering crack and leak risk.
They also help maintain proper alignment for catalytic converters and mufflers, improving performance and emissions consistency.
Standardizing flex sections across models simplifies assembly and repairs, and can marginally reduce noise transmission, contributing to overall vehicle refinement.
How a Flex Pipe Is Constructed
Beginning with a multilayered core, a flex pipe is built from braided stainless steel wrapped over an inner corrugated tube that provides axial and angular flexibility while resisting collapse.
Surrounding layers may include an outer protective braid and, in some designs, a thin stainless jacket to shield against debris and heat.
Ends are formed with flanges or welded sleeves for secure attachment to exhaust components.
Internal welds and precision corrugation guarantee consistent exhaust flow and durability under vibration.
Seams are treated to prevent corrosion.
Assembly emphasizes balance between flexibility, strength, and longevity to meet vehicle operating conditions.
Types of Flex Pipes and How They Differ
With construction principles established, attention shifts to the variety of flex pipes available and the functional differences that determine their suitability for particular exhaust systems.
Common types include braided stainless steel flex pipes, offering high durability and resistance to corrosion; corrugated inner-core designs, which prioritize flexibility and absorb vibration; multi-ply layered hoses that balance strength and movement; and bellows-style assemblies used where axial and angular movement are significant.
Each type differs in flexibility range, thermal tolerance, lifespan, and cost. Selection depends on expected engine movement, exposure to road salts and heat, desired longevity, and budget constraints.
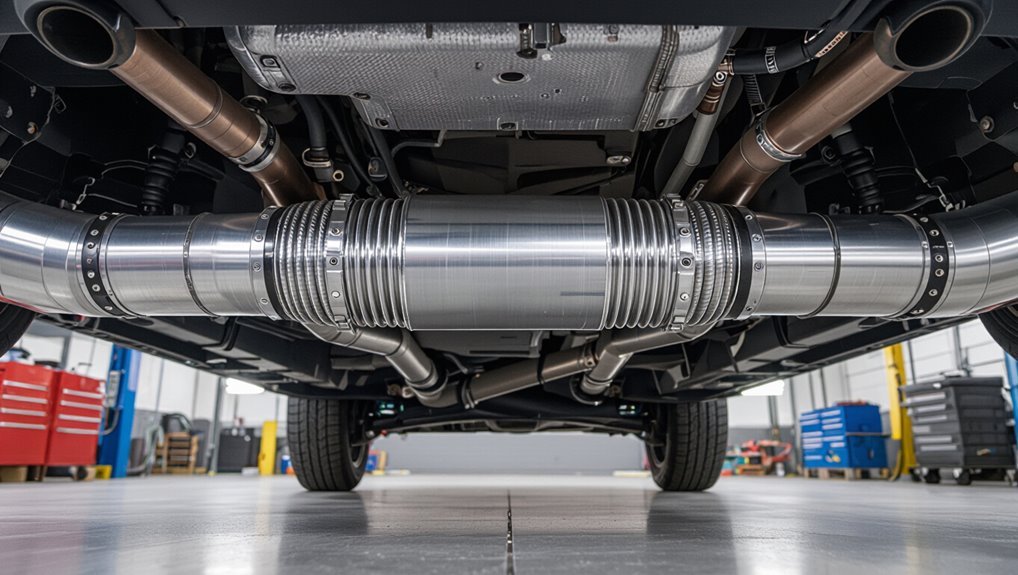
Where the Flex Pipe Sits in the Exhaust System
Located between the exhaust manifold (or turbocharger outlet) and the rigid downstream piping, the flex pipe typically occupies the section of the exhaust system that must accommodate engine movement and thermal expansion.
It is usually positioned immediately downstream of the manifold or turbo and just upstream of the catalytic converter or mid-pipe, depending on vehicle layout.
Placement varies with front- or rear-wheel drive, engine transverse or longitudinal orientation, and space constraints.
In many designs it mounts near engine mounts and steering components, where articulation is greatest.
Proper location guarantees accessibility for inspection and replacement without major disassembly.
How a Flex Pipe Prevents Stress on the Manifold and Cat
Positioned just downstream of the manifold and upstream of the catalytic converter, the flex pipe absorbs movement and misalignment that would otherwise transmit torque and vibration into the manifold and cat housing. It decouples engine motion from the rigid exhaust path, reducing bending loads at flange joints and preventing stress fractures in cast manifolds.
Thermal expansion is accommodated, lowering cyclic strain on welded seams and bolt connections. By smoothing transient loads during acceleration, braking, and road impacts, the flex section preserves sealing surfaces and prolongs component life.
- Isolates torsional and vibrational forces
- Accommodates axial and angular movement
- Minimizes cyclic fatigue at joints
Typical Symptoms of a Failing Flex Pipe
How can a failing flex pipe be recognized before it causes wider exhaust damage? Observable signs include visible cracks, frayed braid, or holes in the flex section and surrounding rusted metal.
Drivers may notice increased exhaust odor inside the cabin, reduced fuel efficiency, or a sudden drop in engine performance.
Vibrations or unusual movement under acceleration or during gear changes can indicate weakening.
Exhaust soot accumulation near joints signals leakage. Inspection may reveal blackened areas or displacement where the flex pipe connects to adjacent piping.
Prompt replacement prevents stress transfer to the manifold, catalytic converter, and downstream components.
How to Diagnose a Flex Pipe Leak by Sound?
A leaking flex pipe often announces itself with a sharp, hissing noise near the exhaust junction. The sound typically becomes more pronounced or changes pitch when the engine accelerates.
Careful listening while revving the engine can help isolate the source of the leak.
Distinctive Hissing Noise
A sharp, repetitive hissing often signals an exhaust flex pipe leak, especially under acceleration when exhaust pressure rises; technicians listen for pitch changes and location by moving around the vehicle with the engine revving at different RPMs.
The sound typically originates near joints or damaged braiding where exhaust gases escape under pressure. Careful comparison between suspected spots and background noise distinguishes flange leaks, manifold cracks, and flex-section breaches.
Temporary detection aids include using a length of hose as a stethoscope or lightly blocking openings to note volume change, but visual inspection confirms corrosion, perforation, or loose clamps before repair.
- Localize by moving listener position
- Compare tones at idle versus higher RPMs
- Confirm with visual inspection
Change During Acceleration
Listen for changes in pitch and intensity as the driver increases RPMs: a flex pipe leak typically grows louder and shifts to a higher, rasping tone under acceleration because rising exhaust pressure forces more gas through the breach.
The noise often correlates with throttle input—quiet at idle, conspicuous when revved. Steering or load changes can alter symptom severity if the flex section is stressed.
Localizing involves safely revving the engine while listening near joints and flex area; use a length of hose as a stethoscope to isolate the source.
Sudden popping or metallic flutter suggests a larger rupture requiring immediate repair or replacement.
Visual Signs to Look for During Inspection
During a visual inspection of a vehicle’s flex pipe, the examiner looks for obvious external damage such as cracks, splits, severe corrosion, or collapsed sections that compromise exhaust flow and structural integrity.
Attention is paid to flex joint braid fraying, punctures in the inner liner, and loose or missing clamps and hangers that allow movement-related wear.
Surface soot or fresh black streaks suggest leaking joints; local bulging indicates heat damage or internal collapse.
Any signs of exhaust odor inside the cabin are noted for safety.
Photographs and measurements document defect locations for repair assessment.
- Frayed braid or visible gaps
- Corrosion near welds and clamps
- Soot streaks or fresh black deposits
Quick Home Checks for Flex Pipe Issues
How can a quick home check reveal early flex pipe problems? A simple visual sweep beneath the vehicle after a short drive often exposes soot, fresh exhaust leaks, or bent corrugations.
Listening for new rattles, ticking, or increased engine noise during idle and acceleration helps identify compromised flex sections.
Gently feeling (with gloves) for loose hangers, abnormal heat patterns, or vibration transfer at mounting points confirms instability.
Noting smells of exhaust inside the cabin or nearby while parked signals leaks.
Recording observations and photos supports timely professional assessment before corrosion or fractures worsen.
Tools Needed to Inspect or Replace a Flex Pipe
After identifying signs of early flex pipe trouble, a basic toolkit prepares a homeowner or mechanic for inspection and possible replacement.
Essential items include safety gear, measurement tools, and fastening equipment.
Safety gloves and eye protection prevent burns and debris injuries.
A flashlight and inspection mirror reveal cracks, corrosion, and loose clamps.
A set of wrenches, socket drivers, and penetrating oil frees seized bolts.
A reciprocating saw or exhaust cutter and replacement clamps or welding gear enable removal and reattachment when needed.
Proper gaskets and anti-seize compound guarantee reliable joints and future serviceability.
- Safety gear
- Inspection tools
- Removal and fastening tools
How Heat and Vibration Cause Flex Pipe Wear
High operating temperatures progressively weaken flex pipe metal, promoting heat-induced fatigue and microfractures.
Continuous engine and road vibration then concentrate stress at those weakened spots, encouraging crack initiation and growth.
Repeated thermal cycling further accelerates corrosion around fatigued areas, reducing structural integrity over time.
Heat-Induced Metal Fatigue
Exposed to repeated heating and cooling cycles, flex pipe metal gradually loses its ability to withstand stress as microscopic cracks form and grow.
Temperature swings change crystal structure subtly, reducing ductility and creating weak points along welds and corrugations.
Oxidation accelerates embrittlement at elevated temperatures, while thermal expansion differences between joined components concentrate stress.
Over time these processes produce visible thinning, small fractures, and eventual leakage.
Inspection focuses on discoloration, surface pitting, and stiffness changes.
Replacement is recommended when deformation or multiple cracks appear to prevent exhaust leaks and further downstream damage.
- Monitor for heat discoloration and pitting
- Check weld seams and corrugations
- Replace at first signs of fracture
Vibration-Induced Stress Cracks
Vibrations from engine operation and road irregularities impose cyclic bending and torsional loads on a flex pipe, concentrating stress at corrugations, welds, and mounting interfaces.
Repeated micro-movements initiate crack nucleation where material experiences tensile reversal; cracks propagate incrementally with each vibration cycle.
Resonant frequencies amplify local strains, accelerating fatigue in thin walls and at attachment points.
Poor alignment or rigid hangers transfer additional load into the flex section, increasing crack growth rate.
Early signs include hairline splits, audible ticking, or exhaust leaks under load.
Addressing mounting flexibility and reducing transmitted vibration extends service life and delays stress-crack formation.
Corrosion From Thermal Cycling
Thermal cycling induces a repeating pattern of expansion and contraction in a flex pipe that accelerates corrosion when combined with mechanical vibration. The metal fatigues at microscopic bonds, oxide layers crack, and protective coatings flake away. Exhaust condensates concentrate salts and acids in crevices, boosting localized pitting. Vibration prevents stable reformation of passive films, so corrosion propagates along stressed braid and weld zones.
Detection often follows surface rust, exhaust leaks, or altered resonance. Timely inspection and targeted repairs extend service life; replacement is required when corrosion breaches structural integrity.
- Fatigue-driven oxide breakdown at joints
- Crevice pitting from condensate accumulation
- Vibration-stalled passive film recovery
Common Locations for Flex Pipe Failures by Vehicle Type
Typically, flex pipe failures cluster at predictable points depending on vehicle design: near engine manifolds and turbochargers on performance cars, at the mid-pipe or resonator junctions on larger SUVs and pickups, and around tight bends or close-to-frame mounts on compact cars.
Performance models see heat and vibration concentrate at header connections and turbo outlets; heavy trucks stress mid-pipe sections from chassis flex and towing loads; small cars suffer abrasion where the exhaust curves under the chassis or contacts suspension components.
Repair strategy varies by location: replace short sections for localized breaks, reinforce or reroute where mounting or clearance issues repeatedly induce damage.
How a Flex Pipe Failure Affects Emissions
A failed flex pipe commonly causes increased exhaust leaks that allow unburned gases to escape before proper treatment.
Those leaks can alter oxygen sensor readings, leading the engine control unit to run incorrect fuel trims. As a result, vehicles with damaged flex pipes are more likely to fail emissions tests.
Increased Exhaust Leaks
When a flex pipe fails, exhaust gases can escape before reaching the catalytic converter, increasing unfiltered emissions and degrading overall emissions control.
The leak creates pathways for hydrocarbons, carbon monoxide and NOx to bypass treatment, raising tailpipe pollution and potentially failing inspections.
Localized exhaust leaks also heat nearby components and can corrode flange connections, worsening sealing integrity.
Repair or replacement restores proper routing, pressure and filtration. Prompt attention prevents progressive damage and environmental harm.
- Unfiltered gases increase pollution and health risks.
- Leaks accelerate corrosion and component wear.
- Timely repair preserves emissions system effectiveness.
Altered Oxygen Sensor Readings
Exhaust leaks upstream of oxygen sensors can skew sensor voltage and waveform, causing the engine control unit to misjudge air–fuel ratio and adjust fuel delivery improperly.
When a flex pipe fails and permits leaks before the sensor, readings become leaner than actual combustion, prompting richer mixture corrections. Conversely, downstream turbulence can disturb heated sensor response timing, creating erratic switching and diagnostic trouble codes.
Prolonged incorrect feedback leads to suboptimal combustion, elevated pollutants, and potential catalyst stress. Repairing or replacing the flex pipe restores designed exhaust flow, stabilizes sensor signals, and allows the engine management system to resume accurate fuel trim and emissions control.
Failed Emissions Tests
Failure of the flex pipe often precipitates failed emissions tests by introducing leaks and flow disturbances that degrade the accuracy of emissions control systems.
A compromised flex pipe allows unmetered air and exhaust to mix, skewing sensor signals, increasing hydrocarbons, carbon monoxide, and NOx, and preventing catalytic converters from operating within designed parameters.
Inspection may reveal visible leaks, rattling, or soot.
Repair or replacement restores proper backpressure, sensor readings, and catalyst efficiency, improving test outcomes.
Timely attention prevents repeated failures, fines, and required repairs.
- Leaks distort oxygen sensor feedback and lambda control.
- Altered backpressure reduces catalytic converter effectiveness.
- Visible exhaust seepage often predicts test failure.
How a Leaking Flex Pipe Changes Fuel Economy
A leaking flex pipe can reduce engine efficiency and increase fuel consumption by upsetting exhaust backpressure and the oxygen sensor readings that control the air–fuel mixture.
Reduced backpressure can alter scavenging and exhaust pulse timing, causing the engine control unit to compensate with richer fueling. Faulty sensor signals from escaping exhaust may trigger longer open-loop operation or incorrect trim adjustments, raising fuel use. Intermittent leaks produce inconsistent combustion, degrading fuel economy under varied loads.
Repairing or replacing the flex pipe restores intended exhaust dynamics and sensor accuracy, allowing the engine management system to return to best air–fuel ratios and improved miles per gallon.
Safety Risks of Driving With a Damaged Flex Pipe
A damaged flex pipe can allow exhaust gases, including carbon monoxide, to enter the passenger cabin, increasing the risk of poisoning.
Leaks near hot components or nearby fuel lines also raise the likelihood of ignition and subsequent fires.
The combined threat to occupants and vehicle integrity makes prompt inspection and repair essential.
Increased Carbon Monoxide Exposure
Often unnoticed by drivers, a damaged flex pipe can allow exhaust gases— including carbon monoxide (CO)—to leak into a vehicle’s cabin, creating a serious health hazard.
A leak near the firewall or undercarriage can draw fumes through vents or gaps, producing symptoms like headache, dizziness, nausea, and impaired judgment before drivers recognize the source.
Chronic low-level exposure risks long-term cardiovascular and neurological effects. Prompt inspection and repair reduce exposure and restore safe ventilation. Ventilation alone may not eliminate CO; fixing the exhaust path is essential.
- Recognize symptoms early and stop driving.
- Inspect seals, joints, and firewall penetrations.
- Replace or professionally repair compromised flex pipes.
Fire And Burn Hazards
Why does a compromised flex pipe raise the risk of fire and burns? A damaged flex pipe can leak hot exhaust gases and sparks, directing heat toward nearby components like fuel lines, electrical wiring, or underbody insulation.
Corrosion or cracks increase the chance of flames igniting flammable residues or fluids. Escaping gases also raise local temperatures, worsening deterioration and creating ignition points during contact with road debris.
Additionally, sudden exhaust breaches can expose technicians or vehicle occupants to hot surfaces when inspecting or repairing the area, causing burns. Prompt inspection and replacement reduce these fire and burn hazards markedly.
Decide: Repair or Replace a Flex Pipe
When evaluating a damaged flex pipe, weigh the extent of the leak, the location, and the condition of adjacent exhaust components to determine whether a repair will hold or a replacement is safer.
A small external split in an accessible section may be repairable if nearby hangers, flanges, and pipe integrity are sound.
Severe corrosion, internal braid failure, or damage near the catalytic converter or manifold usually warrants replacement to prevent recurring leaks and downstream damage.
Consider labor complexity and long-term cost: replacement often avoids repeated shop visits and restores proper exhaust routing and backpressure.
- Safety and longevity over short-term savings
- Diagnostic clarity before committing
- Match repair to material condition
Temporary Fix Options for a Flex Pipe Leak
Temporary fixes for a flex pipe leak provide short-term containment to reduce noise and fumes until a proper repair or replacement can be completed.
Common options include high-temperature exhaust tape, muffler cement, and clamp-on repair sleeves; each offers limited durability and requires clean, accessible metal to adhere or clamp effectively.
Rubber exhaust patches secured with hose clamps can bridge small ruptures briefly.
Temporary welding or tack welds may hold until professional work is possible but demand skill and proper equipment.
These measures prioritize safety and drivability for short periods; they are not permanent solutions and should be followed by a scheduled professional replacement.
Patch a Small Flex Pipe Leak : Step-by-Step
The procedure begins by locating the exact spot of the flex pipe leak to assess size and accessibility.
Once found, the area is cleaned and prepped to remove rust, soot, and oil for proper adhesion.
Finally, an appropriate patch or high-temperature repair tape is applied and secured according to product instructions.
Locate The Leak
How can a small flex pipe leak be found quickly and reliably? A technician inspects the flex section visually with the engine cold, looking for soot, rust, or pinholes.
With the engine running and listening for hissing, gentle hand-held vibration or a length of hose as a stethoscope pinpoints the sound.
A soapy water spray or smoke test confirms bubbles or escaping vapor at the defect. Marking the exact spot with chalk or a tag guarantees accurate repairs and avoids needless disassembly.
- Observe: soot and discoloration reveal slow leaks.
- Listen: sound localizes active breaches.
- Test: bubbles or smoke verify location.
Clean And Prep
With the leak located and marked, attention shifts to cleaning and preparing the flex section for a durable patch. Work begins after the pipe cools; protective gloves and eye protection are recommended.
Remove surface dirt, rust, and soot with a wire brush, then wipe with a clean rag. For stubborn contamination, use a mild degreaser compatible with exhaust metals, applied sparingly and wiped dry.
Lightly sand the area around the mark to expose fresh metal and create a smooth, roughened surface for adhesion. Inspect for hidden cracks or thinning metal; if present, reassess repair viability before proceeding.
Apply Patch Or Tape
Begin by selecting the appropriate repair material—high-temperature exhaust tape or an exhaust patch kit—matched to the leak size and pipe condition.
The technician makes certain the pipe is cool, removes rust and debris, and verifies hole dimensions.
For tape, wrap tightly with overlapping turns extending beyond the damaged area; for a patch kit, secure the clamp or epoxy per instructions and allow cure time.
Reinspect the seal and run the engine briefly to check for leaks.
If vibrations persist or the metal is severely corroded, plan for flex pipe replacement instead of temporary repair.
- Temporary fix extends service life
- Proper prep prevents re-leakage
- Replace if structural failure detected
Replace a Flex Pipe Yourself : Overview and Steps
When replacing a flex pipe, a methodical approach guarantees safety and a reliable repair; this overview outlines the key steps, required tools, and common pitfalls so a competent DIYer can proceed confidently.
First, gather tools: jack stands, penetrating oil, replacement flex pipe or repair kit, clamps, wrenches, exhaust paste, and safety gear.
Secure vehicle, relieve exhaust tension, and inspect surrounding components.
Cut or unbolt damaged section, clean mating surfaces, and test-fit new piece.
Clamp or weld per kit instructions, tighten hardware to spec, and check for alignment.
After lowering vehicle, run engine and inspect for leaks and noise.
What to Expect From a Shop Flex-Pipe Replacement
A shop replacement typically presents a clear estimate of cost and labor time, including any diagnostics and shop hours.
Customers are usually offered choices between OEM-quality, aftermarket, or budget parts, each affecting price and longevity.
Warranties and recommended maintenance schedules are explained so owners know what protections and follow-up care to expect.
Cost And Labor Time
In most repair shops, replacing a car’s flex pipe typically involves a straightforward mix of parts cost and labor hours that varies by vehicle type and exhaust layout.
Estimates commonly range from modest do-it-yourself parts prices to higher shop invoices when access is difficult or additional exhaust sections require removal.
Labor time often spans one to three hours for most passenger cars; trucks or vehicles with rusted hardware can take longer.
Diagnostics, welding versus clamp replacement, and local labor rates influence the final bill.
Clear written estimates help owners compare options before authorizing work.
- Typical labor: 1–3 hours
- Common cost drivers: access difficulty, corrosion
- Price range: parts plus labor balance
Parts Quality Options
Shops typically offer three tiers of flex-pipe replacement parts—economy, OEM-equivalent, and premium—each balancing durability, fitment, and cost.
Economy options use thinner braided stainless or aluminized steel, reducing price but shortening lifespan and increasing corrosion risk.
OEM-equivalent parts match factory dimensions, materials, and performance, providing reliable fit and predictable longevity without brand premiums.
Premium assemblies employ thicker stainless, multi-layer bellows, and reinforced flanges for superior fatigue resistance and corrosion protection, suited to heavy use or extended service intervals.
Customers should expect clear explanations of material differences, visual inspection of weld quality, and pricing tied to proven specifications.
Warranty And Maintenance
When choosing a shop for a flex-pipe replacement, customers should expect clear, written warranty terms covering materials and workmanship, plus guidance on routine inspections and care to preserve the repair.
A reputable shop specifies warranty duration, what failures are covered, and any exclusions (e.g., impact damage, misuse).
Maintenance instructions include periodic visual checks for leaks, mounting hardware tightness, and listening for new exhaust noises.
Documentation of the service and parts used supports future claims.
Shops should explain how warranty claims are handled and any pro-rated policies so owners know recourse and reasonable service intervals.
- Warranty duration and exclusions
- Recommended inspection schedule
- Claims and documentation process
How to Choose the Right Replacement Flex Pipe
For a proper replacement, the flex pipe must match the vehicle’s exhaust layout, engine type, and expected operating conditions.
Selection begins with correct dimensions: inner diameter, length, and flange or slip-joint interfaces.
Material choice affects longevity; stainless steel alloys resist corrosion and heat better than mild steel.
Flexibility and braid design should accommodate anticipated movement without collapsing.
Heat shielding or insulation may be required near sensitive components.
Confirm compatibility with sensors and mounting points to avoid leaks or stress.
Finally, prioritize parts meeting industry standards and obtain professional installation to guarantee exhaust alignment and reliable performance.
OEM vs Aftermarket Flex Pipes : Pros and Cons
After selecting the correct size, material, and braid design for a replacement flex pipe, the choice between an OEM unit and an aftermarket alternative becomes the next decision point.
OEM parts match factory fitment, emissions requirements, and warranty expectations, often costing more. Aftermarket options vary widely: some offer improved performance or value, others sacrifice fit or durability. Decision factors include cost, availability, warranty, and intended use.
For clarity, consider these points:
- OEM: predictable fit, compliance, typically higher price.
- Aftermarket: broader options, variable quality, potential cost savings.
- Use case drives the best balance of cost versus confidence.
Flex-Pipe Materials: Stainless, Braided, Layered
The discussion turns to common flex-pipe materials, starting with stainless steel for its superior corrosion resistance and long-term durability.
Attention then shifts to braided designs, which prioritize flexibility and vibration absorption, versus layered constructions that balance strength and fatigue resistance.
Comparisons will focus on lifespan, failure modes, and typical use cases.
Stainless Steel Durability
Stainless-steel construction gives flex pipe exceptional resistance to corrosion, high temperatures, and fatigue under repeated vibration.
The material’s strength preserves flexibility while maintaining structural integrity, reducing leaks and elongating service life.
Heat cycling and road salts present fewer failure modes compared with softer alloys.
Maintenance intervals lengthen; inspections focus on joints and welds rather than the body.
Cost is higher upfront but often offsets replacement frequency.
Compatibility with exhaust chemistries and catalytic converter temperatures makes stainless a common OEM and aftermarket choice.
- Longer service life reduces overall ownership cost.
- Better resistance to environmental degradation.
- Fewer failure points concentrated at welds.
Braided Versus Layered
While both braided and layered flex pipes aim to absorb engine movement and isolate vibration, they achieve this through different constructions that affect flexibility, durability, and noise characteristics.
Braided flex pipes use an outer woven stainless-steel mesh over an inner bellows, combining high tensile strength with abrasion resistance; they resist debris and puncture while slightly stiffening the assembly.
Layered flex pipes consist of nested or overlapped metal sheets or thin bellows, offering smoother flex, reduced noise transfer, and better fatigue distribution but less external protection.
Choice depends on application: braided for rugged exposure, layered for vibration isolation, and sometimes a hybrid for balanced performance.
How to Measure for the Correct Flex-Pipe Length & Diameter
When measuring for the correct flex-pipe length and diameter, a technician first notes the existing exhaust layout, mounting points, and required bend angles to guarantee an accurate fit.
Measurements include overall length between flanges, overlap allowances for clamps or welds, and inner diameter at connection points.
Material thermal expansion and space for motion influence chosen length and diameter.
Precision prevents leaks, strain, and premature failure.
- Measure between fixed points, then add overlap for secure joints.
- Match inner diameter to adjoining tubing to maintain flow and backpressure.
- Account for movement range to avoid binding during engine operation.
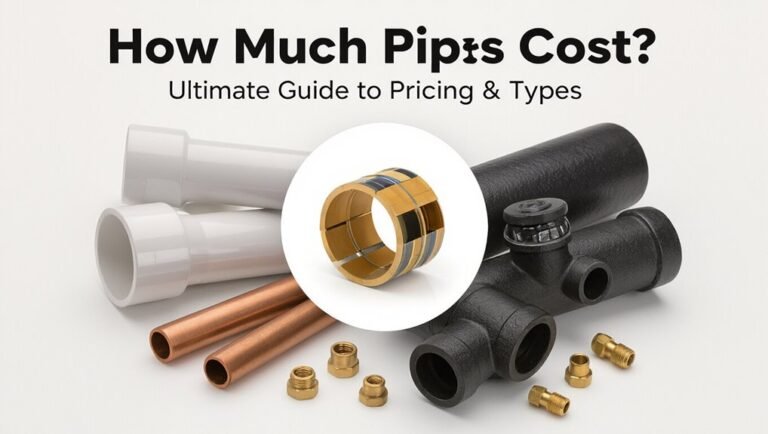
Flex-Pipe Part and Labor Cost Ranges
Typical replacement costs for flex pipe range from inexpensive aftermarket units to pricier OEM parts, depending on material and fitment.
Labor time commonly spans one to three hours, though access and vehicle layout can shorten or extend that estimate.
Price drivers include part quality, vehicle make/model, muffler or catalytic converter removal, and regional labor rates.
Typical Replacement Costs
Replacement of a vehicle’s flex pipe commonly falls into a moderate cost range influenced by pipe material, vehicle make, and labor rates.
Typical parts vary from inexpensive universal sections to OEM assemblies; aftermarket stainless-steel flex pipes often cost more.
Labor pricing depends on exhaust accessibility and shop hourly rates; welding versus clamp repairs also affects totals.
Regional parts availability and emissions equipment (like catalytic converter proximity) can raise expenses.
Owners should obtain multiple quotes and verify part quality to avoid repeat repairs.
- Universal flex-pipe: lower part cost, potential fitment adjustments
- OEM assembly: higher cost, direct fit reliability
- Welding repair: higher labor skill, longer-lasting result
Labor Time Estimates
Having noted how part selection and repair method influence total cost, attention shifts to labor time estimates that underpin those charges.
Typical flex-pipe replacements occupy 0.5 to 2.5 hours depending on accessibility, vehicle layout, and whether adjacent components require removal.
Simple bolt-on replacements on economy cars often complete in under an hour; mid-pack jobs with moderate disassembly run between one and two hours.
Complex systems—exhaust manifolds, turbocharged setups, or rusted fasteners—can extend labor past two hours.
Labor rates vary by shop, so multiplying estimated hours by hourly shop rates yields the labor portion of the repair invoice.
Factors Affecting Price
Costs for flex-pipe repairs depend on several interrelated factors that determine parts and labor ranges. Vehicle make and model influence part availability and replacement complexity; OEM versus aftermarket parts change part cost and expected longevity. Location and shop rates affect labor and total price. Extent of surrounding exhaust damage alters repair scope, possibly requiring additional components or welding. Warranty status and emission regulations can mandate specific parts or procedures, raising costs. Typical part and labor ranges vary widely, so obtaining multiple quotes is advisable.
- Vehicle complexity: affects time and replacement choice
- Part quality: OEM vs aftermarket cost/longevity
- Local labor rates and regulations
How Long a Flex Pipe Typically Lasts
Typically, a flex pipe lasts between 5 and 7 years under normal driving conditions. Lifespan varies with mileage, driving style, climate, road salt exposure, and exhaust system design.
Short trips and stop-and-go traffic accelerate wear by increasing thermal cycling; highway driving tends to be gentler. Corrosion from moisture and road chemicals can perforate the braided metal or weaken welds sooner. Mechanical stress from engine movement, misaligned mounts, or contact with other components also reduces longevity. Quality of the original part or replacement influences service life: higher-grade materials and better construction generally endure longer before exhibiting leaks or failure.
Maintenance Tips to Extend Flex-Pipe Life
A routine schedule of visual inspections helps identify fraying, leaks, or loosened clamps before they escalate.
Attention to preventing corrosion buildup — through cleaning, protective coatings, and avoiding prolonged exposure to road salts — can markedly extend flex-pipe life.
Promptly addressing early signs of wear preserves exhaust integrity and reduces repair costs.
Regular Visual Inspections
Regular visual inspections help detect early wear, leaks, and loose connections in a car’s flex pipe before they become major failures. The inspector notes cracks, frayed braid, misalignment, and gasket condition while the vehicle is cool and supported.
Attention to vibration points and mounting brackets reveals strain that shortens flex-pipe life. Timely identification enables minor repairs or bracket adjustments rather than full replacement, saving cost and preventing exhaust leaks.
Record findings, mileage, and any corrective actions to track deterioration. Consistent, brief checks integrate easily into routine maintenance and extend component service life.
- Inspect joints and clamps for tightness
- Look for frayed or separated braid
- Note any soot or fresh exhaust stains
Preventing Corrosion Buildup
Because moisture and road salts accelerate metal breakdown, preventing corrosion on a car’s flex pipe focuses on limiting exposure and removing contaminants quickly. Regular washing, especially the undercarriage after winter or coastal driving, removes salt and grime that promote rust. Applying high-temperature corrosion inhibitors or exhaust-specific sprays creates a protective barrier without impeding heat dissipation.
Make certain drain holes and hangers remain clear to avoid trapped moisture. Store the vehicle in a dry, ventilated area when possible. Promptly address minor surface rust with wire brushing and heat-resistant paint. Routine attention and timely intervention extend flex-pipe service life effectively.
How Driving Habits Affect Flex-Pipe Longevity
Frequently, driving behavior directly determines how long a flex pipe will last: harsh acceleration, sustained high RPMs, and repeated short trips that keep the exhaust system cold increase stress and fatigue on the braided section and its joints, while smooth acceleration, steady cruising, and allowing the system to reach operating temperature reduce thermal cycling and mechanical strain.
Driving patterns influence vibration exposure and joint movement; frequent stop-and-go or aggressive driving accelerates wear, while highway miles generally prolong service life. Maintenance intervals and prompt repairs further affect longevity.
- Favor steady speeds over frequent revving
- Avoid abrupt throttle changes
- Address exhaust issues quickly
How to Prevent Rust and Corrosion on a Flex Pipe
To minimize rust and corrosion on a flex pipe, owners should focus on preventing moisture, salt, and chemical exposure while keeping the metal clean and dry; targeted measures include protective coatings, proper drainage, and routine inspections to catch early signs of deterioration.
Regularly rinsing undercarriage salt and road grime, especially after winter driving, reduces electrochemical corrosion.
Applying high-temperature anti-corrosion sprays or ceramic coatings creates a barrier without restricting flex.
Make certain exhaust hangers and heat shields allow proper airflow and drainage to avoid trapped moisture.
Promptly replace worn clamps, gaskets, or damaged flex sections to prevent localized corrosion from spreading.
How Aftermarket Exhaust Mods Affect Flex Pipes
Aftermarket exhaust modifications can raise exhaust gas temperatures, exposing flex pipes to greater heat stress and accelerating material fatigue.
Changes in routing and stiffness alter pipe movement and vibration patterns, which can increase flex joint wear.
Non‑OEM bolt‑on components may present fitment mismatches that strain connections and shorten flex pipe service life.
Increased Exhaust Temperatures
When owners install higher-flow headers, less restrictive mufflers, or larger-diameter piping, exhaust gas temperatures can rise because the engine operates closer to its peak scavenging and power bands.
Increased temperatures stress flex pipe materials, accelerating braid fatigue, degrading inner bellows, and promoting corrosion where high heat meets residual moisture.
Heat cycling shortens service life and can cause localized softening or weld cracking, especially on budget aftermarket sections.
Monitoring and mitigation extend longevity through thermal shielding, upgraded high-temp flex sections, and periodic inspection.
Risks grow with power increases and sustained high-load driving; proactive choices reduce premature failure.
- Heat accelerates material fatigue
- Shielding lowers peak exposure
- High-temp replacements resist degradation
Altered Pipe Movement
By changing pipe lengths, angles, or support points, modified exhaust systems shift how movement and vibration transfer to flex pipes. Aftermarket bends can increase angular stress, while extended runs raise lateral deflection; both accelerate braid wear or cause end misalignment. Properly positioned hangers and phased joints can mitigate excess motion, but mismatched stiffness between sections concentrates loads at the flex. Careful measurement and selection of flex type—axial, torsional, or multi-directional—reduces premature failure. Monitoring for loosened clamps and unusual noise detects problems early, allowing targeted reinforcement or replacement before cracking or separation occurs.
| Modification | Effect |
|---|---|
| Longer run | Increased lateral deflection |
| Steeper bend | Higher angular stress |
| Fewer hangers | Greater vibration amplitude |
| Stiffer pipe | Load concentration |
| Mismatched flex | Rapid wear |
Bolt-On Fitment Challenges
Modifying an exhaust system with bolt-on components often creates fitment mismatches that concentrate stress on flex pipes. Aftermarket flanges, brackets, or tailpipes that do not align precisely force the flex section to absorb movement and vibration it was not designed for. This accelerates wire braid fatigue, causes premature leaks, and can transmit noise and harshness into the cabin. Proper measurement and matched hardware reduce risk, while adapters or re-welding can correct offset. Technicians evaluate joint angles, gasket seating, and hangar placement before final assembly to preserve flex pipe life and maintain exhaust sealing.
- Misaligned flanges increase bending loads
- Incorrect hangar placement multiplies vibration
- Adapter use can shift stress concentration
Welding a Flex Pipe: When to Weld and When Not to
In evaluating whether to weld a flex pipe, technicians consider the component’s purpose, material, location, and movement tolerance. Welding suits fixed sections or damaged flanges where movement is minimal; it restores leak paths but can stiffen assemblies and cause future cracks. Avoid welding where engine or drivetrain motion requires lateral or axial flex, or when the flex insert is braided or thin-walled. Proper assessment includes heat control and corrosion protection. When welding is chosen, tack welds and stress relief reduce risk. Alternatives like clamp repairs or replacement preserve intended function and longevity.
| Factor | Weld OK | Weld No |
|---|---|---|
| Movement | Low | High |
| Material | Thick | Thin |
| Location | Rigid | Near joints |
| Cost | Moderate | Low/Replace |
| Durability | Good | Poor |
How to Read a Mechanic’s Flex-Pipe Repair Estimate
How should a vehicle owner interpret a mechanic’s flex-pipe repair estimate? A clear estimate breaks down labor, parts, and taxes; notes whether the flex pipe is OEM or aftermarket; and lists any diagnostic or removal fees. The owner should compare line items, verify part descriptions, and confirm labor hours. Requesting clarification reduces surprises.
- Ask for a written parts breakdown including brand and warranty duration.
- Verify labor rate, estimated hours, and whether welding or clamp repairs are quoted separately.
- Confirm whether corrosion, nearby component damage, or catalytic converter access affects final cost.
Warranty and Certification for Flex-Pipe Replacements
When evaluating a flex-pipe replacement, a vehicle owner should review both the part warranty and the installer’s workmanship certification to understand coverage limits and claim procedures. Coverage typically distinguishes manufacturer defects, corrosion exclusions, and mileage or time limits. Workmanship guarantees cover installation errors for a defined period; document receipts and stamp records for claims. Keep OEM vs aftermarket warranty differences in mind and confirm transferability with vehicle sale. Store warranty contact info and claim steps with service records. A clear certificate and receipt streamline disputes and reduce unexpected costs.
| Item | Typical Detail |
|---|---|
| Part warranty | 12–60 months |
| Workmanship | 90–365 days |
| Exclusions | Corrosion, misuse |
| Claim steps | Receipt + inspection report |
How Emissions Testing Flags Flex-Pipe Problems
Emissions tests detect flex-pipe issues by measuring exhaust composition and flow anomalies that result from leaks, cracks, or ineffective sealing. Test equipment senses elevated hydrocarbons, oxygen imbalance, and unexpected flow rates; these readings indicate unmetered air entry or exhaust loss upstream of sensors. Visual and pressure inspections during testing can corroborate diagnostic flags. Failed results often prompt targeted inspection of flex connections, hangers, and welds. Timely correction prevents regulatory failure and protects downstream sensors and catalytic converters.
- Elevated HC or CO readings without engine fault codes
- Abnormal oxygen sensor voltages or fluctuating lambda
- Reduced backpressure during idle or load
How to Explain Flex-Pipe Issues to Your Mechanic
Describe flex-pipe concerns to a mechanic clearly and concisely, focusing on symptoms, location, and any test results or noises observed. The vehicle owner should state when symptoms began, driving conditions that trigger them, and whether vibrations, ticking, or exhaust leaks are steady or intermittent.
Specify the pipe’s approximate location (front, mid, near catalytic converter) and note visible damage or soot. Report recent repairs, failed emissions notes, and results of any smoke or pressure tests.
Offer to show the mechanic the noise while engine is running and provide mileage; avoid guessing technical causes to let the technician diagnose.
Common Replacement Mistakes to Avoid
After reporting symptoms and test results to a mechanic, owners should be aware of common mistakes to avoid during flex-pipe replacement that can waste money or shorten the repair’s life. Technicians should not use improper welding techniques, which can rigidize the flex section or cause leaks. Incorrect alignment or failing to replace adjoining hangers transfers stress back to the flex pipe. Using substandard or wrong-diameter sections undermines durability. Owners should request proper fitment, quality materials, and inspection post-install.
- Welding that eliminates flex function
- Ignoring exhaust alignment and hanger condition
- Substituting incorrect or low-quality pipe
Upgrades to Consider When Replacing a Flex Pipe
When replacing a flex pipe, consideration of higher-quality stainless steel can improve corrosion resistance and longevity.
Adding heat shielding options helps protect nearby components and reduces thermal transfer.
Upgraded clamps and hangers provide more secure mounting and reduce the risk of future leaks or fractures.
Higher-Quality Stainless Steel
A stainless-steel flex pipe upgrade focuses on material grade and construction to improve durability, corrosion resistance, and heat tolerance compared with standard mild-steel or lower-grade stainless components.
Higher-quality options often use 304 or 316 stainless, thicker braid layers, and precision-welded end fittings to resist cracking, rust, and fatigue under vibration. Selection considers vehicle environment, expected service life, and compatibility with exhaust gases and mounting points.
Properly matched components reduce leaks and maintenance frequency, offering long-term value despite higher upfront cost.
- 304 vs 316: balance cost, corrosion resistance, and temperature tolerance
- Multi-braid construction: enhanced fatigue and abrasion resistance
- TIG-welded ends: superior joint integrity and leak prevention
Heat Shielding Options
Why choose additional heat shielding around a flex pipe? Additional shielding protects nearby components from radiant and convective heat produced by the exhaust, reducing risk of heat soak, wiring damage, and premature deterioration of hoses and insulation.
Options include aluminized wraps, foil-based heat shields, ceramic blankets, and custom-formed stamped shields that bolt to the chassis. Selection depends on temperature range, vibration resilience, space constraints, and corrosion resistance.
Proper installation requires secure mounting, avoiding compression of the flex element, and maintaining clearance for thermal expansion. Effective shielding extends component life and preserves underbody temperatures without altering exhaust flow or backpressure.
Upgraded Clamps And Hangers
In addressing flex pipe replacement, upgrading clamps and hangers improves joint integrity and reduces future leaks by providing better clamping force, corrosion resistance, and vibration isolation.
Choosing stainless steel clamps, welded flanges, or high-strength band clamps minimizes slippage and galvanic corrosion.
Durable hangers with rubber isolators or polyurethane bushings prevent metal-on-metal wear and dampen exhaust pulse transmission to the chassis.
Properly sized hardware eases installation and maintains alignment, reducing stress on new flex sections.
Attention to mounting points guarantees longevity and quieter operation, protecting both the flex pipe and adjacent exhaust components from premature failure.
- Stainless steel band clamps for corrosion resistance
- Rubber-isolated hangers to reduce vibration
- Welded flange options for permanent, leak-free joints
DIY Safety Precautions for Exhaust Work
Before touching the exhaust system, confirm the vehicle is cool, securely supported, and that the work area is well ventilated to prevent burns, asphyxiation, or fire.
Protective eyewear, gloves, and long sleeves reduce injury from debris and hot surfaces.
Use jack stands on level ground; never rely solely on a jack.
Keep a fire extinguisher nearby when cutting or welding.
Disconnect the battery to avoid accidental shorts.
Work with good lighting and a clear floor to prevent trips.
Use appropriate tools and avoid makeshift repairs.
If unsure about structural or emission-related issues, seek professional assistance.
How to Verify a Successful Flex-Pipe Repair
Confirming a successful flex-pipe repair requires a systematic inspection and test sequence that checks for structural integrity, leak containment, and proper function.
The technician visually inspects welded joints, clamps, and braid for gaps, cracks, or deformation.
With the vehicle cold and again at operating temperature, a smoke or soapy-water test reveals leaks; exhaust sound and vibration are compared to baseline measurements.
Road testing under varied loads confirms no rattles or shifting.
Emissions and backpressure readings verify flow is within specification.
Documentation of findings and photos complete the verification record.
- Visual integrity: no cracks, secure fittings
- Leak testing: smoke/soapy method, cold/hot
- Functional check: noise, vibration, backpressure
When to Get a Second Opinion on Exhaust Repairs
After completing the inspection and tests that indicate a repair appears sound, a second opinion should be sought when any uncertainty remains about workmanship, parts quality, or diagnosis—especially if the vehicle exhibits intermittent noises, unusual vibrations, or if emissions/backpressure readings are marginal.
A second assessment helps confirm that welds, clamps, and hangers were installed correctly, that replacement components match OEM specifications, and that underlying issues (corrosion, misalignment, manifold leaks) were not missed.
Seek another qualified technician when costs are high, warranties are unclear, or recommendations conflict. Document findings and request written estimates to compare diagnoses objectively before authorizing further work.
Checklist to Prepare Your Car for a Flex-Pipe Replacement
When preparing a vehicle for a flex-pipe replacement, the owner should gather essential documentation, clear access areas, and secure basic safety measures are in place: have the vehicle’s service records and parts specifications available, remove loose items from the trunk and undercarriage, secure a flat, level workspace with wheel chocks and a functioning jack or lift, and disconnect the battery to prevent electrical hazards.
A concise checklist secures efficiency and safety: confirm correct replacement part, verify required tools and fasteners, and plan for proper ventilation.
Inspect surrounding exhaust components for wear and note any necessary additional parts before starting.
- Confirm part compatibility and torque specs
- Prepare hand and power tools, replacement gaskets
- Arrange PPE, lights, and waste container
Cost-Saving Tips When Fixing a Flex Pipe
Once the vehicle is prepped and parts and tools are verified, owners can focus on strategies to lower the cost of replacing a flex pipe without sacrificing safety or longevity.
Comparing prices for OEM versus high-quality aftermarket pipes, sourcing used or remanufactured components when appropriate, and buying from reputable suppliers reduces parts expense. Performing the installation oneself if competent saves labor; otherwise obtain multiple shop estimates and request itemized quotes. Reusing undamaged adjoining hardware, using proper clamps instead of costly welds when acceptable, and scheduling work during slow shop periods can further trim costs while maintaining a reliable repair.
Signs Your Flex-Pipe Issue Is Part of a Bigger Exhaust Problem
Frequently, a damaged flex pipe is only the most visible symptom of wider exhaust-system failure; rusted hangers, cracked manifolds, clogged catalytic converters, or leaks at joints can coexist and accelerate deterioration.
Observing multiple indicators suggests systemic problems rather than an isolated flex-pipe fault. Persistent exhaust noise after flex-pipe replacement, uneven engine performance, or recurring vibration point to additional damaged components.
A thorough inspection prevents repeated repairs and uncovers root causes that affect emissions, fuel economy, and safety. Prompt professional diagnosis minimizes cascading damage and cost.
- Recurrent noise or vibration after repair
- Visible corrosion beyond the flex section
- Poor emissions or engine drivability
Conclusion
Like a braided bridge that eases traffic over a trembling river, the flex pipe quietly absorbs motion and strain so the exhaust can flow uninterrupted. When it frays or fails, the vehicle’s voice changes and nearby systems feel the strain, signaling a need for attention. Understanding its role, spotting the signs, and choosing prudent repairs lets the car return to balanced motion—restoring harmony between engineered resilience and the road’s constant demands.