How to Use a Hose Bibb Wrench: Step-by-Step Guide for Easy Outdoor Faucet Repairs
A hose bibb wrench is essential for easily repairing outdoor faucets without causing damage. To use it, first shut off the water and drain the line. Next, securely fit the wrench onto the hex or square behind the faucet. This allows you to apply controlled leverage to loosen corroded nuts, remove stems or cartridges, and replace seals. After reassembling, test for leaks and adjust the packing as needed. Further guidance includes selecting the right tool, maintaining it, and troubleshooting more challenging issues.
What a Hose Bibb Wrench Is and Why You Need One
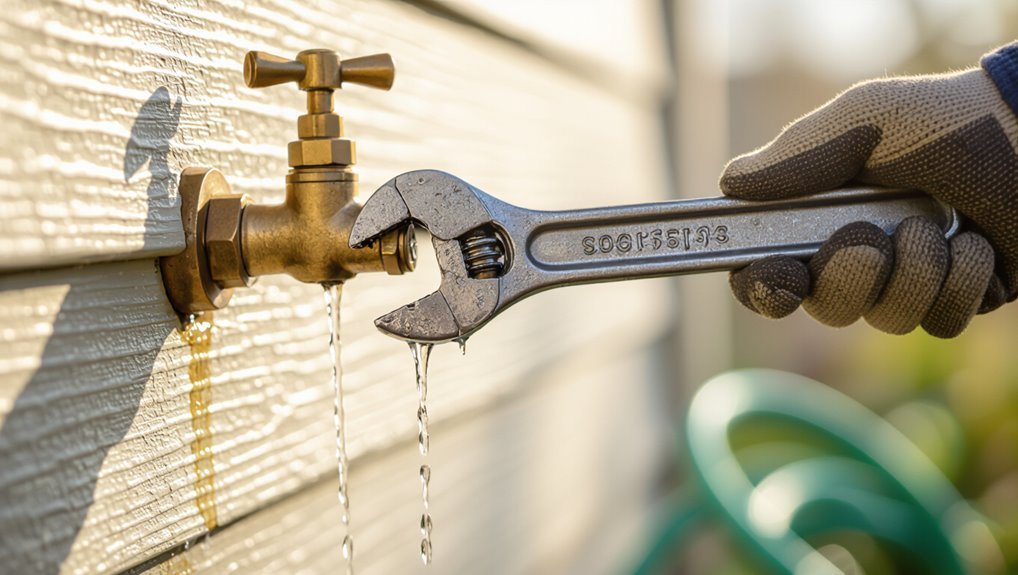
A hose bibb wrench is a simple hand tool designed to grip and turn outdoor faucet stems and spindles without damaging the valve.
It is useful for freeing stuck or corroded stems, replacing broken handles, and preventing leaks caused by rounded fittings.
Wrenches vary from compact, open-ended designs to adjustable or keyed models to match different bibb shapes and sizes.
Definition and purpose of a hose bibb wrench
Hose bibb wrenches are specialized plumbing tools designed to fit the hex or square nut behind outdoor spigots, enabling secure grip and controlled torque to loosen or tighten stubborn or corroded hose bibbs without damaging the fixture.
The tool’s purpose is efficient, safe manipulation of the bibb during repairs or replacement; guides typically explain how to use hose bibb wrench for proper leverage and access.
Common problems it solves with outdoor faucets
Tighten, loosen, or replace corroded outdoor spigots with minimal risk of rounding nuts or stripping threads. A hose bibb wrench addresses seized or frozen valves, damaged packing nuts, leaking connections, and stubborn hose couplings.
It enables controlled torque on irregular or worn fittings, eases removal of stuck spigots, and reduces the need for excessive force that can damage faucet bodies or surrounding plumbing.
Types and designs of hose bibb wrenches
Durable hand tools designed specifically for outdoor spigots, hose bibb wrenches come in several shapes and sizes to match different fittings and access conditions. They allow secure grip, prevent damage, and reach recessed valves.
Common designs include:
- Adjustable jaw wrenches for variable nut sizes.
- Box-end bibb wrenches for confined spaces.
- Long-handle models for extra leverage and reach.
Tools and Materials Needed Before You Start
Before beginning, the article lists the essential tools and optional accessories required for working with a hose bibb wrench, including wrenches, pliers, replacement washers, and thread sealant.
It notes necessary safety gear and precautions such as gloves, eye protection, and shutting off the water supply.
Guidance is provided on selecting the correct wrench size to match the faucet fitting for a secure, non-damaging grip.
Required tools and optional accessories
A few basic tools and a couple of optional accessories will make replacing or servicing a hose bibb faster and safer:
- Adjustable wrench, hose bibb wrench, plumber’s tape for thread sealing.
- Replacement parts (new bibb, packing, washers) and pipe dope as optional upgrades.
- Bucket, rags, and small screwdriver for disassembly and cleanup.
Safety gear and precautions
Personal protective equipment and simple site preparations protect both the worker and the plumbing when servicing a hose bibb.
Gloves, safety glasses, and closed-toe shoes minimize injury.
Clear the area of trip hazards, shut off water supply, and relieve line pressure before loosening fittings.
Use a drop cloth to protect surfaces.
Verify good lighting and ventilation; avoid working alone when possible.
How to choose the right wrench size for your faucet
With safety measures in place and the water shut off, attention turns to selecting the correct hose bibb wrench size.
Measure the faucet hex or flats with calipers or a ruler. Match that measurement to the wrench jaw opening.
Choose adjustable or fixed wrenches that fit snugly to prevent rounding.
Keep common sizes (7/8″, 1″, 1-1/8″) on hand for outdoor faucets.
Quick Overview of the Repair Process
The repair process is outlined in a few concise steps for users already familiar with basic plumbing work.
Shut off the water, remove the old packing and washer, use the hose bibb wrench to disassemble and replace worn parts, then reassemble and test for leaks.
This summary presumes standard hose bibb designs and basic hand-tool proficiency.
Simple step-by-step summary for experienced users
Begin by shutting off the water supply and draining the line.
Inspect the hose bibb, remove the handle and packing nut, then use the wrench to extract the stem or valve cartridge.
Replace worn seals or the cartridge, reassemble in reverse order, tighten fittings to spec, restore water, and test for leaks.
Adjust packing if minor seepage persists.
Step-by-Step Guide: Using a Hose Bibb Wrench to Operate or Repair an Outdoor Faucet
The user should first inspect the outdoor faucet to identify the specific problem, then prepare the workspace and shut off the water supply before any intervention.
Next, the hose bibb wrench is positioned snugly on the bibb so the user can turn a stuck handle safely and release tension without damaging the valve.
Finally, the wrench is used to tighten or loosen the packing nut and bonnet as needed to restore proper operation.
Inspect the faucet and identify the issue
Inspecting the faucet requires a quick visual and tactile assessment to determine whether the problem is a simple obstruction, a worn washer, a frozen stem, or a damaged valve seat.
The inspector checks for leaks, corrosion, mineral buildup, loose packing nuts, and handle play. Gentle operation tests stiffness or binding.
Notes are made on visible damage and likely replacement parts before proceeding.
Prepare the area and shut off water supply
Clear the work area and locate the outdoor faucet’s shutoff before any wrench work begins.
Remove hoses and debris, clear vegetation, and place a bucket or towel beneath the bibb.
Locate and close the indoor or exterior shutoff valve feeding the faucet, then open the bibb to drain residual water.
Verify no flow before proceeding with repairs.
Positioning the wrench correctly on the bibb
With the supply shut off and the bibb drained, attention shifts to seating the wrench properly on the faucet body.
The wrench jaw aligns around the hex or flats of the bibb housing, centering grips to avoid slippage.
Apply even pressure, ensuring teeth or pads engage metal fully.
Confirm clearance for pipe and handle movement before applying force to prevent damage.
Turning and releasing a stuck handle safely
Begin by confirming the water supply is off and any residual pressure has been relieved; then seat the wrench securely on the bibb as previously described.
Apply steady, controlled force to rotate the handle, avoiding jerks. If resistance persists, pause and tap around the stem to free corrosion.
Once the handle moves, ease it through full travel to guarantee smooth operation before removing the wrench.
Tightening or loosening packing nut and bonnet with the wrench
Once the handle has been freed and cycled to confirm smooth operation, attention can shift to the packing nut and bonnet.
The wrench is positioned on the nut or bonnet flats, applying steady torque clockwise to tighten or counterclockwise to loosen.
Small turns prevent over-tightening. If resistance is excessive, stop and inspect for corrosion or damaged seals before proceeding to avoid further harm.
Removing and replacing a damaged valve stem using the wrench
Carefully removing a damaged valve stem requires the proper hose bibb wrench, the right replacement stem, and a methodical approach to avoid water damage or further wear.
Shut off water supply, open faucet to drain pressure, then use the wrench to back out the stem retaining nut and extract the stem.
Inspect seat, install matching replacement stem, hand-start threads, and snug with the wrench to proper alignment.
Reassembling the faucet and testing for leaks
After the replacement stem is seated and the retaining nut is hand-started, reassembly proceeds by reinstalling the packing, bonnet, and handle in their reverse order using the hose bibb wrench only to snug fittings to manufacturer torque recommendations.
Once assembled, restore water slowly, observe for drips around stem and connections, tighten cautiously if needed, then cycle the valve fully to confirm smooth operation and absence of leaks.
When to Use a Hose Bibb Wrench vs. Other Tools
A hose bibb wrench is compared to an adjustable wrench, pliers, and a basin wrench based on grip, access, and risk of damage to the faucet.
It is preferred when the spout is shallow, the nut is rounded or corroded, or when access is limited and a snug, non-marring fit is required.
Other tools may suffice for larger flats, indoor valves, or when extra leverage is the primary need.
Comparison with adjustable wrench, pliers, and basin wrench
When evaluating which tool to use for a hose bibb, the hose bibb wrench excels at fast, secure engagement with the spout’s flats, while adjustable wrenches, pliers, and basin wrenches each serve narrower or different roles depending on access, grip, and risk of damage. Use adjustables for variable sizes, pliers for coarse grip, basin wrenches for confined spaces.
| Tool | Best feature |
|---|---|
| Hose bibb wrench | Secure flats |
| Adjustable wrench | Size flexibility |
Scenarios best suited for a hose bibb wrench
Select a hose bibb wrench for jobs that demand quick, secure engagement with the spout’s flats, especially on exterior faucets exposed to weather, rust, or paint where slipping would strip the fitting.
- Frozen or corroded spigots needing firm grip without damaging flats.
- Tight outdoor hose connection removal where limited clearance prevents larger tools.
- Quick seasonal replacement of exterior faucets and vacuum breakers.
Common Problems You’ll Encounter and How the Wrench Helps
Homeowners commonly face stuck handles and frozen bibbs, leaky packing nuts with dripping spouts, and stripped or rounded faucet hexes.
A hose bibb wrench is designed to provide controlled leverage on seized fittings, compress packing nuts without damaging the stem, and grip damaged hexes for removal or adjustment.
The following sections explain how the wrench addresses each issue and when additional repairs are required.
Stuck handles and frozen bibbs
Stubborn handles and frozen bibbs are common issues caused by mineral buildup, corrosion, or prolonged inactivity. They can make standard wrenches slip or damage valve components.
A hose bibb wrench provides secure, non-marring grip and increased leverage to free seized stems.
Apply penetrating oil, work the handle gently back and forth, then use the wrench to turn slowly until normal operation resumes.
Leaky packing nuts and dripping spouts
Many hose bibbs develop leaks at the packing nut or drip from the spout due to worn packing, loose fittings, or damaged valve seats.
A hose bibb wrench enables precise tightening or loosening of the packing nut, allowing replacement of seal packing or realignment of fittings.
Careful use prevents overtightening and enables testing for residual drips, reducing water waste and restoring proper sealing.
Stripped or rounded faucet hexes
After addressing leaks at packing nuts and spouts, attention often shifts to faucet hexes that have become stripped or rounded from repeated use or improper tools.
A hose bibb wrench fits over damaged hexes, distributing torque across multiple faces to avoid slippage. It allows controlled turning to break corrosion or remove stuck stems, minimizing further rounding and preserving surrounding fixtures during extraction.
Mistakes to Avoid When Using a Hose Bibb Wrench
Common mistakes can turn a simple hose bibb task into a costly repair, such as over-tightening fittings and stripping threads.
Using the wrong size wrench or positioning it poorly increases the chance of slips and damaged hardware.
Skipping basic safety steps—like shutting off the water and relieving pressure—creates unnecessary risk of injury and flooding.
Over-tightening and causing damage
Over-tightening a hose bibb with a wrench can strip threads, warp valve components, or crack the spout, turning a simple repair into a costly replacement.
Excessive force damages seals and packing, causes leaks, and can loosen nearby fittings. Apply moderate, controlled torque, stop once snug, and test for leaks.
Replace damaged parts rather than forcing a compromised assembly back into service.
Using wrong size or poorly positioned wrench
Having noted the risks of applying too much force, attention must also be paid to using the correct wrench size and positioning: A mismatched or poorly aligned wrench can slip, round corners, or damage threads.
Selecting a snug-fitting tool and seating it squarely on the hex prevents slippage. Proper alignment distributes torque evenly, reduces repair time, and preserves faucet integrity.
Ignoring safety and water shutoff steps
Failing to shut off the water and neglecting basic safety precautions before using a hose bibb wrench can turn a minor repair into a messy or hazardous situation.
A detached observer notes potential flooding, personal injury, and damaged fittings when steps are skipped.
- Turn off supply and relieve pressure.
- Wear gloves and eye protection.
- Inspect surroundings for slip or electrical risks.
Maintenance and Care for Your Hose Bibb Wrench
Regular cleaning, periodic lubrication, and proper storage help maintain a hose bibb wrench’s function and prevent corrosion.
Inspecting seals and moving parts regularly will reveal when wear warrants replacement rather than repair.
Replacing the wrench is recommended if threads strip, jaws deform, or leaks persist despite maintenance.
Cleaning, lubrication, and storage tips
A few simple steps keep a hose bibb wrench functioning smoothly and extend its lifespan: remove dirt and debris after use, apply a light lubricant to pivot points and threads, and store the tool dry in a protected location away from moisture and corrosive chemicals.
Periodically inspect for rust, wipe off excess oil, tighten fasteners, and keep the wrench separated from heavy tools to prevent damage.
When to replace the wrench
After cleaning, lubricating, and storing the wrench properly, attention should turn to signs that indicate replacement is needed.
The wrench warrants replacement when jaws are deformed, threads strip, handles crack, or corrosion compromises strength.
If adjustment no longer holds or slippage damages fittings, replacement prevents leaks and injury.
Regular inspections document wear; replace promptly when performance or safety is impaired.
Quick Troubleshooting Checklist
A brief checklist helps identify fast fixes for common outcomes after using the wrench.
It highlights immediate steps for leaks, stiffness, or misalignment.
The list focuses on quick, safe actions and when to seek professional help.
Fast fixes for common outcomes after using the wrench
Consult the quick checklist below to resolve the most common issues that arise immediately after using a hose bibb wrench, keeping steps brief and prioritized so small problems are fixed fast.
- Tightening leak: re-seat washer, snug with wrench, test flow.
- Stiff handle: apply penetrating oil, operate gently, check packing nut.
- Drip persists: replace valve seat or call a plumber if corrosion prevents seal.
Cost, Where to Buy, and Recommended Brands
Typical hose bibb wrenches range from inexpensive basic models to pricier cast‑iron or specialty versions, so cost should be weighed against durability and frequency of use.
Buyers can find options at hardware stores, plumbing suppliers, and online retailers, where reviews and return policies aid selection.
Trusted brands to evaluate include well‑known toolmakers that offer solid warranties and proven performance in plumbing applications.
Price ranges and value considerations
When selecting a hose bibb wrench, buyers should balance upfront cost against durability and warranty coverage to determine true value.
Retail and online outlets offer basic to professional options at varied prices; spending slightly more often yields longer life.
Consider local hardware stores for returns and online marketplaces for selection.
- Budget: basic, limited warranty
- Mid-range: balanced performance
- Professional: long warranty
Trusted brands and models to consider
Trusted brands for hose bibb wrenches span budget-friendly basics to professional-grade tools, each offering distinct trade-offs in cost, availability, and warranty.
Recommendations highlight value versus durability; DIYers favor lower-cost models, professionals choose forged steel with lifetime guarantees.
Typical purchase points include hardware stores, online marketplaces, and specialty plumbing suppliers.
- Ridgid — durable, pro-grade, specialty retailers
- Channellock — reliable, midrange, big-box stores
- Knipex — premium, limited outlets, online retailers
Visual Reference Guide
A clear diagram labels typical hose bibb parts—spout, packing nut, handle, and mounting flange—to orient the user before any tool work.
Accompanying illustrations show proper wrench placement on the packing nut and body, with arrows indicating recommended leverage directions.
These visuals make it easier to identify contact points and apply force without damaging fittings.
Typical hose bibb parts labeled
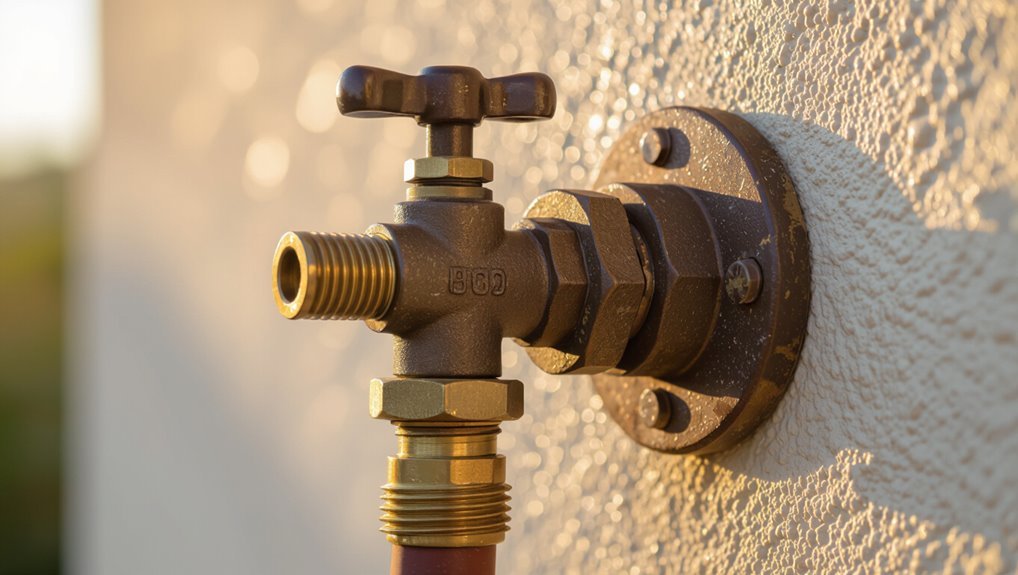
This labeled diagram identifies the common components of a hose bibb so users can quickly locate each part during inspection or repair.
The illustration points out the spout, threaded hose outlet, packing nut, stem/shaft, handle/lever, bonnet, valve seat, vacuum breaker (if present), mounting flange, and supply inlet.
Each label aids diagnosis and part-specific maintenance.
Wrench placement and leverage diagrams
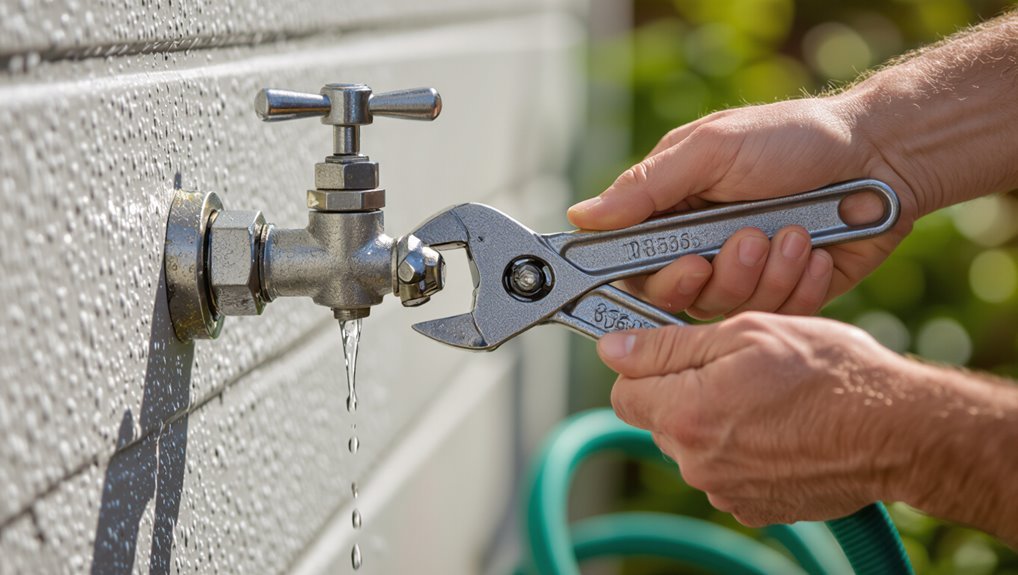
Positioning the wrench correctly is essential for applying effective leverage without damaging the hose bibb or surrounding fittings.
Diagrams show three views: top for jaw alignment over flats, side for handle angle (45°–60°) to maximize torque, and front for centered grip avoiding valve stem.
Use short, controlled strokes; reposition if slipping occurs.
Visual guides emphasize contact points and force direction.
Conclusion
Like a steady hand guiding a weathered key, the hose bibb wrench becomes the gardener’s quiet ally—unlocking stubborn faucets, sparing delicate fittings, and turning small fixes into lasting peace of mind. With routine care and the right technique, it stands ready for seasonal chores or sudden leaks, saving time and expense. Keep it clean, choose quality, and let this simple tool be the hinge between outdoor chaos and domestic order.