How to Turn Up the Temperature on a Tankless Water Heater: Step-by-Step Guide
To safely raise the temperature on your tankless water heater, start by verifying your model, power type, and local codes. Cut off power and gas, then locate the control panel. Adjust the temperature using digital menus or analog dials, increasing it in small increments (1–2°F for electric heaters and 2–5°F for gas). After adjusting, restart the unit, run a fixture to test the output, and confirm the temperature with a thermometer. Make sure to note your new settings and monitor for any error codes. For further assistance, refer to detailed testing, safety checks, and troubleshooting guidance.
How to Safely Increase the Temperature on a Tankless Water Heater
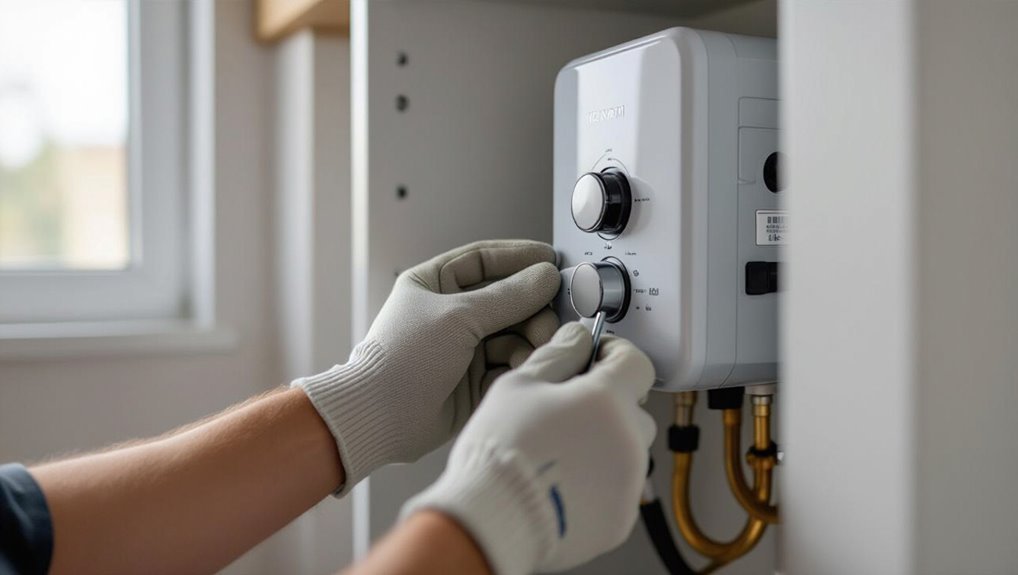
Situations such as colder incoming water or a household need for hotter showers may justify raising a tankless water heater’s setpoint.
Before adjusting, one should shut power and gas, verify water pressure is within range, and have appropriate personal protective equipment on hand.
Necessary tools typically include the unit’s manual, a screwdriver or control panel interface, and a thermometer to confirm the new temperature.
When and why you might need to raise the temperature
Why might a homeowner need to raise a tankless water heater’s temperature? Common reasons include insufficient hot water for showers, dishwasher performance, or colder incoming water during winter.
Understanding how to turn up temperature on tankless water heater helps match output to household demand.
Professional settings, changes in occupancy, or upgraded fixtures may also justify a controlled increase to maintain comfort and efficiency.
Safety precautions to take before you begin
Before attempting any adjustments, the homeowner should guarantee basic safety measures are in place: shut off power to the unit (electricity or gas), turn off the water supply if the manufacturer recommends it for control access, and consult the unit’s manual for model-specific warnings and required tools.
Verify area ventilation for gas units, wear protective gloves and eyewear, and confirm no active leaks or hot surfaces before proceeding.
Tools and materials you’ll need
Several essential tools and a few consumable materials are required to adjust a tankless water heater safely and accurately.
The technician should have an insulated screwdriver, adjustable wrench, multimeter, and thermometer.
Consumables include plumber’s tape, small replacement fuses, and a towel or bucket for minor drips.
Optional items: manufacturer manual, calibrated temperature probe, and safety gloves and goggles for protection.
Quick checklist: Can you adjust your specific unit?
Before attempting any adjustments, the reader should confirm the tankless unit’s exact model and whether it is gas or electric.
They must consult the manufacturer’s stated temperature limits and note any warranty or service restrictions tied to user changes.
Finally, local building codes and required anti-scald devices should be checked to guarantee compliance.
Identifying your tankless water heater model and power type
Understanding which tankless water heater is installed and whether it runs on gas or electricity is essential to knowing if and how its temperature can be adjusted.
Locate the model and serial number on the unit label, note fuel type (natural gas, propane, or electric), and record capacity and BTU/kW ratings.
Consult the owner’s manual or manufacturer website for model-specific controls and compatibility.
Checking manufacturer temperature limits and warranty implications
With the model and power type identified, the next step is to confirm the manufacturer’s temperature limits and any warranty conditions that affect adjustments.
Consult the owner’s manual or manufacturer website for maximum setpoint, internal thermostat access, and approved adjustment methods.
Note warranty voiding actions such as unauthorized modifications, and record serial/model details before proceeding.
If unclear, contact manufacturer support for confirmation.
Local codes and anti-scald device requirements
How do local building codes and anti-scald rules affect whether a tankless unit’s temperature can be raised?
Local codes may cap delivery temperature and mandate thermostatic mixing valves or anti-scald devices at fixtures. Compliance can restrict user adjustments despite manufacturer settings.
Verify municipal regulations, required device types, installation locations, and documentation. Confirm whether altering setpoints violates code or requires a licensed plumber to modify controls.
Step-by-step guide to changing the temperature (electric and gas units)
The following steps outline how to safely change the temperature on both electric and gas tankless water heaters.
Begin by cutting power and gas (if applicable), then locate the control panel or display before making adjustments.
Guidance covers digital menu navigation, analog dial increments, and the proper restart and verification procedure.
Turning off power and gas (if applicable)
Before adjusting a tankless water heater’s temperature, shut off electrical power and close the gas supply if the unit is gas-fired; this prevents shocks, burns, or unintended ignition while controls or internal components are accessed.
Verify power is off at the breaker and confirm pilot or gas valve is fully closed.
Wait a few minutes, then proceed only after ensuring no power or gas flow.
Locating the control panel and display
Locating the control panel and display is the next practical step; most tankless units mount the control interface on the front face near the bottom or behind a small access cover.
Inspect the unit for a labeled panel, removable trim, or a recessed display.
For outdoor or remote models, check nearby junction boxes or wall-mounted controllers.
Refer to the manufacturer label for exact location.
Using digital controls: navigating menus and setting the desired temperature
Begin by waking the control panel—press the power or menu button—so the display becomes active and responsive.
Use arrow or plus/minus keys to open the temperature menu, confirm selection with Enter or Set.
Adjust to the desired temperature, watching the numeric readout. Exit menus to save.
For units with lock or child‑safety, disengage before changes and relock afterward.
Using analog dials or thermostats: recommended adjustment increments
Several tankless models still use simple analog dials or thermostats to set outlet temperature. When adjusting these, change settings in small, consistent increments—typically 1–2°F (0.5–1°C) for electric units and 2–5°F (1–2.5°C) for gas units—to avoid overshooting the target and to allow the system to stabilize between adjustments.
Make one adjustment at a time, record each change, and wait sufficient time before rechecking.
Restarting the unit and verifying operation
Power cycling the tankless water heater completes temperature changes and allows its controls and safety systems to recalibrate.
After adjusting settings, instruct to turn the power or gas back on following manufacturer steps. Then run a hot water tap until temperature stabilizes.
Verify target temperature with a thermometer, check for error codes, listen for unusual noises, and confirm steady flow and expected heat without leaks.
Adjustments for common configurations and features
Adjustments vary by unit type and installed features, so owners should confirm their model before changing settings.
Condensing and non-condensing designs, indoor versus outdoor placement, and the presence of remotes or smart controls affect access and recommended procedures.
Additional components such as mixing or tempering valves and anti-scald devices may limit delivered temperature and require separate adjustment or professional service.
Condensing vs non-condensing units
Condensing and non-condensing tankless water heaters differ in heat exchange design and ventilation, so raising outlet temperature requires different procedures and safety checks for each type.
For condensing units, monitor condensate drainage, combustion efficiency, and manufacturer limits to avoid corrosion.
For non-condensing units, guarantee proper venting, combustion air, and flue temperature.
In both, confirm sensor calibration and adhere to warranty and local codes.
Outdoor vs indoor units
Location plays a key role in how an outdoor or indoor tankless water heater is adjusted and maintained.
Outdoor units require weatherproofing, winterization, and accessible external controls; thermostat changes may need sealed enclosures.
Indoor units allow easier access, cleaner vents, and straightforward thermostat adjustments but demand proper combustion air and vent routing.
Install location dictates service access, clearances, and safety considerations for temperature adjustments.
Units with remote or smart controls
When a tankless unit includes remote or smart controls, the method for setting water temperature shifts from physical access to interface navigation and network configuration.
Users adjust target temperature via onboard digital panels, dedicated remotes, or smartphone apps. Make certain firmware is current, connect securely to the unit, and follow prompts for temperature increments.
Verify changes at a fixture and document preferred settings for future reference.
Mixing valves, tempering valves, and anti-scald devices
Although tankless units can deliver precise water temperatures, downstream mixing or tempering valves and anti-scald devices are often required to manage outlet water for safety and code compliance.
Technicians should identify valve types, verify setpoints, and adjust according to manufacturer instructions and local codes.
After changes, flush and test at fixtures with a calibrated thermometer to confirm safe, consistent delivery and prevent scalding.
How to test and confirm the new temperature
After adjusting the setpoint, testing should begin at representative fixtures such as a kitchen faucet and a shower to confirm consistent output.
Temperature should be measured with a thermometer after running the hot water for several minutes and taking care to avoid scald risk.
If readings do not match the new setpoint, checks should include verifying control settings, inspecting flow rates, and consulting fault codes or a technician for further troubleshooting.
Recommended test points (faucet, shower)
Where should temperature be checked to verify the adjustment?
Temperature should be measured at representative outlets: a primary kitchen faucet and a main shower head.
Test both hot-only and mixed settings, letting water run until the heater stabilizes.
Note readings and compare to the target.
If discrepancies exceed a few degrees, recheck heater settings and any mixing valves or long runs affecting delivery.
Measuring water temperature safely
A few careful checks guarantee the adjusted temperature is accurate and safe: measure at representative fixtures after the heater has run long enough to reach steady output, use a calibrated thermometer or thermocouple for precision, and test both hot-only and mixed settings while avoiding scald risk by starting with low flow and increasing as needed.
Record readings, compare to target, and repeat after a few minutes to confirm stability.
Troubleshooting if temperature isn’t changing
If temperature changes fail to appear after adjustment, the technician should systematically verify causes before assuming hardware failure.
Check display and control lock settings, confirm input water and gas/electric supply, and inspect flow rate and minimum activation threshold.
Measure outlet water with a calibrated thermometer at steady flow.
Review error codes and logs, reset unit if indicated, and document findings before ordering parts.
Common problems and how to fix them
After raising the set temperature, several common issues can appear that merit attention.
These include error codes triggered by the change and their meanings, reduced water flow or temperature fluctuations with corresponding remedies, and situations where the unit locks out or fails to restart.
The following section explains each problem, how to diagnose it, and practical fixes.
Error codes after adjustment and what they mean
Consulting the unit’s display and manual helps diagnose error codes that can appear after temperature adjustments.
Common codes indicate ignition failure, overheating, or sensor faults. The manual lists corrective actions; many require simple resets or cleaning, some need professional service.
Refer to:
- IGN/FLAME — check gas supply and ignition.
- OV/HT — verify venting and reset.
- TEMP/SENSOR — inspect wiring or replace sensor.
Reduced flow or fluctuating temperatures and solutions
Many homeowners encounter reduced flow or unpredictable water temperatures with tankless heaters, usually caused by scale buildup, clogged filters, or inadequate gas/water supply.
Descale the heat exchanger per manufacturer instructions, clean or replace inlet screens, and confirm sufficient gas line size and water pressure.
Inspect showerheads and aerators for debris. If problems persist, consult a licensed technician to test flow sensors and valves.
Unit locks out or won’t restart
When a tankless water heater locks out or fails to restart, it typically indicates a safety shutdown triggered by issues such as flame failure, overheating, ignition faults, or blocked venting; the display or error code will usually point to the cause.
Technicians should read codes, inspect venting, clean burners, verify gas/electric supply, reset per manufacturer instructions, and replace faulty sensors or igniters to restore safe operation.
Safety and maintenance after changing the temperature
After raising the tankless water heater temperature, attention to safety and maintenance is essential to prevent scalding, especially where children or elderly residents are present.
Routine tasks such as checking anti-scald devices, flushing the unit, and inspecting fittings help preserve performance and efficiency.
If unusual noises, persistent temperature fluctuations, or leaks occur, a licensed technician should be contacted promptly.
Preventing scalding in households with children or elderly
If households include young children or elderly residents, adjusting a tankless water heater’s temperature requires careful safeguards to prevent scalding.
Install thermostatic mixing valves or anti-scald devices, set safe maximum temperatures (typically 120°F/49°C), label controls, and educate caregivers about risks.
Test fixtures after changes and consider flow-limiting aerators to reduce sudden hot bursts while maintaining usable water pressure.
Recommended maintenance tasks to preserve performance
Protective measures for homes with children or elderly should be followed by a short program of maintenance to guarantee the tankless water heater continues to operate safely at its adjusted temperature.
Recommended tasks include periodic descaling, flushing the system, cleaning inlet filters, inspecting venting and seals, checking for leaks, testing temperature settings, and replacing worn components.
Keep records of dates and actions.
When to call a licensed technician
When should a homeowner contact a licensed technician following a temperature adjustment to a tankless water heater?
Contact is advised if error codes persist, unusual noises occur, inconsistent water temperature continues, gas smells are detected, pilot or ignition failures happen, or leaks appear.
Also call a professional for annual inspections, complex repairs, electrical or gas-line issues, and if the heater repeatedly trips safety devices.
Comparison: Pros and cons of higher vs lower set temperature
Choosing a higher or lower set temperature affects both energy use and comfort, and it alters the risk profile for Legionella growth. Higher settings can improve comfort and reduce bacterial risk but increase energy consumption, while lower settings save energy at the possible cost of reduced thermal safety. The table below summarizes key trade-offs to evaluate.
| Higher Temperature | Lower Temperature |
|---|---|
| Increased energy use | Reduced energy consumption |
| Better scald protection when mixed | Greater reliance on mixing valves |
| Lower Legionella risk | Higher Legionella growth potential |
| Faster hot water delivery | Longer recovery or wait times |
| Higher operating costs | Lower operating costs |
Energy use and efficiency impacts
Raising a tankless water heater’s set temperature directly affects energy consumption and system efficiency: higher settings increase fuel or electricity use and may reduce unit efficiency due to greater heat losses and more frequent modulation.
On the other hand, lower settings conserve energy but can require higher flow rates or supplemental heating for some uses.
The ideal balance minimizes standby and distribution losses, aligns output with demand, and reduces operating costs.
Comfort and Legionella risk considerations
How hot should a tankless water heater be set to balance everyday comfort with safety risks such as Legionella exposure?
A moderate setting (120–125°F / 49–52°C) offers comfortable taps and reduced scalding risk, but may marginally allow bacterial growth.
Higher settings (above 140°F / 60°C) reduce Legionella risk yet increase scalding and energy use.
Consider mixing valves and periodic thermal disinfection.
Practical tips and best practices
For practical use, recommended temperature ranges are identified for tasks such as dishwashing, showering, and laundry to balance comfort and scald risk.
Seasonal adjustments and simple energy-saving tactics—like lowering the set point in summer or using vacation mode—help reduce costs without sacrificing performance.
Readers are advised to record any setting changes and check warranty terms before altering factory configurations.
Optimal temperature ranges for different uses
Temperature settings on a tankless water heater should match the planned use to balance comfort, energy efficiency, and safety; typical ranges are lower for dishwashing and laundry and higher for showers and baths.
Recommended targets:
- 110–120°F for dishwashing, laundry, and children’s baths.
- 120–125°F for general showers.
- 125–130°F for hot baths or heavy-duty cleaning, avoiding scald risk.
Seasonal adjustments and energy-saving strategies
Having set appropriate temperature targets for different uses, homeowners should adjust those settings seasonally and apply energy-saving practices to maintain comfort without wasting fuel.
Lower setpoints in warmer months, raise modestly during cold spells.
Use vacation or eco modes, insulate pipes, schedule maintenance, and install flow restrictors or low‑flow fixtures.
Monitor usage and adjust to balance comfort with reduced energy consumption.
Documenting settings and warranties
When adjustments are made to a tankless water heater, documenting the new setpoints, service dates, and warranty details guarantees clarity for future owners and technicians.
Record model, serial number, installer contact, and photos of control panels.
Note who made changes and why, retain receipts and warranty cards, and store digital copies with timestamps.
Regularly review records after maintenance or system updates.
Conclusion
Like a ship’s captain trimming sails for a warmer wind, the homeowner adjusts the tankless heater to chase comfort while steering through safety’s shoals. Small, deliberate changes steer hot water to ideal levels; measured tests and regular maintenance act as the compass and charts. Beware scalding currents and efficiency headwinds—balance convenience, cost, and caution. With informed tweaks and routine checks, the household enjoys reliable warmth without sacrificing safety or system longevity.