How to Fix Shower Diverter: Step-by-Step Repair Guide for Leaks and Stiff Valves
To fix a leaking or stiff shower diverter, first identify the type—pull-up, rotary, slide-bar, or tub-spout. Then, shut off the water supply and remove the trim. Inspect the O-rings, springs, and cartridges for wear or damage. Clean any mineral buildup and lubricate the components with silicone grease. Replace any damaged parts, and finally, test the diverter under pressure to ensure there are no leaks and that it operates smoothly. For detailed step-by-step instructions and tips, continue reading.
What Causes a Leaking or Stiff Shower Diverter
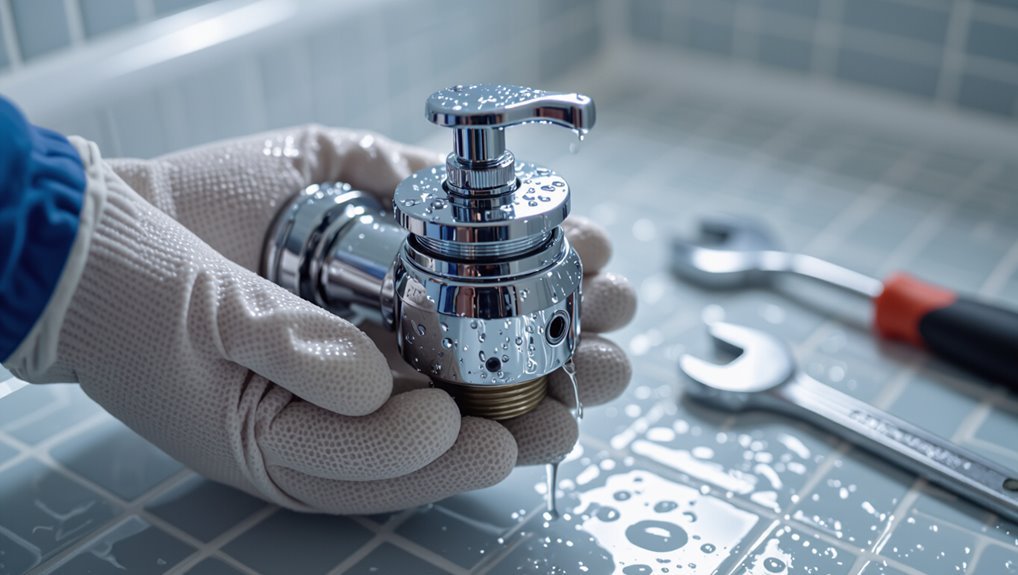
Failure of internal seals, worn cams or cartridges, and buildup on sliding surfaces are common causes of a leaking or stiff diverter.
Hard water deposits and corrosion from age accelerate wear and impede smooth operation.
Leaks around the trim, difficulty switching functions, and visible mineral buildup are signs that can be diagnosed without removing the escutcheon.
Common failure points inside diverter valves
Understanding of internal wear helps pinpoint why a diverter leaks or becomes stiff.
Common failure points include worn rubber seals and O-rings, corroded cartridges, scored valve seats, and mineral-encrusted passages restricting movement.
Loose or broken detents and springs also cause malfunction.
Identifying these faults guides how to fix shower diverter by targeted seal replacement, cartridge swap, seat resurfacing, or debris removal.
How water quality and age affect diverter performance
Internal wear inside a diverter sets the stage, but water quality and the valve’s age determine how quickly those parts degrade.
Hard water deposits abrade seats and pistons, accelerating leaks. Corrosive or chlorinated supply can pit metal components and weaken seals.
Older valves suffer material fatigue, shrinking tolerances and stiff operation. Together, these factors shorten service life and complicate repairs.
Signs you can diagnose without removing trim
Before removing trim, several external signs indicate a diverter is leaking or sticking: persistent drips from the showerhead when the tub spout is selected, water continuing to flow from the tub spout after switching to the shower, difficulty turning or holding the diverter in position, and loud or unusual noises during operation.
Additional indicators include reduced water pressure, intermittent spray patterns, and visible mineral buildup around the spout or trim.
How to Determine Which Diverter Type You Have
First, the reader is asked to note whether the setup uses separate hot and cold handles or a single mixer handle, since two-handle and three-handle systems differ in how the diverter is arranged.
Next, the presence of a built-in diverter on a single-handle mixer is checked, as opposed to a separate control.
Finally, common actuator styles—slide, push-pull, and rotary—are identified by their movement and placement to pinpoint the exact type.
Two-handle tub/shower diverters vs. three-handle systems
When identifying whether a tub/shower uses a two-handle or three-handle diverter, examine the control layout and how water flow is directed:
Two-handle systems combine hot and cold valves with a separate diverter lever or pull, often mounted on the tub spout or between handles.
Three-handle setups add an independent third valve dedicated solely to diverting flow to the showerhead, simplifying isolation and repair.
Single-handle mixer with integrated diverter
Identify the single-handle mixer with an integrated diverter by inspecting the control assembly: these units use one handle to regulate temperature and flow while a built-in mechanism—typically a small pull, push, or twist control on or near the handle—redirects water to the showerhead.
The presence of a single cartridge behind the handle (rather than a separate diverter valve) confirms this configuration.
These mixers consolidate functions and simplify repair.
Slide, push-pull, and rotary diverters identification
Although many diverter styles can look similar at a glance, recognizing slide, push-pull, and rotary types is straightforward by observing the control’s shape and motion: slide diverters move linearly along a slot or bar, push-pull units operate by pulling or pushing a knob perpendicular to the trim, and rotary diverters turn through a circular arc or full rotation.
- Slide: long slot, linear travel
- Push-pull: protruding knob, axial movement
- Rotary: circular knob, turns
- Verify by operating gently to see motion and linkage type
Tools and Parts You’ll Need
A concise list of essential tools—adjustable wrench, screwdrivers, pliers, hex keys, and plumber’s grease—helps guarantee the repair proceeds smoothly.
Common replacement parts to source include model-specific cartridges, O-rings, seals, and small springs.
Guidance will also note when cosmetic pieces like the trim and escutcheon should be replaced versus when only internal components need attention.
Essential tools for diverter repair
Several basic tools and a few replacement parts will cover most common shower diverter repairs.
Essential items include basic hand tools and materials to access and reseal components.
Typical toolkit:
- Adjustable wrench and pliers
- Screwdrivers (flat and Phillips)
- Allen keys and snap-ring pliers
- Utility knife, plumber’s grease, plumber’s tape
These enable removal, inspection, and reassembly.
Replacement parts to source (cartridges, O-rings, seals, springs)
One or two trips to a parts supplier usually provide the replacement components needed for a shower diverter repair: cartridge assemblies, O-rings, seals, and return springs are the most commonly required items.
Identify the make/model or bring the old parts for matching.
Also source compatible retaining clips, seat washers, and lubricant-rated silicone grease.
Purchase quality OEM or proven aftermarket parts to guarantee fit and longevity.
When to replace trim and escutcheon versus internal parts
When corrosion, visible damage, or persistent leaks originate at the visible fittings rather than the valve, replace the escutcheon and trim; conversely, if the finish is intact and problems stem from stiff operation, loss of seal, or internal wear, focus on cartridges, O-rings, seals, and springs.
Inspect for cosmetic wear, stripped screw holes, or warped mating surfaces; replace trim for appearance and fit, internal parts for function.
Safety and Preparation Before You Start
Before any work begins, the water supply should be shut off and remaining pressure relieved to prevent leaks or sprays.
Surfaces and fixtures are best protected with towels or painter’s tape, and small parts should be contained in a tray or labeled bags.
If the valve is corroded, the plumbing layout is complex, or the homeowner is unsure, a licensed plumber should be contacted.
How to shut off water and relieve pressure
Shutting off the water and relieving pressure is the essential first step to prevent leaks and accidental spray while working on a shower diverter.
Locate the home’s main shutoff or the bathroom’s local shutoff valve and close it. Open the shower and nearby faucets to drain residual water.
Pressurized lines may require a few minutes to depressurize; confirm flow has stopped before proceeding.
Protecting finishes and containing small parts
Lay down towels or a rubber mat and cover nearby fixtures with painter’s tape or soft cloth to prevent scratches and water stains.
Use a magnetic tray or small labeled containers for screws, springs, and O-rings. Work over a shallow bin to catch dropped parts.
Remove jewelry and wear gloves to avoid oils on polished surfaces; clean tools before contact with chrome.
When to call a professional instead of DIY
When should a homeowner call a professional instead of attempting a diverter repair alone?
If the plumbing layout is unfamiliar, pipes are corroded, leaks persist after basic fixes, or water damage risk exists, hire a licensed plumber.
Also call one when specialized tools, valve replacements behind walls, or municipal code compliance are required.
Prioritize safety and warranty preservation.
Step-by-Step Repair for Common Diverter Types
The following section outlines concise repair steps for the most common diverter types.
It covers push-pull (pull-up) diverters, rotating/rotary mechanisms, slide-bar diverters, and tub-spout diverters with internal cartridges.
Each subsection presents required tools, common failure points, and clear removal and reassembly guidance.
Push-pull or pull-up diverter repair
The procedure for a push-pull (pull-up) diverter begins with removing the handle and trim to access the mechanism.
The stem, spring, and seals should be inspected and cleaned to identify wear or buildup that impedes operation.
If seals are worn, they are replaced and the assembly is reinstalled and tested for proper function.
Removing handle and trim
Start by shutting off the water supply and confirming no pressure remains in the shower lines; this prevents leaks and makes handle removal safe.
Remove decorative cap or set screw, using an appropriate screwdriver or Allen key. Gently pull the handle straight off the splined stem.
Unscrew trim plate screws and lift trim away. Keep screws and small parts organized for reassembly.
Inspecting and cleaning stem, spring, and seals
With the handle and trim removed, attention turns to the diverter stem, spring, and seals to verify wear and cleanliness.
The stem is inspected for scoring, corrosion, or bending. The spring is checked for loss of tension or deformation.
Seals and O-rings are examined for cracks, flattening, or residue.
Mineral deposits and grime are gently removed with vinegar and a soft brush.
Replacing worn seals and reassembling
Replace damaged seals with matching parts, lubricate new O-rings lightly with plumber’s silicone grease, and prepare the stem and bore for reassembly.
Insert seals in correct orientation, seat springs and washers, then slide the stem gently into the valve body.
Secure retaining clips or nuts to manufacturer torque, test diverter operation, check for leaks, and adjust as needed before reinstalling trim and handle.
Rotating/rotary diverter repair
For rotating or rotary diverters, the first step is gaining access to the cartridge or spindle by removing the handle and trim.
Once exposed, mineral buildup should be cleaned away and moving parts lightly lubricated to restore smooth rotation.
If cleaning does not solve the problem, the cartridge can be removed and replaced with a compatible unit following manufacturer guidance.
Accessing the cartridge or spindle
Begin by removing the handle and escutcheon to reveal the diverter assembly; this provides clear access to the rotating cartridge or spindle that controls water flow between tub and shower.
Securely support surrounding trim, note screw locations, and disconnect retaining clips or nuts.
Gently extract the cartridge or spindle straight out, inspecting for alignment, worn seals, broken tabs, or obstructions before proceeding with repair or replacement.
Cleaning mineral deposits and lubricating moving parts
Using a soft brush and a mild descaling solution, the technician carefully removes mineral buildup from the rotating cartridge, ports, and housing to restore smooth operation.
After thorough rinsing and drying, he applies a thin layer of plumber’s grease approved for potable water to O-rings, splines, and bearings.
Reassembled components are cycled to distribute lubricant and verify free rotation without forcing.
Installing a replacement cartridge
After cleaning and lubricating the original components, the technician proceeds to remove and replace the rotating cartridge when wear or damage prevents reliable operation.
The process includes noting orientation, extracting the old cartridge with proper tools, inserting the new OEM-equivalent unit aligned to index marks, securing retaining clips or nuts, testing for smooth rotation and watertight seals, then reassembling trim and verifying leak-free function.
Slide-bar diverter repair
The slide-bar diverter section covers removal of the sliding mechanism to inspect alignment and track wear.
Technicians should check guide rails and mating surfaces for bends or obstructions that prevent smooth travel.
If bushings or stops are worn, replacing them often restores proper function and prevents leaks.
Removing sliding mechanism and checking alignment
Begin by exposing the slide-bar diverter assembly: loosen any visible set screws on the handset bracket and remove the trim cover or end caps to access the sliding mechanism.
Withdraw the slider carefully, noting orientation and retaining clips. Inspect rail grooves for dents, scale, or misalignment.
Verify smooth travel by guiding the slider along the bar; identify wobble, binding, or uneven gaps before proceeding.
Replacing worn bushings or stops
With the slider removed and rail condition noted, attention shifts to worn bushings and stops that control smooth travel and secure positioning.
The technician inspects plastic or rubber bushings for cracking, compressing, or missing pieces.
Replace with OEM or compatible parts, lubricate with silicone grease, reassemble slider, and confirm alignment and stop engagement.
Test movement and adjust stops for consistent, rattle-free operation.
Diverter inside tub spout repair
The section explains how to access and service the diverter built into a tub spout, starting with identifying whether the spout is a slip-on or threaded type and removing it accordingly.
Once the spout is off, the procedure covers inspecting and replacing the internal diverter assembly to restore proper water flow.
Clear photos or diagrams and the correct replacement parts are recommended for a successful repair.
Removing spout types (slip-on vs. threaded)
Different tub spouts detach in two common ways—slip-on and threaded—and identifying which type is present is the essential first step before any diverter repair.
For slip-on, remove a set screw beneath the spout and pull straight off the copper or chrome-plated pipe.
For threaded, grip the spout with a strap wrench and rotate counterclockwise to unthread it from the pipe nipple.
Replacing internal diverter assembly
Begin by shutting off the water supply and opening the tub faucet to relieve pressure.
Then remove the spout to expose the diverter assembly.
Once accessible, inspect the internal mechanism to determine whether it is a pop-up sleeve, ball-and-plunger, or gate-style diverter so the correct replacement part can be selected.
Remove retaining clips or screws, extract the worn assembly, fit the new unit with proper seals, reassemble, and test for leaks and smooth operation.
How to Fix Specific Problems
The following section addresses four common diverter issues: stopper leaking to the tub while the shower runs, a diverter that sticks or is hard to operate, reduced water flow to the showerhead after a repair, and intermittent drips from the showerhead.
Each problem is outlined with likely causes and concise corrective steps.
Clear diagnostic checks and targeted fixes are presented so the reader can identify and resolve the specific fault.
Stopper leaks to tub while shower is on
When water continues flowing into the tub while the shower is on, it typically indicates a faulty diverter or worn stopper seal allowing bypass of the valve.
Diagnosing whether the issue stems from a stuck or misaligned pull-up/push-down stopper, a corroded pivot rod, or deteriorated rubber seals lets one target the appropriate repair—cleaning and lubricating moving parts, replacing seals, or swapping the diverter assembly.
Inspect linkage, remove debris, replace damaged seals, and test for full diversion; validate proper seating and alignment to prevent leaks.
Diverter sticks or is hard to operate
If a diverter is hard to operate or sticks, the underlying causes often mirror those that let water bypass the valve—corrosion, mineral buildup, damaged seals, or misaligned linkage—but the symptoms are mechanical resistance rather than leakage.
Inspect for calcification, loosen retaining screws, lubricate moving parts with plumber-approved grease, replace worn O-rings or seals, and realign linkage.
Test smooth operation before reassembly.
Reduced water flow to showerhead after repair
Check for restricted flow immediately after a repair, as reduced pressure to the showerhead commonly stems from debris trapped in the diverter, aerator, or showerhead, misaligned cartridges, partially closed supply valves, or buildup in the plumbing lines.
Inspect and clean the showerhead and aerator, flush the diverter and lines, verify full valve openings, and realign or replace cartridges to restore normal flow.
Intermittent drips from showerhead
Investigate intermittent drips from the showerhead by isolating common mechanical causes: a worn diverter seal, a partially closed or leaking cartridge, mineral buildup in the diverter or showerhead, or residual water in the riser tube.
Inspect and test the diverter and cartridge, clean or replace clogged components, flush the riser, and reinstall seals.
Verify operation under pressure to confirm the drip has ceased.
Cleaning, Lubrication, and Preventive Maintenance
This section outlines recommended cleaners that remove mineral buildup while preserving chrome, brass, and plated finishes.
It then identifies lubricants that are safe for rubber seals and cartridge components, and explains how to apply them correctly.
Finally, a concise maintenance schedule is provided to prevent common diverter failures.
Best cleaners for mineral buildup without damaging finishes
Regularly addressing mineral buildup with the right cleaners preserves valve function and finishes without unnecessary abrasion.
Gentle, non‑acidic cleaners—white vinegar diluted 1:1, mild citric‑acid solutions, or commercial descalers labeled safe for plated and brushed surfaces—effectively dissolve deposits.
Apply with soft cloths or toothbrushes, rinse thoroughly, and avoid steel wool, bleach, or harsh acids that pit finishes or corrode metal components.
Lubricants safe for plumbing seals and cartridges
Select lubricants that are explicitly formulated for plumbing seals and cartridge valves to prevent swelling, degradation, or loss of sealing performance.
Recommended options include silicone-based and NSF-approved food-grade greases; avoid petroleum-based products on rubber.
Application tips follow:
- Use silicone grease for O-rings and rubber seals.
- Apply thin coat to cartridge stems.
- Wipe excess to prevent debris buildup.
- Reassemble and test for smooth operation.
Regular maintenance schedule to prevent future failures
Although often overlooked, a concise maintenance routine prevents most diverter problems by keeping moving parts clean, lubricated, and inspected on a predictable schedule.
Monthly wipe-downs remove deposits; quarterly lubrication of seals and spindle uses approved grease; biannual inspections check for leaks, corrosion, and wear; replace cartridges or O-rings at first signs of deterioration.
Record dates and actions to guarantee consistency and early intervention.
When Replacement Is the Better Option
When repair costs approach the price of a new assembly, replacement often becomes the more economical choice.
Visible corrosion, cracked valve bodies, persistent leaks behind the wall, or damaged plumbing are signs that the valve or surrounding components need full replacement rather than part swaps.
Upgrading to a modern diverter can improve performance, reduce future maintenance, and add water-saving or thermostatic features.
Cost comparison: repair parts vs. full diverter replacement
If the diverter still functions but leaks or sticks, repairing with replacement seals, springs, or a cartridge typically costs a fraction of replacing the entire assembly; however, a full diverter replacement becomes the more economical choice when multiple components are damaged, parts are discontinued, or labor for disassembly and diagnosis approaches the price of a new unit.
| Item | Typical cost |
|---|---|
| Seals | $5–$20 |
| Springs | $5–$15 |
| Cartridge | $20–$75 |
| Full unit | $50–$250 |
| Labor | $50–$200 |
Signs the valve body or plumbing behind wall needs replacement
Repairing seals, springs, or cartridges often resolves minor leaks and sticking, but there are clear signs that problems extend beyond replaceable components and require replacing the valve body or the plumbing behind the wall.
Persistent leaks despite new internals, corrosion or mineral buildup on exposed metal, extensive rusted or damaged pipes, multiple recurring failures, low water pressure tied to valve location, and visible wall water damage indicate replacement.
Modern upgrades: benefits of new diverter designs
Although replacing the entire diverter requires more work upfront, modern designs offer clear advantages that often justify the decision.
New diverters provide improved durability, smoother operation, ceramic cartridges, and better seals to prevent leaks.
Many feature universal fit options, water-saving flow control, and corrosion-resistant finishes.
Upgrading reduces maintenance frequency and can enhance shower functionality and long-term value.
Troubleshooting Checklist and Quick Fixes
A concise troubleshooting checklist guides a user through step-by-step checks when a diverter leak persists, including confirming actuator alignment, inspecting seals, and testing valve operation.
If parts or a plumber are not immediately available, short-term fixes—such as tightening connections, applying plumber’s tape, or using a rubber washer—can reduce leakage until permanent repairs are made.
The following steps balance immediate containment with clear indicators for when professional replacement is necessary.
Stepwise checklist to follow if leak persists
Begin by isolating the source and severity of the leak: inspect the diverter assembly, showerhead, valves, and hose connections to determine whether water escapes only when diverting, continuously, or under pressure.
Follow this stepwise checklist:
- Shut off water, disassemble diverter, and inspect seals.
- Replace worn O-rings or cartridges.
- Clean mineral buildup and re-lubricate moving parts.
- Test under normal pressure and observe for recurrence.
Temporary fixes while waiting for parts or a plumber
Prepare a few quick measures that reduce water waste and minimize damage until proper parts or a plumber arrive.
Temporarily divert flow with a showerhead shutoff clamp, wrap leaking joints with plumber’s tape or waterproof tape, and place a bucket under drips.
Reduce water pressure at the main valve, avoid using the affected outlet, and document leak location and photos for the technician.
Helpful Measurements and Photos to Take Before Buying Parts
Before purchasing replacement parts, measurements of the spindle length and diameter, cartridge dimensions, and spout inlet size should be recorded with a caliper or ruler.
Photographs should include a clear close-up of the exposed valve, a shot of the spout and escutcheon from several angles, and an image showing any stamped model numbers or brand logos.
These details help guarantee hardware compatibility and speed up part selection.
How to measure spindle, cartridge, and spout dimensions
Accurate measurements and clear photos are essential when replacing a shower spindle, cartridge, or spout because parts vary widely by make and model.
Measure spindle length, diameter, and splines; record overall cartridge height, body diameter, and inlet/off‑set locations; note spout projection, inlet type (threaded/slip), and diameter.
Use calipers and a ruler; list measurements in millimeters and inches for accuracy.
What photos to capture for hardware matching
Which photos will make identifying the correct replacement parts easiest? The technician should photograph key angles and details to match hardware precisely.
- Close-up of the diverter faceplate with visible screw positions.
- Side view showing spout profile and outlet orientation.
- Clear shot of the cartridge or spindle removed, with ruler for scale.
- Pipe connection and threading detail near the valve.
Cost Estimates and Time Requirements
Typical DIY time varies by diverter type: simple cartridge swaps often take 30–60 minutes, pull-out tub spouts 15–30 minutes, and complex three-valve assemblies 1–3 hours.
Parts typically range from $10–$60 for cartridges or spouts, $50–$150 for higher-end assemblies, and $200+ if valves or trim must be replaced.
Labor raises costs substantially when plumbing access, valve replacement, or tile repair is required, often doubling or tripling the total expense.
Typical DIY time per diverter type
Most DIYers can expect repair times to range from 15 minutes for a simple cartridge swap to two hours for a recessed or multi-valve diverter requiring partial faucet disassembly.
Single-handle pull-up or rotary diverters: 15–45 minutes.
Three-way diverters and shower/tub combos: 45–90 minutes.
Corroded or seized units needing penetrating oil, heating, or extra cleanup: up to two hours.
Expected parts cost ranges and when labor raises costs
A range of parts costs typically spans from about $10 for a basic rubber seat or O-ring kit to $150–$250 for OEM cartridges or specialty diverter assemblies.
Labor begins to drive total expense when installations require valve removal, access panel work, or time-consuming corrosion cleanup that converts a short DIY job into a multi-hour professional call.
Typical labor rates add $50–$120/hour; complex jobs reach $300–$800.
Common Mistakes to Avoid During Diverter Repair
Common errors during diverter repair include over-tightening trim or cartridges, which can crack components, and installing parts that are not compatible with the existing valve.
Incorrect sequencing when reassembling the unit often leads to leaks or malfunction even if the correct parts are used.
Careful matching of replacement parts and following the original assembly order prevent most common failures.
Over-tightening and damaging trim or cartridges
Over-tightening trim pieces or cartridge retaining nuts can strip threads, crack plastic components, and warp seals, turning a simple diverter adjustment into a costly repair.
Technicians should hand-tighten, then use appropriate torque or snug increments, testing function between turns. If resistance feels abnormal, stop and inspect for cross-threading or debris.
Replace damaged fasteners or trim rather than forcing fit.
Using incompatible replacement parts
Select replacement parts that match the original diverter’s specifications to prevent leaks, mechanical failure, or premature wear.
Using wrong-size seals, mismatched cartridges, or generic trim can cause poor fit, binding, leaks, and accelerated wear.
Verify model numbers, dimensions, materials, and flow orientation.
When uncertain, consult manufacturer diagrams or bring the old part to a supplier to guarantee proper compatibility.
Reassembling in wrong order
Begin reassembling components only after confirming their correct sequence, because reversing the order of seals, spacers, or valve plates can block ports, cause leaks, or prevent the diverter from shifting properly.
Inspect parts, photograph original layout, and arrange pieces in order on a clean surface.
Tighten fasteners progressively to seat components evenly.
Test operation before final trim installation to catch misassembly early.
Final Testing and Verification After Repair
The technician performs a final inspection to check for leaks around the valve, connections, and spout while the system is pressurized.
They operate the diverter through each position to confirm smooth switching and correct water routing.
Pressure and flow measurements are taken at both showerhead and tub spout to verify restoration of normal performance.
How to test for leaks and proper diverter function
Once the diverter has been reassembled and water restored, a systematic final test confirms both watertight integrity and correct switching between tub and shower modes.
Inspect visible joints for drips while cycling from tub to shower multiple times. Observe for steady redirection without sputtering or leaks.
Check under the valve access panel and around spout connections. Note any persistent seepage for rework.
Pressure and flow checks to confirm successful repair
Validate repair success by measuring water pressure and flow at both tub and shower outlets under normal operating conditions.
Use a pressure gauge and timed bucket method to record static and running pressure and gallons per minute.
Compare readings to pre-repair values or manufacturer specifications.
Confirm consistent pressure, expected flow rates, and absence of pressure drops when switching outlets.
Note and address any discrepancies.
Conclusion
Investigating whether simple maintenance truly restores a misbehaving shower diverter reveals a clear truth: most leaks and stiffness stem from worn seals, mineral buildup, or failing cartridges, and are fixable with the right parts and basic tools. Following proper measurements, safety steps, and the correct procedure for the diverter type typically resolves the problem quickly and affordably. Confidence comes from testing for smooth operation and leak-free performance after repair—proof that effort pays off.