How to Clean Bathroom Sink Overflow: Easy Steps to Unclog, Deodorize & Prevent Mold
To clean a clogged and smelly bathroom sink overflow, start by removing visible debris using pliers or a flexible wire. Flush the channel and scrub it with a mixture of baking soda and vinegar or an enzymatic cleaner. After disinfecting, rinse thoroughly. To prevent future clogs, improve ventilation and install a strainer. Regular monthly maintenance will help stop mold and odors. For detailed steps, tools, troubleshooting tips, and guidance on when to call a plumber, follow the full guide.
What causes bathroom sink overflow clogs and odors
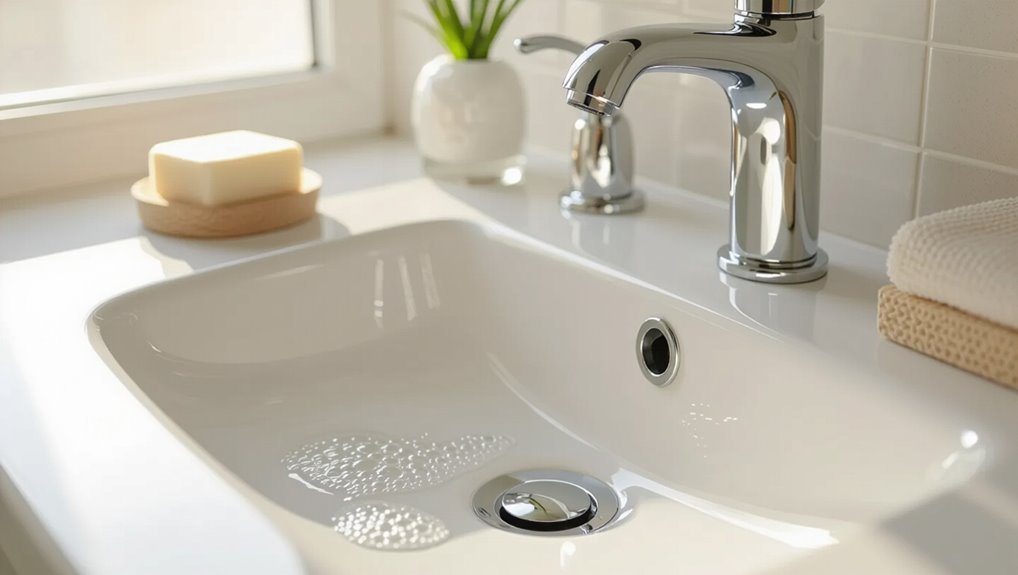
Common debris such as hair, soap residue, skin flakes, and lint often accumulates in the overflow channel and restricts water flow.
Soap scum binds with hair and mineral deposits from hard water to form stubborn clogs that are difficult to flush out.
Trapped moisture and organic buildup create an environment for mold and bacteria, producing musty odors from the overflow passage.
Common debris that blocks the overflow channel
Many types of debris can accumulate in a sink’s overflow channel, creating clogs and unpleasant odors by trapping moisture and organic matter.
Common culprits include lint, paper fibers, skin flakes, toothpaste residue, small cosmetics, and trapped food particles. Mineral flakes and grit also settle there.
Recognizing these items helps prioritize tools and steps when learning how to clean bathroom sink overflow.
How soap scum, hair, and mineral deposits contribute to clogs
Soap scum, hair, and mineral deposits each play a distinct role in forming overflow clogs and odors: soap scum creates a sticky matrix that captures particles, hair forms tangled mats that trap moisture and debris, and mineral deposits narrow the channel and roughen surfaces so buildup adheres more readily.
Together they reduce flow, foster anaerobic pockets that emit odors, and make mechanical removal harder.
Why overflow passages develop mold and odors
Several factors converge in overflow passages to create conditions favorable for mold growth and foul odors: restricted airflow, persistent moisture, and accumulated organic material.
Stagnant water from splashes and slow drainage feeds microbes; soap residue, skin cells, and hair supply nutrients; mineral scaling traps moisture and encourages biofilms.
Poor ventilation and infrequent cleaning allow odors and mold to establish and persist.
Quick checklist: When to clean the overflow and what you’ll need
A brief checklist helps determine when the sink overflow needs attention and what to have on hand.
Recommended items for routine and deep cleaning include:
- Rubber gloves
- Small bottle brush or pipe cleaner
- Baking soda and vinegar (or mild cleaner)
- Flashlight and bucket
- Mask and guarantee good ventilation
Follow safety precautions and ventilate the area before starting.
Tools and materials for simple and deep cleaning
Gather the right tools and materials before attempting either a quick or deep clean of a bathroom sink overflow to guarantee efficiency and safety.
Essential items include a flashlight, small brush or bottle brush, pipe cleaner, flexible wire or zip brush, vinegar, baking soda, mild detergent, spray bottle, microfiber cloths, rubber gloves, plastic tray, and a small bowl.
Optional: disinfectant and toothbrush.
Safety precautions and ventilation
With tools and materials assembled, attention should turn to safety precautions and proper ventilation before beginning work on the sink overflow.
The person should open windows, run an exhaust fan, and wear gloves and eye protection.
If using chemicals, read labels and avoid mixing cleaners.
Keep children and pets away, have a phone nearby, and guarantee adequate lighting to reduce slips and errors.
Step-by-step: How to unclog and clean the bathroom sink overflow
The following steps guide a systematic approach to unclogging and cleaning the sink overflow, beginning with locating and inspecting the inlet.
They cover mechanical removal of visible debris and hair, flushing the overflow channel, applying safe cleaners to dissolve buildup, and finishing with disinfection to remove mold and bacteria.
Each step focuses on simple, practical actions and basic safety precautions.
Step 1 Accessing the overflow: locating and inspecting the inlet
Begin by identifying the overflow slot or holes near the back rim of the sink; this inlet is typically a thin horizontal slit or a series of small round openings beneath the faucet.
Next, inspect visually with a flashlight for discoloration, mineral buildup, mold, or standing water.
Note size, number, and position of openings to choose appropriate tools and cleaning agents later.
Step 2 Removing visible debris and hair mechanically
Reach for a small tool kit—needle-nose pliers, a straightened wire hanger, a zip-tie snake, or a plastic pick—to extract hair and visible gunk from the overflow inlet.
Work gently to avoid scratching the finish. Pull out accumulations, wiping tools on paper towels.
Repeat until debris is gone. Dispose of waste, then sanitize the inlet edges with a cloth dampened in mild disinfectant.
Step 3 Flushing the overflow channel with water
After removing visible debris from the inlet, attention shifts to flushing the overflow channel with water to dislodge trapped grime and loosen remaining buildup.
A steady stream is directed into the inlet while the drain is opened slightly to encourage flow through the channel.
Multiple short bursts and a final longer rinse help push loosened particles toward the drain for removal and inspection.
Step 4 Using safe cleaning solutions to dissolve buildup
Prepare a mild, safe cleaning solution to target mineral deposits, soap scum, and organic buildup without harming plumbing or finish.
A common mix uses equal parts white vinegar and warm water or diluted citric acid; apply with a small funnel or syringe into the overflow, let sit 10–15 minutes, then agitate with a flexible brush and flush thoroughly with warm water.
Step 5 Disinfecting the overflow to remove mold and bacteria
Disinfecting targets remaining microbes and mold spores that survive physical cleaning and mild solutions; use an EPA-registered disinfectant or a household bleach solution (1 tablespoon bleach per quart of water) applied sparingly into the overflow.
Allow the contact time specified on the product label (typically 5–10 minutes), then rinse thoroughly with warm water to prevent corrosion or residue.
After rinsing, dry the area and ventilate.
Step 6 Reassembling and testing flow
Reassemble the overflow components in the reverse order of disassembly, ensuring seals and gaskets sit squarely to prevent leaks.
Tighten fasteners evenly, avoiding overtightening that can distort rubber parts.
Run water to verify steady drainage and proper overflow function.
Inspect for drips beneath the sink and around the overflow faceplate.
Retighten or reseat components if necessary, then dry and document completion.
Natural vs chemical cleaners: safe options and effectiveness
A comparison of natural and chemical options helps readers choose safe, effective approaches for sink overflow cleaning. Simple homemade mixes (baking soda, vinegar, salt, lemon) are usually sufficient for mild clogs and regular maintenance, while commercial chemical cleaners can be reserved for stubborn buildup with attention to safety and fixture compatibility. The following quick-reference table highlights typical uses, strengths, and cautions to guide selection.
| Cleaner type | Typical use | Key caution |
|---|---|---|
| Baking soda + vinegar | Mild clogs, deodorizing | Avoid mixing with bleach |
| Salt + lemon | Mineral spots, light cleaning | Can be abrasive on some finishes |
| Enzymatic cleaners | Organic buildup | Slower action, safe for pipes |
| Commercial drain cleaners | Severe clogs | Corrosive—use sparingly and with PPE |
| Bleach solutions | Disinfection | Can damage finishes and react with other chemicals |
Homemade cleaning mixes and how to use them
Readers weighing homemade cleaning mixes for sink overflows should consider both natural and chemical options regarding safety, effectiveness, and compatibility with plumbing materials.
Simple mixes—baking soda plus vinegar, diluted hydrogen peroxide, or mild dish soap with warm water—offer noncorrosive cleaning and deodorizing.
Apply carefully, wait 10–20 minutes, flush with hot water, and avoid prolonged use on older seals or metal components to prevent damage.
Commercial products: when to choose stronger cleaners
Following simple homemade mixes, there are situations where commercial cleaners become the more practical choice: persistent mineral buildup, black mold deep in the overflow channel, or clogs that resist repeated baking soda and vinegar cycles.
Choose enzyme-based or oxygen bleach products for organic residue; use dilute acid descalers for mineral deposits cautiously.
Follow label instructions, ventilate, wear gloves and avoid mixing chemicals to prevent dangerous reactions.
Troubleshooting stubborn overflow clogs
When a stubborn overflow clog resists routine cleaning, a flexible brush or pipe cleaner may clear hair and debris while a plumber’s snake can reach farther obstructions.
Persistent slow drainage, gurgling, or repeated clogs can indicate deeper trap, drain, or venting problems.
If mechanical methods fail or signs point to a systemic issue, a professional plumber should be contacted.
When to use a flexible brush, pipe cleaner, or plumber’s snake
Choose the right tool based on clog location, severity, and accessibility: flexible brushes for shallow buildup in the visible overflow channel, pipe cleaners for narrow bends and tight spots near the stopper, and a plumber’s snake for deeper, more stubborn blockages farther down the drain.
Use a brush first for surface grime, a pipe cleaner for confined twists, and a snake when reaching past the trap and into the main line.
Recognizing signs of deeper drain problems or venting issues
How can a persistent overflow clog reveal a deeper problem in the drain or venting system? Recurrent slow drainage, gurgling noises, bubbles in the sink, or backups elsewhere indicate more than surface debris.
These signs suggest obstructed main lines, collapsed pipes, vent blockages, or improper slope. Inspecting multiple fixtures and checking roof vents helps isolate issues before attempting more invasive cleaning.
When to call a professional plumber
Under what circumstances should a homeowner stop DIY efforts and call a professional plumber?
If overflow clogs persist after snaking and cleaning, water backs up into fixtures, multiple drains are affected, foul odors remain, or mold returns despite treatment, a plumber should be hired.
Also call when leaks, damaged pipes, or suspected venting or sewer-line issues are present to prevent further damage and guarantee code-compliant repairs.
How to deodorize the overflow and eliminate mold permanently
The section outlines quick deodorizing options such as baking soda, white vinegar rinses, and enzyme-based sprays to neutralize odors from the overflow.
It then covers durable mold removal methods, including mechanical scrubbing, targeted biocidal treatments, and ensuring thorough drying and ventilation.
Finally, it recommends preventive antimicrobial strategies like periodic enzymatic maintenance and material upgrades to keep mold from recurring.
Short-term deodorizing methods
Treat the overflow as a small, enclosed humid zone prone to trapped debris and mildew; short-term deodorizing focuses on neutralizing odors quickly while addressing surface mold to prevent recurrence.
Use a cotton swab and diluted vinegar or hydrogen peroxide to wipe accessible surfaces, follow with baking soda to absorb odors, rinse thoroughly, and ventilate.
Repeat weekly until odors dissipate.
Long-term mold removal and antimicrobial techniques
Addressing overflow mold permanently requires combining thorough physical cleaning, antimicrobial treatment, and measures that prevent moisture buildup.
After scrubbing with a stiff brush and detergent, apply an EPA-registered antimicrobial spray or diluted bleach, following label directions.
Guarantee complete drying, improve ventilation, and fix leaks.
Periodically re-treat vulnerable areas, inspect for recurrence, and maintain low humidity to prevent mold regrowth.
Preventive maintenance: simple habits to keep overflow clear
Preventive maintenance keeps the overflow functioning and reduces odor and mold recurrence.
Simple habits include regular cleaning schedules, small accessories that block debris, and seasonal inspections to catch issues early.
Suggested actions include:
- Weekly wipe-down of the overflow opening and rim
- Monthly mild scrub with a toothbrush and baking soda solution
- Install a small strainer or overflow cover to trap hair and soap scum
- Keep a soft brush or pipe cleaner on hand for occasional clearing
- Inspect for discoloration, loose fittings, or slow drainage each season
Weekly and monthly cleaning routines
A few simple weekly and monthly tasks can greatly reduce clogs in a bathroom sink overflow by removing debris and inhibiting buildup before it becomes a problem.
Weekly: rinse overflow channel with hot water, wipe visible grime, and flush with a mild cleaner.
Monthly: inspect with a flashlight, use a flexible brush or pipe cleaner to dislodge film, and finish with a disinfecting rinse.
Products and accessories that reduce buildup (strainers, covers)
Several simple products and accessories can greatly reduce buildup in a bathroom sink overflow by catching debris and limiting moisture exposure.
Small strainer inserts trap hair and soap scum before entry; removable silicone covers block splash and allow airflow.
Antimicrobial liners and breathable screens discourage mold while remaining easy to clean.
Regularly removing and rinsing these items prevents accumulation and preserves overflow function.
Seasonal checks and what to inspect
Two seasonal checks—spring and fall—help keep the sink overflow clear and functional.
Inspect the overflow slot and channel for debris, mold, and mineral deposits; probe with a flexible brush or pipe cleaner.
Run water to verify drainage and listen for gurgles.
Check seals and trim for corrosion or gaps.
Replace or deep-clean components as needed to prevent future blockage.
Common mistakes to avoid when cleaning sink overflows
Many homeowners use harsh chemical combinations or highly corrosive cleaners that can damage metal and finish inside the overflow.
Excessive force with wires or probes can deform or break internal passages, making clogs worse.
Overlooking persistent gurgling, slow drainage, or leaks can miss signs of underlying plumbing failure that require a professional.
Unsafe chemical mixes and corrosive products
A handful of common household cleaners can become dangerously reactive when combined, and using strong acids or alkalis on sink overflows risks corrosion of metal and failings in rubber seals.
Bleach mixed with ammonia or acid releases toxic gases; concentrated drain cleaners can eat pipes and gaskets.
Prefer mild, labeled products, dilute per instructions, ventilate, and wear gloves and eye protection to minimize chemical damage.
Forcing tools that can damage overflow passages
Avoid forcing metal probes, coat hangers, or high-pressure tools into overflow passages, as these can bend, scratch, or dislodge the thin metal lip and damage internal channels or rubber gaskets.
Such damage can cause leaks, reduced drainage, and costly repairs.
Use flexible nylon brushes, gentle snake tools designed for overflows, or compressed air at low pressure to clear debris without risking structural harm.
Ignoring signs that indicate plumbing failure
How can subtle changes in an overflow’s behavior be missed until they become serious? Ignoring slow drainage, persistent odors, or intermittent gurgling often delays diagnosis of leaks, corrosion, or blocked vents.
Routine checks and prompt professional assessment prevent worsening damage and costly repairs. Dismissing these signs as minor inconveniences risks mold growth, structural harm, and complete fixture failure that could have been avoided.
Estimated time, cost, and effort for DIY cleaning vs professional service
A brief comparison helps readers decide whether to tackle overflow cleaning as a quick DIY task or to hire a pro when complications arise. Many straightforward cleanings can be completed in 15–30 minutes with common household supplies, while costs increase if replacement parts, specialized tools, or paid labor are required. The table below summarizes typical time and cost factors to evaluate.
| Factor | Typical outcome |
|---|---|
| Quick DIY time | 15–30 minutes |
| DIY cost | Low (cleaners, brushes) |
| Professional cost | Higher (parts + labor) |
Quick projects you can finish in 15 to 30 minutes
Tackle quick overflow-cleaning tasks that fit into a 15–30 minute window by comparing the estimated time, cost, and effort for a DIY approach versus hiring a professional.
DIY: unclog with vinegar, baking soda, brush, and hot water; low cost, minimal effort, about 15–30 minutes.
Professional: faster guarantee, higher fee, scheduling time.
Choose DIY for simple blockages; call pros for persistent issues.
When costs rise: parts, tools, and labor considerations
As problems move beyond surface clogs, costs can escalate due to needed parts, specialized tools, and paid labor, changing the balance between DIY and professional service.
Simple DIY: 15–60 minutes, minimal cost for cleaners and basic tools.
Complex issues: several hours, replacement parts ($20–$200) and potential tool rental.
Professional service often adds labor fees ($75–$250+), but saves time and guarantees proper repair.
Visual guide: photos and diagrams to identify overflow parts and cleaning steps
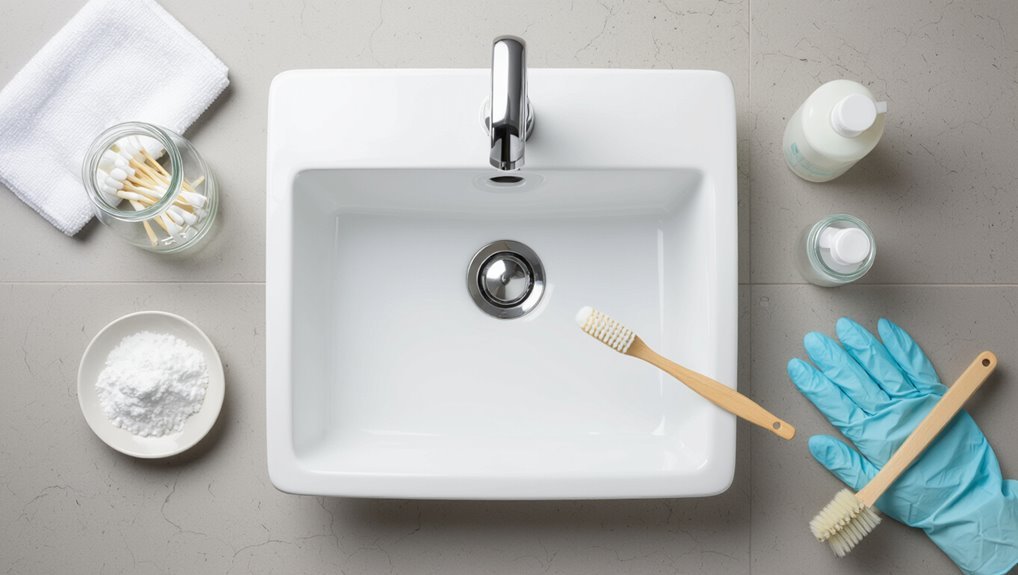
Where is the overflow located and what parts make up its pathway? A clear photo shows the rim opening, internal channel, and tailpiece connection.
Diagrams label traps, venting points, and access screws.
Step-by-step images depict inspection, brush insertion, flushing, and sanitizer application.
Before-and-after shots confirm results. Captions note tools, safety tips, and when to seek professional repair.
Conclusion
Like a hidden stream reclaiming its path, a cleared sink overflow restores quiet order to the bathroom’s small ecosystem. With routine care—gentle tools, safe cleaners, and watchful habits—stagnant scents and stubborn blockages dissolve, yielding fresh flow and peace of mind. Neglect, like fallen leaves, invites buildup; attention, like sunlight, prevents it. Maintaining the overflow transforms a nuisance into a subtle, well-tended current that reflects household health and calm.