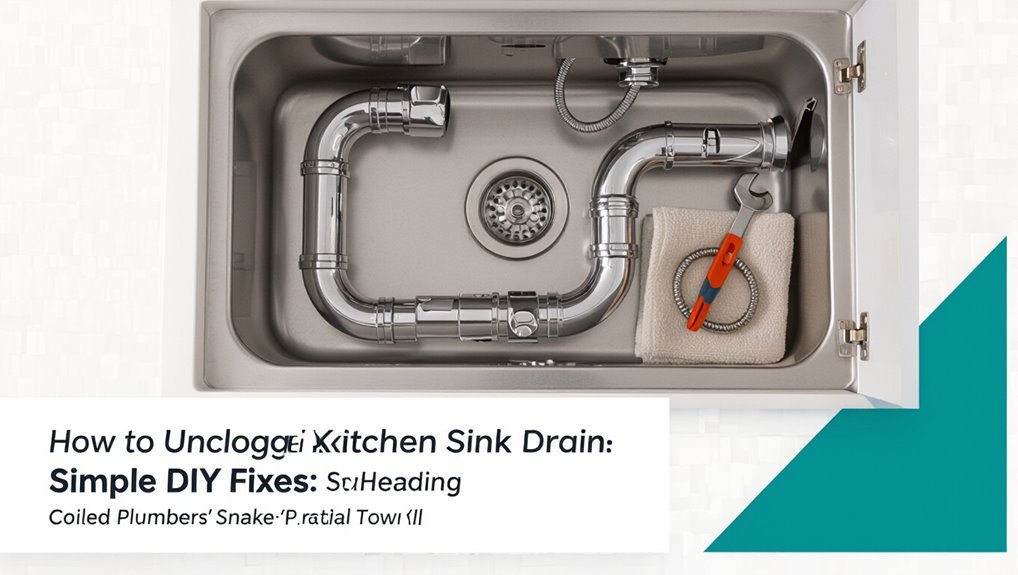
How to Unclog a Kitchen Sink Drain Pipe Fast: Simple DIY Fixes
To quickly unclog your kitchen sink drain pipe, first stop the water flow, clear the area, and wear gloves and eye protection. Remove the strainer or stopper to access any visible debris. Use a sink plunger by sealing the overflow, filling the sink to cover the bell of the plunger, and pumping it 10–15 times. If this doesn’t work, insert a plumber’s snake or a straightened hanger into the drain to retrieve hair and other gunk, or loosen the P-trap over a bucket to clean it out. Finally, flush the drain with hot water for optimal results.
Quick Fix: Unclog a Kitchen Sink in 5 Minutes
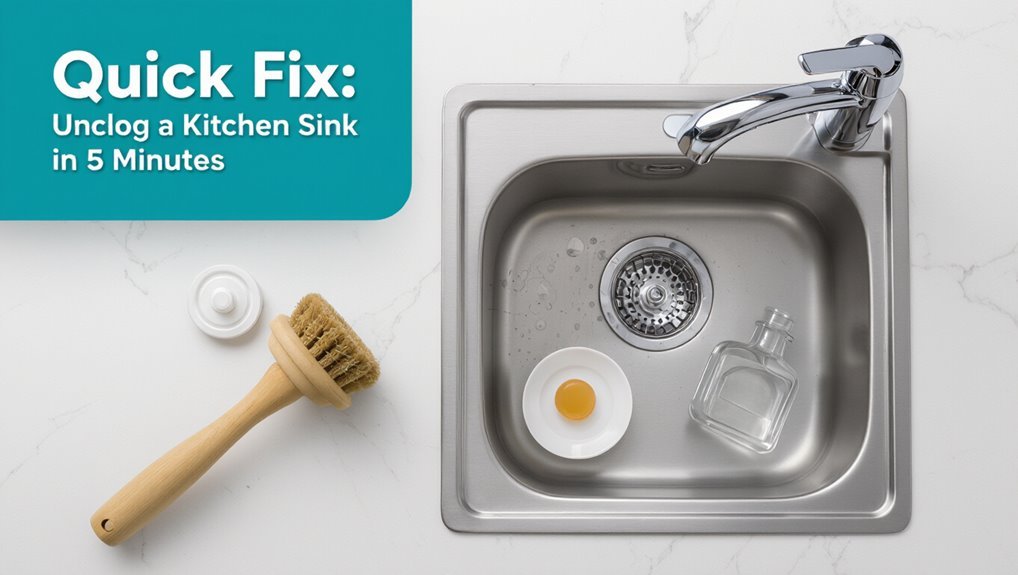
With a few simple tools and a bit of technique, a kitchen sink can often be cleared in about five minutes. The person assesses visible debris, removes the stopper or strainer, and uses a plunger to dislodge soft blockages.
If that fails, a plumber’s auger or wire coat hanger fed gently into the drain can snag hair and buildup. Baking soda followed by vinegar, then hot water, can dissolve light grease.
Throughout, hands stay protected with gloves and goggles. After flow resumes, the user runs hot water to flush remaining residue and reassembles the stopper or strainer securely.
Stop Water Flow and Clear the Area
Before beginning any repair, the water supply to the sink should be shut off to prevent leaks or sudden flow.
Nearby countertops must be cleared of dishes, appliances, and loose items to create a safe workspace.
Protect cabinets and the floor with towels or a waterproof mat to catch drips and debris.
Turn Off Water Supply
Shut off the sink’s water supply to prevent accidental flow while working: locate the shutoff valves under the sink and turn them clockwise until fully closed, then open the faucet to relieve residual pressure and confirm the water is stopped.
Verify both hot and cold valves are sealed; if supply uses a single valve, make certain it is closed.
Have a bucket and towels ready beneath the trap for any drips when disconnecting pipes.
If valves are stuck, use an adjustable wrench carefully or shut off the home’s main water supply.
Note valve condition for possible replacement after repairs.
Clear Nearby Countertops
To prevent water damage and give unobstructed access, clear all items from the countertops and the area immediately around the sink — move small appliances, dish racks, toiletries, and decorative objects to a dry surface at least a few feet away.
Remove fragile or absorbent items first and stack washable dishes on a towel in another room. Wipe surfaces dry to prevent slipping and accidental staining.
Keep a small bucket or bin nearby for removed debris and tools. Assure good lighting and unobstructed movement so tools can be used safely.
Confirm cleared space before beginning any plunging, snaking, or disassembly.
Protect Cabinets And Floor
With the water supply turned off and the sink emptied, the next step is to protect the cabinets and floor by containing any remaining water and creating a clear, dry workspace.
A shallow pan or bucket is placed beneath the P-trap to catch drips; towels or absorbent pads line cabinet bottoms and the floor.
Valuables and cleaning products are removed to prevent damage or contamination.
Protective plastic sheeting or a folded tarp shields flooring from splashes.
Adequate lighting is arranged, and a small fan or open door promotes drying.
This preparatory containment minimizes water damage and simplifies subsequent plumbing work.
Safety Checklist Before You Start
Before beginning work, the user should don appropriate personal protective equipment such as gloves and eye protection to guard against debris and chemical splashes.
They should also locate and turn off the water supply to the sink to prevent accidental flooding.
A quick check that tools are on hand and the work area is clear completes the safety checklist.
Personal Protective Equipment
How should one protect hands, eyes, and lungs when preparing to unclog a kitchen sink? Wear chemical-resistant gloves (nitrile or heavy-duty rubber) to prevent burns, cuts, and contamination.
Use safety goggles to block splashes and debris.
A disposable dust mask or N95 respirator protects against particulates and fumes from cleaners.
Long sleeves and closed-toe shoes shield skin from spills and dropped tools.
Keep a waterproof apron handy for additional protection.
Make sure gloves fit and goggles seal; replace damaged PPE.
Dispose of or clean reusable items after use.
Have a first-aid kit accessible for minor injuries or exposures.
Turn Off Water Supply
After checking personal protective equipment, the next step is to shut off the water supply to prevent accidental flooding and reduce pressure in the lines.
Locate the sink’s shutoff valves beneath the cabinet; turn each clockwise until fully closed. If individual valves are absent or leaks persist, close the home’s main water valve.
Open the faucet to confirm flow has stopped and relieve residual pressure. Keep a bucket and towels handy for any remaining drips.
Note valve condition—stiff, corroded, or leaking valves may require replacement before repairs. Proceed only when water is fully isolated to guarantee a safe, controlled workspace.
Gather Tools and Supplies
With a clear list and workspace, the person assembles the essential tools and supplies for clearing the sink drain: a plunger, adjustable wrench, bucket, plumber’s tape, pipe brush or old toothbrush, rubber gloves, a drain snake or auger, and a flashlight.
They add rags, a hand mirror, and a small container for removed debris.
A mild drain cleaner and baking soda plus vinegar are kept aside for chemical or natural options, used cautiously.
Safety glasses protect against splashes.
All items are placed within reach on a towel to catch spills, minimizing trips and keeping the repair orderly and efficient.
Diagnose: P‑Trap vs. Deeper Clog
Now that the workspace and tools are ready, the next step is to determine whether the blockage sits in the accessible P‑trap or further down the drain line. The inspector checks sink performance: slow drainage suggests partial P‑trap clog; no flow or gurgling may indicate deeper obstruction. Visual inspection and gentle probe give quick signals. If water pools when trap is emptied, debris originated above. Persistent backing after trap clearing signals downstream issue requiring a snake or professional help.
| Sign | Likely Location | Quick Test |
|---|---|---|
| Slow drain | P‑trap | Remove trap |
| No flow | Deeper | Snake needed |
| Gurgling | Deeper | Run other fixtures |
| Backflow when emptied | Above trap | Inspect tailpiece |
Turn Off the Disposal and Power
Before working near the sink’s disposal, the power should be turned off to prevent accidental startup and injury.
The homeowner should locate the disposal switch—often on the wall or under the sink—and flip it off, then unplug the unit or shut off its circuit for added safety.
Confirming the power is disconnected reduces the risk while inspecting and clearing the clog.
Why Turn Off Power
Because the garbage disposal is an electrically powered, sharp-bladed device mounted beneath the sink, cutting its power is essential before any plumbing work begins.
Disabling power prevents accidental activation that could cause severe lacerations or amputations when hands or tools enter the drain. It also eliminates electrical shock risk if water contacts motors or switches during repairs.
Turning off the disposal reduces the chance of motor damage from foreign objects shifted while clearing clogs.
Finally, powering down creates a safer environment for inspecting and manipulating plumbing connections, allowing focus on mechanical clearing without managing unexpected electrical hazards.
Locate Disposal Switch
With power off to the disposal, attention turns to finding its switch and confirming the circuit is deenergized.
The reader is advised to locate the wall switch, typically near the sink, and check for a removable plug on the power cord or a nearby outlet.
If a dedicated circuit breaker serves the unit, label and switch it off.
Physically testing the disposal with a nonconductive tool guarantees no unexpected startup.
- Identify wall switch location.
- Inspect under-sink for a plug or cord.
- Turn off and label the breaker if dedicated.
- Test motor with a wooden stick.
Use Boiling Water to Clear Grease Clogs
Pouring boiling water down a grease-clogged kitchen sink can soften and flush away fatty deposits that solidify inside the drain. The method requires caution: remove standing water, boil a kettle, and pour slowly in stages to avoid pipe stress. Repeat several times, allowing heat to work between pours. This approach is effective for minor grease buildup but not for hardened blockages or non-grease obstructions. If clogs persist, escalate to mechanical cleaning or professional help. Protective gloves and attention to plastic piping limits are advised to prevent damage.
| Step | Action | Result |
|---|---|---|
| 1 | Clear standing water | Expose clog |
| 2 | Boil water | Melt grease |
| 3 | Pour in stages | Flush debris |
| 4 | Repeat | Improve flow |
| 5 | Assess | Decide next steps |
Baking Soda + Vinegar: How to Flush a Sink
The sink is prepared by clearing standing water and removing any visible debris from the drain opening. A measured amount of baking soda is poured into the drain, followed by a controlled pour of vinegar to create the fizzing reaction.
After the reaction subsides, the drain is flushed with hot water to carry away loosened residue.
Prepare The Drain
Before beginning, make sure the sink basin is clear of standing water so the cleaning solution can contact the clog directly.
The area should be ventilated and protected; remove dishes and cover nearby surfaces.
A small bowl and funnel help control application.
Check for and remove any visible debris from the strainer or stopper; this improves contact with the blockage.
- Inspect the drain opening and remove hair, food particles, or grease buildup manually.
- Clear the sink stopper or strainer to guarantee unobstructed access.
- Ventilate the area to disperse odors and fumes.
- Position a bowl and towel beneath the P-trap in case of spills.
Pour Baking Soda
With a small funnel or cup, baking soda is poured directly into the drain to coat the interior surface and reach the blockage. A measured amount—typically half to one cup—is used to avoid waste and guarantee sufficient contact. The powder settles into bends and crevices, adhering to greasy residues and mineral buildup.
Gentle tapping or a short shake of the funnel helps dislodge trapped soda into deeper sections. Care is taken to prevent spillover onto the countertop. After distribution, the drain is left undisturbed so the baking soda can begin breaking down deposits before the next step is applied.
Add Vinegar And Flush
Following the baking soda application, a measured amount of vinegar is slowly poured down the drain to trigger fizzing that loosens grime and dislodges trapped debris.
The effervescence agitates residues, breaking bonds so water can carry particles away.
After a waiting period, hot (not boiling) water is introduced to flush soluble material and cool the P-trap slightly, reducing odor release.
If bubbles persist, repeat once more; if not, inspect flow rate.
For safety, avoid mixing with commercial cleaners.
The method is chemical-light, inexpensive, and generally safe for pipes when used occasionally.
- Measure vinegar quantity
- Pour slowly
- Wait 10–15 minutes
- Flush with hot water
How to Plunge a Kitchen Sink Correctly
Begin by positioning a sink plunger correctly over the drain to create a tight seal, ensuring the bell fully covers the opening and any overflow holes are blocked.
Fill the basin with enough water to cover the plunger bell.
Grip the handle vertically and use firm, controlled thrusts: push down slowly, then pull up sharply without breaking the seal. Repeat 10–15 times, checking drainage periodically.
If the sink has a double basin, seal the opposite drain with a wet cloth.
After plunging, run hot water to flush loosened debris. Stop if water level rises markedly and seek further assessment.
When to Use a Plumber’s Snake (Drain Auger)
A plumber’s snake is recommended when blockages sit beyond the reach of a plunger or when water barely moves despite repeated plunging.
Comparing a snake to a plunger highlights suitability for deep, solid, or stubborn clogs versus surface seal-based obstructions.
Use of a drain auger carries risks—pipe damage or dislodged debris—so appropriate technique and gentle handling are essential.
When Clogs Are Deep
Reaching past the trap and into the wall line, a plumber’s snake (drain auger) becomes the appropriate tool when blockages lie well beyond where a plunger or hand auger can reach.
It threads flexible cable into deeper pipe runs to break or retrieve dense obstructions like compacted grease, hair bundles, or foreign items.
Proper technique and steady feed reduce pipe damage; inserting too forcefully risks scraping or snagging.
Rental or purchase options vary by cable length and drum size; larger jobs may require an electric drum auger.
When uncertain or when multiple attempts fail, professional service is advised.
- Assess blockage depth
- Choose cable length
- Feed slowly, rotate gently
- Stop if resistance feels abnormal
Snake Vs. Plunger
Many homeowners face the choice between a plunger and a plumber’s snake when a sink drains slowly, and the decision hinges on clog location and severity. A plunger works well for shallow, soft blockages; a snake reaches deeper, dislodging hair, grease, or objects beyond the trap. Use a snake when plunging fails or when water remains despite attempts. Manual snakes suit most kitchens; powered augers handle tougher buildups. Inspect results and repeat as needed. Choose based on access, clog type, and tool availability to restore flow efficiently.
| Tool | Best For | Notes |
|---|---|---|
| Plunger | Shallow clogs | Fast, simple |
| Manual snake | Mid-depth clogs | Affordable, effective |
| Powered auger | Deep/tough clogs | More forceful |
| Chemical-free | All | Safer for pipes |
Risks And Precautions
After choosing a plumber’s snake over a plunger for deeper or stubborn clogs, users should be aware of specific risks and safety steps before feeding the cable into the drain. A snake can damage pipes, finishings, or fixtures if misused; chemical residues may splash; and improper technique can worsen blockages.
Wear gloves and eye protection, inspect the auger for defects, and use gentle feeding with controlled rotation. If resistance feels solid or pipe material is old, stop and consult a professional to avoid costly damage.
- Protect: gloves, goggles, and durable clothing.
- Inspect: check cable and drum condition.
- Feed: advance slowly, avoid force.
- Stop: consult pro on firm resistance.
Remove and Clean the P‑Trap
Loosen the slip nuts that connect the curved P‑trap to the tailpiece and drain arm, then lower the trap into a bucket to catch standing water and debris.
Inspect the trap for hair, grease, and sediment; wear gloves and use a brush or small bottle brush to dislodge buildup.
Flush the trap with water or a vinegar‑and‑baking‑soda rinse to remove odors and residual grime.
Check washers and slip nuts for cracks or deformation; replace worn parts to guarantee a proper seal.
Reassemble hand‑tight, then run water and observe for leaks, tightening gently if needed.
Dispose of waste properly.
Clearing Clogs in a Double‑Basin Sink
When two basins share a drain, a clog in one side can quickly cause backups in the other, so identifying the flow pattern is essential.
The technician inspects both stoppers and the shared trap to determine whether the blockage is localized or inside the common pipe. Clearing the shared trap or using a plumber’s snake through the crossover prevents recurrence and restores proper drainage.
Preventing Cross‑Basin Backups
In a double‑basin sink, clogs in the shared trap or tailpiece often cause water to back up into the opposite bowl, so addressing cross‑basin backups requires locating and clearing the blockage where the two drains converge.
Regular preventive steps reduce recurrence: avoid pouring grease, use sink strainers, and flush both drains with hot water after heavy use.
Periodically inspect and tighten tailpiece connections to prevent debris buildup.
Consider installing a low‑profile disposal baffle or check valve if code permits.
- Remove visible debris from strainers frequently.
- Flush with hot water weekly.
- Tighten tailpiece joints.
- Avoid grease and fibrous waste.
Clearing Shared Trap Clogs
Clearing a shared trap in a double‑basin sink requires locating the junction where the two tailpieces meet and removing the trap assembly to access trapped debris. The homeowner disconnects slip nuts, supports pipes, and inspects the curved trap for hair, grease, or food buildup. After clearing and rinsing, reassemble with proper alignment and test for leaks. If obstruction persists, check the branch arm and venting. Wear gloves, place a bucket under the trap, and keep small tools handy. Call a plumber for stubborn clogs or damaged fittings.
| Step | Tool | Tip |
|---|---|---|
| 1 | Bucket | Catch water |
| 2 | Wrench | Loosen nuts |
| 3 | Brush | Scrape debris |
| 4 | Test | Run water |
Clean the Sink Stopper and Strainer
Remove the stopper and strainer to inspect for trapped hair, grease, and food debris that commonly block flow.
The detached components often hide compacted residue; routine removal restores performance.
Gloves protect hands while a brush and cloth dislodge buildup.
Inspect seals and springs, replacing damaged parts to prevent recurring leaks or jams.
- Rinse components under hot water to soften grease and wash away particles.
- Scrub with an old toothbrush and mild detergent, reaching crevices and mesh.
- Clear creased rubber gaskets, ensuring a proper seat upon reassembly.
- Reassemble and test drainage, repeating if flow remains restricted.
Use a Wet/Dry Vacuum to Remove a Clog
After cleaning the stopper and strainer, a wet/dry vacuum can extract stubborn clogs deeper in the trap or drain line.
The device should be set to liquid mode if water is present; create the best seal at the sink opening using a wet rag or adapter.
Start on low power, then increase suction if safe.
Run for short bursts, checking results and removing debris from the hose.
Avoid inhaling fumes and wear gloves and eye protection.
If the vacuum fails to clear the blockage after several attempts, proceed to mechanical methods such as a plumber’s snake or inspect the P-trap.
Choose Enzyme Drain Cleaners (When to Use)
Enzyme drain cleaners are recommended when clogs are organic (food, grease, hair) and a noncaustic option is preferred.
They work slowly and require following label directions for temperature and contact time to be effective.
Users should avoid mixing them with chemical cleaners and allow several hours or overnight for enzymes to break down debris.
When To Choose Enzyme Cleaners
When is an enzyme cleaner the best option for a clogged kitchen sink? An enzyme cleaner suits organic, slow-developing clogs: grease, food particles, and biofilm in drains. It is appropriate when mechanical removal is impractical and when pipe materials could be harmed by harsh chemicals.
- Persistent, soft organic buildup that recurs despite plunging.
- Older or plastic piping where corrosive chemicals are a concern.
- Preventive maintenance to keep slow drains moving without damage.
- Situations favoring eco-friendly, low-toxicity solutions around pets or children.
Enzyme cleaners are ineffective on mineral scale, hard blockages, or solid obstructions.
Safe Usage And Timing
Having established the types of clogs best handled by enzyme cleaners, guidance on proper use and timing helps guarantee effectiveness and safety.
Enzyme products require room-temperature conditions and minimal disturbance; avoid using immediately after pouring caustic cleaners or bleach. Apply according to label dosage, pour slowly, and allow extended dwell time—typically overnight to 8–12 hours—for enzymes to digest organic buildup.
Keep the drain covered to maintain moisture and activity.
Repeat treatments weekly for maintenance or until cleared.
Do not combine with chemical drain cleaners or boiling water.
Store enzymes per instructions and keep away from children and pets.
Why Avoid Chemical Drain Cleaners
Why risk further damage for a quick fix? Chemical drain cleaners promise speed but often cause corrosion, harming metal pipes and degrading PVC joints. They can also react unpredictably with residues, creating hazardous fumes and splashes. Professional plumbers caution against repeated use because it masks underlying issues while accelerating deterioration.
Consider safer mechanical or enzymatic options first.
- Corrosion: acids and alkalis erode pipe materials over time.
- Hazardous reactions: mixing with other substances can produce toxic gases.
- Surface-only action: many cleaners fail to remove deep clogs.
- Safety risks: burns and inhalation hazards for users.
Dislodge Food and Grease in the Tailpiece
Loosen the slip nut beneath the sink and remove the tailpiece to inspect for trapped food and congealed grease; these common obstructions often collect where the vertical drain meets the horizontal trap arm.
Using gloves and a small brush, scrape away residue and flush loosened debris into a bucket.
Warm water and a degreasing dish soap or diluted vinegar solution helps dissolve fatty buildup; let it soak briefly, then scrub and rinse.
Reassemble the tailpiece loosely, run hot water while checking for leaks, and tighten the nut once clear.
Repeat inspection if flow remains slow or residual odor persists.
Fix Clogs From Hair, Soap, or Foreign Objects
Clear the drain of hair, soap scum, and small foreign objects by accessing the trap and trap arm where these materials commonly accumulate. Begin by placing a bucket, loosening slip nuts, and removing the P-trap; inspect and remove visible debris with gloves or a grabber.
Flush the trap arm with water or a straightened coat hanger if obstruction persists. Reassemble, checking seals and testing flow.
If debris resists, repeat removal and use a biodegradable enzyme cleaner overnight. Persistent blockage or damaged parts call for replacement or professional service to prevent recurring buildup and protect plumbing integrity.
- Remove P-trap
- Extract debris
- Flush or probe
- Reassemble and test
Fix Slow Drainage After a Partial Unclog
After a partial unclog, lingering slow drainage often indicates residue in the P-trap or buildup further down the line.
The P-trap should be checked and cleaned first, removing trapped debris and reassembling the fittings securely. If flow remains sluggish, a baking soda followed by vinegar and hot water can help dissolve remaining organic buildup.
Check P-Trap And Clean
Rinsing the sink and inspecting the area beneath, one should examine the P-trap next: this curved section of pipe commonly holds debris and can cause sluggish drainage even after a partial unclog is addressed.
Turn off water, place a bucket beneath, and loosen slip nuts carefully. Remove the trap, empty contents, and inspect for hair, grease, or small objects.
Scrub interior with a bottle brush and rinse parts.
Reassemble, ensuring washers seat properly and nuts are snug. Test with water, checking for leaks and flow improvement.
- Prepare tools and bucket
- Loosen nuts gently
- Clean and rinse trap
- Reassemble and test
Use Baking Soda Method
If the P-trap is clean but the sink still drains slowly, a simple chemical-free remedy uses baking soda and vinegar to break down remaining buildup.
Sprinkle about half a cup of baking soda directly into the drain, then pour one cup of white vinegar slowly. Allow vigorous fizzing to work for 10–15 minutes, then flush with boiling water to clear loosened grease and residue.
Repeat once more if necessary. This method avoids harsh chemicals, is inexpensive, and suits routine maintenance.
If flow does not improve after two attempts, inspect deeper lines or call a professional to prevent damage.
Why Clogs Keep Coming Back (Root Causes)
Often clogs recur because underlying causes are not addressed: grease and food solids build up on pipe walls, mineral deposits narrow passageways, and improper trap or vent configurations trap debris and slow flow.
Residual residues, repetitive small blockages, and inadequate cleaning routines encourage reformation of clogs. Habits and water quality matter.
- Accumulated grease congeals and captures particles.
- Hard water leaves calcium deposits that reduce diameter.
- Infrequent flushing allows organic matter to decompose and adhere.
- Partial blockages and poor venting create slow flow, promoting further buildup.
Addressing these root causes prevents frequent recurrence.
Inspect Under‑Sink Connections for Leaks
Regularly checking the fittings and seals under the sink helps catch small leaks before they cause water damage or worsen clogs. A quiet inspection reveals loose slip‑nuts, cracked washers, and damp P‑traps; tightening, replacing seals, or swapping a corroded tailpiece prevents drips that attract mold and odors. Hands, a flashlight, and a bucket suffice. After repairs, run water and observe for slow seepage. Documenting locations and actions avoids repeating mistakes and preserves confidence in a durable fix.
| Concern | Feeling |
|---|---|
| Drip under trap | Unease |
| Corroded joint | Frustration |
| Damp cabinet | Urgency |
When a Sink Clog Means Venting or Main‑Line Trouble
When clear water in the basin refuses to drain despite a clean trap and a snaking attempt, the problem may lie beyond the visible plumbing: blocked venting or a compromised main sewer line can create slow drains, gurgling sounds, or backups in multiple fixtures.
A vent obstruction prevents air flow, causing suction and sluggish drainage; main‑line issues produce wider symptoms and foul odors.
Diagnosis often requires inspection tools or a professional. Interim measures are limited and temporary. Consider calling a plumber when multiple fixtures are affected or smells persist.
Possible indicators include:
- Repeated gurgling from drains
- Slow draining across fixtures
- Sewage odors
- Toilet backups
Test If the Blockage Is in the Main Sewer Line
How can one determine whether a clog lies in the main sewer line rather than a single fixture? Observe multiple drains: if toilets, basement drains, and several sinks back up or drain slowly simultaneously, the main line is suspect.
Check for gurgling noises when water runs in distant fixtures and rising water levels in toilets after using other drains.
Inspect the cleanout plug outside or in the basement for standing sewage or slow discharge when removed (use protective gear).
A localized clog will affect only one fixture; widespread symptoms, sewage odors, or backups at the main cleanout indicate a main sewer obstruction.
DIY vs. Plumber: Cost and Time Comparison
Deciding between a DIY repair and hiring a plumber hinges largely on the clog’s complexity and the homeowner’s skill level: simple blockages can often be cleared with basic tools and minimal time, while main-line obstructions or problems requiring camera inspection, pipe replacement, or sewage disposal typically demand professional equipment, expertise, and higher cost.
- DIY: low cost, common tools, 15–60 minutes for simple clogs; risk of incomplete clearing or minor damage.
- Plumber: higher upfront cost, diagnostic tools, 30 minutes to several hours depending on severity.
- Hidden issues: professionals catch underlying damage; DIY may miss them.
- Warranty and liability favor plumbers.
Emergency Unclog Methods With No Tools
Act quickly but calmly: a few household techniques can temporarily relieve a kitchen sink clog without tools, buying time until a permanent fix is possible.
First, remove standing water with cups or bowls, then pour boiling water in stages to dissolve grease.
Use a wet-dry method: block the overflow or adjacent opening with a cloth, then vigorously force water down the drain by raising and slamming a large flat object like a cutting board to create pressure pulses.
Try a homemade enzymatic boost by pouring a mix of baking soda followed by vinegar, waiting, then flushing with hot water.
Repeat as needed, monitoring results.
Habits That Prevent Kitchen Sink Clogs
Regularly practicing a few simple habits can substantially reduce the chance of kitchen sink clogs. Consistent routines minimize debris entry, protect pipes, and limit buildup. Attention to what goes down the drain and timely minor maintenance prevent most slowdowns before tools or chemicals become necessary.
- Scrape plates into compost or trash before rinsing to keep solids out of the drain.
- Use a sink strainer and empty it after each use to catch hair and food particles.
- Flush the drain with hot water after dishwashing to help move oils along.
- Periodically inspect and clean the P-trap to remove accumulating debris.
Everyday Products That Reduce Grease Buildup
Often, households can cut grease buildup with a few common products that safely break down oils and prevent residue from adhering to pipe walls.
Liquid dish soap with grease-cutting enzymes emulsifies fats when used with hot water; a tablespoon after greasy rinses helps.
Baking soda and vinegar, used sparingly, create a foaming action that dislodges light deposits.
Citrus-based degreasers dissolve oily films on contact and rinse clean.
Enzyme drain treatments, applied weekly, target organic buildup without harming pipes.
Paper towels or compostable wipes absorb excess oil before washing; never pour large quantities of cooking fat down the sink.
How and When to Clean Your Garbage Disposal
Periodically inspecting and cleaning the garbage disposal prevents odors, clogs, and premature wear. The unit should be cleaned monthly and after fibrous or greasy use.
Use cold water while running to solidify fats, then flush with dish soap. For deodorizing, grind ice cubes with coarse salt, followed by citrus peels. Turn power off at the breaker before manual cleaning; use a hex key in the reset slot to free a jam. Avoid chemical drain cleaners that can damage components.
Keep a regular schedule: monthly light clean, deeper quarterly inspection and mechanical clearing as needed.
- Monthly maintenance
- Cold-water operation
- Ice, salt, citrus method
- Safe manual clearing
Heavy‑Use Checks to Avoid Clogged Pipes
Frequent heavy use of a kitchen sink—such as large meal prep, frequent baking, or cleaning greasy cookware—requires specific checks to prevent clogs and strain on drain plumbing. Inspect strainers, run warm water during grease-heavy tasks, verify disposal load limits, and check for slow drains after busy sessions. Monitor piping for leaks or soft spots and note odors indicating buildup. Record any recurring backups to identify patterns before severe blockages form.
| Check area | What to look for |
|---|---|
| Strainer | Debris accumulation |
| Disposal | Overfilling signs |
| P-trap | Leaks or corrosion |
| Drain flow | Slowing after use |
Simple Maintenance Schedule for Kitchen Drains
After noting heavy‑use indicators—slow draining after meals, greasy buildup, or disposal overload—a simple, regular maintenance schedule helps keep kitchen drains clear and plumbing sound.
- Weekly: Run hot water and flush the disposal for one minute after dishwashing to remove light grease and residue.
- Biweekly: Use a brush or pipe snake on the strainer and clean visible buildup around the sink opening.
- Monthly: Inspect and tighten slip nuts under the sink; check for leaks and remove accumulated debris from the P‑trap.
- Quarterly: Perform a deeper mechanical check with an auger to catch early blockages before they worsen.
Eco‑Friendly Unclogging Options That Work
Often homeowners prefer eco-friendly unclogging methods because they reduce chemical exposure and protect plumbing and municipal waterways.
Practical options include boiling water poured slowly to dissolve grease, a baking soda then vinegar reaction to break down organic buildup, and a salt-and-hot-water rinse to dislodge residue.
A manual plunger or plumber’s snake provides mechanical clearing without chemicals.
Enzymatic drain cleaners target organic matter safely over time and are suitable for routine maintenance.
Regular strainer use and mindful disposal of fats prevent recurrence.
These approaches minimize environmental impact while remaining effective for most common kitchen sink clogs.
Troubleshooting: Sink Still Backing Up After Fixes?
If eco-friendly methods and basic mechanical clearing fail to stop a kitchen sink from backing up, further troubleshooting is required to identify causes beyond everyday clogs. Inspect visible trap and tailpiece for hair, grease, or foreign objects; tighten or remove slip nuts to access blockages. Check dishwasher and garbage disposal connections for reverse flow or trapped debris. Run water while watching venting sounds—gurgling suggests a blocked vent or partial sewer line restriction. Use a hand auger to probe deeper; avoid chemical extremes that mask issues. Document findings and consider sewer camera inspection if obstructions persist.
- Inspect trap and tailpiece
- Check appliance connections
- Listen for venting gurgles
- Use hand auger and document findings
When to Call a Plumber: Clear Warning Signs
Recognize clear warning signs that warrant professional help rather than continued DIY attempts: persistent backups despite repeated clearing, multiple drains backing up simultaneously, sewage odors or visible sewage in the sink, slow drainage accompanied by gurgling throughout the house, recurring clogs after repairs, and any signs of water damage or leaks around pipes.
A plumber should also be called for suspected mainline blockages, broken or collapsed pipes, or if homemade chemical treatments and plunging fail. Professionals can diagnose with cameras, clear deep obstructions safely, repair damaged piping, and prevent contamination. Timely intervention minimizes property damage, health risks, and costly emergency repairs.
Conclusion
A calm kitchen becomes a small battlefield of suds and silence: a once-stubborn, gurgling drain now free and humming like a well-oiled clock. Against the everyday clutter—sponges, takeout boxes—the simple, quick fixes stand like neat tools on a white countertop. Little hands of routine keep trouble at bay; when shadowy plumbing woes return, a confident call to a professional cuts through the quiet, restoring order and steady flow.