How to Turn On a HydroJet Water Heater: Step-by-Step Guide for Quick Startup
To turn on a HydroJet water heater, follow these essential steps for a safe and efficient startup: First, ensure the power or gas supply is connected. Next, close the pressure-relief and drain valves. Fill the tank and purge any air trapped inside. Check all connections for leaks. Once everything is secure, restore water flow, turn on the electrical power, or relight the gas pilot according to the manufacturer’s instructions. Set the thermostat to approximately 120°F (49°C). Finally, monitor the initial heating cycle for any unusual noises or smells, and be prepared to shut down if anything seems off. Further troubleshooting steps are provided below.
How to Turn On a HydroJet Water Heater Quickly and Safely
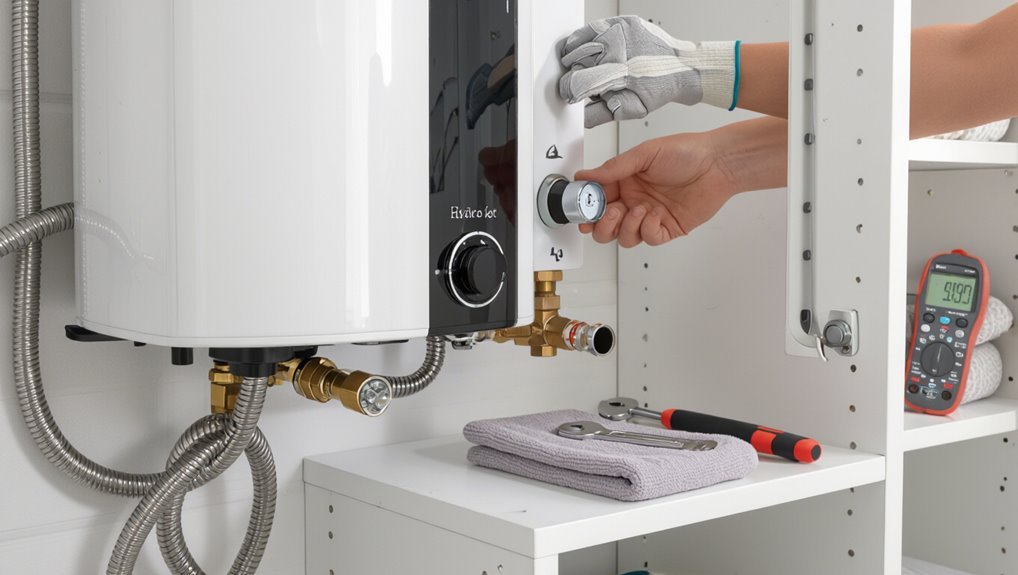
A HydroJet water heater is a tankless-style unit that uses rapid-flow heating technology and sensors to differ from conventional storage heaters.
Typical reasons to power the unit on include initial setup, restoring service after maintenance, or restarting following a power outage.
The following section will outline the quick, safe steps required for each scenario.
What a HydroJet water heater is and how it differs from conventional heaters
HydroJet water heaters employ a dedicated internal flow and agitation system to reduce sediment buildup and improve heat transfer, setting them apart from conventional tank heaters that rely solely on stationary water and regular manual flushing.
The design yields faster recovery, higher efficiency, and reduced maintenance.
Instructions about how to turn on a HydroJet water heater focus on power, valves, and safety checks tailored to its internal circulation.
Common reasons to power the unit on (initial setup, after maintenance, power outage)
Because the internal flow system reduces sediment and changes startup considerations, users will power the unit on for a few common reasons: initial installation, after maintenance or flushing, and following a power outage.
Initial setup confirms connections, pressure, and venting.
Post-maintenance restart verifies valves, thermostats, and leak-free plumbing.
After outages, cycling restores controls and purges air pockets before normal operation.
Safety Precautions Before Turning On
Before powering up a HydroJet water heater, the reader should assemble required tools and proper personal protective equipment and inspect the area for gas, water, and electrical hazards.
They must verify that the unit was installed to manufacturer clearances and that venting, piping, and electrical connections are secure.
If any leak, improper installation, or uncertainty is found, a qualified professional should be contacted rather than attempting repairs.
Required tools and personal protective equipment
A concise checklist of required tools and personal protective equipment (PPE) guarantees the water heater can be started safely and efficiently.
Necessary tools include adjustable wrench, screwdrivers, pipe wrench, pipe tape, and a flashlight.
PPE comprises safety glasses, heat-resistant gloves, long sleeves, and slip-resistant footwear.
A basic multimeter is recommended for electrical verification by qualified personnel.
Checking for gas, water, and electrical hazards
Inspect the area for gas, water, and electrical hazards before applying power or fuel to the HydroJet water heater.
Check for gas odors, listen for hissing, and confirm gas shutoff valves operate.
Look for visible leaks, pooling water, or corrosion at fittings.
Verify electrical connections are dry, intact, and properly grounded.
Remove ignition sources and ventilate the space if any concern exists.
Verifying proper installation and clearances
Confirm that the HydroJet unit and all associated components were installed according to the manufacturer’s instructions and local codes, with specified clearances maintained around the heater for ventilation, service access, and combustion air.
Inspect mounting, flue routing, and vent terminations for secure connections and correct slope.
Verify unobstructed access to controls, panels, pressure relief valve, and shutoff valves before initial startup.
When to call a professional instead of DIY
After verifying installation and clearances, homeowners should recognize specific signs that require a licensed technician rather than a DIY startup.
Call a professional if there are gas smells, frayed electrical wiring, corrosion, leaking fittings, pressure irregularities, failed safety valves, repeated pilot or ignition failures, unusual noises, or if manufacturer warranty mandates certified service.
Complex diagnostics and repairs demand trained intervention.
Pre-Startup Checklist
Before initiating the HydroJet, a concise pre-startup checklist guarantees safe and proper operation.
The technician confirms power and breaker status, inspects water connections and shutoff valves, and verifies pressure relief and drain valve positions.
For gas models, venting and combustion air are checked, and thermostat and control panel accessibility is confirmed.
Confirm power supply and circuit breaker status
One essential pre-startup task is verifying that the HydroJet water heater is connected to a properly rated power source and that the dedicated circuit breaker is in the correct position.
A qualified person should confirm voltage matches nameplate, the breaker is labeled and switched on, and there are no tripped or partially engaged breakers.
Document any irregularities and address electrical faults before proceeding.
Inspect water connections and shutoff valves
Visually examine all inlet and outlet fittings, supply lines, and shutoff valves to confirm correct connections, proper orientation, and the absence of leaks, corrosion, or loose fittings.
Guarantee valve handles move smoothly and fully close/open; tag or note any that are stiff.
Verify supply lines are secured and supported, with appropriate seals or tape on threaded joints.
Replace damaged components before startup.
Check pressure relief valve and drain valve positions
After confirming supply connections and shutoff operation, attention shifts to the pressure relief and drain valves to verify safe startup.
The pressure relief valve must be closed and free of visible leaks; cycle it briefly if accessible to ascertain mobility.
Confirm the drain valve is tightly shut and capped to prevent accidental discharge.
Record positions before proceeding.
Verify venting and combustion air (for gas models)
Several critical checks verify safe combustion when preparing a gas HydroJet water heater for startup.
Inspect venting for secure connections, proper slope, and no obstructions. Confirm vent termination meets code clearances.
Verify combustion air openings are unobstructed and sized per specifications.
Ascertain vent materials and seals show no corrosion or leaks.
Correct any deficiencies before ignition to prevent backdrafting or carbon monoxide hazards.
Ensure thermostat and control panel are accessible
One clear step before energizing the HydroJet water heater is to confirm that the thermostat and control panel are readily accessible: controls should be unobstructed, within comfortable reach, and illuminated or labeled for quick identification.
Verify panels open fully, wiring and switches are visible, and any protective covers operate smoothly.
Accessibility simplifies adjustments, troubleshooting, and emergency shutoff, improving safety and response time.
Step-by-Step Startup Procedure
The startup procedure guides the operator through essential actions to bring the HydroJet online safely and reliably.
Follow these core steps in sequence:
- Prepare the unit (fill, purge air, open valves) and restore the water supply while checking for leaks.
- Turn on electrical power or relight the gas pilot, set the thermostat to the recommended initial temperature, and monitor the first heat cycle.
- Observe for abnormal noises or odors and verify stable operation before normal use.
Step 1 Prepare the unit (fill, purge air, and open valves)
Begin by verifying that the installation area is safe and that all supply and return valves are in the closed position; this prevents pressurized flow during the initial fill.
Then connect a hose to the fill port, open the fill valve slowly, and purge trapped air by venting at high points or a purge valve until steady water flows.
Close vents and set valves to operating positions.
Step 2 Restore water supply and check for leaks
Restore water to the system by slowly opening the main supply valve and any branch valves that were left closed during filling.
Observe pressure gauges and watch all joints, fittings, and drain pans for moisture.
Tighten accessible connections if minor weeping appears; replace faulty components if significant leakage occurs.
Allow system to stabilize, recheck fittings, and document any unresolved leaks before proceeding.
Step 3 Turn on electrical power or relight gas pilot safely
Proceed cautiously when re-energizing the HydroJet: confirm all water-side checks are complete and no leaks remain before restoring electrical power or relighting the gas pilot.
For electric units, switch the breaker on only after panels are secure.
For gas models, follow manufacturer pilot-relight instructions, verify adequate ventilation, and smell for gas first.
Monitor for normal operation and any unusual noises or odours.
Step 4 Set thermostat and initial temperature recommendations
Adjust the thermostat to a safe startup setting before full operation.
Set the thermostat to 120°F (49°C) as an initial target to prevent scalding and reduce stress on components. If domestic demand is low, consider 110–115°F.
Allow the unit to reach setpoint, then verify stable readings.
Record the setting and schedule later adjustments based on household needs and energy efficiency.
Step 5 Monitor first heat cycle and check for abnormal noises or odors
With the thermostat set and the unit reaching its initial setpoint, the operator should initiate the first heat cycle and observe the HydroJet closely for the next 15–30 minutes.
During this period, note any unusual vibrations, clicking, hissing, or burning smells.
If abnormal sounds or odors appear, shut power off, ventilate the area, document observations, and contact qualified service before continuing operation.
Step 6 Verify hot water delivery at fixtures and adjust settings
Confirm hot water delivery at multiple fixtures to guarantee the HydroJet supplies expected temperature and flow throughout the system.
Inspect faucet and shower outputs sequentially, noting temperature consistency and pressure.
Adjust thermostat settings if temperatures deviate from setpoint, and modify flow controls or pressure-balancing valves as needed.
Record any persistent issues for service.
Recheck after adjustments to confirm stable, uniform delivery system-wide.
Troubleshooting During Startup
Troubleshooting during startup focuses on common faults that prevent a successful first firing and on quick checks to restore safe operation.
The technician should scan these core areas before further action:
- Electrical and ignition checks (power, resets, pilot/thermocouple).
- Water flow issues (airlocks, sediment, low flow) and visible leaks.
- Abnormal sounds or odors and immediate safety responses.
A brief systematic approach reduces downtime and limits risk.
No power or unit won’t turn on electrical checks and reset tips
When a HydroJet water heater shows no power or fails to start, begin by isolating the electrical supply and basic controls to pinpoint the fault.
Check breaker, fused disconnect, and external switches. Inspect wiring for loose connections and burned terminals.
Verify thermostat and high-limit reset button function; press reset if tripped.
Test incoming voltage with a multimeter before replacing components or calling a technician.
No flame or ignition problems on gas models pilot relight and thermocouple checks
Several common causes can prevent a gas HydroJet water heater from producing a flame at startup, so attention should focus on the pilot assembly, ignition source, and thermocouple.
Inspect and clean the pilot orifice, guarantee proper gas supply and valve position, and verify spark or piezo igniter function.
Test thermocouple voltage and replace if weak or damaged; consult a qualified technician for gas-related repairs.
Low or no hot water airlocks, sediment, and flow issues
Many startup issues with low or no hot water stem from airlocks, sediment buildup, or restricted flow in the plumbing and unit components.
Technicians should purge air by opening all hot taps and using the unit’s purge valve. Inspect inlet strainers, shutoff valves, and flow sensors for blockages.
Flush the tank or element passages to remove sediment, then verify proper flow and pressure before retesting.
Leaks or drips after startup where to inspect and tighten
A systematic inspection after initial power-up should prioritize common leak sources—connections, fittings, and seals—since even minor weeps can indicate improper torque, deteriorated gaskets, or misaligned components.
Check inlet/outlet unions, pressure relief valve, drain and cold-water shutoff fittings, and heating element gasket areas.
Tighten hand-tight plus quarter-turn where specified, replace worn seals, and retest under normal pressure for residual drips.
Unusual noises or smells what they indicate and immediate actions
When HydroJet units emit unfamiliar noises or odors during startup, they often signal specific mechanical or combustion issues that require immediate attention.
Grinding, banging, or hissing suggests loose components, scale buildup, or pressure problems; a rotten-egg smell indicates gas leak—evacuate, ventilate, and shut gas supply.
Burning or electrical odors mean wiring fault—power off and call a technician.
Document symptoms and avoid restarting.
Maintenance Steps to Ensure Reliable Startup
Regular maintenance prevents common startup failures and prolongs HydroJet performance.
Recommended tasks include routine flushing to remove sediment, inspecting and replacing anode rods and filters, and testing the pressure relief valve and thermostats.
Additionally, following proper seasonal shutdown and startup procedures helps guarantee reliable operation year-round.
Routine flushing to remove sediment
Flushes remove mineral buildup and prolong HydroJet performance by preventing sediment accumulation in the tank and heat exchanger.
Technicians drain several gallons, open the drain valve, and flush until discharge runs clear. Periodic cold-water rinses dislodge settled grit; performing this annually—or more in hard-water areas—maintains heating efficiency, reduces noise, and minimizes corrosion risk without altering anode or filter procedures.
Checking and replacing anode rods and filters
After sediment has been removed from the tank and heat exchanger, attention turns to anode rods and filters, which protect internal surfaces and maintain water quality.
Inspect rods for heavy corrosion or depletion; replace if more than 50% consumed.
Clean or swap inlet and inline filters to remove scale and debris.
Reinstall components securely and verify seals to prevent leaks before startup.
Testing pressure relief valve and thermostats
Begin by verifying the pressure relief valve and thermostats function correctly to guarantee safe, reliable startup.
Inspect the valve for leaks, corrosion, and proper discharge path; lift the lever to confirm flow and resealing.
Test thermostat setpoints and response by adjusting temperature and observing burner or element cycling.
Replace faulty valves or thermostats before energizing the unit to prevent damage or unsafe pressure.
Seasonal shutdown and startup procedures
Prepare the HydroJet for seasonal changes by following a concise shutdown checklist and a clear startup sequence to prevent freeze damage, sediment buildup, and component failure.
Drain and flush tank, isolate and winterize external lines, and remove or bypass electrical and gas supplies per manufacturer directions.
On startup, inspect anode, valves, and fittings; refill slowly, purge air, restore power, and verify pressure and thermostat operation.
When to Seek Professional Service
Signs such as a gas odor, persistent leaks, or electrical faults indicate a need for immediate professional attention.
Routine inspections by a qualified technician are recommended at least once a year, or more often for older units.
A service visit typically includes safety checks, component testing and cleaning, and the owner should ask about detected faults, expected repairs, costs, and maintenance recommendations.
Signs of serious malfunction (gas odor, persistent leaks, electrical faults)
A HydroJet water heater requires immediate professional attention when indicators of severe malfunction appear—most critically the smell of gas, any persistent or growing leaks, or electrical faults such as tripping breakers, burning odors, or visible arcing.
These signs suggest hazardous conditions: gas leaks risk explosion, water undermines components and causes corrosion, and electrical failures can ignite fires.
Stop use and contact a licensed technician immediately.
Recommended frequency for professional inspections
When homeowners rely on a HydroJet water heater for daily hot water, scheduling regular professional inspections guarantees safe, efficient operation and helps catch developing issues before they become emergencies.
Annual inspections are recommended for gas and hybrid models; every two years may suffice for basic electric units with light use.
Immediate service is advised after unusual noises, performance drops, leaks, or odor detection.
What to expect from a service visit and questions to ask
How should a homeowner prepare for a HydroJet service visit and what will the technician typically do?
The homeowner clears access, provides model and maintenance history, and notes symptoms.
The technician inspects connections, pressure, valves, heating elements, and the HydroJet flush system.
They perform diagnostics, recommend repairs or parts, and document findings.
Ask about warranty, expected costs, needed parts, timeline, and preventive steps.
Quick Reference: Startup Troubleshooting Checklist
Consult the checklist before attempting full operation to isolate common startup issues quickly and safely. The technician uses this concise guide to verify power, fuel, water supply, and error codes, enabling rapid resolution or safe shutdown. Refer to the table for prioritized checks and actions.
| Check | Symptom | Action |
|---|---|---|
| Power | No lights | Reset/replace breaker |
| Water | Low flow | Open valve |
| Fuel | No ignition | Inspect line |
| Codes | Error displayed | Consult manual |
Conclusion
Promptly prepared, the prudent person powers up the HydroJet with practiced patience, prioritizing protective precautions and proper procedures. Careful checks — connections, combustion, controls — create consistent, confident cold-to-hot conversions. When stubborn sputters surface, simple solutions succeed; should serious snags show, skilled service steps in. Regular routine maintenance maintains machine might and minimizes mishaps. In short, safe, steady startup stems from sensible steps, sharp scrutiny, and scheduled service for sustained steaming satisfaction.