How to Install a Moen Kitchen Faucet: Step-by-Step Guide for DIY Success
To successfully install a Moen kitchen faucet, start by ensuring compatibility with your sink model. Gather the necessary tools and turn off the water supply. Assemble the faucet and position the escutcheon or deck plate before inserting the unit into the sink. Secure it with the mounting hardware, then connect and tighten the supply lines and pull-down hoses, ensuring no kinks. Once the shutoffs are reopened, flush the system and check for leaks. Make any adjustments to the handle alignment and perform routine maintenance as needed. For troubleshooting tips and warranty information, refer to the detailed sections that follow.
What a Moen Kitchen Faucet Includes and Why Model Matters
The section outlines common Moen kitchen faucet types and their distinguishing features to show why model selection affects fit and function.
It also explains how to verify sink and plumbing compatibility, lists required tools and materials, and notes essential safety precautions.
Clear workspace setup guidance is provided to minimize risks and streamline installation.
Common Moen kitchen faucet types and features
Moen kitchen faucets vary by spout style, handle configuration, and technology, so buyers should match model features to their kitchen needs.
This overview aids readers researching how to install a Moen kitchen faucet and choose appropriately.
- Single-handle pull-down with spray modes
- Two-handle centerset or widespread
- Touchless/voice-activated smart models
- Commercial-style high-arc options
How to confirm compatibility with your sink and plumbing
Because faucets differ in deck-hole count, spout reach, valve type, and control electronics, confirming a model’s fit with existing sink and plumbing prevents surprises during installation.
Measure deck-hole spacing and diameter, verify supply line connection size and water pressure requirements, check clearance for spout and handle motion, and confirm valve compatibility with mounting thickness.
Consult Moen specifications and local codes before purchase.
Tools and materials you’ll need before starting
After confirming sink and plumbing compatibility, assemble the tools and materials specific to the chosen model before beginning work.
Required items vary by Moen model; confirm parts list and included hoses.
Typical essentials include:
- Adjustable wrench and basin wrench
- Phillips and flathead screwdrivers
- Plumber’s tape and silicone sealant
- Supply lines or adapters matching faucet connections and shutoff valves
Safety precautions and workspace setup
When preparing to install a kitchen faucet, the installer should first create a safe, well-lit workspace and review the specific model’s component list so that all included parts and required tools are accounted for.
Shut off water supply, clear surrounding area, protect cabinets and sink with drop cloths, and use gloves and eye protection.
Verify stable ladder access and adequate ventilation.
Quick overview of the installation process
A typical Moen kitchen faucet installation takes about 45 minutes to 2 hours for someone with basic plumbing skills and common hand tools.
More complex sinks, additional features, or unexpected issues can extend that time and may require intermediate experience.
A professional plumber should be called if there are hard-to-reach connections, damaged supply lines, or any uncertainty about shutoff valves or leak prevention.
Estimated time and skill level
Most single-handle Moen kitchen faucet installations take about 1 to 2 hours for someone with basic DIY experience.
More complex models, existing plumbing complications, or replacing a multi-hole configuration with a deck plate can extend the task to 2–4 hours.
The job requires intermediate hand skills, basic tools, patience for tight spaces, and familiarity with shutoff valves and sealants.
Prior plumbing experience speeds completion.
When to call a professional
Call a professional if the project exceeds the homeowner’s comfort or skill level—complex valve replacements, corroded supply lines, unexpected leaks, or difficulty accessing tight cabinet spaces are clear signals.
A licensed plumber handles permit-requiring work, gas or electrical complications, and hidden water damage.
Hiring guarantees proper sealing, code compliance, warranty protection, and prevents costly repairs from amateur mistakes, saving time and stress.
Preparing for installation
Before beginning, the installer turns off the water supply and tests the lines to confirm no pressure remains.
A concise checklist guides removal of the old faucet, including disconnecting hoses and clearing mounting hardware.
Finally, the installer inspects and cleans mounting holes and the sink surface to guarantee a proper seal and fit for the new Moen unit.
Shutting off water and testing supply lines
Several simple steps guarantee the water is shut off and the supply lines are ready for the new Moen faucet.
The installer closes the under-sink shutoff valves, then tests by turning on the faucet to confirm no flow.
If whole-house valves are required, they are closed and lines drained.
Supply flexible hoses are inspected for wear, leaks, and correct connection sizing before proceeding.
Removing the old faucet step checklist
Disconnecting and removing the old faucet requires a clear, ordered checklist to prevent damage and guarantee a smooth shift.
The homeowner should follow concise steps before installing the new Moen unit.
- Turn off water and open handles to relieve pressure.
- Place a bucket and towels under the sink.
- Disconnect supply lines with proper wrench.
- Remove mounting nuts and lift out the faucet carefully.
Inspecting and preparing mounting holes and sink surface
With the old faucet removed and the area cleared, the installer should inspect the mounting holes and sink surface for damage, corrosion, or leftover sealant.
Clean thoroughly with non-abrasive cleaner, removing old putty or caulk.
Verify hole alignment and size against the new Moen faucet specifications.
Smooth rough edges, apply plumber’s putty or gasket as directed, and guarantee a dry, level surface before mounting.
Step-by-step Moen faucet installation
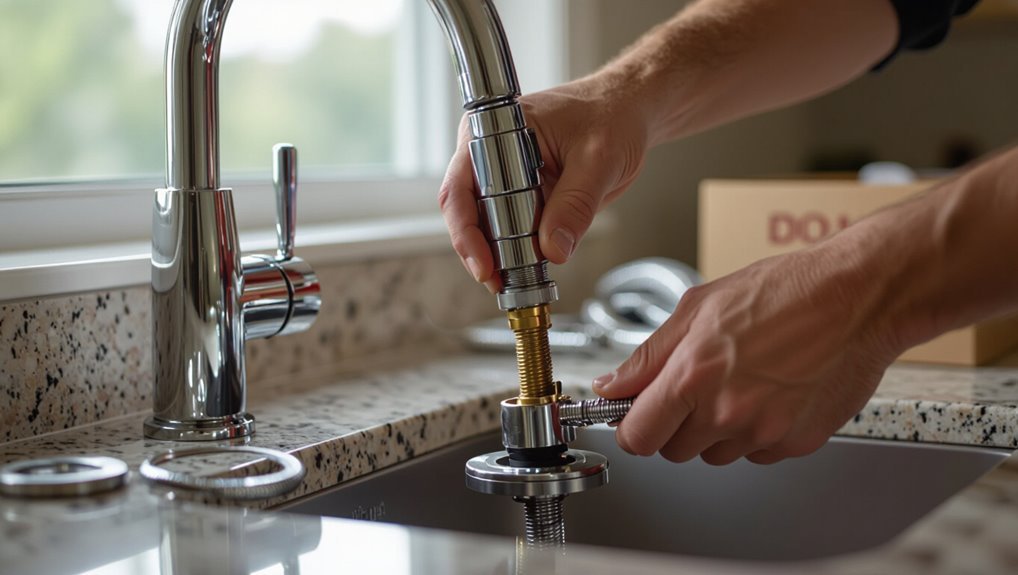
The installer begins by assembling the faucet components on the countertop and, if needed, fitting the escutcheon or deck plate.
Next, the faucet is inserted into the sink opening and the mounting hardware is tightened to secure it.
Finally, supply lines and fittings are connected and any sprayer or side components are attached and checked for leaks.
Assembling the faucet components on the countertop
Begin by placing the faucet body and accompanying parts on a clean, padded section of the countertop to confirm all components are present and oriented correctly.
Assemble cartridge, retaining clip, and handle per manufacturer orientation.
Attach hose connections and weight (if pull-down) loosely for adjustment.
Thread mounting hardware onto shank finger-tight, ensuring gaskets sit flush.
Verify smooth operation before final installation.
Installing the escutcheon or deck plate (if applicable)
Install the escutcheon or deck plate by centering it over the sink holes and verifying the gasket or rubber seal sits flat against the countertop to prevent leaks.
Align any mounting tabs or alignment pins, press firmly to seat the gasket, and wipe away excess sealant if used.
Confirm the plate does not rock and that faucet hole openings match fixtures before proceeding.
Inserting the faucet and securing mounting hardware
With the escutcheon seated and gasket flush, the faucet body can be lowered through the sink or countertop opening so that the outlet and supply lines extend beneath the deck.
Align the faucet, ensuring proper orientation.
From below, thread the mounting nut or bracket onto the shank, hand-tighten, then use the provided tool or a basin wrench to secure firmly.
Wipe excess sealant.
Connecting supply lines and using the proper fittings
Now attention turns to the supply lines: verify the water is still shut off, then check that the faucet’s flexible hoses reach the shutoff valves without kinking.
Use appropriate adapters—typically 3/8-inch compression—to match valve threads. Hand-tighten then secure with a wrench a quarter to half turn.
Inspect rubber washers, apply plumber’s tape on threaded fittings, and test for leaks before finalizing.
Attaching the sprayer or side components
Proceed to mount the sprayer or any side components by aligning each part with its designated hole and ensuring gaskets or escutcheons sit flat to prevent leaks.
Feed the hose or supply line through the deck, secure the component from below with its mounting nut, tighten evenly, and attach any quick-connect fittings.
Verify connections are snug and components sit flush before finishing under-sink organization.
Installing pull-down/pull-out hoses and checking spray function
After securing the sprayer or side components, attention turns to routing and connecting the pull-down or pull-out hose to the faucet body and spray head.
Feed the hose through the spout, seat any weight per manufacturer instructions, and attach quick-connect fittings or threaded connectors.
Cycle the sprayer to verify smooth movement, confirm watertight connections, and test spray modes for proper flow and return.
Final tightening sequence and torque guidance
Begin the final tightening sequence by loosening each mounting nut slightly.
Then gradually re-torque them in an alternating pattern to achieve even compression of the gasket and deck plate.
Use a torque wrench if available; Moen recommends moderate hand-tight plus 1/8–1/4 turn with a wrench (roughly 15–25 in·lb).
Recheck alignment, verify hoses are free of twist, then test for leaks.
Post-installation checks and first use
After installation, the homeowner should slowly reopen the shutoff valves and inspect all connections for leaks.
They should run water to flush out debris, test and adjust the handle and spray settings, and confirm correct hot/cold orientation and adequate pressure.
Any leaks or performance issues should be addressed before regular use.
Reopening valves and checking for leaks
Turn the shutoff valves slowly to the open position, allowing water to flow gradually into the new Moen faucet to prevent pressure surges.
Observe supply lines, connection points, and body for any drips. Have a towel or bucket ready to catch minor leaks.
Run both hot and cold, operate handles and sprayer while watching.
Tighten fittings if slow leaks appear; recheck until dry.
Flushing the faucet and removing debris
Flush the faucet to clear installation debris and protect cartridges and aerators from sediment.
Open cold then hot separately, letting water run for one to two minutes each to expel particles.
Remove and inspect the aerator, rinse under flowing water, and capture debris on a cloth.
Reinstall aerator securely.
Verify steady, clear flow and absence of noises indicating trapped debris.
Adjusting handle and spray settings
With the lines cleared and flow verified, attention moves to calibrating the handle tension and spray functions to secure smooth operation and correct water delivery.
The installer adjusts the set screw or cartridge retaining nut to achieve desired resistance, tests swivel range, and confirms the sprayer button and diverter snap operate reliably.
Final tweaks secure leak-free motion and consistent spray patterns before routine use.
Verifying hot/cold orientation and water pressure
After the initial flow tests confirm there are no leaks, the installer verifies that the hot and cold handles correspond to their labeled sides and that water temperature changes smoothly when the handle is moved.
This includes opening each side briefly to verify the hot supply is on the correct inlet and that the cartridge or mixing valve is oriented properly.
Then steady flow and balanced pressure are checked at various settings, noting any sputter.
Troubleshooting common installation problems
Common post-installation issues include leaks at connections or the faucet base, reduced water pressure or weak spray, a wobbling or loose fixture, and misaligned handles or cartridge malfunctions.
Each problem has straightforward diagnostic steps—tightening fittings, checking aerator and supply lines, securing mounting hardware, and inspecting or realigning the cartridge.
The following section outlines concise remedies and when to call professional service.
Fixing leaks at connections and base
Begin troubleshooting by identifying the leak source—connections at supply lines, the faucet base, or the sprayer hose—as each requires a different fix.
Tighten compression nuts, replace deteriorated supply line washers, or swap damaged flexible hoses.
For base leaks, inspect and reseat or replace the mounting gasket and guarantee the escutcheon is evenly torqued.
Recheck after pressurizing and monitor for persistent seepage.
Resolving low water pressure or poor spray performance
Diagnose low water pressure or weak spray by systematically checking aerators, supply valves, and in-line filters for clogs or debris.
Remove and clean aerator and spray head; soak in vinegar if mineral buildup exists.
Verify both hot and cold supply valves are fully open.
Inspect supply hoses for kinks or internal obstructions.
Replace damaged cartridges or clogged hoses to restore normal flow and spray performance.
Dealing with wobbling or loose faucet
After confirming water flow issues are resolved, attention should shift to stability problems: a wobbling or loose Moen kitchen faucet usually indicates an improperly tightened mounting assembly, a missing or misaligned gasket, or worn mounting hardware.
Inspect underside connections, tighten the mounting nut evenly, replace damaged gaskets or mounting plates, and add or replace a washer or stabilizing bracket as needed to restore secure seating.
Addressing misaligned handle or cartridge issues
Check the handle alignment and cartridge seating when the faucet exhibits stiff movement, off-center positioning, or inconsistent water flow; these symptoms commonly stem from a misaligned handle, improperly seated cartridge, or debris interfering with cartridge spline engagement.
Inspect spline engagement, remove and clean the cartridge and housing, realign the handle with the index mark, then re-tighten retaining nut to factory torque.
Test operation and adjust.
Maintenance tips to extend faucet life
Routine cleaning and periodic removal of mineral deposits preserves finish and flow.
Replacement of worn cartridges or O-rings at the first sign of leaks restores proper operation and prevents water damage.
Simple seasonal checks—tightening fittings, inspecting hoses, and flushing aerators—reduce wear and extend the faucet’s service life.
Routine cleaning and mineral deposit removal
Regular cleaning prevents buildup and preserves finish and performance.
The homeowner should wipe surfaces weekly with mild soap and a soft cloth, avoiding abrasive cleaners.
Vinegar soaks remove mineral deposits from aerators and spray heads; rinse thoroughly.
For stubborn scale, use a toothbrush and diluted vinegar, then lubricate moving parts lightly.
- Weekly wipe-down
- Aerator vinegar soak
- Toothbrush for crevices
- Rinse and lubricate
When and how to replace the cartridge or O-rings
Inspecting and replacing the cartridge or O-rings is the next step when leaks, reduced water pressure, stiff handle movement, or persistent dripping indicate internal wear.
Turn off water, remove handle and escutcheon, then extract the cartridge per Moen’s model instructions.
Compare parts, install new cartridge or O-rings with plumber’s grease, reassemble, restore water, and test for smooth operation and watertight seals.
Seasonal checks and preventative care
How often should a Moen kitchen faucet receive seasonal attention to remain reliable and efficient?
A quarterly inspection is recommended: check for leaks, tighten fittings, clean aerator, and flush supply lines.
Annually, inspect cartridges and hoses for wear, replace worn O-rings, and apply silicone grease where specified.
Promptly address minor issues to prevent corrosion, mineral buildup, and costly repairs.
Comparing DIY vs. professional installation considerations
When choosing between DIY and professional installation, the homeowner should weigh cost, time, warranty effects, and task complexity. Below is a concise comparison to frame that decision. The right choice depends on confidence with plumbing, budget, and warranty priorities.
| Factor | DIY vs Professional |
|---|---|
| Cost | Lower labor cost DIY; higher total cost for pro |
| Time | DIY may take longer; pros complete faster |
| Warranty | DIY can void some warranties; pros often preserve them |
| Complexity | Simple installs suit DIY; complex setups favor pros |
| Risk | Higher risk of errors DIY; lower risk with professionals |
Cost, time, warranty, and complexity comparison
Although a homeowner can save on labor by installing a Moen kitchen faucet themselves, the decision hinges on trade-offs in cost, time, warranty implications, and task complexity. DIY lowers expense but may consume hours and risk voiding parts of a warranty if mistakes occur; professional service costs more but is faster, insured, and often preserves warranty coverage.
| Aspect | Comparison |
|---|---|
| Cost | DIY cheaper, pro pricier |
| Time | DIY longer, pro faster |
| Warranty | DIY may risk voiding, pro protects |
| Complexity | DIY needs skills, pro handles challenges |
Helpful resources and warranty information
The article points readers to Moen’s model-specific manuals and step‑by‑step installation videos for precise guidance and parts diagrams.
It explains how to register a faucet on Moen’s website to activate warranty coverage.
It also outlines the basic steps for submitting a warranty claim and what documentation is typically required.
Locating model-specific Moen manuals and installation videos
Where can a homeowner find the exact Moen manual or video that matches a faucet model?
The homeowner should use Moen’s official resources and verified dealers to locate precise guides and demos.
Recommended sources:
- Moen.com Product Support search
- Model number on faucet underside
- Moen YouTube channel (official)
- Certified retailer or installer documentation
How to register your Moen faucet and claim warranty
Registering a Moen faucet soon after installation guarantees the homeowner secures warranty coverage, facilitates faster service, and preserves proof of purchase for future claims.
Registration occurs online at Moen’s website or via phone; require model number, serial if present, purchase date, and retailer.
Retain confirmation email and original receipt.
For warranty claims, contact Moen support with photos and documentation to expedite repair or replacement.
Conclusion
A quiet kitchen breathes easier now that the Moen faucet sits firmly in place—an unexpected coincidence of skill and timing: the homeowner’s spare afternoon, a helpful neighbor’s socket set, and the right model arriving the same week. Small triumphs accumulate; the steady stream from the spout becomes proof that careful preparation pays. This simple fixture, once a task, now quietly rewards daily routines, turning practical effort into a modest, lasting comfort.