How to Detect Pinhole Leaks in Copper Pipe: Easy Inspection Tips and Fixes
Detecting pinhole leaks in copper pipes is essential for preventing water damage and maintaining plumbing integrity. Look for pin-sized wet spots, green or white crusting, and persistent damp stains, especially at joints and bends. To inspect, visually examine the pipes, use a paper towel to check for moisture, utilize a moisture meter or borescope, and monitor your water meter for any unusual drops in pressure. For temporary fixes, consider using epoxy or clamps; however, permanent repairs typically require replacing affected sections or fittings. Follow the step-by-step inspection and repair guidance for effective results.
What Causes Pinhole Leaks in Copper Pipe and Why They Matter
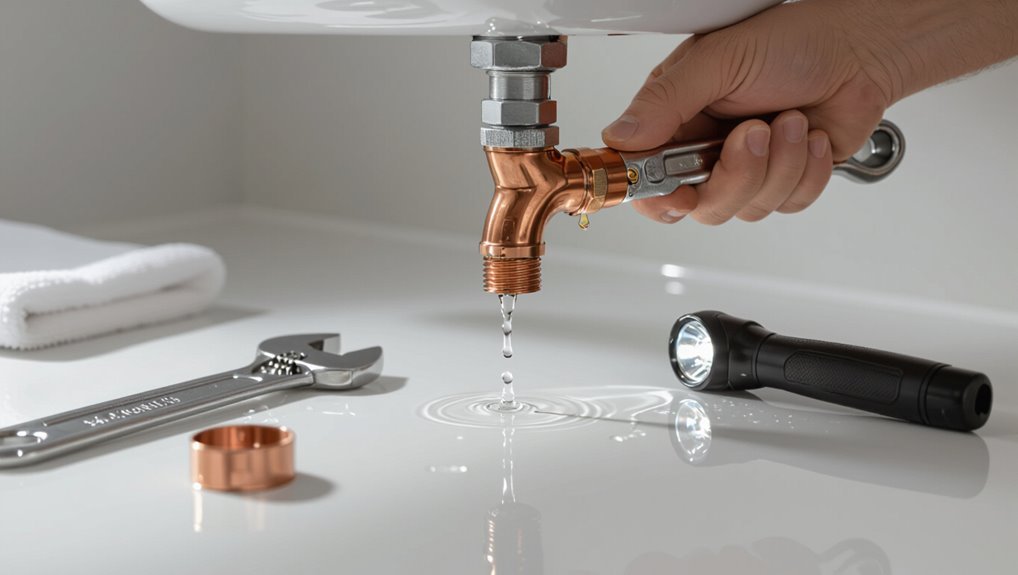
Pinhole leaks in copper pipe most often stem from water chemistry and corrosion, accelerated erosion, or physical damage to the tubing.
They typically appear at joints, bends, or along corrosion-prone runs and manifest as small drips, greenish stains, or unexplained wet spots.
Left unaddressed, pinholes can cause progressive water damage, mold growth, and increased water bills.
Common causes (water chemistry, corrosion, erosion, physical damage)
Investigating the root causes of small leaks reveals that a mix of water chemistry, corrosion, erosion, and physical damage are the primary drivers behind copper pipe failures.
Clear understanding aids how to detect pinhole leaks in copper pipe and prioritize repairs.
- Aggressive water (low pH, high chloride) accelerates pinhole formation.
- Corrosion from electrochemical reactions thins walls.
- Mechanical abrasion and impacts create stress points.
Typical locations and signs where pinholes appear
Leaks in copper piping most often show up at predictable weak points—joints, bends, high-stress supports, and sections exposed to aggressive water or external abrasion—because these locations concentrate mechanical, chemical, or electrochemical attack.
Other common sites include soldered fittings, near valves, under insulation, and where pipes contact metal or masonry.
Visible signs: green/white crusting, pin-sized wet spots, staining, or persistent dampness.
Risks of leaving pinhole leaks untreated (water damage, mold, higher bills)
When left unaddressed, small perforations in copper piping can escalate from minor nuisances into significant liabilities, causing structural water damage, promoting mold growth, and increasing utility costs through continuous water loss.
Unchecked leaks weaken drywall, flooring, and framing, foster hidden microbial colonies that threaten health, and drive higher bills. Early detection and timely repair limit repair scope, cost, and long-term property degradation.
Quick Way to Confirm a Pinhole Leak Exists
A quick confirmation begins with a focused visual inspection of exposed copper lines for wet spots, green corrosion, or drips.
Simple tools like a paper towel or a handheld moisture meter can localize an active leak by wiping suspected areas or scanning for elevated moisture.
Checking the home’s water meter with fixtures off and isolating sections of the system helps verify the leak and narrow its location.
Immediate visual inspection steps for homeowners
Several clear steps let a homeowner quickly confirm whether a pinhole leak is present in a copper pipe: inspect for tiny wet spots, green or white corrosion, or mineral crusts along straight runs and joints.
Check underside of horizontal pipes and fittings, look for fresh droplets or darkened insulation, and note damp odors.
Photograph locations and shut off water if pooling appears.
How to use simple tools to detect active leaks (paper towel test, moisture meter)
Use simple, inexpensive tools to quickly confirm an active pinhole leak: a paper towel or tissue for spotting fresh moisture and a handheld moisture meter for detecting hidden dampness.
Press paper gently along suspected areas, watching for wet spots or staining.
Scan pipe runs and surrounding surfaces with the meter; elevated readings indicate seepage.
Repeat after drying to verify continuous leaking before repairs.
How to check water meter and isolate the leak
How can the house water meter be used to quickly confirm and isolate a pinhole leak? The occupant notes meter movement with all fixtures off; if the dial or digital flow indicator moves, a leak exists.
Next, shut off the main valve and check the meter again: continued movement indicates a leak between meter and shutoff, no movement isolates it inside the house.
Detailed Step-by-Step Inspection Process
Before beginning, the inspector secures safety, shuts off water, and assembles needed tools and detection aids.
They then follow a systematic, room-by-room routine that compares exposed copper runs in basements and crawlspaces with concealed lines in walls and ceilings.
For slow or intermittent weeps, the inspector employs dye, food coloring, or a dusting of flour to trace the source.
Preparing for inspection (safety, shutoff, gather tools)
Begin by ensuring the area is safe and the water supply is controlled: shut off the main or local valve, relieve pressure by opening a faucet, and disconnect electrical devices near the leak.
Then gather essential tools and PPE, confirm lighting and access, and plan containment.
Follow this concise checklist:
- Gloves, goggles, flashlight
- Wrenches, leak detector, towels
- Bucket, pipe tape, bucket liners
Systematic room-by-room inspection procedure
A room-by-room inspection proceeds in a consistent sequence to guarantee no section of the plumbing system is overlooked: start at the entry point to the house and move methodically through living areas, kitchens, bathrooms, utility rooms, and basements, examining exposed copper runs, fittings, and appliances at eye level and below for signs of pinholes such as greenish discharge, dampness, or concentrated corrosion.
Then, document findings, note suspect locations, test nearby fixtures, and photograph damage for repair planning.
Inspecting exposed copper vs. hidden pipes (basement, crawlspace, walls)
How should inspectors adjust their approach when evaluating exposed copper runs versus pipes hidden in basements, crawlspaces, or behind walls?
Inspectors prioritize visual and tactile checks on exposed runs: look for greenish corrosion, dampness, and pinhole spray patterns.
For hidden pipes, they rely on humid/damp odor, localized staining, water stains on finishes, soft drywall or insulation, and focused probing with a flashlight and moisture meter.
Using dye, food coloring, or flour to trace slow leaks
To trace slow, elusive leaks, the inspector employs simple, low-cost tracers—food coloring, commercial dye, or a light dusting of flour—introducing them into the system at a strategic point (fixture, drain, or accessible section of pipe) and observing downstream or surrounding surfaces for migration patterns.
The choice of tracer and injection method depends on accessibility, flow rate, and the need to avoid staining or contamination.
The inspector monitors, documents, and isolates flow to confirm source.
Using Diagnostic Tools and When to Call a Professional
A pressure test is recommended when visible leaks are absent but system pressure drops, as a sustained loss indicates one or more pinhole leaks.
Thermal imaging and borescopes are useful for locating leaks in concealed or buried runs by revealing temperature anomalies and visual access inside pipes.
A licensed plumber or specialist should be called for persistent pressure loss, complex hidden leaks, or when repairs require soldering, pipe replacement, or access to structural areas.
When to use a pressure test and how it indicates pinhole leaks
Begin diagnostic work with a pressure test when visual inspection and moisture detection suggest a hidden leak or when intermittent dripping and unexplained pressure loss occur.
Technicians isolate sections, pressurize with water or air to recommended psi, monitor for drops indicating leakage.
Gradual pressure decline, audible hissing, or test gauge movement pinpoints probable pinhole locations and guides targeted repairs or professional intervention.
Using thermal imaging and borescopes for hidden pipes
Following a pressure test that indicates a concealed leak, technicians often rely on thermal imaging and borescopes to locate pinholes in hidden copper piping without invasive demolition.
Thermal cameras reveal cold spots from escaping water; borescopes inspect joints, solder seams, and interior corrosion.
Combined, they pinpoint access points, guide targeted repairs, and reduce exploratory damage.
Equipment rental or professional operation is commonly recommended.
Signs that require a licensed plumber or specialist
Red flags that demand a licensed plumber or specialist include persistent drops in system pressure after isolation, visible corrosion paired with active weeping, recurring moisture stains despite temporary fixes, and water that has migrated into concealed structural elements or electrical spaces.
A professional should be summoned when diagnostic tools (pressure gauges, leak detectors, borescopes, thermal imagers) confirm elusive sources, when repairs risk structural or electrical safety, or when extensive pipe replacement is indicated.
Temporary Fixes for Pinhole Leaks You Can Do Yourself
The section outlines practical temporary repairs homeowners can perform on copper pinhole leaks, including step-by-step application of epoxy putty.
It also covers correct use of repair clamps and rubber patches, and when a soldered patch is appropriate.
Safety precautions and limits of these temporary measures are highlighted.
How to apply epoxy putty step-by-step
Begin by cutting a small amount of epoxy putty and kneading it until the color is uniform and the material is pliable; this activates the bonding agents and prepares the patch.
Clean and dry the copper around the pinhole, remove corrosion, press the putty firmly over the hole, smooth edges, and allow specified cure time before restoring water pressure.
Using repair clamps and rubber patches correctly
After applying epoxy putty for a temporary seal, attention can turn to repair clamps and rubber patches as alternative short-term fixes for pinhole leaks.
The pipe must be drained and dried; the rubber pad centered over the leak, clamp tightened evenly to compress without over-torquing.
Inspect for seepage, retighten if needed, and replace with a permanent repair promptly to prevent recurrence.
When soldering a temporary patch is appropriate and safety tips
Soldering a temporary patch is appropriate when the leak is a small pinhole on an accessible copper section, water can be fully drained from that pipe segment, and the surrounding area is free of flammable materials; under these conditions a skilled DIYer can create a quick, durable seal while arranging a permanent repair.
Use flux and proper solder, heat evenly, avoid overheating joints, ventilate, wear eye protection, and keep a fire extinguisher nearby.
Permanent Repair Options and Pipe Replacement Strategies
For permanent repair of pinhole leaks, the discussion moves to replacing affected copper sections by cutting out the damaged length and joining new pipe with soldered fittings or modern alternatives.
Push-fit fittings and compression couplings offer reliable, code-compliant connections that can serve as long-term solutions without soldering.
When damage is widespread or recurring, full repiping—typically in copper or PEX—should be considered, weighing durability, cost, and installation impact.
Replacing a section of copper pipe (cutting, fitting, soldering) overview
Replacing a damaged segment of copper pipe requires cutting out the compromised section and installing a properly sized replacement using compatible fittings and joints.
This overview outlines permanent repair options and practical pipe-replacement strategies.
Essential steps include isolating water, measuring and cutting squarely, deburring, fitting with sweat or mechanical joints, soldering or brazing for leak-proof seals, pressure testing, and insulating or supporting the new run.
Using push-fit fittings and compression couplings as permanent solutions
After removing the damaged section and preparing clean, square pipe ends, a homeowner or plumber can opt for push-fit fittings or compression couplings as permanent repair methods that bypass soldering.
Push-fit fittings offer quick, tool-free installation and reliable seals; compression couplings require tightening nuts and ferrules for a mechanical seal.
Both suit copper-to-copper joins and minimize downtime without heat or flux.
When full repiping is recommended and material options (copper vs. PEX)
When multiple leaks, extensive corrosion, or a system nearing the end of its service life are evident, full repiping becomes the prudent choice rather than repeated patch repairs.
Professionals weigh cost, longevity, and water quality when choosing copper or PEX. Copper offers durability and heat resistance; PEX provides flexibility, easier installation, and lower material cost.
Local code, budget, and application determine the best selection.
Cost Estimates and Timeframes for Repairs
Cost comparisons between typical DIY fixes and hiring a professional help homeowners weigh immediate expense against long-term reliability.
Estimates for common repairs and full replacements vary widely by materials, access, and regional labor rates.
Repair and replacement timeframes—from a quick patch to a multi-day repipe—affect disruption and should be considered alongside cost.
Typical DIY vs. professional repair costs
Compare DIY patching to hiring a licensed plumber to understand how price, time, and risk differ for pinhole leaks in copper pipe. DIY kits and soldering cost less but carry leak risk; professionals charge more with warranty and code compliance. Homeowner decisions weigh cost, confidence, and potential damage.
| Option | Typical cost | Pros/Cons |
|---|---|---|
| DIY kit | $10–$50 | Cheap, riskier |
| Solder/parts | $20–$100 | Affordable, skill needed |
| Plumber | $150–$600+ | Reliable, costly |
Time required for common repairs and replacements
Most common pinhole repairs and replacements take between 30 minutes and several hours, depending on access, pipe condition, and chosen method.
Simple epoxy or clamp fixes often require 30–90 minutes.
Soldering or cutting and replacing a copper section can take 1–3 hours.
Extensive corrosion, behind-wall access, or system shutdowns add time, potentially extending work to a full day.
Preventing Future Pinhole Leaks
Preventing future pinhole leaks focuses on controlling corrosive factors and mechanical stresses on copper piping. This includes using water quality treatments and corrosion inhibitors, addressing erosion and high-velocity flow that wear pipe walls, and establishing a routine maintenance checklist to detect early signs of trouble.
Implementing these measures can extend pipe life and reduce the frequency of urgent repairs.
Water quality treatments and corrosion inhibitors
Addressing water chemistry is a key strategy for reducing copper pipe pinhole formation, because dissolved minerals, oxygen levels, and pH directly influence corrosion processes.
Municipal or point-of-entry treatments—softening, deaeration, and pH adjustment—stabilize water.
Orthophosphate or silicate corrosion inhibitors form protective films inside pipes.
Regular monitoring and professional dosing guarantee inhibitor effectiveness without promoting scaling or biological growth.
Reducing erosion and high-velocity flow issues
Reduce high-velocity conditions and turbulent flow to minimize mechanical wear that exposes copper to corrosive attack. Localized erosion from rapid flows, fittings, or abrupt changes in direction accelerates thinning and pinhole formation.
Assess flow rates, resize or reconfigure piping, install flow restrictors or gentle bends, and replace eroded fittings.
Promote laminar flow and avoid sharp turns or sudden diameter reductions to extend copper service life.
Routine maintenance checklist to catch problems early
Having minimized turbulent flow and erosion risks, maintenance routines serve as the next line of defense against pinhole leaks in copper pipe.
Routine inspections, water chemistry checks, and timely repairs limit corrosion and stress.
Recommended checklist:
- Inspect visible pipe runs monthly for green spots, dampness, or pinholes.
- Test water pH and chloride levels quarterly; adjust treatment.
- Flush and exercise lines biannually to remove deposits.
Troubleshooting Common Misdiagnoses and Mistakes
Common errors in diagnosing pinhole leaks include mistaking steady condensation or pipe sweating for active perforations, which can lead to unnecessary repairs.
Homeowners attempting DIY fixes often use inappropriate materials or apply temporary patches without addressing underlying corrosion.
Verification of a successful repair requires pressure testing and observation over time rather than relying solely on an absence of visible drips.
Differentiating pinhole leaks from sweating pipes and condensate
How can a homeowner tell a true pinhole leak from normal sweating or HVAC condensate?
A pinhole leak produces steady drips, corrosion rings, or localized wetness despite dry ambient air.
Sweating appears as uniform moisture on cold pipes, often when humidity is high.
Condensate trails follow nearby HVAC discharge patterns and stop when systems shut off; pinhole weeps persist.
Mistakes to avoid when attempting DIY fixes
When homeowners attempt do-it-yourself repairs on copper pinhole leaks, they often misdiagnose the problem or apply temporary fixes that worsen corrosion or hide the underlying failure.
Common mistakes include using incompatible solder or sealants, over-tightening fittings, neglecting water chemistry causes, patching instead of replacing severely pitted sections, and failing to isolate the correct pipe.
These errors increase leak risk and long-term damage.
How to verify a repair is successful
After correcting misdiagnosis and undoing any improper temporary fixes, homeowners should systematically verify that a repaired copper pinhole leak is truly resolved rather than merely concealed.
Inspect the repair visually, dry surrounding areas, restore normal pressure and temperature, then monitor for at least 24–48 hours.
Recheck with a tissue or paper towel, listen for drips, and confirm no corrosion or dampness remains.
Helpful Materials, Tools, and Products to Keep on Hand
A compact inspection and emergency repair kit — including a flashlight, inspection mirror, pipe cutter, adjustable wrench, pliers, and leak clamp or repair tape — equips responders to locate and temporarily stop pinhole leaks.
Reliable repair products to keep on hand include silicone-based or epoxy pipe repair compounds, compression fittings, and solderless coupling options for copper.
Selecting proven brands and matching fittings to pipe size reduces failed repairs and repeat visits.
Recommended tool kit for inspections and emergency repairs
An organized kit of specific tools and materials enables fast detection and temporary repair of pinhole leaks in copper piping.
Essential items include basic detection, sealing, and safety gear for prompt action.
- Multimeter, inspection mirror, flashlight
- Pipe cutters, emery cloth, temporary seal tape
- Gloves, goggles, portable bucket
Trusted repair products and fittings to consider
Practicality guides the selection of trusted repair products and fittings for copper pipe pinhole incidents.
Maintain quality solder, flux, and a propane torch for permanent repairs; lead-free compression fittings and repair couplings for quick replacements; epoxy putty and silicone pipe wrap for temporary patches; roll of PTFE tape; replacement copper tubing and push-fit (SharkBite) connectors.
Store safety goggles and gloves.
Real-World Examples and Short Case Scenarios
Two brief case scenarios illustrate common outcomes and remedies.
The first describes an isolated pinhole on exposed copper that was patched and monitored with a successful short-term outcome.
The second presents multiple pinholes from corrosive water and the longer-term solution required to stop recurrent failures.
Example 1: Isolated pinhole on exposed copper fix and outcome
One typical example involved a single isolated pinhole in an exposed section of 1/2-inch copper supplying a bathroom sink. The leak was located by visual inspection and confirmed by drying the area and watching for fresh drips.
The homeowner cut out the damaged segment, installed a short replacement with compression fittings, tested for leaks, and reported a lasting repair with normal water flow restored.
Example 2: Multiple pinholes due to corrosive water long-term solution
When prolonged exposure to aggressive water chemistry affects a length of copper, multiple pinholes often appear along the same run rather than a single isolated defect.
The homeowner observed leaks at several joints and mid-run spots. A plumber recommended replacing the affected section, installing dielectric unions, testing and treating water pH, and adding filtration.
Long-term resolution required material replacement and water chemistry correction.
Final Checklist Before Finishing a Repair
Before closing the repair, a pressure test of the repaired section should be performed to confirm integrity under normal and slightly elevated system pressures.
A clear monitoring plan should be established, specifying which signs to watch for—such as drops in pressure, new moisture, or corrosion at joints—and how often to inspect.
Documenting test results and the monitoring schedule guarantees any recurrence is detected and addressed promptly.
Pressure-testing the repaired section
Pressurize the repaired section slowly and monitor it closely to verify integrity before restoring normal service.
Increase pressure in increments to the system’s operating level, holding each step to check for drops.
Inspect joints, fittings, and the repair area for leaks or deformation.
Use a calibrated gauge and allow a short dwell period; record results and only proceed if stable with no pressure loss.
Monitoring plan and signs to watch for after repair
After confirming the repaired section holds pressure with no immediate loss, establish a short- and medium-term monitoring plan to catch delayed failures.
Inspect visually at 24 and 72 hours, then weekly for a month. Recheck joints and surrounding insulation for dampness, corrosion, or discoloration.
Monitor water meter for unexplained usage. Log observations and act on any sign of seepage or pressure variation immediately.
Conclusion
After a chapter of heroic inspections and DIY valor, the copper pipe quietly proves its point: tiny holes cause big drama. The homeowner, now a reluctant plumbing detective, learns that corrosion, stray electrical currents, and poor installation conspire with gravity and bad timing. Armed with a flashlight, solder, and humble patience, the leak is stopped—temporarily or forever—while everyone involved secretly hopes the pipes will behave better than people. Such is plumbing: predictably unpredictable.