How to Tighten a TOTO Toilet Seat Quickly: Step-by-Step Fix for Loose Hinges
To quickly tighten a loose TOTO toilet seat, start by lifting the seat and opening the hinge caps to access the bolts. Use an adjustable wrench or pliers to hold the bolt head while tightening the nut or screw with a screwdriver. Alternate tightening on both sides to keep the seat centered, and be cautious not to over-tighten plastic components. If wobbling continues, clean any mineral buildup and replace worn washers. Follow the detailed steps below for simple fixes and long-term solutions.
Quick Fix Summary Tighten a Loose TOTO Toilet Seat in Under 10 Minutes
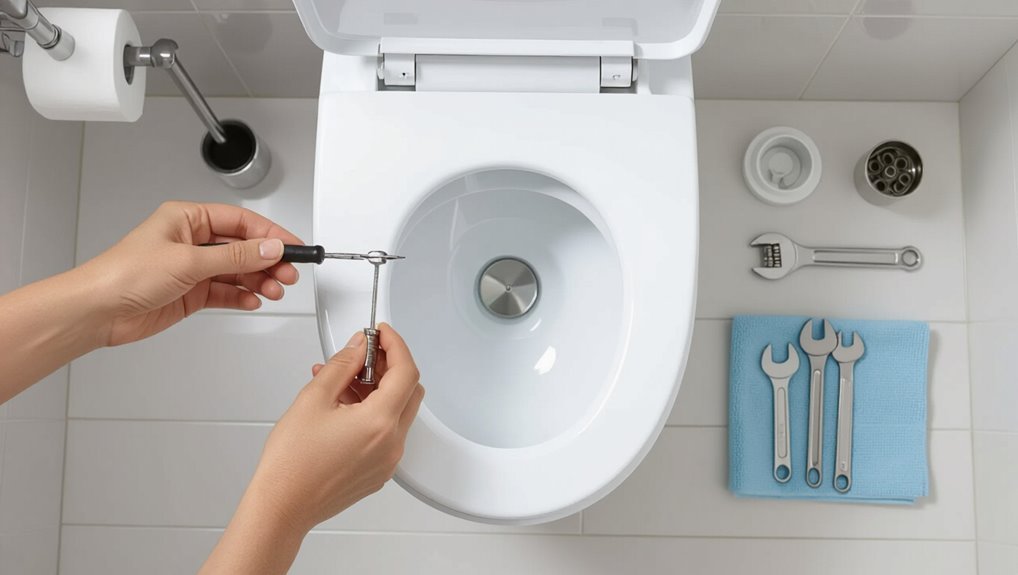
A quick summary lists the common household tools and replacement parts needed—adjustable wrench or screwdriver, pliers, and replacement bolts or rubber bumpers if needed.
It then presents a concise step-by-step checklist: locate fasteners, tighten or replace them, and test seat stability.
This brief guide prepares the reader to secure a loose TOTO toilet seat in under ten minutes.
Tools and parts you’ll need (common household items)
Several simple household items are usually sufficient to tighten a loose TOTO toilet seat quickly.
For a basic how to tighten toto toilet seat repair, gather an adjustable wrench or pliers, a flathead screwdriver, replacement nylon bolts or washers, and a small rag.
Optional: a flashlight and lubricant.
Keep parts organized and test fit before final tightening to avoid surprises during the quick fix.
Fast step-by-step checklist for immediate tightening
With the adjustable wrench, screwdriver, and any replacement parts gathered, the tightening procedure can be completed in under ten minutes.
Inspect hinges, lift seat, loosen caps, align seat, tighten bolts evenly, test for movement.
If wobble persists, replace worn washers or bolts.
Recheck tightness after seating.
Clean tools and dispose of old parts.
Procedure complete; seat should be stable.
Why TOTO Seats Become Loose Common Causes
TOTO seats commonly loosen over time due to wear and tear on hinge bolts and nuts.
Corrosion, mineral buildup, stripped threads or damaged plastic parts also undermine fastening integrity.
Repeated use or improper installation can cause misalignment that accelerates these failures.
Wear and tear on hinge bolts and nuts
Over time, hinge bolts and nuts undergo gradual wear from repeated use, moisture exposure, and routine cleaning, which causes threads to strip, fasteners to corrode, and connections to loosen.
Worn threads reduce clamping force, allowing movement; vibration from use enlarges holes.
Repeated tightening can round heads or damage nylon inserts in locknuts, necessitating replacement rather than further adjustment.
Corrosion and mineral buildup
Corrosion and mineral buildup quietly undermine seat stability by degrading metal components and obstructing fastening surfaces.
Over time, rust loosens bolts, pits hinge plates, and deposits hard mineral crusts that prevent proper seating and clamp engagement.
Regular inspection reveals discoloration, flaking, or stiff movement.
Removing deposits with vinegar or descaler and replacing corroded metal parts restores secure contact and reliable fastening.
Stripped threads or plastic parts
Stripped threads and worn plastic components compromise seat stability by preventing bolts and fasteners from gripping securely.
Over time, repeated tightening, cross-threading, or aging plastics can strip anchor points and hinge inserts, causing play and rattling.
Replacement of damaged bolts, threaded inserts, or hinge assemblies restores proper engagement.
Using correct-sized hardware and gentle torque prevents recurrence and guarantees lasting seat stability.
Misalignment from repeated use or improper installation
Repeated use and improper installation can gradually shift a TOTO toilet seat out of alignment, producing uneven gaps, rocking, and poor hinge engagement.
Over time bolts loosen, mounting holes wear, and plastic hinges deform, causing lateral or angular displacement. Misalignment increases stress on fasteners, accelerates wear, and prevents secure clamping.
Realignment, correct torque, and replacing worn components restore proper fit and function.
Identify Your TOTO Seat Type and Hinge Mechanism
A quick visual check of the underside or the label on the seat will usually reveal the TOTO model or hinge style, speeding identification.
Common hinge types include standard bolts, quick-release fittings that unclip for cleaning, and soft-close mechanisms with dampers that slow closing.
Hinge components like loose bolts or worn bushings can often be tightened or replaced individually, whereas damaged soft-close dampers or cracked hinge housings typically require a full replacement.
Quick method to find model or hinge type
How can a homeowner quickly determine which TOTO seat or hinge they have?
Inspect the hinge area for visible release buttons, screws, or plastic covers.
Measure hinge spacing and note metal versus plastic components.
Check underside for stamped model numbers or labels.
Photograph the assembly and compare with TOTO online parts pages or retailer images.
Keep notes for replacement or instructions.
Differences between quick-release, soft-close, and standard hinges
When identifying a TOTO seat, recognizing the hinge type clarifies function and replacement needs:
Quick-release hinges allow easy removal for cleaning via a latch or button.
Soft-close hinges include damping to prevent slamming and require different torque handling.
Standard hinges are basic, non-damped, often fixed, and simplest to tighten or swap.
Each type dictates compatible replacement parts and maintenance approach.
When hinges are repairable vs when to replace
Recognizing hinge type—quick-release, soft-close, or standard—helps determine whether a repair is practical or a replacement is the better option.
Repairable signs: stripped mounting bolts, loose screws, or clogged soft-close dampers that respond to cleaning or new fasteners.
Replace when plastic housings are cracked, internal gears shredded, persistent wobble remains, or proprietary quick-release parts are unavailable or costlier than a new seat.
Detailed Step-by-Step Tightening Procedure
Before beginning, the area should be cleared and basic safety observed; turning off the water is unnecessary for most TOTO seats but can be done if preferred.
First, hinge covers are opened to expose the bolts. Then the appropriate wrench or pliers are used to snug external nuts while a screwdriver or hex key addresses internal fasteners.
Finally, the seat is tested for movement and adjustments are repeated until the fit is secure.
Preparation: turn off water? clear area? safety tips
A few simple preparatory steps guarantee a safe, efficient tightening procedure: shut off the water supply at the shutoff valve, flush the toilet to drain the tank and bowl, and place a towel or small bucket under the tank to catch residual drips.
Clear the surrounding area, remove fragile items, wear gloves and eye protection, and verify adequate lighting and ventilation before beginning work.
Step 1 Open hinge covers and locate bolts
Flip up the plastic hinge covers on the rear of the TOTO seat to expose the mounting bolts beneath.
Inspect the two bolts and surrounding washers for corrosion, stripped threads, or loose hardware.
Note bolt type (hex, Phillips) and access orientation.
Clear debris, then confirm both bolts are visible and reachable through the hinge openings before proceeding to the tightening step.
Step 2 Choose the right tool and tighten the nuts
Select the correct wrench or screwdriver based on the bolt head observed and the nut size beneath the bowl; using the wrong tool risks rounding the fastener or slipping.
Position the wrench on the nut under the bowl, hold the bolt head above steady with fingers or pliers, then tighten clockwise until snug.
Avoid overtightening; confirm hinge alignment and test seat stability before replacing covers.
Step 3 Use a screwdriver or hex key for internal bolts
Proceed to access the internal bolts by lifting the hinge covers and locating the recessed fasteners; use the appropriate screwdriver or hex key to engage each bolt head, turning clockwise in short, controlled increments until resistance increases and the seat no longer shifts.
Maintain steady pressure, alternate between bolts for even tension, and avoid over-tightening to prevent cracking plastic or stripping threads.
Step 4 Test for movement and repeat if needed
Check the seat for movement by applying firm, brief pressure near the hinges and along the rim; any wobble indicates further tightening is needed.
If movement persists, incrementally tighten bolts or nuts, testing after each adjustment. Guarantee even tension on both sides to prevent misalignment.
Continue until no lateral or vertical play remains, then confirm smooth hinge operation before moving on.
Step 5 Reattach hinge covers and final checks
With the seat fully tightened and hinge operation confirmed, reinstall the hinge covers to protect fasteners and complete the assembly.
Snap or screw each cover into place, ensuring alignment and secure fit.
Wipe away debris, lower and raise the seat to verify smooth motion, and inspect for remaining gaps or wobble.
Confirm all tools are removed and discard or store hardware safely.
Alternative Quick Fixes When Bolts Won’t Tighten
When the original bolts fail to secure a TOTO seat, quick alternatives can provide a firmer hold. Options include applying threadlocker or plumber’s tape, inserting rubber shims or washers to stop wobble, or using temporary measures like cable ties or a small amount of epoxy where appropriate.
Each method carries trade-offs in durability and reversibility that should be considered before proceeding.
Using threadlocker or plumber’s tape for a firmer hold
If bolts on a TOTO toilet seat refuse to tighten securely, applying a threadlocker or wrapping the threads with plumber’s tape can create the friction needed to hold fast without replacing hardware.
Threadlocker (removable grade) cures to prevent loosening; apply sparingly.
Plumber’s tape builds slight bulk for a tighter fit.
Allow cure time for threadlocker; retighten and test stability before regular use.
Add rubber shims or washers to stop wobble
A simple shim or washer can eliminate seat wobble by filling the gap between the bolt and mounting hole, creating a snugger fit without replacing hardware.
Rubber shims or neoprene washers compress to absorb movement, prevent noise, and distribute pressure.
Install one or more beneath the bolt head or between hinge and porcelain, trimming for fit.
Check alignment and retighten gently to avoid cracking.
Temporary fixes: cable ties or epoxy (when appropriate)
After trying shims or washers to eliminate wobble, temporary measures like cable ties or epoxy can provide a short-term solution when bolts refuse to tighten.
Cable ties looped under hinges and cinched snugly stabilize movement; trim excess.
Epoxy applied sparingly to cracked plastic or stripped threads bonds parts until proper repairs occur.
These are interim fixes; replace hardware or call a professional for permanent safety.
When to Replace Hinges or the Entire Seat
If hinge components are cracked, corroded, or wobble despite tightening, replacement is recommended.
The writer should explain how to verify model compatibility and select a genuine TOTO hinge or seat that matches mounting style and measurements.
Finally, a brief outline of removal and installation steps will clarify whether a hinge swap or full seat replacement is needed.
Signs hinge parts are beyond repair
Inspecting the hinges for visible cracks, warped components, or metal corrosion provides the clearest indication that repair is no longer feasible.
Other definitive signs include stripped threads, fractured plastic bushings, persistent wobble after tightening, and bent mounting plates.
If hinges seize, grind away threads, or repeatedly loosen despite new fasteners, replacement of the hinge assembly or entire seat is warranted.
How to choose a compatible TOTO replacement hinge or seat
When determining whether to replace just the hinges or the entire TOTO seat, prioritize matching model compatibility, hinge type, and mounting dimensions to ascertain a proper fit and function.
Verify original part numbers or measure bolt spacing and hinge length. Choose OEM or certified aftermarket parts specified for the toilet model.
Consider material, finish, and soft-close features to confirm durability and user preference.
Basic replacement steps overview
Begin by removing the seat to assess whether damage is limited to worn or loose hinges or involves cracks, warping, or persistent wobble that warrant replacing the entire seat.
If hinges are faulty, replace them using matching parts, tighten fasteners, and test alignment.
If the seat is compromised, remove both seat and hinges, install the new seat per manufacturer instructions, and confirm stability.
Common Mistakes and How to Avoid Them
Common mistakes include over-tightening, which can crack plastic hinges, and using incorrect tools or fasteners that damage fittings.
Failure to clean and address existing corrosion is another frequent error, as rust will return and loosen connections.
The guide will explain proper torque, correct hardware, and simple cleaning steps to prevent repeat problems.
Over-tightening and cracking plastic components
Over-tightening the mounting bolts or hinge screws can easily stress TOTO’s plastic components, leading to hairline cracks or sudden breakage that compromise seat alignment and safety.
Careful, incremental tightening until snug — not forced — preserves integrity. Inspect plastic hinges for stress marks during adjustment.
If cracks appear, replace the damaged component rather than attempting repairs that risk failure and injury.
Using the wrong tools or fasteners
Several types of mistakes arise when incorrect tools or fasteners are used on a TOTO toilet seat, including stripped bolt heads, damaged hinges, and insecure mounts that lead to wobble or failure.
Using mismatched screws, cheap replacements, or improper drivers can worsen damage.
Recommend OEM-compatible fasteners, correct-size screwdrivers or sockets, and hand-tightening with controlled torque to guarantee secure, non-damaging installation.
Ignoring corrosion that will recur without cleaning
If corrosion on the toilet-seat hardware is ignored, it will return even after tightening unless the rust and mineral deposits are properly removed first.
Corroded screws, nuts, and hinge plates prevent secure fastening and accelerate wear. Cleaning with a descaler or rust remover and replacing heavily pitted parts prevents recurrence.
Regular inspection and maintenance guarantee lasting stability and avoid repeated repairs.
Preventive Maintenance to Keep TOTO Seat Tight
A routine inspection schedule with simple upkeep helps catch loose hardware before it becomes a problem.
Gentle cleaning methods that remove soap and mineral deposits without harsh chemicals protect hinges and fasteners.
In high-use bathrooms, planning for periodic part or seat replacement guarantees consistent fit and function.
Regular inspection schedule and simple upkeep
Routine checks performed monthly keep a TOTO toilet seat functioning securely and prevent small issues from becoming loose, noisy, or damaged.
Inspect hinge bolts for tightness, verify seat alignment, and check for hairline cracks or wear.
Tighten fasteners as needed with appropriate tools, replace worn washers or bumpers promptly, and record actions to track recurring problems and schedule replacements before failure.
Cleaning techniques to prevent mineral buildup
Several simple cleaning practices prevent mineral buildup that can seize hinges and corrode fasteners on a TOTO toilet seat.
Wipe hinges and mounting areas weekly with a soft cloth and mild detergent, rinse thoroughly, and dry.
For mineral deposits, use a vinegar solution applied briefly, then scrub gently with a soft brush.
Avoid abrasive pads and harsh acids that damage finishes and seals.
Recommended replacement intervals for high-use bathrooms
How often should a toilet seat in a high-use bathroom be replaced to maintain secure fittings and hygiene?
For commercial or busy residential bathrooms, replace the TOTO seat every 12–18 months or sooner if cracks, persistent wobble, corrosion, or hygiene concerns appear.
Regular inspections quarterly and prompt replacement after damage preserve hinge integrity, user safety, and sanitary conditions.
Cost and Time Estimates
Tightening a TOTO toilet seat typically takes 10–20 minutes, while a full replacement can require 30–60 minutes depending on model and experience.
Parts for a basic tighten are usually free or under $10 if bolts need replacing; a new replacement seat ranges from $30 to $150.
Common tools such as a screwdriver, adjustable wrench, or pliers are inexpensive and often already on hand.
Typical time to tighten vs replace
When evaluating whether to tighten or replace a TOTO toilet seat, time and cost are the primary practical considerations.
Tightening typically takes 10–30 minutes for hinge adjustments and minor hardware tightening.
Replacement, including removal, fitting, and alignment, often requires 30–90 minutes.
Choose tightening for quick fixes; opt for replacement when damage, recurring loosening, or fit issues make repeated repairs inefficient.
Estimated cost of parts and common tools
Although parts and tools vary by model and condition, most TOTO seat tightening jobs require only inexpensive hardware and basic tools. Parts (bolts, nuts, replacement hinges) usually cost $3–$15. Common tools: screwdriver, adjustable wrench, pliers, possibly hex key. Typical DIY time: 10–30 minutes.
| Item | Typical cost | Purpose |
|---|---|---|
| Bolts/nuts | $3–$8 | Securing hinge |
| Replacement hinge | $10–$15 | If damaged |
| Screwdriver | $5–$10 | Tightening |
| Wrench/pliers | $5–$15 | Hold/tighten |
| Hex key | $0–$5 | Specialized fasteners |
Troubleshooting Checklist for Persistent Looseness
When repeated tightening does not stop wobble, a brief troubleshooting checklist helps isolate the cause and decide whether repairs or a pro are needed.
The homeowner should follow clear diagnostic steps to check fasteners, hinge parts, and mounting holes before replacing components. If structural damage, stripped threads, or unclear results appear, contacting a plumber is the recommended next step.
- Inspect bolts, caps, and hinge hardware for wear or looseness.
- Test mounting holes and seat alignment for cracks or movement.
- Call a professional if threads are stripped, ceramic is damaged, or stability remains uncertain.
Step-by-step diagnostic actions if tightening fails
Begin by confirming basic assumptions: verify that the seat and hinges are clean, that mounting bolts are fully engaged, and that the correct fasteners were used.
Inspect plastic inserts for cracks or deformation. Check bolt threads and nuts for stripping.
Test alignment and seat-to-bowl fit. Swap in known-good hinges or bolts if available.
Note any cracked porcelain or warped seat surfaces.
When to call a professional plumber
Why does a persistent loose TOTO seat merit professional attention?
A plumber should be consulted when repeated tightening fails, plastic or metal hinges are cracked, mounting bolts strip or spin, water leaks near the base, or concealed damage to the bowl or bolt holes is suspected.
Professionals assess structural integrity, replace corroded components, and prevent further damage or unsafe conditions.
Quick Reference: Tools, Parts, and Where to Buy
A concise kit of common tools and replacement parts will streamline tightening a TOTO toilet seat: usually a flathead or Phillips screwdriver, an adjustable wrench or socket (typically 10–12 mm), and replacement nylon bolts and nuts or TOTO-branded mounting kits if the originals are corroded.
Sources include home centers, plumbing supply stores, and online retailers for genuine parts.
- Home improvement stores
- Plumbing supply shops
- Manufacturer and major online marketplaces
Conclusion
In mere minutes, the loose TOTO seat transformed from a rebellious, wobbling menace into a steadfast throne fit for royalty, banishing bathroom anxiety and restoring domestic dignity. With a few simple turns, the once-sinister hinges surrendered, and ordinary hardware achieved heroic stability. The quick fix felt almost miraculous—so effortless that one might suspect plumbing gods intervened—yet it was simply good technique, basic tools, and a modest investment of attention that delivered triumphant results.