How to Thaw a Frozen Bathtub Drain Quickly and Safely
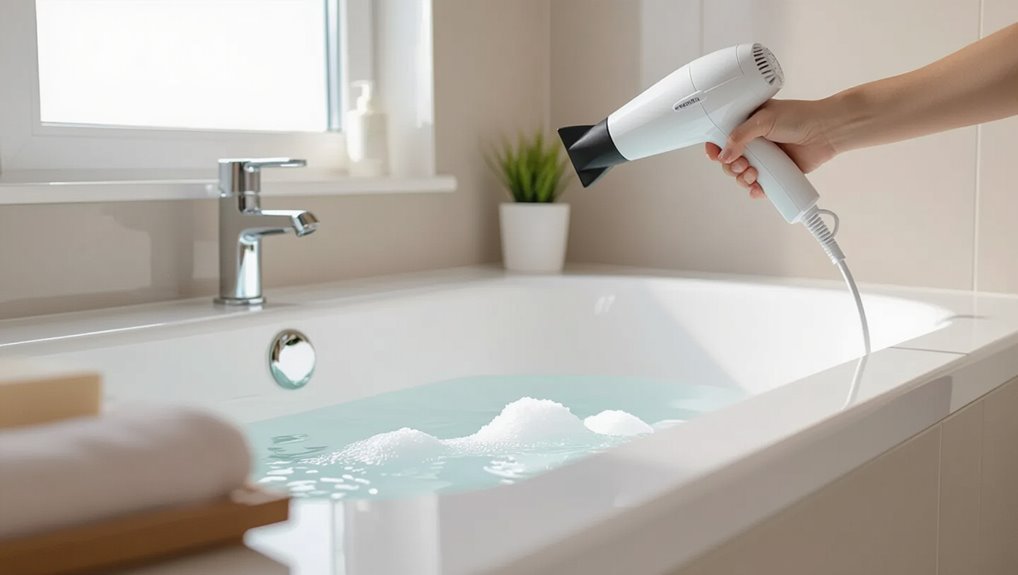
To quickly and safely thaw a frozen bathtub drain, first shut off the water supply and any nearby circuit breakers. Clear the area of hazards and wear gloves for protection. Apply controlled heat by pouring hot (not boiling) water down the drain, using a hair dryer or a low-setting heat gun, or directing a space heater at the affected wall while keeping an eye out for leaks. If these methods don’t work, consider using a plumber’s snake, a wet/dry vacuum, or removing the P-trap. Avoid using open flames or subjecting the pipes to rapid temperature changes to prevent damage. For long-term prevention tips or if the issue persists, consult a plumber.
How to Thaw a Frozen Bathtub Drain Quickly and Safely
Before attempting to thaw a bathtub drain, one should perform immediate safety checks such as turning off nearby electrical sources and ensuring the work area is dry to prevent shocks.
The technician should look for signs that the drain is frozen—glass-like blockage near fittings, cold pipe surfaces, and trapped air—rather than a typical clog indicated by slow drainage and gurgling.
Confirming these differences guides whether gentle heat and insulation or mechanical clearing is the appropriate next step.
Immediate safety checks before you start
Several quick checks help guarantee safety before attempting to thaw a frozen bathtub drain: confirm the water supply to the tub is shut off, locate and turn off nearby electrical breakers if any outlets or heater components are present, and clear the area of flammable materials.
The person should inspect vents, ascertain adequate ventilation, gather proper tools, wear protective gloves, and verify stable footing before proceeding with how to thaw frozen bathtub drain.
Signs your bathtub drain is frozen vs clogged
A few clear differences help distinguish a frozen bathtub drain from a simple clog: a frozen drain typically produces no water flow at all and may be accompanied by cold pipes, visible frost, or a sudden drop in fixture temperature.
In contrast, a clogged drain usually allows slow drainage, gurgling sounds, or water backing up elsewhere.
Additional indicators include localized cold spots, ice near trap, or persistent standing water despite attempted plunging.
Quick, low-effort methods to thaw the drain
The section outlines quick, low-effort options for thawing a frozen drain, starting with careful hot water pours to melt ice near the trap.
It then covers using a hair dryer or heat gun with safety precautions to avoid burns or damage.
Finally, it summarizes how to use an electric heating pad or space heater safely and the steps to apply them effectively.
Hot water pour technique
Pouring hot water down a frozen drain can quickly melt surface ice and restore flow with minimal tools. The person should heat water to a near-boil, pour in stages, and monitor for leaks. Repeat until drainage resumes.
Use caution around fixtures and avoid chemical interactions.
- Pour slowly in controlled amounts
- Check surrounding pipes and seals
- Allow cooling between pours
Using a hair dryer or heat gun safely
After trying hot water, users can move to targeted heat sources like a hair dryer or heat gun to thaw localized ice without introducing more liquid.
Use low heat, keep moving, and maintain distance to avoid damage. Inspect for plastic fittings and electrical hazards before starting.
- Aim heat in short bursts, 6–12 inches away
- Protect surrounding surfaces from overheating
- Wear heat-resistant gloves
Electric heating pad or space heater method precautions and steps
Several simple electric heating options can gently thaw a frozen drain without adding water. The user should prioritize safety: keep devices dry, avoid direct contact with plumbing insulation, and monitor continuously.
Use low settings and timers to prevent overheating. Maintain ventilation and never leave unattended.
- Place pad near exposed pipe, not on wet surfaces.
- Aim a space heater at the affected wall.
- Check cords and GFCI protection.
Tools and materials to thaw a frozen drain effectively
Recommended household tools and supplies include a hair dryer, heat gun (used with caution), plumber’s snake, insulated gloves, towels, and a bucket.
Chemical de-icers are appropriate when mechanical warming fails or when ice is deep in exposed pipe sections; choose products labeled safe for plumbing and follow manufacturer instructions.
Protective gear and proper ventilation should be used when handling any chemical de-icer.
List of recommended household tools and supplies
When tackling a frozen drain, having the right tools and supplies on hand reduces risk and speeds recovery. Recommended items prioritize safety and effectiveness for thawing a bathtub drain without chemicals.
Use gentle heat, basic plumbing tools, and materials to contain water and debris while monitoring progress.
- Hair dryer or heat gun (low setting)
- Rubber gloves and towels
- Bucket and drain snake
When to use chemical de-icers and what to choose
Chemical de-icers should be considered only after mechanical and gentle-heat methods have failed or are impractical, and when the user can access the frozen section safely without risking nearby finishes or exposed plumbing.
Select products formulated for indoor plumbing, avoid rock salt or corrosive compounds, and follow manufacturer instructions precisely.
- Safe, low-corrosion glycol or enzyme gel
- Non-chloride, plumbing-safe pellets
- Commercial pipe thawing fluids
Mechanical options if heat alone doesn’t work
If heat fails to clear the blockage, mechanical methods offer targeted alternatives such as manually snaking the line, removing and inspecting the P-trap, or using a wet/dry vacuum to extract ice.
Instructions should cover step-by-step auger use and safety precautions, clear guidance and diagrams for trap removal and inspection, and techniques and tips for effective vacuum extraction.
Each option requires appropriate tools and attention to plumbing connections to prevent damage.
Manual drain snake or auger use steps and safety
Reach for a manual drain snake or hand auger when heat and hot-water methods fail to clear an icy blockage.
Insert gently, rotating to feed the cable; avoid forcing. Retract slowly to bring debris or ice fragments out. Sanitize and dry the tool after use.
- Wear gloves and eye protection.
- Use steady, controlled turns.
- Stop if resistance feels sudden.
Removing and inspecting the trap (P-trap) steps and diagrams
Begin by placing a bucket beneath the P-trap to catch water. Then loosen the slip nuts at each end with adjustable pliers or by hand if possible. The trap can be removed once the nuts are sufficiently loosened and the curved section pulled down.
Inspect for ice, debris, and cracks. Clean and reassemble with new washers if needed.
- Check seals and threads
- Clear visible blockages
- Photograph fit before reinstallation
Using a wet/dry vacuum to pull out ice method and tips
A wet/dry vacuum can mechanically extract ice and standing water from a frozen drain when heat methods prove insufficient. By creating strong suction at the trap or access point, it pulls loose ice fragments and meltwater that would otherwise refreeze farther down the line.
- Use a tight-fitting nozzle and test suction on a rag.
- Remove the trap first to expose ice.
- Work in short bursts, clearing debris and avoiding tool damage.
Steps to protect pipes and prevent future freezing
Next, attention turns to simple and practical measures that reduce the risk of repeat freezes.
Recommendations include insulating exposed pipes and drains, adopting seasonal bathroom practices like modest heating, intermittent taps, and sealing drafts.
Additionally, consider longer-term upgrades such as relocating vulnerable lines, improving wall insulation, or installing heat cables.
These steps balance immediate fixes with durable solutions to prevent future blockages.
Insulation solutions for exposed pipes and drains
Insulation is the primary defense against freezing for exposed pipes and drains, reducing heat loss and keeping water temperatures above freezing even in cold air.
Foam sleeves, fiberglass wrap, and self-sealing rubber insulation create barriers. Properly fitted and sealed materials minimize cold spots. Regular inspection and replacement prevent degradation.
- Foam pipe sleeves
- Fiberglass wrap with vapor barrier
- Self-sealing rubber insulation
Preventive winter practices for bathrooms (heat, running water, sealing)
Increase warmth and circulation in bathroom spaces to reduce the risk of frozen pipes: maintain a consistent room temperature, allow faucets to drip during extreme cold, and seal gaps around fixtures and penetrations to block cold air.
- Keep cabinet doors open to let warm air reach plumbing.
- Run a slow, steady trickle from distant taps during deep freezes.
- Use caulk and foam to close drafts around vents and pipes.
Long-term upgrades: pipe relocation, better insulation, and heating cables
After implementing short-term measures like keeping cabinets open and letting faucets drip, homeowners can reduce future freeze risk by making permanent changes to plumbing and building fabric.
- Relocate exposed pipes to interior walls or higher elevations to avoid cold zones and simplify heat access.
- Add continuous insulation and seal gaps around penetrations to maintain pipe temperatures.
- Install approved self-regulating heat cables with thermostat control for consistent freeze protection.
When to call a professional plumber
If water is leaking, there is visible pipe bulging, or a section has already burst, a professional plumber should be contacted immediately.
The homeowner should be prepared to describe symptoms, locations, and any temporary measures already taken.
The plumber will assess for damage, shut off water if needed, and explain repair or replacement options and expected costs.
Warning signs of pipe damage or burst pipes
Recognize early signs of pipe damage to prevent widespread water loss and costly repairs; visible cracking, bulging, or frost on exposed pipes often indicates imminent failure.
Additional warnings include unexplained wet spots, damp ceilings or walls, sudden drops in water pressure, hissing sounds, or ice buildup around fittings.
Immediate professional assessment is advised if leaks, warped flooring, or discoloration appear to avoid escalation.
What to tell the plumber and what to expect during a service call
When should a plumber be called, and what information will help speed diagnosis and repair? A professional is needed if thawing fails, leaks appear, or noises suggest internal damage.
Provide concise details: location, symptoms, recent DIY attempts, and water shutoff status.
Expect inspection, leak testing, targeted thawing, and repair estimate; ask about warranties and preventive recommendations.
- Exact pipe/location
- Symptoms and timing
- Actions already taken
Common mistakes to avoid when thawing a drain
The section highlights common mistakes to avoid when thawing a frozen drain.
It warns against dangerous techniques, such as open flames or unapproved electrical devices, that risk fire or injury.
It also outlines actions that can cause pipe damage or leaks, like sudden temperature changes or using inappropriate tools.
Dangerous techniques to never use
Avoid using makeshift or extreme methods to thaw a frozen drain, as they can cause serious injury, damage plumbing, or create costly water damage.
Use only safe, approved tools and techniques. Never introduce open flames, live electrical devices near water, or chemical mixtures not designed for drains.
Seek professional help if unsure. Prioritize personal safety and structural integrity when addressing frozen drains.
Actions that can cause pipe damage or leaks
After warning against risky methods, attention should shift to common mistakes that can damage pipes or cause leaks during thawing.
Applying excessive force, using metal tools, rapid temperature swings, and repeated freezing/thawing weaken joints and fittings.
Overheating localized spots, ignoring corrosion, or neglecting proper support can create stress fractures.
Always use gentle, controlled heat and inspect for compromised seals afterward.
Quick-reference troubleshooting checklist
The quick-reference checklist presents a step-by-step decision flow to select the safest, most effective thawing method based on location, accessibility, and risk factors.
Each option is paired with an estimated time and a difficulty rating to help prioritize actions.
This compact guide enables rapid assessment and consistent choices during an emergency thawing situation.
Step-by-step decision flow for choosing a thawing method
When should a homeowner escalate from simple warming to more advanced thawing techniques? The decision flow prioritizes safety, accessibility, and visible progress:
start with gentle warming; if no improvement or risk signs appear, escalate to targeted tools; if obstruction persists or pipes are concealed, seek professional assistance.
- Assess safety and visible thawing
- Try noninvasive warming next
- Escalate to tools or call a pro
Estimated time and difficulty for each method
List estimated time and difficulty for each thawing method to help homeowners choose efficiently. Presented objectively, each option lists expected duration and required skill, allowing calm, confident selection under stress.
| Method | Time & Difficulty |
|---|---|
| Hot water | 5–15 min, Low |
| Hair dryer | 10–30 min, Low |
| Heat tape | 30–60 min, Medium |
| Plumber’s torch | 10–20 min, High |
| Call plumber | 30–120 min, Low–High depending on service |
Conclusion
In freezing conditions, thawing a bathtub drain quickly and safely requires calm, deliberate actions. Like a flashlight cutting through fog, applying controlled heat, gentle mechanical methods, and proper insulation restores flow without causing damage. Prioritize safety—avoid open flames, check for leaks, and insulate exposed pipes afterward. If ice persists or pipes show stress, call a plumber. With basic tools, patience, and preventive steps, owners can resolve most clogs and reduce future freeze risk.