
How to Replace a Check Valve on a Well Pump: Step-by-Step Guide for DIY Success
To replace a faulty well pump check valve, start by disconnecting power and depressurizing the lines. Isolate the pump, then confirm the valve’s failure through pressure and one-way flow tests. Remove the old valve and install a new one, ensuring it’s oriented correctly. Use PTFE tape or an approved sealant on the fittings, tighten to specification, and support the piping. Gradually re-pressurize the system while checking for leaks and proper cycling. For further assistance, refer to troubleshooting tips, valve selection advice, and maintenance steps.
What a Check Valve Does on a Well Pump System
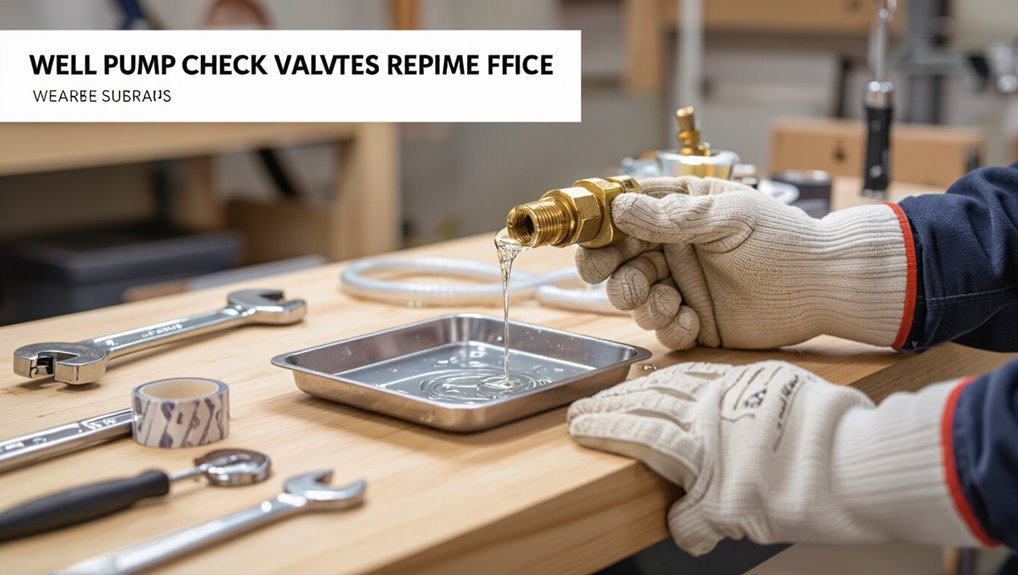
A check valve on a well pump permits water to flow upward while preventing backflow, protecting the pump and maintaining system pressure.
Common types include spring-loaded, swing, and foot valves, each offering different sealing and wear characteristics.
When a check valve fails, the pump can cycle frequently, lose prime, or exhibit reduced pressure and flow.
Purpose and function of a check valve in well systems
Stops backflow and maintains system pressure: the check valve in a well pump system permits water to flow upward from the pump while preventing reverse flow into the well, preserving prime and ensuring immediate pressure at fixtures.
It protects the pump from dry starts, reduces cycling, and limits contamination risk.
Clear understanding aids those learning how to replace check valve on well pump safely and correctly.
Common types of check valves used for well pumps
Having established how a check valve prevents backflow and preserves system pressure, the discussion now turns to the common types used on well pumps.
Typical options include spring-loaded (compact, reliable for variable flow), swing/check flap (simple, low resistance), piston/plunger (robust, good for higher pressures), and ball check (compact, tolerates debris).
Material choices—brass, stainless steel, PVC—match application and water quality.
How a failed check valve affects pump performance and pressure
When a check valve fails, the immediate consequence is uncontrolled reverse flow that undermines the pump’s ability to maintain pressure and prime.
The pump cycles more frequently, draws extra power, and may overheat. Pressure tanks lose charge, causing short cycling and pressure drops at fixtures.
Long-term effects include increased wear, reduced efficiency, higher energy costs, and premature pump failure.
How to Know If Your Check Valve Needs Replacing
Recognizing a failing check valve begins with observing key symptoms such as rapid pressure loss, pump short-cycling, or water hammer.
Simple diagnostic tests—visual inspection, pressure gauge checks, and a one-way flow test—can confirm whether the valve is leaking or stuck.
Based on severity, age, and repairability, a decision can be made to replace the valve outright or attempt a targeted repair.
Key symptoms of a bad or failing check valve
If flow issues, unusual pump cycling, or loss of prime occur, they can indicate a failing check valve that is letting water backflow into the well.
Additional symptoms include reduced pressure, sputtering faucets, water hammer, frequent motor starts, and decreased run time.
Visible leaks at fittings, air in lines, and a tank that won’t hold pressure also signal possible check valve failure requiring inspection or replacement.
Diagnostic tests to confirm check valve failure
A few simple diagnostic tests can quickly confirm whether a check valve is failing by isolating backflow, pressure loss, or mechanical sticking without immediately disassembling the pump.
Measure static and running pressure, observe pressure drop after shutoff, and listen for reverse flow or water hammer.
Inspect for pump cycling, test with a pressure gauge at the tank, and use a one-way flow indicator if available.
When to replace versus repair
After confirming a malfunction with pressure and flow tests, the next decision is whether the check valve can be repaired or must be replaced.
Assess physical damage, corrosion, seized components, and persistent leakage despite cleaning.
Repair is viable for minor debris or worn seals; replacement is recommended for pitting, significant corrosion, repeated failures, or when parts are unavailable.
Prioritize long-term reliability and safety.
Tools, Materials, and Safety Equipment Needed
A concise list of the tools and materials required for replacing a check valve on a well pump sets the foundation for a safe, efficient job.
It should cover hand and power tools, common parts and how to choose a compatible replacement check valve, and any fittings or sealants likely needed.
The section must also spell out essential safety precautions, including electrical and water shutoff procedures before work begins.
Required tools for replacing a check valve
Several specific tools and safety items are essential before attempting to replace a well pump check valve.
Necessary hand tools, pipe wrenches sized to the plumbing, and Teflon tape or pipe dope are required. Protective gear guarantees safety.
- Adjustable and pipe wrenches
- Screwdrivers, pliers, and utility knife
- Safety glasses, gloves, and work boots
Parts and replacement check valve selection guide
With the wrenches, screwdrivers, and protective gear assembled, attention turns to the parts themselves and choosing the correct replacement check valve.
Essential materials include the new check valve (match pipe size, thread type, and pressure rating), thread sealant or PTFE tape, replacement fittings, pipe cutters, and spare washers.
Confirm material compatibility (brass, stainless, PVC) with well water chemistry and pump specifications.
Safety precautions and electrical/water shutoff steps
Before beginning any work, verify power to the well pump is fully disconnected and water lines are depressurized to prevent electric shock and sudden discharge; this includes turning off the pump circuit at the breaker or motor disconnect, locking/tagging the breaker if possible, and opening a downstream faucet or pressure-relief valve to bleed remaining pressure.
Wear insulated gloves, safety glasses, and use a voltage tester. Confirm zero volts and close main water shutoff.
Step-by-Step Guide to Replacing a Check Valve on a Well Pump
The following steps guide the technician through replacing a well pump check valve, beginning with preparing the site and shutting down the system.
The procedure covers depressurizing and isolating the pump, safely removing the old valve, and inspecting related components such as the pressure tank, fittings, and piping.
It concludes with correct installation of the new check valve, emphasizing proper orientation, secure fittings, and appropriate thread sealant.
Preparing the site and shutting down the system
Begin by securing the area around the well pump to guarantee safe, unobstructed access and to prevent accidental activation.
The technician verifies electrical power is off at the breaker and locks out controls.
Clear debris, position tools and a containment tray for spills, and place warning signage.
Confirm personal protective equipment is worn and that a helper is nearby before proceeding.
Depressurizing the plumbing and isolating the pump
Shut down and drain the system to remove stored pressure and prevent water flow while the check valve is replaced.
Close the main shutoff and any branch valves, open a faucet or drain to relieve residual pressure, and verify gauge reads zero.
Lock or tag the pump breaker.
Confirm isolation by attempting to start the pump and ensuring no water emerges before proceeding.
Removing the old check valve safely
With pressure relieved and the pump electrically isolated, attention shifts to accessing and removing the worn check valve.
The technician wears gloves and eye protection, places a bucket beneath the joint, and loosens fittings with appropriate wrenches.
Corroded connections receive penetrating oil and steady force; one hand secures the pipe while the other turns fittings to prevent twisting.
Extract the valve carefully, containing residual water.
Inspecting nearby components (pressure tank, fittings, piping)
After removing the old check valve, inspect the pressure tank, fittings, and piping for signs of corrosion, leaks, or mechanical damage before installing the replacement.
Check tank pressure and bladder condition, examine threaded and soldered joints, look for hairline cracks or mineral buildup, and guarantee pipe supports are secure.
Note any parts requiring repair or replacement to prevent future failures.
Installing the new check valve correctly (orientation, fittings, thread sealant)
Begin by orienting the replacement check valve so its flow arrow points toward the house and away from the pump; incorrect orientation will prevent proper backflow protection.
Use compatible fittings, avoid mixing dissimilar metals, and guarantee threads match.
Apply PTFE tape or approved thread sealant on male threads only, tighten to manufacturer torque, and support adjacent piping to prevent stress on the valve.
Re-pressurizing and restarting the system
Once the new check valve is secured and fittings sealed, the system can be re-pressurized and brought back online.
Slowly open the main shutoff or pump isolation valve to allow gradual pressure build.
Monitor the pressure gauge for steady rise without spikes.
Restart the pump per manufacturer instructions.
Observe for normal cycling and listen for unusual noises before leaving the system unattended.
Post-installation checks for leaks and proper operation
Inspect the entire assembly for leaks and correct operation immediately after pressurization.
Observe fittings, joints, and the check valve for drips or moisture, listening for air or water noise.
Verify steady pressure on the gauge, proper pump cycling, and one-way flow at outlets.
Tighten or reseal any leak sources, recheck electrical connections, and monitor the system for several cycles before concluding the job.
Troubleshooting After Replacement
After replacing the check valve, the operator should watch for common immediate problems such as leaks, loss of prime, or rapid cycling and apply simple fixes like tightening fittings or re-priming the pump.
They should verify proper pressure tank operation and pump cycling by observing steady-state pressure, noting cut-in/cut-out points, and checking for air charge in the tank.
If problems persist or diagnostic checks are inconclusive, a licensed well technician should be contacted.
Common immediate problems and fixes
Start by verifying basic system operation: the pump should prime, the pressure tank should pressurize, and faucets should deliver steady flow without sputtering.
If leaking appears at joints, tighten or reseal connections. Persistent backflow indicates a faulty check valve—replace immediately.
Air in lines suggests trapped air; bleed low points. No flow may point to clogged intake or failed pump motor—inspect and clear or call a pro.
How to verify proper pressure tank operation and pump cycling
With the check valve replaced and basic flow restored, the next step is verification of the pressure tank and pump cycling to confirm the system holds pressure and engages at the correct set points.
Observe pressure gauge during several cycles, note cut-in and cut-out values, confirm they match the switch settings.
Listen for short cycling, check tank air charge with pump off and drained, adjust if necessary.
When to call a professional
When should a professional be called if problems persist?
If leaks continue, pressure remains unstable, pump cycles rapidly, or no water flow occurs after a correct check valve replacement, a licensed well technician should be contacted.
Complex issues like damaged pump components, collapsed pipes, electrical faults, or contamination risks require diagnostic tools and experience beyond typical DIY skills to guarantee safe, code-compliant repairs.
Choosing the Right Replacement Check Valve
Selection of a replacement check valve should begin with material choice—brass and stainless offer durability and corrosion resistance for deep or metal-rich water, while PVC provides cost-effectiveness and chemical resistance for non-corrosive systems.
Next, the valve must match the pipe size, pressure rating, and flow requirements of the pump to prevent cavitation, pressure loss, or premature failure.
Finally, the installer should choose a valve design rated for the specific pump type, since submersible pumps often require inline spring or flapper checks while jet pumps commonly use threaded or swing-style valves.
Material options (brass, stainless steel, PVC) and pros/cons
Choosing the right check valve material depends on water chemistry, pressure conditions, and budget constraints. Brass: durable, good for potable water; can corrode with aggressive water. Stainless steel: excellent corrosion resistance, costly. PVC: inexpensive and corrosion-proof for low-pressure systems, less UV and temperature tolerant.
| Material | Key pros/cons |
|---|---|
| Brass | Durable; may corrode |
| Stainless steel | Corrosion-resistant; expensive |
| PVC | Cheap; limited temperature/pressure limits |
Size, pressure rating, and flow considerations
Proper sizing and pressure ratings guarantee a replacement check valve will protect the pump and maintain system performance. The valve’s diameter must match pipe size and its pressure rating must exceed the well’s maximum operating and surge pressures.
Flow considerations include minimizing head loss, matching Cv to pump output, and ensuring the cracking pressure is low enough to prevent wasted cycling yet high enough to stop backflow.
Compatible valve designs for submersible vs. jet pumps
After confirming size, pressure rating, and flow needs, the next consideration is matching valve design to pump type: submersible and jet pumps impose different mechanical and installation demands.
Submersible systems favor in-line, corrosion-resistant check valves rated for continuous immersion and minimal cavitation.
Jet pumps often use larger, accessible swing or spring checks compatible with aboveground piping and higher vibration.
Select materials and cracking pressures accordingly.
Cost, Time, and Difficulty Estimates
Typical parts and basic tools for a check valve replacement usually cost between $20 and $150 depending on valve type and quality, while specialized fittings or replacement piping can raise the total.
A competent DIYer can generally complete the job in one to three hours, assuming the system drains and fittings are accessible. Moderate plumbing skill is required; common pitfalls include improper sealing, incorrect valve orientation, and failing to depressurize the line before work.
Typical cost range for parts and tools
A basic check valve replacement for a well pump generally costs between $15 and $150 for parts, while necessary tools or specialty fittings can add another $0–$100 depending on what the homeowner already owns.
Typical check valves run $15–$60; compression adapters or brass fittings $10–$40; pipe dope, Teflon, clamps, and small supplies $5–$20; specialty valves or unions can reach $100+.
Estimated time to complete the job for DIYers
Time estimates for replacing a check valve on a well pump vary with pump accessibility, piping complexity, and the homeowner’s experience level.
Typically, a straightforward replacement takes 1–2 hours including shutdown and testing.
Moderately complex setups with confined space or extra fittings may require 2–4 hours.
Allow extra time for troubleshooting, part retrieval, and safety precautions to avoid rushed work.
Skill level required and common pitfalls
Generally, homeowners with basic plumbing skills and the right tools can replace a check valve on a well pump, but the job’s difficulty, cost, and time vary with system type, access, and experience.
Intermediate skill prevents leaks, improper orientation, and damage to fittings.
Common pitfalls include failing to depressurize, misthreading, using wrong valve size or material, and inadequate sealing, which increase repair time and cost.
Maintenance Tips to Extend Check Valve Life
A regular inspection schedule helps identify wear, mineral buildup, and seal deterioration before they cause failure.
Seasonal and environmental factors—such as freezing temperatures, heavy sediment, or corrosive groundwater—should be checked and mitigated during routine visits.
Preventive measures like flushing, replacing worn parts, and installing strainers or insulation can greatly extend check valve service life.
Routine inspection schedule and what to look for
When establishing a routine inspection schedule, homeowners should balance frequency with seasonal demands and pump usage to catch wear before it causes failure.
Inspections every 3–6 months are typical; check for leaks, pressure drops, and corrosion. Record findings and replace parts showing deterioration promptly.
- Visual leaks or corrosion
- Unusual pressure fluctuation
- Debris or seal wear
Seasonal and environmental considerations
Because temperature swings, groundwater chemistry, and seasonal flow patterns all affect check valve performance, homeowners should tailor maintenance to local conditions.
Inspect before freeze/thaw cycles, after heavy rains, and during droughts.
Monitor for mineral buildup, corrosion, and sediment accumulation tied to runoff or low flow.
Adjust inspection frequency seasonally and document findings to detect trends related to environmental stressors.
Preventive measures to avoid premature failure
Implement routine preventive care to reduce wear and extend the service life of a well pump check valve.
Inspect periodically for leaks, corrosion, and debris; clean or replace screens and strainers; verify pressure settings and eliminate water hammer with appropriate devices; lubricate moving parts if specified by manufacturer; use compatible materials and water treatment to limit corrosive wear; document maintenance and schedule timely replacements.
Related Repairs and Upgrades to Consider
The homeowner should inspect and service the pressure tank and switch while the system is accessible to confirm proper pressure settings and diaphragm condition.
Considering an upgrade to a quieter or more durable valve design can reduce noise and extend service life.
Any corroded or worn plumbing and fittings encountered during the job should be replaced to prevent future leaks and simplify maintenance.
Inspecting and servicing the pressure tank and switch
Inspecting and servicing the pressure tank and switch helps guarantee reliable system pressure and prevents frequent cycling that shortens pump life.
Technicians should check tank air charge, bladder integrity, and overall tank corrosion. The pressure switch contacts and settings require cleaning, adjustment, and replacement if pitted.
Proper tank precharge and correct cut-in/cut-out pressures restore efficient pump operation and extend component lifespan.
Upgrading to a quieter or more durable valve design
After verifying tank precharge and switch operation, attention can turn to the check valve itself as a candidate for quieter or longer-lasting performance.
Consider spring-loaded, stainless steel, or hydraulic-seated designs to reduce water hammer and wear. Match pressure ratings and pipe size, check flow direction, and prefer corrosion-resistant materials.
Installation often requires minimal change to existing fittings but improves reliability and noise control.
When to replace additional plumbing or fittings during the job
Often several nearby fittings and short pipe runs show wear or incompatibility when a check valve is replaced, so they should be assessed for concurrent replacement to avoid repeat work.
Inspect for corrosion, threaded leaks, brittle PVC, mismatched materials, and failing unions.
Replace damaged sections, upgrade to compatible materials, and consider new clamps or dielectric unions to guarantee reliable seals and simplify future maintenance.
Conclusion
Like a quiet gatekeeper at the heart of the well, the check valve keeps water moving forward and trouble at bay. With the right tools, careful steps, and routine care, a homeowner can restore that steady rhythm—cutting off backflow and saving money. When uncertainty rises like a stubborn tide, consult a pro. Regular inspections and timely replacements will keep the pump singing and the household flowing smoothly for years to come.
