How to Tell If Your Pool Filter Is Working: 10 Signs and Quick Fixes
To determine if your pool filter is functioning properly, look for clear water, consistent pump noise, normal pressure gauge readings, strong return jets, and minimal surface scum. If you notice weak returns, cloudy water, fluctuating pressure, air in the lines, or debris being recirculated, these are warning signs that your filter may not be working effectively. Quick fixes include cleaning skimmer baskets, priming the pump, backwashing or replacing filter media, and checking seals. For detailed diagnostics and solutions, continue reading.
How to Know If Your Pool Filter Is Working Right Now
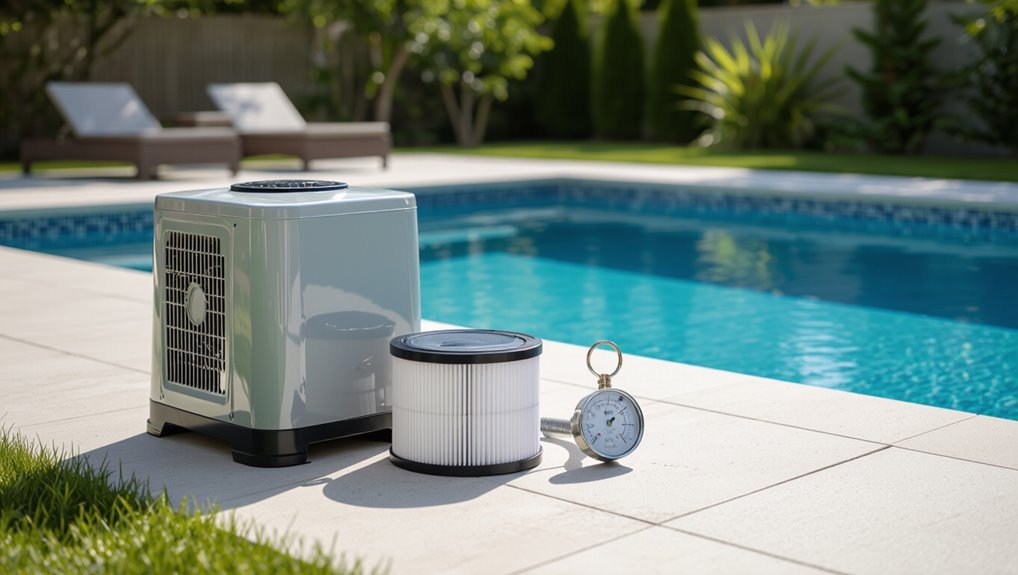
A quick checklist helps determine immediate filter performance: check clarity of return water, gauge pressure, and pump flow.
A properly functioning filter will produce steady, clear returns with a consistent, low humming from the pump and no unusual vibrations or leaks.
If pressure is excessively high or abnormal noises occur, the system should be shut down before further inspection.
Quick checklist to assess immediate filter performance
One quick way to gauge immediate filter performance is to run a short, focused inspection covering water clarity, pump pressure, flow, and audible cues.
This checklist helps determine how to tell if pool filter is working without delay.
- Water clarity: visible debris and turbidity.
- Pressure gauge: normal vs. high reading.
- Flow rate: skimmer and return strength.
- Sounds: unusual grinding or gurgling.
What a properly functioning filter looks and sounds like
Clear, steady water and a quiet, rhythmic hum from the pump indicate a properly functioning pool filter: return jets push consistent, debris-free streams, the water surface shows minimal scum or floating particles, and the pressure gauge sits within the manufacturer’s normal range without sudden spikes.
Skimmer and pump baskets remain mostly clear, flow feels even at returns, and no unusual vibrations, gurgles, or odors are present.
When to shut down the system before further inspection
If the pump’s steady hum or the return flow shows irregularities, the system should be powered down before any hands-on inspection.
Shut off electricity at the breaker, close valves to isolate the pump, and wait for moving parts to stop.
Drain trapped pressure via relief valves, wear gloves and eye protection, and only proceed once the system is fully depressurized and locked out.
10 Common Signs Your Pool Filter Is Struggling
A struggling pool filter often reveals itself through changes in water flow and clarity.
Signs include weak return jets, cloudy or milky water despite proper treatment, sudden or persistently abnormal pump pressure, and air in the lines.
Short filter cycles or the need for constant backwashing also indicate the system is not functioning efficiently.
Low water circulation or weak return jets
Noticeable reduction in water flow from the return jets often signals that the filtration system is underperforming.
Reduced circulation can allow debris accumulation, temperature stratification, and uneven chemical distribution.
Causes include clogged skimmer or pump basket, dirty filter media, partially closed valves, or air leaks.
Inspect equipment, clear obstructions, verify valves are open, and prime the pump to restore proper flow before more serious issues develop.
Cloudy or milky water after adequate treatment
Cloudy or milky water persisting after proper chemical treatment indicates the filter is not removing fine particulates or dissolved contaminants as planned.
This suggests media compaction, clogged cartridges, exhausted diatomaceous earth, or bypassing due to damaged seals.
The pool operator should inspect media condition, backwash or clean cartridges, verify correct DE addition, and check for leaks or channeling to restore clarity.
Rapidly rising pump pressure or frequent pressure spikes
When cloudiness persists despite correct chemistry, mechanical resistance within the filter is often to blame; another common indicator of this is a rapidly rising pump pressure or frequent pressure spikes, which signal that flow is being restricted.
Sudden pressure increases usually result from clogged cartridges, dirty DE grids, or compressed sand beds. Addressing buildup, backwashing, or filter cleaning typically restores stable pressure and proper circulation.
Constantly low pump pressure or air in the lines
Constantly low pump pressure or the presence of air in the lines indicates impaired suction or an air leak that undermines filtration efficiency.
Causes include cracked pump lid O-rings, loose plumbing unions, hair and lint buildup in skimmer baskets, or a failing pump.
Consequences are poor circulation and increased debris.
Inspect seals, tighten fittings, clear baskets, and prime the pump; replace damaged components promptly.
Short filter cycles or need for constant backwashing
If the filter requires backwashing far more often than expected or cycles through dirty-to-clean quickly, it signals trapped debris, a clogged filter media, or a broken internal component reducing filtration capacity.
Immediate inspection should check pressure gauge trends, inspect grids/cartridge for tears and compaction, and verify correct valve settings.
Repair or replace damaged media, clean thoroughly, and confirm pump flow to restore normal cycle length.
Visible debris returning to the pool
Seeing leaves, bugs, or fine particles circulate back into the pool signals that the filter is not capturing contaminants effectively.
Persistent return of visible debris indicates clogged media, damaged cartridges, broken laterals, or a malfunctioning skimmer/basket.
Operators should inspect and clean baskets, examine filter elements for tears or buildup, check pump basket and suction, and replace compromised components to restore proper filtration.
Algae growth despite normal chlorine levels
Noticeable algae buildup despite maintained chlorine levels often points to filtration problems rather than sanitizer failure.
Poor circulation, clogged filter media, or short-cycling allow algae to evade removal. Inspect and clean cartridges, DE grids, or sand; backwash or replace media as needed.
Verify run times and skimmer function to restore turnover.
Persistent blooms may require shock treatment after filtration corrections.
Unusual noises from the pump or filter tank
A sudden clank, grinding, or high-pitched squeal from the pump or filter tank often signals a mechanical issue that requires prompt attention.
Such noises can indicate worn bearings, a failing motor, loose impeller, or debris caught in the housing.
Immediate inspection prevents further damage; tighten fittings, clear obstructions, and replace damaged parts.
If unsure, consult a qualified technician for diagnosis and repair.
Chemical imbalance that won’t stabilize
Why won’t chemical levels settle despite repeated adjustments?
Persistent swings in chlorine, pH, or alkalinity often indicate inadequate filtration circulation or organic load bypassing the system.
Fine debris, algae, or stabilizer imbalance can consume chemicals faster than dosing compensates.
Testing, shock treatment, backwashing or cleaning cartridges, and verifying turnover rate help identify and correct causes so readings stabilize reliably.
Leaks, cracks, or damaged filter components
If chemical fluctuations persist despite proper dosing and circulation checks, physical damage to the filter assembly may be the root cause.
Visible leaks, hairline cracks in the tank, warped O-rings, or broken pressure gauges compromise filtration and allow debris or air into the system.
Prompt inspection and replacement of damaged components restore function; continuing operation risks pump damage and inefficient water treatment.
How to Diagnose the Cause for Each Sign
The next step is to match each warning sign to its underlying cause by systematically checking circulation components, pressure readings, and potential air leaks.
Attention then turns to the specific filter media—sand, DE, or cartridge—to spot characteristic wear or blockage and to separate mechanical failures from biological issues.
Clear, step-by-step checks for skimmers, pumps, lines, gauges, and media will guide accurate diagnosis and targeted repairs.
Diagnosing circulation issues: skimmer, pump, and lines
Diagnosing circulation issues begins with a systematic inspection of the skimmer, pump, and plumbing to identify where flow is restricted or interrupted.
Check skimmer basket for debris, weir operation, and suction.
Inspect pump strainer, impeller noise, and seal leaks.
Examine visible plumbing for air entry, cracks, or collapsed sections.
Verify return fittings for flow and obstructions.
Interpreting pressure gauge readings step-by-step
Following inspection of skimmer, pump, and plumbing, attention shifts to the filter’s pressure gauge as a direct indicator of system performance.
Readings are compared to the normal operating range noted after a clean filter. A sudden high reading suggests clogging or restricted flow; a low reading indicates poor suction or closed valves.
Note changes over time to pinpoint progressive issues.
Identifying air leaks and where they originate
How can one tell where air is entering a pool circulation system? Visual cues include steady bubbles at returns, air in pump strainer basket, and sputtering flow.
Inspect visible connections: pump lid O‑ring, suction-side unions, skimmer lines, and hairpin bends.
Tighten clamps, replace cracked fittings, and pressure-test plumbing to isolate leaks.
Record location, repeat after repairs to confirm resolution.
Examining filter media: sand, DE, and cartridge symptoms
After tracing and repairing air leaks in the suction side, attention shifts to the filter media, where specific symptoms point to sand, DE, or cartridge issues.
Sand filter cloudiness, channeling, or gritty backwash indicates degraded sand.
DE filter loss of clarity, visible powder in the pool, or rising pressure suggests ruptured grids or depleted DE.
Cartridge clogs, torn pleats, or persistent high pressure signal cleaning or replacement.
Distinguishing biological vs. mechanical filtration failures
When a pool exhibits cloudy water, algae growth, or recurring chlorination issues, determining whether the root cause is biological (organisms and chemical imbalance) or mechanical (filtration or flow problems) is essential.
Testing residual chlorine, pH, and combined chlorine diagnoses biological issues, while inspecting pump pressure, flow rate, and media condition reveals mechanical faults.
Match treatment: shock/algaecide and balance chemicals for biological; clean/repair or replace filter components for mechanical.
Quick Fixes You Can Do Today
A brief set of practical steps can often restore filter performance and clear common issues without professional help.
The following actions focus on circulation, routine maintenance, small air leaks, and short-term water-clearing measures that someone can apply immediately. Each item targets a specific, common fault and can be completed with basic tools or pool supplies.
- Prime the pump and clear skimmer baskets to restore circulation.
- Backwash and rinse sand/DE systems as directed to remove trapped debris.
- Clean or replace cartridge filters and inspect lid O-rings, unions, and valves for minor air leaks.
- Use a flocculant or filter aid as a temporary measure to clear cloudy water.
Restoring circulation: priming the pump and clearing skimmer baskets
Check the pump’s suction and inspect skimmer baskets to restore circulation quickly.
Turn off power, remove debris from baskets and hair/debris traps, then replace lids securely.
Prime the pump by filling the strainer with water, resealing, and restarting to remove airlocks.
Monitor pressure and flow; repeat priming if sputtering continues.
Clear visible blockages in plumbing or skimmer throats as needed.
Backwashing and rinse procedures for sand/DE systems
Several simple steps restore filtration efficiency quickly for sand and DE systems: shut off the pump, set the multiport valve to “Backwash,” restart the pump until the sight glass shows clear water, then stop and set the valve to “Rinse” for 15–30 seconds before returning to “Filter.”
For DE systems, add fresh DE powder per manufacturer instructions after rinsing.
Monitor pressure gauge and repeat when pressure rises 8–10 psi.
Cleaning or replacing cartridge filters
Inspecting cartridge filters begins with confirming the pump is off and the system depressurized.
Then, remove the cartridge for a visual check of accumulated debris, tears, or calcified buildup.
Rinse pleats with a hose, use a filter-cleaning solution for oil or scale, and allow to dry fully before reinstalling.
Replace cartridges showing permanent damage or reduced flow despite cleaning to restore filtration efficiency.
Addressing minor air leaks (lid O-ring, unions, valves)
When small air leaks appear in the pump lid O-ring, unions, or valves, they often manifest as intermittent sputtering at the skimmer or a loss of prime and can usually be fixed without calling a technician.
Inspect O-rings for cracks, lubricate with silicone grease, tighten unions, and replace worn valve seals.
Re-prime the pump and test for steady flow; repeat if necessary.
Temporary solutions for cloudy water (flocculant, filter aid)
After fixing small air leaks and confirming steady pump flow, a homeowner can try quick, temporary measures to clear mildly cloudy water while longer-term solutions are arranged.
Applying a flocculant gathers fine particles for vacuuming to waste; a filter aid (clarifier) helps the filter trap smaller debris.
Use correct dosages, run the pump, and follow manufacturer instructions to avoid overuse or chemical imbalance.
When to Perform Deeper Maintenance or Repairs
When routine troubleshooting fails or recurring issues appear, the owner should consider deeper maintenance such as scheduled replacement of sand, DE, or cartridge elements and inspection for worn pump parts.
Attention should be given to malfunctioning pressure gauges, sticky multiport valves, and degraded O-rings, which often require repair or replacement.
Complex problems—persistent leaks, motor failure, or evidence of internal damage—warrant hiring a qualified technician.
Replacing filter media: schedules and signs for sand, DE, cartridge
Although regular cleaning keeps most filters functioning, periodic replacement of the filter media is essential to restore full efficiency and prevent recurring problems.
Sand typically needs replacement every 3–5 years when cloudiness persists or pressure rises despite backwashing.
DE grids require recharging or replacement when clogs or tears appear.
Cartridges should be replaced every 1–3 years if fibers split, deform, or cleaning no longer restores flow.
Rebuilding or replacing worn pump components
Replacing filter media restores filtration, but persistent flow issues, unusual noises, or leaks often indicate wear in the pump itself that filter changes cannot fix.
Technicians should inspect impellers, shafts, seals, and bearings for corrosion, scoring, or wobble.
Rebuilding a pump can restore performance; replacement is warranted when parts are obsolete, damage is extensive, or repair costs approach new-unit pricing.
Follow manufacturer specs.
Repairing or replacing pressure gauges, multiport valves, and O-rings
Inspect pressure gauges, multiport valves, and O‑rings promptly whenever persistent pressure anomalies, slow flow, leaks, or difficulty switching valve positions occur, since these small components often signal deeper system problems and can compromise filtration efficiency if left unaddressed.
Replace cracked gauges, sticky valve handles, and flattened or perished O‑rings.
Verify correct gauge calibration, lubricate compatible O‑rings, and test for leaks after reassembly.
Hiring a pro: problems that need a technician
Call a professional when signs point beyond routine upkeep: persistent low or erratic pressure that survives basic troubleshooting, unexplained cloudy water after correct chemical balancing, leaks at hard-to-access plumbing or the pump seal, electrical faults in the timer, motor, or control systems, and repeated valve or filter failures despite part replacements.
A technician assesses diagnostics, performs pressure and flow tests, locates leaks, repairs motors, and guarantees safe electrical fixes.
Preventive Maintenance Routine to Keep Filters Working
A concise preventive maintenance routine keeps a pool filter efficient and extends its service life.
It should cover weekly, monthly, and seasonal checklists; target water chemistry levels that minimize particulate and organic load; and specify proper backwashing and cartridge cleaning techniques.
Seasonal tasks must also include clear winterizing and startup procedures to protect the filter from freeze damage and contamination.
Weekly, monthly, and seasonal maintenance checklist
One clear routine separates reactive fixes from proactive care: a concise weekly, monthly, and seasonal checklist focused on filter performance and system health.
- Inspect skimmer and pump baskets; clear debris weekly.
- Backwash or clean cartridge per pressure rise; monthly check.
- Inspect hoses, O-rings, and seals; replace worn parts seasonally.
- Service multiport valve and lubricate fittings; schedule professional tune-up before heavy use.
Water chemistry targets that reduce filter load
Following the maintenance checklist, attention shifts to water chemistry targets that directly reduce the amount of particulate and organic load the filter must handle.
Maintain stable pH (7.2–7.6), proper alkalinity (80–120 ppm) and calcium hardness (200–400 ppm).
Keep free chlorine or alternative sanitizer at recommended levels, shock regularly to break down organics, and control phosphates and combined chlorine to minimize biofilm and debris reaching the filter.
Best practices for backwashing and cartridge cleaning
Backwash and cartridge cleaning routines prevent rapid pressure buildup and preserve flow efficiency, so they should be scheduled based on measured pressure differentials and visible debris rather than arbitrary intervals.
Inspect gauges weekly, backwash until discharge runs clear, and rotate valves per manufacturer guidance.
For cartridges, rinse with low-pressure hose, soak in filter cleaner periodically, inspect endcaps and pleats, and replace worn elements promptly.
Winterizing and startup procedures to protect the filter
Every winterization and startup should begin with a clear, checklist-driven plan that protects the filter from freeze damage, debris intrusion, and chemical corrosion.
Close valves, drain housings, and remove cartridges or media as specified. Store parts dry and insulated.
Treat water chemistry before closing and after opening.
Inspect seals, O-rings, and pressure gauges; replace compromised components to guarantee reliable filtration throughout seasonal changes.
Choosing the Right Filter and Upgrades to Improve Performance
Choosing the right filter and targeted upgrades can markedly improve water clarity and system efficiency. A concise comparison of sand, DE, and cartridge filters, guidance on when to increase filter size or add a secondary unit, and the advantages of booster pumps, variable-speed pumps, and filter aids frame practical decisions for owners. The table below summarizes key trade-offs and typical benefits to prompt further consideration.
| Topic | Quick comparison/benefit |
|---|---|
| Sand vs DE vs Cartridge | Particle removal, maintenance frequency, cost |
| When to upgrade size | Flow rate limits, frequent cloudiness, larger bather load |
| Adding a secondary filter | Redundancy, finer polishing, extended run times |
| Booster pumps | Targeted pressure for cleaners, improved circulation |
| Variable-speed & filter aids | Energy savings, finer capture, prolonged media life |
Comparison of sand vs. DE vs. cartridge filters
When evaluating pool filtration options, owners should weigh how sand, diatomaceous earth (DE), and cartridge systems differ in filtration fineness, maintenance demands, cost, and flow resistance. Each type balances particle capture, backwash or cleaning frequency, and long-term expense; selection depends on clarity goals and labor tolerance.
| Filter Type | Key Trait |
|---|---|
| Sand | Low maintenance |
| DE | Finest filtration |
| Cartridge | Easy cleaning |
When to upgrade filter size or add a secondary filter
Why consider upsizing a filter or adding a secondary unit? Persistent cloudy water, frequent high pressure, or inability to maintain turnover indicate undersized filtration.
Upsizing increases flow capacity and dirt-holding; adding a secondary filter (e.g., a fine cartridge or polishing filter) improves particle removal without overworking the primary.
Evaluate pump compatibility, plumbing, and budget; consult a professional to match capacity and plumbing constraints.
Benefits of booster pumps, variable-speed pumps, and filter aids
Several targeted upgrades can markedly boost a pool’s filtration effectiveness: booster pumps focus circulation through secondary or fine filters, variable-speed pumps optimize flow and energy use across different filtration needs, and filter aids enhance particle capture within existing media.
Together they improve clarity, reduce runtime and energy costs, lower strain on primary equipment, and extend media life; selection depends on pool size, contaminant load, and plumbing compatibility.
Common Mistakes That Shorten Filter Life and How to Avoid Them
Frequent chemical shocks without following with a filter cleaning can quickly degrade cartridges and DE grids. Therefore, users should coordinate shock treatments with maintenance.
Neglecting pressure changes, skipping scheduled backwashes, or running the pump for inappropriate durations stresses the system and shortens component life.
Installing incompatible media or incorrect DE amounts further impairs performance, making correct parts and measured dosing essential.
Overusing chemical shocks without cleaning the filter
Overreliance on chemical shocks without first cleaning the pool filter accelerates wear and reduces effectiveness, because sediments and organic matter trapped in a dirty filter bind shock byproducts and prevent proper circulation.
Residue buildup corrodes media and clogs pores, forcing higher chemical doses and stressing pump components.
Clean or backwash before shocking, use measured doses, and inspect media regularly to extend filter life and maintain water clarity.
Ignoring pressure changes or skipping regular backwash
After stressing the filter with repeated chemical shocks, another common mistake is ignoring pressure changes or skipping scheduled backwashes—both symptoms and causes of declining performance.
Neglecting pressure rises allows debris buildup, strains the pump, and reduces flow. Skipping backwash compacts trapped particles, increasing wear and fostering bacterial growth.
Regular pressure monitoring and timely backwashes preserve efficiency and extend filter lifespan.
Using incompatible filter media or incorrect DE amounts
Using the wrong filter media or adding incorrect amounts of diatomaceous earth (DE) undermines filtration efficiency and accelerates wear.
Mismatched sand, cartridge, or DE types reduce particle capture and strain components. Too little DE allows fine debris through; too much clogs plates and raises pressure.
Owners should follow manufacturer specifications, replace media with compatible options, and measure DE precisely to preserve performance and longevity.
Running the pump too little or too long
Selecting proper media and dosing DE correctly protects the filter’s internals, but pump run time is an equally important factor that owners often mismanage.
Running the pump too little reduces circulation, causing debris buildup, algae, and chemical imbalance. Running it excessively accelerates wear and wastes energy.
Establish manufacturer-recommended daily runtime, adjust seasonally, and use a timer to optimize filtration without shortening equipment life.
Troubleshooting Scenarios and Stepwise Solutions
The section presents common troubleshooting scenarios paired with clear, stepwise remedies to restore filter performance.
It covers high pressure with poor flow, persistent cloudiness after adequate filtration, air in the pump with fluctuating pressure, and rapid sand compaction or channeling.
Each scenario is followed by concise diagnostic checks and corrective actions to guide safe, effective repairs.
Scenario: High pressure but poor flow step-by-step resolution
What causes high pressure on the filter gauge while pool return flow remains weak? A clogged filter element, blocked skimmer or pump basket, restricted return lines, or a failing multiport valve can create high gauge readings with poor flow.
Stepwise resolution:
- Shut off pump.
- Backwash or clean filter.
- Clear baskets and skimmers.
- Inspect valves and lines.
- Restart and monitor pressure and flow; repeat as needed.
Scenario: Persistent cloudiness after proper filtration
Why does a pool remain cloudy even when the pump and filter appear to be running correctly?
Fine particles, algae spores, or dissolved organics can pass a functioning filter, or poor circulation creates dead zones.
Test and balance chemistry, shock if necessary, add a clarifier or flocculant, brush and vacuum, clean or backwash the filter, and inspect skimmers and returns for restricted flow.
Scenario: Air in pump and fluctuating pressure readings
How did air enter the pump, and how does it cause erratic pressure?
Air intrusion usually stems from loose unions, cracked lids, damaged O-rings, or low water level.
Trapped air causes cavitation and pressure swings on the gauge.
Inspect seals, tighten fittings, replace worn O-rings, and guarantee proper water priming.
Recheck for steady pressure and repeat service if bubbling resumes.
Scenario: Rapid sand compaction or channeling in sand filters
Rapid sand compaction or channeling occurs when the filter bed loses uniformity, causing water to carve preferential pathways or the sand to settle into dense zones that reduce filtration efficiency and raise pressure.
The technician inspects for uneven flow, high differential pressure, or clear discharge.
Corrective steps: backwash thoroughly, rake or rotate the media, replace aged sand, and guarantee proper flow rates and distributor integrity to restore performance.
Tools, Parts, and Supplies to Keep on Hand
A basic kit of diagnostic tools—such as a pressure gauge, flow meter, and pool vacuum—helps confirm whether the filter is operating within normal parameters.
Keeping common replacement parts on hand, including O-rings, clamps, and appropriate media (DE or cartridge elements), reduces downtime during repairs.
A small supply of recommended chemicals and filter aids guarantees proper media performance and water balance between service intervals.
Essential diagnostic tools (pressure gauge, flow meter, vacuum)
Several basic diagnostic tools reliably indicate a pool filter’s performance: a pressure gauge to show head pressure changes, a flow meter to quantify circulation rate, and a vacuum to test suction and debris removal.
Regular readings identify clogs, leaks, or pump issues. Calibrated meters, a reliable hand vacuum or pool cover vacuum, and basic hoses enable quick troubleshooting and document trends for maintenance.
Replacement parts to stock (O-rings, clamps, DE, cartridges)
After using pressure and flow readings to pinpoint issues, having common replacement parts on hand prevents minor problems from becoming pool-stopping repairs.
Stock spare O-rings and lid clamps for leaks, extra DE or a box of cartridges for media replacement, and a basic seal kit.
Include hose clamps and a multi-size screwdriver set to enable quick, reliable field repairs.
Recommended chemicals and filter aids
Keeping a small, well-chosen inventory of pool chemicals and filter aids guarantees prompt treatment of water issues and smoother filter performance.
Recommended items include chlorine or shock, pH increaser and decreaser, alkalinity buffers, cyanuric acid, and clarifiers.
Algaecide, enzyme treatments, and DE powder or filter cleaner extend longevity.
Store labeled containers, measure precisely, and follow manufacturer dosing to protect equipment and swimmers.
Signs That Mean It’s Time to Replace the Entire Filter System
When a filter reaches the end of its usable life, experiences chronic failures, or requires repairs that approach the cost of a new system, replacement becomes the practical choice.
Owners of growing or heavily used pools may opt for an upgraded unit sized for higher flow and load capacities. Changes in environmental standards or local regulations can also necessitate switching to a different filter type.
Age, chronic failures, and repair cost vs. replacement math
If a filter is approaching the end of its expected lifespan, recurring breakdowns and mounting repair bills often indicate replacement is more economical than further fixes.
Calculate cumulative repair costs, estimate remaining service years, and compare to replacement price. Factor efficiency losses, warranty status, and downtime impact.
When repair expenses approach half or more of replacement cost, replacement typically yields better long‑term value and reliability.
Upgrading for larger pools or higher bather loads
As pool size or swimmer load increases beyond a filter’s designed capacity, signs like prolonged cloudiness after backwashing, rapid pressure spikes, and consistently reduced turnover rates indicate the system is undersized.
At that point, replacing the entire filter with a higher-capacity unit—rather than repeatedly tweaking or repairing the existing one—ensures adequate circulation, consistent clarity, and lower long-term strain on the pump and plumbing.
Professional sizing, upgraded media, and larger housings restore proper turnover, reduce maintenance frequency, and prevent chronic equipment stress.
Environmental or regulatory reasons to change filter type
Beyond capacity and load concerns, external forces can make a particular filter type inappropriate regardless of its mechanical condition.
Changes in local water chemistry, new contamination sources, tightening regulations on backwash discharge, or bans on certain media (e.g., diatomaceous earth) can mandate replacement.
An owner should assess compliance, environmental impact, and long-term costs when selecting a new filtration system to meet updated requirements.
Conclusion
A well-maintained pool filter is like a vigilant lighthouse: its steady performance keeps water clear and warns of unseen faults. Regular checks, prompt fixes, and mindful operation preserve both safety and equipment life. When subtle signs escalate or troubleshooting reveals internal failure, replacement becomes prudent rather than protracted repair. With basic tools and seasonal attention, caretakers can guarantee the filter continues to guard the pool’s health, saving time, expense, and frustration.