How to Change Tub Faucets: Step-by-Step Guide for Replacing and Upgrading Your Fixture
To change your tub faucets, start by shutting off the water supply and clearing the area. Determine if you need to repair or fully replace the faucet. Next, remove the escutcheons and handles, then extract the cartridges or valve stems. Clean the mounting surface thoroughly. When selecting a new faucet, ensure it matches your existing plumbing setup. Install the new cartridges, valves, and trim using plumber’s tape and sealant. Once everything is in place, restore the water supply and check for leaks, making any necessary adjustments. If you’re considering an upgrade, look into single-handle units or pressure-balancing valves for better control and efficiency. Follow the detailed steps for installation and troubleshooting to ensure a smooth process.
Overview of Replacing a Tub Faucet
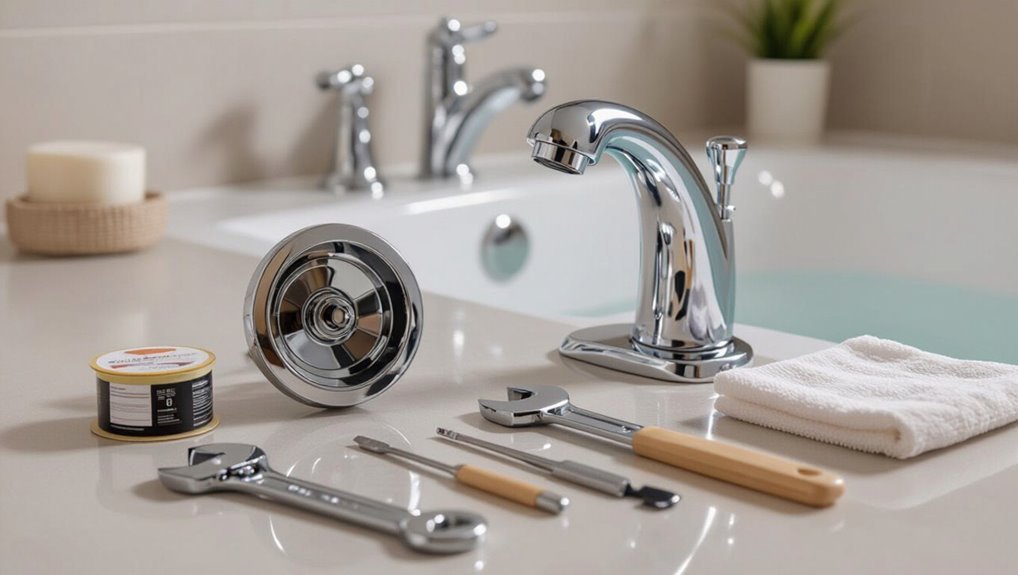
Replacing a tub faucet typically involves shutting off water, removing the old fixture, matching the replacement to the supply and mounting type, and installing the new unit with proper seals.
Deciding whether to replace or repair depends on the faucet’s age, condition, and whether parts are available or corrosion has compromised function.
Common faucet types—single-handle, double-handle, tub-spout diverter, and wall-mounted vs. deck-mounted styles—affect both parts needed and the complexity of the job.
What replacing a tub faucet involves
Removing an old tub faucet and installing a new one typically involves shutting off the water, detaching the trim and spout, loosening the valve or cartridge, and fitting the replacement unit to the existing plumbing.
The process includes measuring connections, matching parts, sealing threads or using plumber’s tape, securing trim, restoring water, and testing for leaks.
This outlines how to change tub faucets efficiently.
When to replace vs. repair a tub faucet
When is a faucet beyond simple fixing? Decisions hinge on leak severity, corrosion, and parts availability.
Minor drips, worn cartridges, or loose handles often justify repair.
Persistent leaks, damaged valve bodies, widespread corrosion, or obsolete parts indicate replacement.
Consider long-term cost, water damage risk, and desired upgrades; replacement is prudent when repairs are temporary, costly, or compromise reliability and safety.
Common faucet types and mounting styles
A clear understanding of common faucet types and mounting styles helps determine compatibility, required tools, and the scope of work for a tub faucet replacement.
Tub faucets include single-handle cartridges, dual-handle compression, and thermostatic valves.
Mounting varies: wall-mounted, deck-mounted, and tub-spout diverter configurations.
Identifying type and attachment method informs part selection, removal technique, and whether plumbing modifications or escutcheon adjustments are necessary.
Tools and Materials Needed
A concise list of essential hand and power tools is provided to guarantee a straightforward faucet replacement.
Required replacement parts and common optional upgrades are outlined to help match function and finish.
Guidance is given on selecting the correct replacement faucet for the tub’s mounting style and plumbing connections.
Essential tools list
Proper preparation begins with assembling the right tools and materials to remove and install tub faucets efficiently and without damage.
The essential toolkit minimizes delays and prevents harm to finishes and plumbing. Items should be quality, sized appropriately, and used with care.
- Adjustable wrench and basin wrench for nuts and tight spaces
- Screwdrivers (Phillips and flat)
- Allen keys and faucet handle puller
- Plumber’s tape and silicone sealant
Replacement parts and optional upgrades
Several common replacement parts and a few optional upgrades can extend faucet life and improve performance. Recommended parts include durable cartridges, replaceable valve seats, O-rings and washers, plus escutcheons.
Optional upgrades may add a pressure-balancing cartridge or ceramic disc. Consider finish-matching trim and water-saving aerators for efficiency and style.
- Cartridge or ceramic disc
- Valve seats and springs
- O-rings/washers
- Water-saving aerator
How to choose the right replacement faucet for your tub
Which tools and materials will guarantee a smooth faucet replacement?
Select a replacement matching existing valve type (single‑handle, two‑handle, or tub/shower trim) and rough‑in dimensions.
Gather proper tools: adjustable wrench, basin wrench, plumber’s tape, silicone sealant, replacement cartridge or stems, supply lines, and mounting hardware.
Verify finish, water pressure compatibility, and certification (UPC/NSF) for durability and code compliance.
Preparing for the Job
Before beginning work, the water supply should be shut off and lines drained to prevent flooding.
The tub and surrounding surfaces must be protected, and the existing plumbing and valve types inspected to confirm compatibility with the new faucet.
Appropriate safety precautions should be observed and a professional contacted if corrosion, unfamiliar valve configurations, or other complications are found.
Turning off water supply and draining lines
Shut off the water to the tub at the house’s main valve or the localized shutoff valves, then open the tub spout and nearby faucets to relieve pressure and let remaining water drain.
If no shutoffs exist, turn off the building’s main supply.
Verify flow has stopped, close any valves used, and catch residual water with towels or a bucket.
Check for leaks before proceeding.
Protecting the tub and surrounding area
Protect the tub and surrounding area by covering surfaces and clearing the workspace to prevent scratches, stains, and water damage.
Lay down drop cloths or towels, tape protective film over edges, remove toiletries and rugs, and prop a bucket under fittings to catch drips.
Confirm adequate lighting and a stable step stool.
Keep tools organized and a cloth handy for spills.
Inspecting existing plumbing and valve types
With the area secured and tools at hand, the next step is a careful inspection of the existing plumbing and valve types to determine compatibility and required parts.
The technician notes valve style (single-handle cartridge, ball, ceramic disk, or two-handle stem), supply line connections, trim dimensions, and corrosion or leaks.
Measurements and photos guide selection of adapters, replacement valves, or retrofit kits.
Safety precautions and when to call a professional
Before beginning work, assess hazards and establish safety controls: turn off the main water supply and electrical power to any nearby outlets, drain the tub lines, wear eye protection and gloves, and place a drain cover to catch small parts.
Confirm ventilation, steady ladder placement, and adequate lighting.
Call a licensed plumber for corroded pipes, unknown valve types, persistent leaks, or if soldering, gas lines, or complex repairs are required.
Step-by-Step Guide to Removing the Old Tub Faucet
The process begins with removing escutcheon plates and trim to expose the internal components.
Next, handles and cartridges or valve stems are detached and the spout or valve body is unscrewed.
Finally, the mounting surface is cleaned and prepared for the new faucet.
Removing escutcheon plates and trim
Carefully removing the escutcheon plate and trim is the next step in disassembling the old tub faucet, as these components cover the valve and secure the handle assembly.
Inspect for visible screws, lift trim rings, and pry gently where needed. Remove fasteners, loosen concealed clips, and slice through old caulk with a utility knife.
Clean mating surfaces before proceeding.
Detaching handles and cartridges/valves
1. The technician removes handle caps, loosens set screws, and lifts handles off splines.
Retaining clips or bonnet nuts are unscrewed with pliers or a wrench.
Cartridges or valve stems are extracted straight out, using cartridge pullers if seized.
Old O‑rings and seals are noted for replacement.
Parts are organized for inspection, ensuring orientation is preserved for reinstall.
Unscrewing spout or valve body
Begin by locating any retaining collars, mounting nuts, or escutcheon screws that secure the spout or valve body to the plumbing.
Use the appropriate screwdriver or wrench to loosen fasteners, turning counterclockwise.
For threaded spouts, hold the body steady and unscrew; for slip-on spouts, retract set screws then slide off.
Inspect threads and connections as components are removed.
Cleaning and preparing the mounting surface
With the spout or valve body removed and threads inspected, the mounting surface must be cleaned and prepped before installing the new faucet.
Debris, old sealant and corrosion are scraped away with a putty knife and nylon brush. Surfaces are wiped with solvent, allowed to dry, and checked for damage.
Any pits or unevenness are filled or sanded to guarantee a flush, watertight fit.
Step-by-Step Guide to Installing the New Tub Faucet
The installer first verifies that the new faucet’s rough-in and mounting requirements match the existing plumbing and notes whether a valve or cartridge replacement requires rough-in work or a retrofit.
Next, the valve or cartridge is set, the spout, handles, and escutcheon are mounted, and threaded connections receive plumber’s tape or thread sealant as appropriate.
Finally, supply lines are reconnected and the system is pressurized to check for and correct any leaks.
Comparing new faucet requirements to existing plumbing
Before installing a new tub faucet, the installer should verify that the replacement’s mounting style, valve spacing, and water supply connections match the existing rough-in dimensions and plumbing layout.
Additionally, check pipe material, thread types (NPT, BSP), and access panel alignment.
Confirm clearance for escutcheons and spout reach, and guarantee pressure and flow requirements meet fixture specifications to avoid incompatible performance.
Installing valve or cartridge (rough-in vs. retrofit)
Begin by identifying whether the installation will be a rough-in—where the plumbing and valve assembly are installed prior to finishing walls—or a retrofit, which replaces the valve or cartridge through an existing access opening; this determination governs tools, parts, and steps needed.
For rough-in, assemble and secure the valve body, align inlet/outlet piping, pressure-test.
For retrofit, remove trim, extract cartridge, inspect seals, install replacement, and test.
Mounting spout, handles, and escutcheon
Carefully position and secure the spout, handles, and escutcheon so the new tub faucet functions correctly and finishes flush with the wall surface.
Align escutcheon against tile, feed spout and handle stems through openings, and seat gaskets.
Tighten mounting nuts evenly to prevent distortion.
Verify handle rotation and spout alignment.
Check for smooth operation, then trim excess backing material and reinstall decorative caps.
Applying plumber’s tape and thread sealant correctly
Apply plumber’s tape and thread sealant to the threaded connections to guarantee a watertight seal and prevent leaks.
Wrap PTFE tape clockwise around male threads two to three full turns, smoothing edges.
Apply a thin film of compatible paste to threads where recommended, avoiding excess.
Assemble fittings hand-tight, then finish with the correct wrench torque.
Wipe away surplus sealant before curing.
Reconnecting supply lines and testing for leaks
Reconnect the water supply lines to the new faucet, ensuring each connection aligns with its corresponding hot or cold valve and the fitting seats fully against the mating surface.
Tighten connections hand‑tight, then snug with a wrench without over‑torquing.
Restore water supply slowly, observe joints for leaks, test handles and spout, and recheck after several minutes.
Address any seepage immediately.
Upgrading to Modern Fixtures
Homeowners considering upgrades may replace two-handle setups with single-handle systems for simpler operation and a cleaner look.
They might also install pressure-balancing or thermostatic valves to improve temperature control and safety, while selecting finishes and water-saving features to match style and efficiency goals.
Accessibility concerns, including ADA-compliant handles and clearances, should guide final choices.
Converting from two-handle to single-handle systems
Converting a two-handle tub faucet to a single-handle system modernizes the fixture, simplifies temperature control, and can reduce leaks by eliminating separate hot and cold valves.
The process requires evaluating existing rough-in spacing, selecting a compatible single-handle valve cartridge, adapting or replacing trim and escutcheon, and ensuring proper alignment and sealing.
Professional plumbing inspection is recommended for complex retrofits.
Installing pressure-balancing or thermostatic valves
Install a pressure-balancing or thermostatic valve to improve shower comfort and safety by maintaining consistent water temperature despite pressure fluctuations.
The installer selects compatible valves, follows manufacturer rough-in dimensions, and isolates supply lines.
Pressure-balancing units prevent sudden temperature changes; thermostatic valves allow precise temperature control and include anti-scald settings.
Proper mounting, cartridge installation, and leak testing guarantee reliable, code-compliant operation and user protection.
Choosing finishes and water-saving features
When upgrading tub fixtures, selecting finishes and water-saving features balances aesthetics, durability, and efficiency; finishes set the visual tone and resist corrosion while flow-restricting components reduce consumption without sacrificing performance.
Choose finishes compatible with cleaning products and local humidity. Opt for EPA WaterSense-certified faucets, aerators, and pressure-compensating cartridges.
Confirm flow rates meet preferences, ensuring sufficient rinse force while maximizing long-term savings and reduced utility bills.
Considerations for ADA compliance and accessibility
Accessibility is a practical priority in tub-faucet upgrades, requiring attention to lever handles, pressure balance valves, spout reach, and control placement to accommodate users with limited strength, dexterity, or mobility.
Select ADA-compliant fixtures with single-lever controls, temperature limit stops, and easy-grip surfaces.
Verify mounting height, clear knee and approach space, and consider handheld showers and anti-scald features to improve safety and usability.
Troubleshooting Common Problems
The troubleshooting section addresses frequent issues encountered after replacing a tub faucet, including leaks at the spout or handles and their common fixes.
It covers low water pressure—how to identify causes and restore flow—and how to distinguish a persistent drip caused by a faulty cartridge from one caused by a damaged seat.
It also outlines methods for handling corroded or seized parts safely to avoid further damage.
Leaks at the spout or handles and fixes
Inspecting leaks at the spout or handles often reveals worn seals, corroded parts, or loose fittings as the root causes.
The guide recommends shutting water, removing handles and escutcheons, and examining O-rings, seats, and valve cartridges.
Replace damaged seals or cartridges, clean corrosion with appropriate cleaners, tighten mounting nuts, and reassemble.
Test for leaks and adjust as needed before finalizing.
Low water pressure causes and solutions
After addressing leaks at the spout and handles, low water pressure is a common next concern that often stems from different causes.
Causes include clogged aerators, mineral buildup in cartridges or supply lines, partially closed shutoff valves, and municipal supply issues.
Solutions: clean or replace aerators and cartridges, flush lines, fully open valves, check building supply, and consult a plumber if pressure problems persist despite these steps.
Dripping after installation: diagnosing cartridge vs. seat issues
If a tub faucet begins to drip soon after installation, pinpointing whether the cartridge or the valve seat is at fault directs the repair and prevents repeated work.
Inspect the cartridge for worn seals, mineral deposits, or improper seating. If cartridge replacement stops the drip, the seat is likely fine.
Persistent leaks after a new cartridge suggest a damaged valve seat requiring resurfacing or replacement.
Dealing with corroded or seized parts
Seized stems, frozen nuts, and calcified cartridges are common when mineral-rich water and years of neglect meet metal; addressing them promptly reduces the risk of further damage.
Use penetrating lubricant, apply heat cautiously, and tap gently to break corrosion.
When removal fails, cut or bore seized fasteners and replace affected components.
Finish with anti-seize compound and regular maintenance to prevent recurrence.
Maintenance After Replacement
After installation, the new faucet should be flushed and inspected for leaks and proper operation to confirm correct installation.
Routine tasks such as cleaning aerators, checking seals, and monitoring water pressure will help extend the faucet’s service life.
If persistent leaks, unusual noises, or decreased performance occur, a scheduled inspection or professional maintenance is recommended.
How to flush and check the new faucet
Begin by running water through the new tub faucet to flush out debris and air that may have entered during installation.
Inspect for steady flow, correct hot/cold orientation, and any sputtering. Check all visible connections and the escutcheon for leaks while water runs.
Test diverter function and pressure at various settings.
Shut off, dry fittings, and recheck for slow leaks before finishing.
Routine maintenance to extend faucet life
With the system flushed and inspected, routine maintenance helps preserve the new tub faucet’s function and appearance.
Periodic care prevents mineral buildup, leaks, and finish damage while ensuring smooth operation and extending service life.
- Wipe finishes with mild soap and a soft cloth after use
- Remove aerators and screens to clear deposits monthly
- Exercise valves and handles quarterly
- Check for minor leaks and tighten fittings promptly
When to schedule inspections or professional maintenance
How often should a homeowner schedule inspections or call a professional after replacing a tub faucet depends on water quality, usage, and fixture type; generally, a basic visual check every six months and a professional inspection every 2–3 years will catch developing issues before they cause damage.
Immediate inspection is advised after leaks, noisy operation, or decreased flow.
Older or high-end fixtures may warrant annual professional checks.
Cost, Timeframe, and When to Hire a Pro
Typical DIY faucet replacements take one to three hours for a straightforward swap, with difficulty ranging from easy to moderate depending on access and corrosion.
Material costs commonly range from $20–$200 while professional labor adds $100–$350 or more, varying by region and complexity.
Professional help is advised when there are persistent leaks, damaged valves or supply lines, unclear pipe configurations, or when local codes require a licensed plumber.
Typical DIY time estimates and difficulty levels
Estimate projects by complexity: replacing a simple tub spout or cartridge can take 30–90 minutes for a competent DIYer.
Installing a new deck-mount faucet or swapping rough-in valves typically requires 2–4 hours plus drying time.
Switching wall-mounted valves or moving plumbing lines often becomes a multi-day job.
Skill level, available tools, access, and unforeseen corrosion determine actual time and difficulty.
Breakdown of material and labor costs
Budgeting for a tub-faucet project requires separating straightforward material costs from variable labor charges and potential contingency expenses. Typical parts range $30–$300; basic DIY time is 1–3 hours. Labor can be $75–$150/hour, rising if access or valves need work. Include a small contingency (10–20%) for unexpected parts or minor repairs.
| Item | Typical cost/time |
|---|---|
| Parts | $30–$300 |
| Labor | $75–$150/hr |
Signs the job requires professional plumbing services
Recognize when a tub-faucet replacement exceeds routine DIY scope by looking for hard signs: persistent leaks despite gasket changes, corroded or seized valves, deteriorated or damaged supply lines, visible water damage or mold around the tub, and inaccessible mounting hardware or valve bodies behind finished walls.
Professional service is advised when structural repairs, hidden valve replacement, complex trim work, permit requirements, or time-sensitive water shutoff issues arise.
Quick Checklist Before Finishing
Before calling the job complete, a final leak test and water temperature check confirm proper function and safety.
The installer should verify all fittings are tightened and the spout and handles are aligned.
Remaining debris and the old fixtures must be cleaned up and disposed of according to local regulations.
Final leak test and water temperature check
Open the shutoff valves and gradually restore water to the tub, observing all visible joints, connections, and the faucet body for any signs of leakage.
Run hot and cold independently, then together, verifying stable flow and correct mixing.
Check for internal drip when handles are off.
Confirm scald-prevention device operation and set comfortable maximum temperature before completing work and restoring full use.
Tightening and alignment checklist
Check each fastening and alignment point methodically to confirm the faucet sits flush, operates smoothly, and will remain leak-free under use.
Verify escutcheon and handle concentricity, tighten mounting nuts to manufacturer torque, confirm spout and valve alignment, guarantee supply lines are not twisted, and check aerator seating.
Reinspect cartridge retention and trim screws.
Perform a brief operational cycle to detect binding or misalignment.
Cleanup and disposing of old fixtures
With mounting, alignment, and operation verified, attention shifts to cleanup and disposal of the removed fixtures and debris.
The area is cleared, remaining screws and seals collected, and surfaces wiped to prevent corrosion or staining. Waste is sorted by material and local regulations followed for disposal or recycling.
Final inspection guarantees no leaks or leftover parts before restoring water.
- Collect small parts and fasteners
- Separate metals for recycling
- Bag and label hazardous components
- Wipe and sanitize surfaces
Conclusion
Careful craftsmanship culminates in a clean, confident conclusion: after following the focused, functional fixes for faucet fatigue, the tub transforms into a tidy, trouble-free tool. Routine rinses, regular resealing, and responsive repairs preserve performance and prevent pesky problems. Whether pursuing a polished, professional polish or simply swapping spouts for style, steady selectivity and sensible safety secure satisfaction. Keep clear checklists, cautious connections, and consistent care to confidently conserve comfort and curb costly callbacks.