How to Tell If a Wax Ring Is Leaking: 7 Signs Your Toilet Seal Needs Repair
If you suspect your toilet’s wax ring is leaking, watch for signs like persistent odors, damp floors, or visible stains around the base. Other indicators include water pooling, mold growth, a rocking toilet, and discoloration at the flange. To confirm a leak, you can perform simple tests such as paper towel checks, controlled flushes, or using a moisture meter, but ultimately, removing the toilet will provide a definitive answer. Follow the step-by-step guide for inspection, diagnosis, and repair to address the issue effectively.
What a Wax Ring Does and Why It Matters
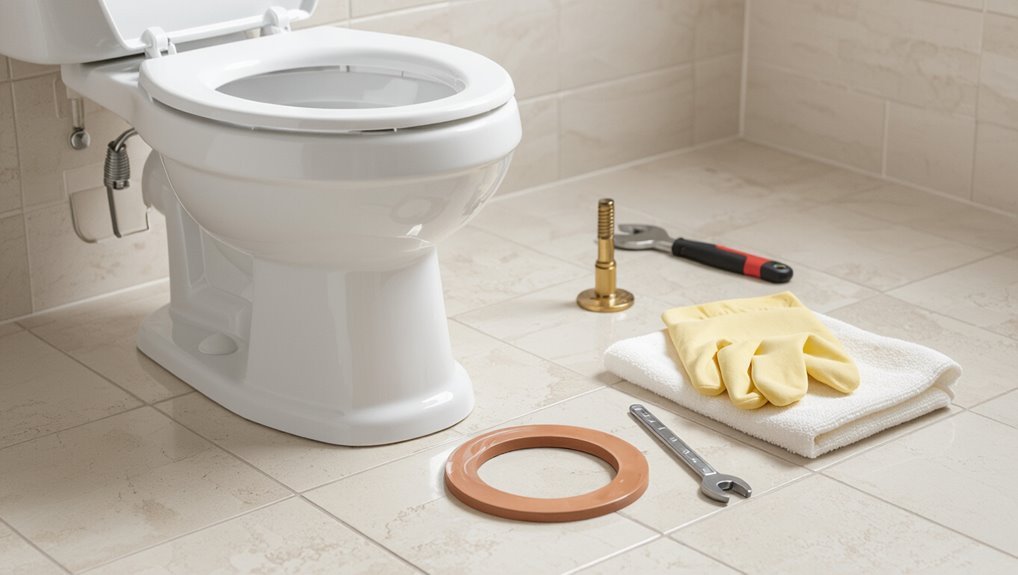
A wax ring creates a watertight and gas-tight seal between the toilet base and the drain flange, preventing leaks and sewer odors.
Common toilet seals include traditional wax rings, reinforced wax rings, and non-wax alternatives such as rubber or foam gaskets, each with different durability and installation considerations.
When a wax ring fails, it can cause water damage, mold growth, and structural problems, so timely detection and replacement are important.
Function of the wax ring in toilet systems
Seals the connection between toilet and drain, the wax ring prevents sewer gases and wastewater from escaping while accommodating slight misalignments and movement.
It creates a compressible, watertight barrier beneath the toilet base, absorbing vibration and minor shifts.
Understanding its role helps homeowners recognize how to tell if wax ring is leaking by linking odor, stains, and wobble to seal failure and needed replacement.
Common types of toilet seals and alternatives to wax rings
Although wax rings are the traditional choice for sealing toilets to drains, several alternatives and variations exist—each with distinct advantages, limitations, and installation requirements.
Options include thicker wax rings, reinforced wax with plastic collars, rubber or foam gaskets, waxless mechanical seals, and rubber boots.
Choices affect reusability, alignment tolerance, and resistance to compression; installers select based on flange condition, toilet type, and maintenance preferences.
Risks and consequences of a failed wax ring
Failing wax rings can allow wastewater and sewer gases to escape at the toilet base, leading to water damage, mold growth, lingering odors, and potential structural deterioration of the subfloor and surrounding finishes.
Left unaddressed, leaks promote rot, reduce indoor air quality, attract pests, and compromise fixture stability.
Repair costs escalate as hidden damage spreads, increasing health risks and requiring more extensive restoration.
Quick Indicators That the Wax Ring Is Leaking
A few clear signs can signal a failing wax ring and warrant prompt inspection. These include a persistent sewer smell, water pooling or stains at the toilet base, and wobbling or rocking during use.
Recurrent mold, mildew, or chronically damp flooring around the toilet are additional red flags.
Smell of sewer gas in the bathroom
Why does a persistent sewer smell often point to a faulty wax ring? A compromised wax ring can allow sewer gas to escape from the drain into the bathroom.
The odor is typically sulfuric or rotten-egg-like and lingers despite ventilation. Its presence near the toilet, especially after flushing or when the room is still, indicates the seal may be failing and warrants inspection or replacement.
Water pooling around the toilet base
Water pooling around the toilet base is one of the clearest visual signals that a wax ring may be compromised.
Persistent dampness or puddles after flushing indicate a failed seal allowing bowl discharge or tank condensation to escape.
Inspect for water after several flushes, note staining or soft flooring, and determine whether the moisture originates beneath the toilet rather than from external plumbing or surface spills.
Toilet wobbling or rocking when you sit or flush
Noticing moisture around the toilet base often goes hand in hand with movement in the fixture. When the toilet wobbles or rocks while someone sits or flushes, it can signal that the wax ring no longer provides a stable, sealed connection between the bowl and the flange.
Persistent rocking indicates a compromised seal, loose or corroded flange bolts, or uneven flooring—all increasing leak risk and warranting prompt inspection.
Stains or discoloration at the floor-to-toilet junction
When dark or pale rings, mineral streaks, or discolored patches appear at the base of a toilet, they often signal that the wax ring’s seal has failed and sewage or seepage is escaping where the bowl meets the floor.
Such staining usually follows intermittent leaks during flushes, concentrates around the flange, and may be accompanied by a persistent odor; prompt inspection and wax ring replacement prevent further damage.
Recurrent mold, mildew, or damp flooring around the toilet
If patches of mold, mildew, or a persistently damp floor develop around the base of a toilet, the wax ring seal may be compromised and allowing sewage or wastewater to escape during or after flushing.
Persistent moisture promotes microbial growth, warps flooring, and emits odors.
Regularly inspect for recurring wetness or staining after use; such signs suggest the seal should be checked and likely replaced promptly.
Frequent toilet clogs or poor flushing performance
Frequent clogs or weak flushes can signal a compromised wax ring because a failing seal may allow sewer gases and waste to escape into the bowl pathway, disrupting siphon action and reducing flush efficiency.
Persistent partial flushes, recurring blockages after proper use, or needing multiple flushes to clear waste indicate seal-related venting or flow issues rather than simple drain blockage, warranting inspection.
Audible gurgling or unusual sewer sounds after flushing
Why does a toilet emit gurgling or sewer-like noises after flushing? A compromised wax ring can allow sewer gases into the bowl or drain line, causing gurgling, bubbling, or backflow sounds.
These noises often indicate air escaping through a poor seal or intermittent siphoning.
Paired with dampness or odor, unusual sewer sounds strongly suggest the wax ring needs inspection and likely replacement.
How to Confirm a Wax Ring Leak Safely
To confirm a wax ring leak safely, the reader should follow clear, low-risk steps that narrow down the source before removing the toilet.
A brief checklist can guide simple checks and controlled tests without causing extra damage. If uncertainty remains after these steps, professional help or toilet removal may be warranted.
- Visual inspection steps for the toilet base
- Methods to detect hidden leaks beneath the toilet
- Using paper towels and tissue tests to pinpoint active leaks
- When to remove the toilet for a definitive inspection
Visual inspection steps for the toilet base
A close visual inspection of the toilet base provides the first reliable evidence of a failing wax ring; the observer should look for dampness, staining, mineral deposits, or discoloration at the junction between the porcelain and floor.
Check for softened flooring, concentrated odors, or fresh water after flushing.
Inspect bolt covers, caulk lines, and surrounding grout for gaps or moisture indicating seal compromise.
Methods to detect hidden leaks beneath the toilet
After visually evaluating the toilet base, further steps are needed to confirm whether a wax ring is leaking without causing unnecessary damage.
Professionals recommend placing a dry cardboard or moisture meter around the flange, running controlled flushes while observing for dampness, and inspecting the closet flange bolts and subfloor for soft spots.
Dye tests in the bowl can help trace slow seepage without dismantling the fixture.
Using paper towels and tissue tests to pinpoint active leaks
Place folded paper towels or tissues around the toilet base and along the flange area.
Then run several controlled flushes while observing for fresh dampness or streak patterns that indicate active leakage.
Replace damp towels between flushes to localize the source.
Note whether moisture appears consistently at the base rim, seams, or bolt areas.
Record timing and repeatability before pursuing repairs.
When to remove the toilet for a definitive inspection
If paper towel tests repeatedly show fresh moisture at the base despite tightened bolts and no visible tank or supply leaks, removing the toilet becomes necessary to confirm whether the wax ring is failing.
The toilet should be removed when leaks persist, odors continue, or floor damage is suspected.
Turn off water, drain the bowl, disconnect supply, unbolt carefully, and inspect the flange, wax ring, and subfloor directly.
Diagnosing Causes Beyond the Wax Ring
Beyond the wax ring, several other issues can mimic or cause toilet leaks and should be checked.
Attention should be paid to loose or corroded closet bolts, a damaged or misaligned flange, and improper installation or a warped toilet base.
Floor or subfloor rot and plumbing venting problems can also produce symptoms similar to a failed seal and warrant inspection.
Loose or damaged toilet bolts and flange problems
Inspecting the toilet’s mounting hardware and flange is essential when diagnosing leaks that may be mistaken for a failing wax ring.
Loose or corroded closet bolts allow movement that breaks the wax seal; a cracked, warped, or improperly seated flange can prevent a secure connection to the drain.
Tightening bolts, replacing broken anchors, or repairing the flange often resolves peripheral leaks.
Improper toilet installation or warped toilet base
Consideration of the toilet’s overall installation and the shape of its base is essential when leak symptoms persist despite a good wax ring.
Misaligned bolts, uneven floor contact, or a warped, cracked base can prevent a consistent seal.
Visual inspection and feeler checks around the rim reveal gaps.
Replacing or reseating the fixture, or using a flange spacer, often corrects these installation-related leaks.
Floor damage or subfloor rot that mimics seal failure
When water appears around a toilet despite an intact wax ring, a damaged floor or rotted subfloor can be the culprit.
Soft spots, sagging, or discolored flooring often indicate that moisture has compromised the structural support, allowing leaks to track and pool away from the flange.
Inspection requires removing the fixture or lifting floor covering to confirm rot, replace compromised joists or sheathing, and restore proper sealing.
Plumbing venting issues versus seal leaks
Air movement and pressure imbalances in the drain-waste-vent system can produce symptoms that mimic a failing wax ring, so distinguishing venting problems from actual seal leaks is essential for accurate diagnosis.
Venting issues often cause gurgling, slow drains, or odors without visible water. A true wax-ring leak shows moisture at the base, staining, or subfloor wetness.
Testing involves dye, smoke, and vent inspection.
Step-by-Step: Replacing a Wax Ring
The following steps outline the practical process for replacing a wax ring after confirming a leak.
Key tasks include gathering supplies, preparing the space, removing the toilet, and checking the flange and floor before installing the new ring.
- Tools and materials needed for replacement
- Preparing the bathroom and shutting off water
- Safely removing the toilet and old wax ring
- Inspecting and repairing the flange and floor as needed, then installing the new wax ring and reseating the toilet
Tools and materials needed for replacement
A concise, well-organized toolkit guarantees the wax-ring replacement proceeds efficiently and safely.
Essential items include a new wax ring (standard or reinforced), closet bolts and washers, adjustable wrench, screwdriver, putty knife, rubber gloves, sponge, bucket, and utility knife.
Optional but useful: wax-free ring, flange repair kit, caulk, shop towels, and disposable protective sheeting to protect flooring and ease cleanup.
Preparing the bathroom and shutting off water
Begin by clearing the area around the toilet and laying down protective sheeting or towels to catch water and debris; then locate and close the shutoff valve by turning it clockwise until it stops, or, if none exists, shut off the home’s main water supply.
Disconnect the supply line at the tank, drain residual water into a bucket, and unplug nearby electrical devices.
Guarantee ventilation and adequate lighting.
Safely removing the toilet and old wax ring
Lift the toilet off the flange carefully after draining the tank and disconnecting the supply line, keeping movements steady to avoid splashing or cracking porcelain.
Set the bowl on a protected surface.
Remove old bolts and the wax ring with a putty knife, scraping residue from the toilet base and flange opening.
Dispose of contaminated materials, clean surrounding area, and inspect for visible damage.
Inspecting and repairing the flange and floor as needed
With the toilet removed, inspect the flange and surrounding floor for cracks, corrosion, or gaps that could let water pass or prevent a proper seal.
Tighten or replace broken flange bolts, remove corroded metal, and clean debris.
If the flange is damaged beyond repair, install a repair ring or flange extender.
Replace rotten subfloor sections and guarantee the surface is level and dry.
Installing the new wax ring and reseating the toilet
Set the new wax ring centered over the flange—preferably on the toilet outlet if using a horn-style ring—so it seats evenly and aligns with the closet bolts; then carefully lower the bowl straight down, ensuring the flange bolts pass through the mounting holes and the base compresses the ring uniformly to form a watertight seal.
Tighten bolts alternately and evenly, avoiding over-torquing, and trim bolt ends.
Reconnecting, testing for leaks, and finishing touches
Reconnect the water supply, restore the tank to the bowl, and secure all fittings before testing for leaks.
Turn on water slowly, observe for drips at the base, bolts, and supply connection. Flush several times while watching.
Tighten any loose nuts; replace faulty parts if needed.
Apply new caulk around the base for a finished seal and wipe away excess for a clean appearance.
Temporary Fixes and When They Are Appropriate
Short-term solutions such as wax ring extenders or plumbers putty can temporarily reduce leaks and buy time before a full replacement.
These fixes are quick and inexpensive but may not seal reliably, risk clogging, or mask underlying flange damage.
Immediate permanent repair is warranted when there is persistent leaking, water damage to floors or ceilings, or a compromised flange.
Short-term solutions: wax ring extenders and plumbers putty
When a full wax-ring replacement isn’t feasible immediately, homeowners and plumbers may turn to temporary options like wax ring extenders and plumber’s putty to curb leaks and buy time for proper repairs.
Extenders add height between flange and bowl; putty seals small gaps around bolts or base.
Both are interim measures to reduce drips and avoid immediate water damage until a permanent replacement is scheduled.
Pros and cons of using temporary fixes
Evaluating temporary fixes requires weighing immediate benefits against limitations: wax-ring extenders and plumber’s putty can halt minor leaks and prevent short-term water damage, but they do not restore a proper flange-to-bowl seal or address degraded flange, bolts, or drain alignment.
Temporary measures buy time for scheduling repairs and reducing urgency but may fail, trap odors, complicate later permanent replacement, and offer limited longevity.
Situations that require immediate permanent repair
Temporary measures can provide breathing room, but certain signs mean a permanent repair must be performed without delay.
Persistent water on the floor, mold growth, sinking or rocking toilet, foul sewer odors, or repeated clogs indicate wax-ring failure or flange damage.
In these cases, a full seal replacement, flange repair or replacement, and professional inspection are required to prevent structural damage and health risks.
Costs, Time, and When to Call a Professional
Typical DIY wax-ring repairs often take an hour or two and cost mainly for a replacement ring and basic tools, while professional work carries higher labor and diagnostic fees. The table below summarizes DIY time/cost, typical professional ranges and inclusions, and clear signs that warrant hiring a licensed plumber. If symptoms include persistent leaks, water damage to flooring or ceiling, or difficulty accessing the flange, a professional should be called.
| Aspect | DIY Estimate | Professional Range |
|---|---|---|
| Time | 1–2 hours | 1–3 hours (inspection + repair) |
| Cost | $10–$50 (ring, sealant, basic tools) | $150–$600 (labor, parts, possible flange/pipe work) |
| When to Call | Minor seepage, confident access | Persistent leakage, structural damage, hard-to-access flange |
Typical DIY time and cost estimates
Estimate time and cost realistically before starting: replacing a wax ring typically takes an experienced DIYer 30–90 minutes if the toilet is easy to remove, while beginners should allow 1.5–3 hours.
Typical materials include a wax or foam ring, new bolts, caulk, and basic tools. Expect parts to cost $10–40; add rental or replacement of a flange or specialty ring if needed.
Professional repair cost ranges and what they include
When homeowners prefer a professional, plumbing firms generally charge more than a DIY approach but bundle labor, parts, and diagnostic work into a single service.
Typical service calls run $150–$350 plus parts, while full wax ring replacement with flange repair or bolts often totals $200–$500.
Estimates usually include inspection, removal, new ring, seals, labor, and cleanup; warranties vary by provider.
Signs you should hire a licensed plumber
Several clear signs indicate it is time to hire a licensed plumber: persistent water stains around the base of the toilet, recurrent sewer odors, wobbling fixtures, or water continuously seeping despite replacing the wax ring.
A professional assesses hidden damage, checks flange integrity, diagnoses drainage issues, and prevents mold.
Expect inspection time, parts cost, and labor; call immediately for structural or continuous leakage to avoid escalation.
Preventive Measures to Avoid Future Wax Ring Failures
Preventing future wax ring failures focuses on proper installation, routine inspection, and protecting the surrounding structure to keep the seal effective.
Key steps include:
- Proper installation practices to extend seal life
- Regular maintenance checks and specific signs to watch for
- Protecting the flange and subfloor from moisture damage
- Using quality materials and replacing worn components promptly
Addressing these points reduces the chance of leaks and costly repairs.
Proper installation practices to extend seal life
Proper installation practices greatly reduce the risk of wax ring failure by ensuring a secure, durable seal between the toilet and the flange.
Install on a clean, level flange; use the correct wax ring thickness or reinforced ring for flange height; align bolts and base precisely; torque bolts evenly; avoid rocking—shim and caulk where appropriate; replace the ring whenever the toilet is removed to maintain seal integrity.
Regular maintenance checks and what to look for
Regular maintenance checks catch early signs of wax ring deterioration before they become emergencies: inspect around the toilet base for dampness, discoloration, or soft flooring; monitor for persistent or recurring odors; listen for gurgling or slow-draining fixtures that can indicate a compromised seal; and check bolt tightness and toilet stability periodically, noting any new rocking or unevenness that may stress the ring.
Monthly visual and functional checks suffice.
How to protect the flange and subfloor from moisture damage
Seal the area around the toilet flange and keep the subfloor dry to minimize wax-ring failures and downstream rot.
Apply a non-setting flange sealant, install a flange extender if needed, and use a waterproofing membrane or primer on the subfloor.
Guarantee proper ventilation, fix leaks promptly, and replace rotted plywood.
Periodic inspections prevent moisture accumulation and extend wax-ring life.
Red Flags Indicating Structural Damage or Health Hazards
Visible soft spots or sagging around the toilet can indicate subfloor rot and structural compromise.
Persistent leaks that produce odors, staining, or visible mold present clear health risks from sewage exposure and indoor air contamination.
Immediate steps should include stopping the leak, avoiding affected areas, and arranging professional cleanup and repairs to mitigate contamination and restore safety.
Identifying subfloor rot and structural compromise
A soft, spongy floor around a toilet is a primary indicator that a wax-ring failure has allowed water to saturate the subfloor. Probing the area with a screwdriver or pushing gently with a foot will reveal give or sag that signals rot.
Dark stains, crumbling plywood edges, and gaps at floor-to-toilet or baseboard seams denote spread. Immediate inspection and joist assessment determine repair scope.
Health risks from ongoing sewage leaks and mold
Recognize that ongoing sewage leaks and resulting mold growth present acute health hazards as well as structural threats: exposure can cause respiratory irritation, allergic reactions, gastrointestinal illness from pathogens in wastewater, and prolonged mold exposure may exacerbate asthma or lead to chronic sinus issues.
Chronic dampness increases mold proliferation, spreads bacteria and viruses, degrades air quality, and raises risks for vulnerable individuals, signaling urgent assessment.
Steps to mitigate contamination and ensure safe cleanup
Begin by isolating the affected area and controlling access to prevent further contamination and exposure: shut off HVAC and bathroom ventilation, close doors or use plastic sheeting to contain airborne particles, and post warnings so occupants—especially children, elderly, and immunocompromised people—avoid the space until it is assessed.
Wear PPE, remove visible sewage, disinfect surfaces with EPA-approved agents, dispose contaminated materials properly, dry structure thoroughly, and document damage for professional remediation.
Checklist: Is Your Wax Ring Leaking? (Printable Diagnostic Guide)
When did the leaks start, and where do they appear?
A concise printable checklist guides inspection, documentation, and next steps.
Follow checks, note observations, and decide repair or pro service.
- Inspect floor around base for moisture or staining.
- Check ceiling below for drips or water damage.
- Observe water pooling after flushes.
- Confirm wobble or uneven toilet base.
Conclusion
A leaking wax ring often signals a small fix or a bigger problem; prompt attention prevents odors, water damage, and mold. Importantly, plumbing leaks in homes cause an estimated 10% of insurance claims related to water damage—underscoring how minor-seeming issues can escalate. By recognizing signs, confirming leaks safely, and replacing the seal when needed, homeowners can avoid costly repairs and health risks. Regular checks and proper installation greatly reduce future failures.