
How to Tell If My AC Is Low on Freon: 10 Signs, Tests, and What to Do Next
If you suspect your AC is low on freon, look for signs like weak or warm airflow, frozen coils or lines, hissing sounds, higher energy bills, uneven cooling, and frequent cycling. To check at home, inspect filters and vents, and feel the temperature of the lines. For a more thorough evaluation, professionals use pressure gauges and leak detectors. If you notice any of these symptoms, turn off the unit and call a certified HVAC technician for leak repair and recharging. Read on for specific tests, costs, and next steps.
How to Tell If Your AC Is Low on Freon Quick Diagnosis Summary
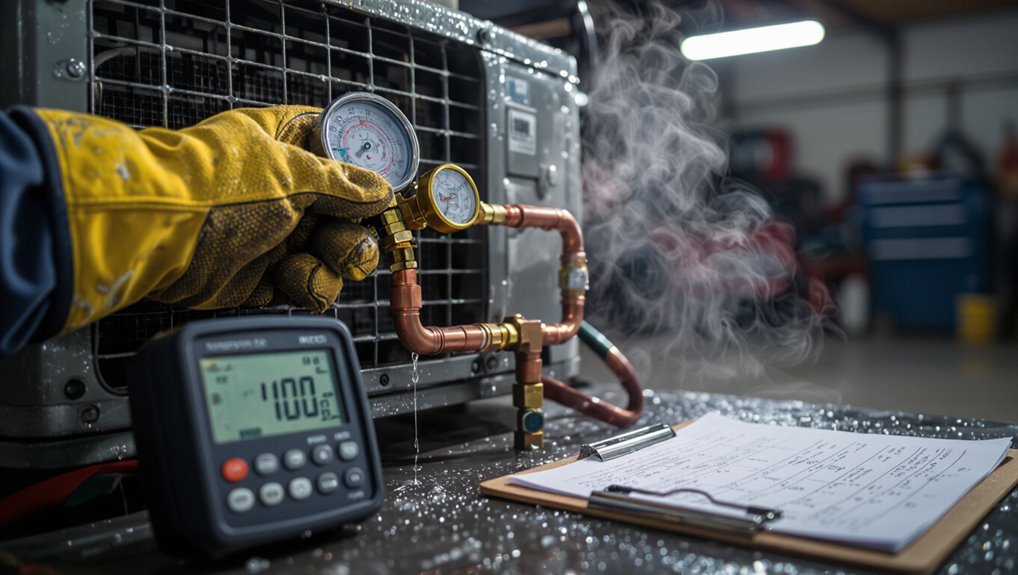
A concise one-sentence checklist helps homeowners spot common signs of low freon—weak cooling, ice on lines, and hissing sounds.
If readings show low pressure, visible leaks, or the system repeatedly cycles without cooling, a professional should be contacted immediately.
Prompt diagnosis reduces damage and guarantees safe, legal handling of refrigerant.
One-sentence checklist for homeowners
Several clear signs let a homeowner quickly check for low refrigerant: weak or warm airflow, ice on the evaporator coil or refrigerant lines, frequent short cycling, hissing or bubbling noises from the system, and an unexplained rise in energy bills.
A concise one-sentence checklist: how to tell if my ac is low on freon — inspect airflow, feel vents, look for ice, listen for leaks, and note runtime or bill spikes.
When you should call a professional immediately
Homeowners who notice the checklist signs—weak or warm airflow, ice buildup, strange hissing, or sudden energy spikes—should immediately consider professional service when problems are severe or rapid.
A technician should be called if cooling fails, refrigerant odors or visible leaks occur, breakers trip repeatedly, or compressor sounds abnormal.
Prompt diagnosis prevents system damage, addresses refrigerant handling legally, and restores safe, efficient operation.
What Freon Is and Why Proper Refrigerant Levels Matter
Freon refers to the refrigerant fluids used in air conditioning systems, most commonly older R-22 and newer R-410A formulations.
These refrigerants circulate through the compressor, condenser, expansion device, and evaporator to absorb indoor heat and release it outside, enabling home cooling.
When refrigerant levels are low, systems lose efficiency, risk compressor and component damage, and can create safety or environmental hazards.
Refrigerant basics and common refrigerants (R-22, R-410A)
Because refrigerant is the working fluid that absorbs and releases heat in an air conditioning system, understanding its types and correct charge is essential for efficient operation and safety.
Common residential refrigerants include R-22, phased out for environmental reasons, and R-410A, now standard in newer equipment. Each requires specific pressures, oils, and handling; improper type or charge reduces performance and risks equipment damage.
How refrigerant circulates and cools your home
A refrigerant circulates through the air conditioning system as a closed-loop working fluid, absorbing heat from indoor air at the evaporator coil and releasing it outdoors at the condenser coil.
Compression raises its pressure and temperature, enabling heat rejection; expansion lowers pressure and temperature before the evaporator.
Proper charge guarantees the refrigerant changes state where designed, sustaining continuous heat transfer and consistent indoor cooling.
Risks of low refrigerant: efficiency, component damage, and safety
When refrigerant levels fall below manufacturer specifications, the system’s ability to move heat is compromised and several negative consequences follow.
Cooling efficiency drops, energy use rises, and runtime increases.
Low charge causes evaporator coil freezing, liquid slugging, compressor overheating, and premature failure.
Leaks may release refrigerant, posing environmental and health hazards.
Prompt diagnosis and qualified repair preserve performance and safety.
10 Common Signs Your AC May Be Low on Freon
Signs of low Freon are often visible or audible and can affect comfort and cost.
Common indicators include:
- Weak or warm airflow from vents
- Longer cooling cycles and poor temperature hold
- Ice on coils, hissing sounds, or rising energy bills
Homeowners noticing any of these should consider a professional refrigerant check.
Weak or warm airflow from vents
Weak or warm airflow from vents often signals that an air conditioning system is undercharged with refrigerant, reducing its ability to absorb heat and cool circulating air.
Reduced refrigerant lowers evaporator coil cooling, causing lukewarm air despite blower operation.
Persistent weak or warm output, uneven room temperatures, or frost on lines warrant professional diagnosis to confirm a leak and recharge rather than filter or fan fixes.
Longer cooling cycles and poor temperature hold
Extended run times and difficulty maintaining set temperatures often indicate an undercharged air conditioning system. The compressor runs longer attempting to reach thermostat settings, yet rooms cycle between cool and warm.
Reduced refrigerant lowers heat transfer efficiency, causing prolonged runtimes, higher energy use, and uneven comfort. Persistent inability to hold temperature suggests a professional leak diagnosis and proper recharge are needed to restore performance.
Ice or frost on the evaporator coil or refrigerant lines
When refrigerant levels are too low, the evaporator coil or adjacent refrigerant lines can develop visible ice or frost as the remaining refrigerant absorbs heat unevenly and the coil temperature drops below freezing.
Ice formation restricts airflow, reduces heat exchange, and causes the system to run longer or cycle.
Technicians check coil condition during diagnostics; defrosting and repairing leaks or recharging refrigerant follow professional assessment.
Hissing or bubbling sounds from the outdoor unit or lines
A faint hissing or intermittent bubbling from the outdoor unit or refrigerant lines often signals a refrigerant leak; escaping Freon makes noise as it passes through small openings or interfaces with moisture and oil.
Technicians listen for these sounds near fittings, valves, and brazed joints.
Paired with reduced cooling or visible oil stains, audible hissing warrants prompt professional inspection and leak detection to prevent system damage.
Unusually high electricity bills without usage change
Audible signs like hissing often accompany performance problems that also show up on the utility bill.
A system low on freon runs longer and cycles more frequently, reducing efficiency. This increases compressor and fan runtime, raising electricity consumption without behavioral changes.
Comparing monthly usage patterns, noting constant thermostat settings, and inspecting runtime can indicate refrigerant loss and the need for professional diagnosis.
Refrigerant odor or chemical smell near the unit
How can a faint chemical or sweet solvent scent around an air conditioning unit signal low refrigerant levels? A detectable odor near the indoor or outdoor unit can indicate a refrigerant leak.
Technicians note that escaping refrigerant sometimes emits a faint, sweet or solvent-like smell. Presence of such odor warrants prompt inspection and leak detection; refrigerant loss affects performance and requires certified repair.
Frequent short-cycling of the compressor
Noticing a faint chemical odor near the unit can also coincide with other operational symptoms, such as frequent short-cycling of the compressor.
Low refrigerant reduces cooling capacity, causing the thermostat to rapidly call for more cycles. This stresses components, raises energy use, and can trigger overheating or protective shutdowns.
Persistent short cycles warrant a professional refrigerant check and system diagnosis.
Visible oil residue on refrigerant line fittings
Oil film on refrigerant line fittings is a clear visual clue that a leak may be present.
Technicians note oily residue where fittings, joints, or service ports meet insulation or piping. Because refrigerant carries lubricant, oil traces often mark slow leaks.
Observing fresh, wet-looking oil or accumulated grime at connections warrants prompt professional inspection and leak testing rather than DIY sealing attempts.
Uneven cooling across rooms
Why does one room feel noticeably warmer while others stay cool?
Uneven cooling can indicate low refrigerant: insufficient charge reduces capacity, so airflow farthest from the evaporator or with longer ducts cools less.
Technicians check pressure, temperature split, and room-by-room airflow to distinguish refrigerant shortage from duct leaks, blocked vents, thermostat placement, or zoning issues before recommending repair.
AC trips breaker or compressor overheating
Uneven cooling can point to a system struggling with refrigerant, but more severe symptoms may emerge when the compressor is overworked.
Low refrigerant forces the compressor to run longer and hotter, potentially tripping breakers or activating thermal protection.
Repeated trips indicate mechanical strain or electrical issues tied to undercharge.
A qualified technician should inspect for leaks, test pressures, and repair before adding refrigerant.
Simple Tests Homeowners Can Do Before Calling a Technician
Before calling a technician, a homeowner can run a few quick checks to rule out simple causes of poor cooling.
Try these basic steps:
- Check and change air filters;
- Inspect vents and airflow strength;
- Look for ice on lines or coils and feel suction/liquid line temperatures safely.
Also monitor thermostat behavior and cycle times to see if problems persist.
Check and change air filters
Inspecting and replacing air filters is a quick, low-cost step homeowners can take to rule out airflow restrictions that mimic low refrigerant symptoms.
Visually check filters monthly; replace or clean when visibly dirty, clogged, or past manufacturer lifespan. Proper filters improve system efficiency, prevent coil freezing, and reduce wear.
If cooling issues persist after fresh filters, proceed with further diagnostics or contact a technician.
Inspect vents and register airflow strength
A quick vent-and-register check helps determine whether weak room airflow stems from blocked ducts, closed dampers, or an underperforming system.
Measure airflow by holding a tissue near each register; note differences room-to-room. Inspect vents for obstructions, furniture, or debris and guarantee dampers are open.
Record weak locations to share with a technician; uneven airflow alone doesn’t confirm low refrigerant.
Look for visible ice on lines and coils
If uneven airflow was noted at the registers, the next visible check is the refrigerant lines and evaporator coil for ice buildup.
Homeowners should inspect outdoor and indoor unit piping, coil surfaces, and nearby drain pans for frost, white ice, or moisture patterns.
Ice indicates restricted refrigerant flow or low charge; thawing before technician arrival prevents compressor damage and clarifies diagnosis.
Feel suction and liquid line temperatures (safely)
One simple, safe check homeowners can perform is to feel the two refrigerant lines—one thick (suction) and one thin (liquid)—to compare their temperatures.
The suction line should be noticeably colder than the liquid line when the system is running. Gloves prevent frostbite; avoid insulated sections.
If both lines are similar in temperature or the suction line is warm, it can indicate low refrigerant or airflow issues, warranting a professional diagnosis.
Monitor thermostat behavior and cycle times
How quickly and predictably the thermostat calls for cooling can reveal refrigerant problems or other system faults.
Homeowners should note short cycles, long runtimes, or uneven intervals. Record start and stop times over several hours at a steady setpoint.
Compare against expected cycles (typically 15–30 minutes). Irregular or rapidly repeating cycles suggest airflow, charge, or control issues requiring professional diagnosis.
Use a basic infrared thermometer on ductwork and vents
After tracking thermostat cycles, a homeowner can gain more concrete evidence by checking temperatures along supply and return ducts and at vents with a basic handheld infrared thermometer.
Measure multiple vents during a steady run, comparing supply air to return air and to room temperature.
Significant smaller-than-expected temperature drops, inconsistent readings between vents, or unusually cold duct surfaces suggest low refrigerant or airflow issues requiring professional diagnosis.
Professional Diagnostic Tests Technicians Use
Technicians use specialized tools and measurements to confirm refrigerant levels and locate leaks with precision.
Common professional checks include:
- Pressure manifold readings and interpretation
- Leak detection (electronic detectors, UV dye, soap bubble)
- Temperature split, superheat, subcooling, and compressor/electrical performance.
These tests together distinguish low refrigerant from other mechanical or electrical issues.
Pressure manifold gauge readings and interpretation
A pressure manifold gauge set provides the primary diagnostic view of a refrigeration system by simultaneously displaying low-side and high-side pressures, enabling direct comparison to expected values for the installed refrigerant and operating conditions.
Technicians interpret static, running, and equalized pressures, correlate readings with temperature/pressure charts, assess subcooling and superheat, and identify restrictions, compressor faults, or undercharge requiring repair or recharge.
Leak detection methods: electronic detectors, UV dye, and soap bubble tests
Pressure manifold readings can indicate an undercharge or abnormal pressure behavior, but pinpointing the source of refrigerant loss requires targeted leak detection methods.
Technicians use electronic refrigerant detectors for fast, sensitive gas sensing; UV dye introduced into the system reveals leaks under ultraviolet light; and soap bubble or soapy water tests provide simple, visual confirmation on accessible fittings and joints before repairs or pressure testing.
Evaporator and condenser temperature split measurement
How can temperature differentials across the evaporator and condenser reveal refrigerant issues?
Technicians measure air and line temperatures: evaporator inlet vs. outlet and condenser coil or liquid line.
Deviations from expected splits indicate low charge, restriction, or airflow problems.
Recorded deltas guide diagnosis without performing superheat/subcooling calculations, prompting leak checks or system recovery and recharge as appropriate.
Superheat and subcooling calculations
Following temperature-split measurements, technicians move to superheat and subcooling calculations to pinpoint refrigerant charge and system performance more accurately.
Superheat compares evaporator outlet vapor temperature to saturation temperature at low-side pressure; high superheat suggests undercharge or airflow issues.
Subcooling compares liquid line temperature to condenser saturation; low subcooling indicates low refrigerant.
Calculations guide charging decisions and confirm proper heat exchange.
Electrical and compressor performance checks
Begin by verifying electrical integrity and compressor function, since accurate refrigerant diagnosis requires confirming the system can respond properly.
A technician inspects contactor, capacitors, fuses, and wiring for voltage, amperage, and continuity.
Compressor current draw, locked-rotor amps, and run winding resistance are measured.
Abnormal readings indicate mechanical or electrical faults that can mimic low refrigerant and must be corrected before refrigerant adjustments.
Common Causes of Low Refrigerant and Associated Problems
Refrigerant loss most commonly stems from leaks in coils, fittings, service ports, or line sets, often caused by corrosion, vibration, or rodent damage.
Improper installation or undercharging at setup can also leave systems with insufficient refrigerant from the start.
Left unaddressed, low refrigerant strains the compressor and accelerates wear, reducing system efficiency and shortening overall lifespan.
Refrigerant leaks: where they occur and why
Leaks typically form at joints, seals, and components that experience vibration or corrosion, such as service ports, condenser coils, evaporator coils, and schrader valves.
Leaks also occur where dissimilar metals meet, at brazed or soldered connections, and around access panels.
Corrosion, physical damage, UV exposure to fittings, and age-related seal degradation accelerate loss, reducing efficiency, causing icing, and stressing the compressor.
Poor installation or undercharging at setup
Beyond leaks, low refrigerant can stem from errors made during installation or intentional undercharging at setup.
Incorrect charge, improper line sizing, poor brazing, or skipping proper system evacuation leaves insufficient refrigerant or contaminants that impair performance. Symptoms mimic leaks: reduced cooling, higher pressures, and iced coils.
Proper charging with gauges, manufacturer specs, and leak testing at startup prevents these issues and guarantees efficient operation.
Damage from corrosion, vibration, or rodents
Corrosion, vibration, and rodent damage are common physical causes that allow refrigerant to escape from HVAC systems.
Corroded coils and fittings develop pinholes, loose connections form where vibration fatigues joints, and rodents chew lines or insulation.
Resulting leaks reduce cooling, create ice on evaporator coils, and permit oil loss.
Detection requires leak inspection, dye or electronic testing, and targeted repairs or component replacement.
Long-term effects on compressor and system lifespan
Prolonged refrigerant deficiency accelerates wear on the compressor and undermines overall system reliability.
Reduced lubrication, overheating, and excessive cycling increase mechanical stress, leading to premature compressor failure.
Refrigerant-starved coils accumulate moisture and debris, promoting corrosion and reduced heat transfer.
Cumulative damage shortens component lifespan, raises repair frequency, and ultimately necessitates earlier system replacement than properly maintained units.
What to Do Next: Safe Steps and Repair Options
The homeowner should first take immediate precautions—turn off the unit if it’s icing or making unusual noises and improve ventilation to limit further damage.
Next steps include scheduling a professional leak check before any recharge, weighing repair-first versus recharge-only options based on leak severity, age of the system, and cost estimates.
If repair costs approach the value of the system or efficiency is poor, replacement may be the more economical long-term choice.
Immediate actions to minimize damage
Act promptly to reduce further harm when an air conditioner is suspected to be low on freon: shut off the unit to prevent compressor damage, open windows or use fans to maintain safe indoor temperatures, and document any signs like hissing noises or oil stains around refrigerant lines for technicians.
Isolate power at the breaker if odors or electrical issues occur, and avoid attempting refrigerant repairs without certification.
When to schedule a leak check and repair
When should a leak check be scheduled, and what repair options are appropriate? A leak check is warranted when symptoms persist after basic troubleshooting, when visible oil or corrosion appears, or when recharge fails quickly.
Schedule a certified technician promptly to locate and assess leaks.
Repair options range from seal replacements and component swaps to brazing or coil replacement; choices depend on leak severity, age, and cost-effectiveness.
Refrigerant recharge vs. repair-first approach
After a leak check confirms or rules out active leaks, homeowners and technicians must choose between simply recharging the system or addressing defects before adding refrigerant.
A recharge alone may restore cooling short-term if no leaks exist.
If leaks, compressor faults, or component failures are present, repair-first prevents repeated loss, protects system integrity, and guarantees compliance with refrigerant handling regulations.
Estimated costs and factors that affect price
Because multiple variables influence repairs and recharges, estimated costs for low-refrigerant service vary widely and should be considered as ranges rather than fixed quotes. Typical factors include leak diagnostics, refrigerant type, labor rates and system access. Below is a quick cost-factor overview:
| Factor | Impact |
|---|---|
| Leak detection | Increases cost |
| Refrigerant type | Varies per pound |
| Labor/time | Hourly charges |
| Accessibility | Raises complexity |
When replacement of the system makes more sense
Consider replacing the air-conditioning system if recurring refrigerant leaks, repeated repairs, or repair costs approaching the value of a new unit indicate diminishing returns.
Persistent performance issues, age (typically 10–15 years or more), and poor energy efficiency further justify replacement over continued patchwork.
Evaluate total lifetime cost, energy savings, and refrigerant phaseouts.
Consult a qualified HVAC professional for inspection, efficiency estimates, and replacement quotes aligned with home needs.
How Technicians Fix Leaks and Recharge Refrigerant
Technicians typically locate and repair leaks using methods such as electronic detectors, dye injection, brazing or replacing damaged components, and sealing minor leaks where appropriate.
After repairs, they evacuate the system, check for proper vacuum, and recharge the refrigerant to manufacturer-specified levels because accurate charging guarantees efficiency and prevents compressor damage.
Certified professionals following legal refrigerant-handling rules and EPA or local regulations should perform these tasks.
Common leak repair techniques
When a refrigerant leak is suspected, HVAC professionals first locate and repair the breach before restoring charge to the system.
Technicians use electronic leak detectors, UV dye, or soap bubble tests to pinpoint leaks.
Common repairs include tightening fittings, replacing O-rings, brazing copper lines, or replacing evaporator/condenser coils.
After repairs, systems are vacuumed and tested for integrity prior to recharging.
Proper recharging process and why accurate charging matters
After repairs are completed and the system has been evacuated and pressure-tested, the proper recharging process begins with measuring the exact refrigerant charge required and introducing refrigerant while monitoring pressures, temperatures, and superheat/subcooling to guarantee correct performance.
Technicians add refrigerant incrementally, adjust metering devices, verify airflow and compressor load, and confirm system stability to prevent inefficiency, liquid floodback, or premature component failure.
Certification and legal requirements for handling refrigerants
How are refrigerants legally and safely handled during leak repair and recharge?
Technicians must hold EPA Section 608 (or local equivalent) certification, follow recovery/recycling rules, use approved equipment, and document refrigerant quantities.
Regulations require leak repair verification, proper disposal, and use of permitted refrigerants.
Noncompliance risks fines and environmental harm; homeowners should confirm credentials before service.
Preventive Maintenance to Avoid Low Refrigerant Issues
Preventive maintenance helps keep refrigerant levels steady and prevents leaks before they become costly.
Recommended actions include a short checklist for technicians and homeowners:
- Regular tune-ups, inspections, and quality installation/components
- Maintain airflow and clean coils, especially at seasonal change
- Watch for unusual sounds, reduced cooling, or ice when seasons shift
These steps reduce the risk of low refrigerant and extend system life.
Regular tune-ups and inspection checklist
A consistent schedule of tune-ups and inspections is the most reliable way to catch slow refrigerant leaks before they reduce cooling performance or damage the system.
Checklist items include verifying refrigerant charge and pressures, inspecting compressors and service valves for oil or corrosion, testing for leaks with electronic detectors, checking line set connections and access ports, confirming proper thermostat operation, and documenting findings and corrective actions.
Maintaining airflow and coil cleanliness
Maintaining unrestricted airflow and clean coils reduces strain on the refrigeration circuit and helps reveal small leaks before they worsen.
Routine filter replacement, unobstructed vents, and professional coil cleaning prevent frost buildup and compressor overwork.
Clear condensate drains and proper fan operation maintain heat exchange efficiency, lowering pressure imbalances that mask refrigerant loss.
Documented maintenance schedules catch anomalies early, reducing repair scope and cost.
Signs to watch for during seasonal transitions
As airflow and coil cleanliness are kept up, attention should shift to seasonal checkpoints where refrigerant issues often first become apparent.
During spring and fall startups, monitor unusually long cooling cycles, weak airflow despite clear filters, warm spots in conditioned spaces, and ice forming on evaporator coils.
Note sudden pressure or noise changes at the outdoor unit and schedule prompt diagnostic testing if anomalies appear.
Choosing quality installation and components
Several key decisions during installation determine the long-term integrity of an HVAC system’s refrigerant circuit. Selecting certified technicians, OEM or equivalent-quality components, and properly sized lines and fittings minimizes leak risk and guarantees accurate charge levels.
Routine pressure testing, vacuum evacuation, and brazing by trained installers prevent contamination and joint failure. Durable valves, proper insulation, and documented commissioning support reliable performance and easier future diagnostics.
Cost-Saving Tips and When to Consider Upgrading
The section compares budget-friendly fixes, such as sealing leaks and routine tune-ups, with longer-term investments like replacing aging equipment.
It notes that newer refrigerants and modern systems often deliver measurable efficiency gains and lower operating costs.
It also highlights available rebates and incentives that can offset upfront replacement expenses.
Budget-friendly fixes vs. long-term investments
Many homeowners face a choice between quick, budget-friendly fixes—like sealing ducts, replacing filters, or patching small refrigerant leaks—and longer-term investments such as replacing an aging compressor or upgrading to a more efficient system.
Deciding which path to take depends on the unit’s age, frequency of repairs, energy bills, and whether recurring issues suggest underlying failure rather than a simple refrigerant shortfall.
Short-term fixes lower costs temporarily; persistent problems warrant replacement.
Efficiency gains from newer refrigerants and systems
When newer refrigerants and modern HVAC systems are introduced, they often deliver measurable efficiency gains—lowering energy consumption, reducing operating costs, and improving cooling performance per ton.
Upgrades can shrink seasonal energy use, stabilize temperatures, and extend equipment life.
Evaluations should compare SEER/HSPF ratings, refrigerant global-warming potential, and lifecycle costs to decide if replacement yields sufficient savings.
Rebates and incentives for high-efficiency replacements
Because governments and utilities often subsidize efficiency, homeowners can offset much of the upfront cost of replacing an aging HVAC with rebates, tax credits, and low-interest financing targeted at high-SEER systems and low-GWP refrigerants.
Eligibility, application deadlines, and required documentation vary; contractors often handle paperwork.
Research federal, state, and utility programs, compare offers, and factor incentives into lifecycle cost and payback calculations before upgrading.
Troubleshooting Scenarios and Decision Flowcharts
The guide outlines three common troubleshooting scenarios to help identify whether low refrigerant is the issue and what remedies to try.
Scenario A addresses warm air with no visible ice and lists likely causes and straightforward fixes.
Scenario B covers ice buildup on the coil.
Scenario C covers audible hissing or oil spots, each paired with probable causes and recommended next steps.
Scenario A: Warm air + no ice likely causes and fixes
Detecting warm air from vents combined with no visible ice on the evaporator or refrigerant lines typically indicates issues other than overcharging.
Most commonly, this points to a refrigerant undercharge, airflow restriction, or a failing compressor component.
Inspect for low refrigerant by checking pressures.
Verify airflow by replacing/cleaning filters and clearing ducts.
Confirm condenser fan operation and test compressor electricals.
Call a licensed technician for recharge or repairs.
Scenario B: Ice buildup on coil likely causes and fixes
Warm-air delivery with no visible ice points toward undercharge or airflow problems, but when evaporator coils show frost or solid ice, a different set of causes should be considered.
Frozen coils often result from restricted airflow (dirty filters, blocked returns, failing blower) or refrigerant overcharge/leaks causing low pressure and excess cooling.
Recommended actions: restore airflow, defrost, inspect refrigerant levels and repair leaks before restarting.
Scenario C: Audible hissing or oil spots likely causes and fixes
Several clear signs point to refrigerant problems when audible hissing or oily stains appear around an AC unit: a hissing sound often indicates a refrigerant leak escaping under pressure, while oil spots mark where refrigerant — which carries lubricant — has seeped and evaporated.
Recommended actions: shut system off, visually trace leak source, avoid DIY charging, contact certified HVAC for leak detection, repair, and proper recharge.
Checklist for Hiring an HVAC Technician
When choosing an HVAC technician, the homeowner should ask clear questions about experience, pricing, and expected diagnostics before booking.
The technician’s service visit will typically include system inspection, pressure checks, leak search, and a written estimate of repairs or refrigerant recharge.
Prior to work, verify the technician’s license, warranty terms, and EPA refrigerant-handling certification.
Questions to ask before hiring
Why ask specific questions before hiring an HVAC technician? A concise checklist helps verify licenses, insurance, and certifications, confirms experience with refrigerant systems, and clarifies diagnostic fees, warranty coverage, and estimated costs.
Ask about EPA refrigerant handling credentials, references, timelines, and whether parts are OEM.
Request written estimates and a clear explanation of repair versus replacement options.
What to expect during a service visit
After confirming credentials and getting written estimates, homeowners should know what typically occurs during an HVAC service visit so they can follow the process and assess the technician’s thoroughness.
The technician inspects system components, measures pressures and temperatures, checks for leaks, documents findings, explains diagnoses, recommends repairs or recharge options, provides cost breakdowns, and leaves a written report with parts used and follow‑up instructions.
Verifying licenses, warranties, and refrigerant handling credentials
Because HVAC work involves regulated materials and long-term system performance, confirming a technician’s licenses, warranty coverage, and refrigerant-handling certifications is essential.
Homeowners should request proof of state or local HVAC licensure, verify that any offered warranties are written and transferable, and guarantee technicians hold current EPA Section 608 (or local equivalent) certification for handling refrigerants.
Additionally, check insurer bonding, read reviews, and document all credentials before work begins.
Resources and Further Reading
For readers seeking more guidance, reliable sources cover safety rules, reputable brands, and simple tools for homeowners.
Refer to these categories for further reading and practical links:
- Government and safety guidance on refrigerants
- Recommended manufacturers and professional associations
- Tools and products for homeowner-level checks.
Government and safety guidance on refrigerants
Several authoritative sources offer guidance on refrigerant handling, safety, and legal requirements to help homeowners and technicians comply with regulations and protect health.
Government agencies (EPA, OSHA) publish rules on refrigerant types, disposal, leak repair, and certified technician requirements.
Public health advisories and safety data sheets detail exposure risks and emergency response.
Local codes and appliance labels also govern proper servicing and recordkeeping.
Recommended manufacturers and professional associations
A handful of reputable HVAC manufacturers and professional associations provide reliable products, technical resources, and certification programs that homeowners and technicians can consult when addressing refrigerant concerns.
Manufacturers like Carrier, Trane, and Mitsubishi publish system specifications and refrigerant guidance.
Associations such as ASHRAE and EPA-certified training bodies offer standards, best practices, and directories of certified technicians for safe, compliant refrigerant service.
Tools and products for homeowner-level checks
Basic diagnostic tools and a few homeowner-oriented products can help screen an air conditioner for signs of low refrigerant before calling a technician.
A concise overview of practical, safe options follows:
- Digital infrared thermometer for delta-T checks.
- Refrigerator/freezer coil-cleaning spray and soft brush.
- Leak-detection dye kits or electronic sniffer (visualize only; leave repairs to pros).
Conclusion
To summarize, recognizing low Freon early can prevent costly repairs and restore comfort; this guide condenses clear signs, simple homeowner tests, and when to call a pro. Some readers may worry DIY checks will worsen the system; the article emphasizes safe, noninvasive steps and advises certified technicians for refrigerant handling. Use the checklist and cost tips to make informed choices, and consult a licensed HVAC professional for any refrigerant work or persistent issues.
