How to Set a Geyser: Step-by-Step Guide to Installation, Temperature & Safety
To install a geyser safely and effectively, follow this step-by-step guide. A geyser, whether tank, tankless, or heat-pump based, heats water for your household needs. The selection depends on factors like fuel type, capacity, and ventilation.
Installation Steps:
- Shut Off Utilities: Ensure all relevant utilities (water, gas, electricity) are turned off.
- Secure Mounting: Properly mount the geyser according to the manufacturer’s guidelines.
- Plumbing and Electrical/Gas Hookups: Connect the geyser to the water supply and, if applicable, to the gas or electrical system.
- Install Safety Devices: Equip the geyser with a Temperature and Pressure Relief (TPR) valve and an expansion vessel to ensure safety.
- Set Thermostat: Adjust the thermostat to a safe temperature between 49–60°C (120–140°F) and install anti-scald controls for vulnerable individuals.
- Perform Safety Checks: Before commissioning, conduct pressure, leak, and carbon monoxide checks.
Follow these steps carefully to ensure a safe and efficient geyser installation.
What a Geyser Is and How It Works
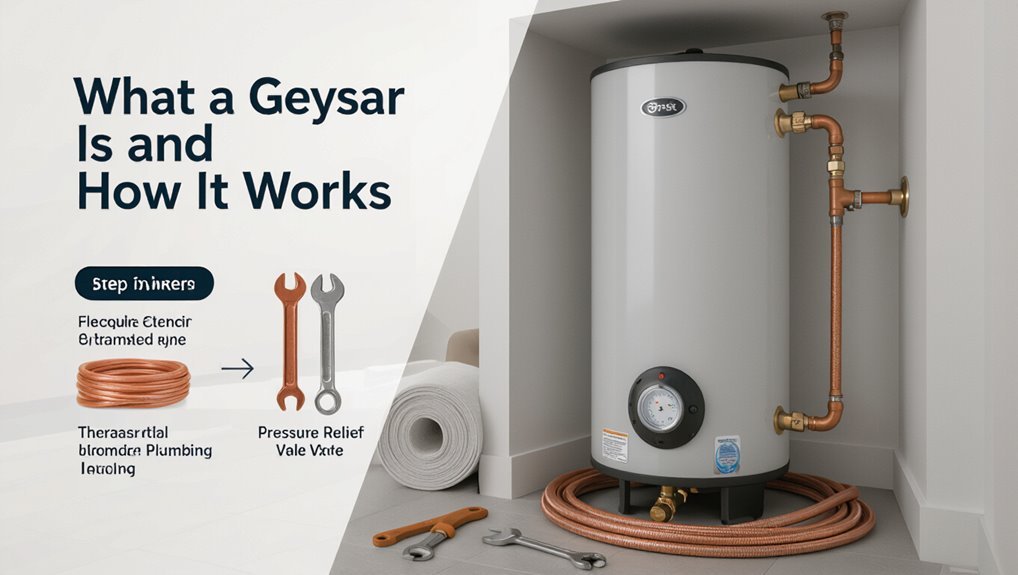
A geyser is a water-heating device available in tank, tankless, and heat-pump varieties, each offering different storage and efficiency characteristics.
Its core components—thermostat, heating element or compressor, and pressure relief valve—work together to regulate temperature, generate heat, and guarantee safety.
Geysers may run on electricity, natural gas, or other fuels and have specific power and ventilation requirements that affect installation and operating cost.
Definition and common types (tank vs tankless vs heat pump)
Geysers are household water heaters that deliver hot water on demand by raising the temperature of stored or flowing water. They come in three common types—storage tank, tankless (on-demand), and heat pump models—each using different methods to heat and supply water.
The storage tank stores heated water; tankless heats per use; heat pumps move ambient heat.
Guidance on how to set a geyser focuses on selection and placement.
Basic components and operation (thermostat, heating element, pressure relief valve)
Following selection and placement considerations, attention turns to the internal parts that make a geyser function: thermostat, heating element, and pressure relief valve.
The thermostat senses water temperature and signals heating cycles. The heating element converts electrical energy into heat within the tank.
The pressure relief valve prevents overpressure by releasing excess steam or water, safeguarding the tank and connected plumbing from dangerous failures.
Typical fuel sources and power requirements
Hot-water systems rely on several common fuel sources—electricity, natural gas, propane, and in some regions, solar thermal or biomass—to deliver the energy required to heat and maintain stored water at set temperatures.
Electric units demand circuits and kilowatt capacity; gas requires proper venting, gas line sizing and BTU rating; solar and biomass need collectors or burners and storage integration for consistent output.
Quick Overview: Installing a Geyser Key Steps at a Glance
The overview summarizes the essential pre-installation checklist: site suitability, correct geyser capacity, necessary permits, and required tools.
It also briefly outlines typical timeframes, estimated costs, and the skill level needed for a safe installation.
This sets the stage for step-by-step guidance and decision points that follow.
Pre-installation checklist (site, capacity, permits, tools)
Before installation begins, a concise pre-installation checklist verifies the site, capacity, permits, and tools are aligned with project requirements:
Inspect mounting location for structural support, clearance, and ventilation; confirm water pressure and electrical supply; select geyser capacity to match household demand; obtain necessary local permits and utility approvals; inventory required tools, fittings, and safety gear; schedule any required inspections before proceeding.
Time, cost, and skills required
A straightforward residential geyser installation typically requires a half to full day of work, varying with site complexity and whether new plumbing or electrical runs are needed.
Costs range from modest DIY expenses (unit plus materials) to higher professional fees, typically influenced by unit capacity, labor, permits, and upgrades.
Basic plumbing and electrical skills suffice for installers; novices should hire a certified technician.
Choosing the Right Geyser for Your Home
Selecting the appropriate geyser requires matching capacity to household hot-water demand and weighing energy-efficiency ratings against expected running costs.
Homeowners should compare fuel and model options—electric, gas, solar, and heat-pump—while considering upfront price and long-term savings.
Placement decisions, including indoor versus outdoor siting, ventilation needs, and service access, will also influence the ideal choice.
Sizing: How to pick capacity based on household needs
How much hot water a household needs depends on the number of occupants, their typical simultaneous usage, and appliance flow rates.
So sizing a geyser begins with a simple inventory of showers, taps, dishwashers, and washing machines and the frequency they run.
Convert fixture counts to litres per minute, estimate peak-hour demand, add a safety margin, and select a storage or instantaneous unit matching that peak requirement.
Energy efficiency ratings and expected running costs
Once storage size or flow rate has been determined, attention turns to efficiency ratings and expected running costs. The guide explains reading energy labels, standby losses, and estimated annual cost calculations. Consumers compare rated efficiencies and local tariffs to predict bills; maintenance and insulation reduce expenses.
| Metric | Meaning | Impact |
|---|---|---|
| Energy rating | Efficiency score | Lowers consumption |
| Standby loss | Heat lost idle | Raises cost |
| Annual cost | Estimated spend | Budgeting tool |
Comparing fuel and model options (electric, gas, solar, heat-pump)
When choosing a geyser, homeowners should weigh fuel type and model design against household hot-water patterns, installation constraints, and local energy prices. Electric units offer simplicity; gas gives rapid recovery; solar lowers bills; heat-pumps maximize efficiency. Match capacity to demand and maintenance ability. Emotional resonance:
| Choice | Feeling |
|---|---|
| Electric | Relief |
| Gas | Confidence |
| Solar | Pride |
| Heat-pump | Satisfaction |
Selecting installation location: indoor vs outdoor, ventilation, and access
Choosing where to install a geyser hinges on balancing safety, performance, and convenience: indoor placement protects against weather and freezing but requires space and proper ventilation, while outdoor units save interior room yet demand weatherproofing and clearances.
Installers should prioritize accessible servicing, maintain required clearances from combustibles, guarantee exhaust and fresh-air paths for gas models, and comply with local codes.
Preparing for Installation
Before beginning installation, the installer confirms compliance with local permits and safety codes.
A concise checklist of tools, fittings, and materials is prepared while plumbing and electrical systems are inspected for compatibility.
The chosen site is evaluated for a suitable mounting surface, required clearances, and proper drainage.
Safety and regulatory requirements (permits, local codes)
Several jurisdictions require permits and adherence to local codes before installing a geyser, and verifying these obligations is an essential first step.
Installers must check plumbing, gas and electrical regulations, seizure of required inspections, and zoning restrictions. Compliance guarantees safety, prevents fines, and maintains warranty validity.
Obtain documented approvals, schedule mandated inspections, and retain records for future reference and resale.
Required tools and materials checklist
A clear inventory of tools and materials guarantees a smooth geyser installation and minimizes onsite delays. The checklist includes essential fittings, safety gear, and mounting hardware.
Clear labeling and quantities prevent omissions. Verify quality and compatibility before work begins.
- Pipework, valves, connectors, insulation.
- Mounting brackets, anchors, sealing compounds.
- PPE: gloves, goggles, leak detector.
Assessing plumbing and electrical compatibility
Evaluating plumbing and electrical compatibility guarantees the geyser can be integrated without unsafe modifications or costly rework.
Inspect water supply pipe size, material, and pressure to confirm flow and fittings match inlet requirements. Verify drain and pressure-relief routing capacity.
Confirm electrical supply voltage, circuit amperage, cable gauge, and dedicated breaker meet heater specifications and local code; note grounding and bonding needs.
Site preparation: mounting surface, clearances, and drainage
Mounting surface, clearances, and drainage must be verified before any installation work begins: the chosen wall or floor needs sufficient load-bearing capacity, compatible anchoring material, and a flat plane to guarantee the geyser sits plumb and stress-free.
Required clearances for service access and ventilation are checked; nearby combustibles removed.
Provision for condensate and overflow drainage, slope to drain, and accessible shutoffs are confirmed.
Step-by-Step Geyser Installation Guide
The installation sequence begins with shutting off utilities and draining any existing unit to guarantee a safe workspace.
Next, the geyser is positioned and mounted—either on a wall bracket or stand—before making the inlet, outlet, and pressure-relief plumbing connections.
Final steps cover electrical or gas hookup according to regulations and fitting safety devices such as a TPR valve, expansion vessel, and isolation valves.
Step 1 Turn off utilities and empty existing system
Cut off power and water supply to the existing geyser before any work begins, and confirm both valves are fully closed to prevent flow.
Drain the tank via the drain valve into a suitable container or to a safe drain, relieving pressure by opening a hot tap.
Verify absence of power with a tester, ascertain no residual water remains, and dispose of wastewater responsibly.
Step 2 Positioning and mounting the geyser (wall/stand installation)
With power isolated and the tank emptied, attention turns to selecting the installation location and fixing method for the new geyser.
The unit should sit near existing plumbing, on a load-bearing wall or a sturdy stand, clear of combustible materials and accessible for service.
Secure brackets or bolts to structural supports, check level and clearance, and confirm manufacturer mounting specifications before proceeding.
Step 3 Plumbing connections: inlet, outlet, and pressure relief valve
Plumbing connections now require careful attention: identify and prepare the cold-water inlet, hot-water outlet, and temperature/pressure relief valve locations, ensuring correct pipe sizes, secure fittings, and proper orientation to prevent leaks and allow safe pressure discharge.
Install shutoff valves on the inlet, use union fittings for serviceability, slope outlet piping toward fixtures, and fit the relief valve with a discharge pipe terminating safely near a drain.
Step 4 Electrical or gas connections and wiring requirements
The installer must now address the energy supply: determine whether the geyser is electric or gas and follow the manufacturer’s specifications and local codes for connections.
For electric units, install correct gauge cable, dedicated circuit, appropriate breaker and secure earth/neutral terminations.
For gas, use certified gas fittings, correct pipe sizing, leak testing and proper venting.
Confirm permits and inspections as required.
Step 5 Installing safety devices (TPR valve, expansion vessel, isolation valves)
Begin by fitting all required safety devices before bringing the geyser into regular service: a temperature-pressure relief (TPR) valve, an expansion vessel, and isolation valves must be installed according to manufacturer instructions and local code.
The TPR discharges safely; the expansion vessel absorbs thermal expansion; isolation valves allow service and emergency shutoff.
Verify correct orientation, secure mounts, rated fittings, and leak-tested joints.
Step 6 Filling, venting air, and initial start-up procedure
Open cold-water supply slowly to allow the tank to fill while monitoring pressure and fittings for leaks; simultaneously open a nearby hot tap to vent trapped air until a steady stream of water flows. Then close the tap and confirm the relief valve and expansion vessel remain seated and dry before energizing the unit.
Record inlet pressure, check thermostats setpoint, then power on and observe initial heating cycle for normal operation.
Step 7 Checking for leaks, correct pressure, and proper flame/electric function
Inspect all visible joints, valves, and connections for signs of water or gas leakage, while confirming system pressures match manufacturer specifications and the burner or electric elements operate correctly.
Use calibrated gauges and soap solution for gas checks.
Verify thermostats, pressure relief valve seating, and stable flame appearance or steady electric element current.
Document readings and correct faults before proceeding.
Step 8 Final commissioning and handover checklist
With leaks addressed, pressures verified, and heating components confirmed functional, the final commissioning and handover checklist consolidates the remaining verifications and documentation required before the system is handed to the owner.
Inspect safety devices, confirm thermostat calibration, record operating pressures and temperatures, provide user instructions and warranty papers, label isolation points, demonstrate shutdown and maintenance procedures, and obtain owner acknowledgment and sign-off.
Setting and Adjusting Temperature Safely
Recommended temperature ranges for safety and comfort are outlined, followed by clear instructions for changing thermostats on various geyser types.
The role of anti-scald devices and thermostatic mixing valves is explained with attention to child safety.
Guidance is provided on balancing lower energy use against the increased risk of scalding.
Recommended temperature settings for safety and comfort
Set the thermostat to a temperature that balances scald prevention, energy use, and household needs: most guidelines place safe domestic hot water between 49–60°C (120–140°F), with 49–54°C (120–130°F) minimizing burn risk while still effective for cleaning and hygiene.
Adjust slightly for vulnerable occupants, dishwashing or laundry requirements, and seasonal variations; document settings and routinely verify with a thermometer.
How to change the thermostat on different geyser types
Begin by identifying the geyser type—tank, tankless, or hybrid—since thermostat access and adjustment methods vary by design.
For tank units, power off, drain as needed, remove access panel and rotate or replace thermostat.
For tankless models, consult manufacturer, adjust digital controls or replace control board.
Hybrid units combine both approaches; follow model-specific instructions and restore power only after confirming safe reassembly.
Anti-scald devices, thermostatic mixing valves, and child safety
After adjusting a geyser thermostat or control, attention should turn to measures that prevent scalding at the tap: anti-scald devices and thermostatic mixing valves (TMVs) regulate outlet temperature by blending hot and cold water, while child-safety fittings and temperature limits reduce burn risk for vulnerable users.
Install TMVs at main supply points, set max outlet to 49–50°C, test regularly, and restrict accessible controls.
Balancing energy savings vs scald risk
Many households weigh modest temperature reductions against safety: lowering a geyser thermostat saves energy and cuts scald risk, but excessive drops can encourage bacterial growth or require higher-flow settings that defeat savings.
A balanced approach sets storage water at a safe minimum (typically around 60°C) while using mixing valves, periodic thermal disinfection, insulation, and user education to optimize efficiency without compromising health.
Testing, Troubleshooting, and Common Problems
After installation and temperature adjustment, the system should be tested for adequate hot water and correct flow by running several taps and measuring temperature and pressure.
If there is no heat, visible leaks, unusual noises, or pressure fluctuations, basic diagnostics—checking power, valves, and visible fittings—can identify common installation faults.
Persistent issues or any suspected gas, electrical, or major plumbing failures should prompt contacting a licensed professional.
How to test for adequate hot water and correct flow
A simple, methodical check of hot water adequacy and flow begins by measuring temperature and volume at representative fixtures; this quickly distinguishes supply issues from distribution or appliance faults.
Use a thermometer and timed bucket to record liters per minute, compare with expected output, inspect aerators and shutoffs, confirm simultaneous fixture performance, and note delayed recovery.
Document results for follow-up.
Diagnosing common installation issues (no heat, leaks, pressure problems)
Begin by isolating the symptom and gathering basic measurements—temperature, flow rate, visible leaks, and inlet/outlet pressures—to separate appliance faults from installation or supply problems.
Check power/gas supply, thermostat settings, element/pilot condition, and wiring.
Inspect joints, valves, and relief valve for leaks.
Verify inlet strainers and pressure-reducing valves for blockages or incorrect settings causing low flow or overpressure.
When to call a licensed professional
When should a licensed professional be called for geyser testing and troubleshooting?
A professional is required for gas leaks, electrical faults, persistent pressure or temperature inconsistencies, hidden leaks, safety valve failures, or after attempted DIY fixes that didn’t resolve the issue.
Certified technicians guarantee code-compliant repairs, accurate diagnostics, and safe restoration.
Engage a licensed expert immediately if performance or safety is in doubt.
Maintenance and Longevity
A straightforward maintenance schedule—regular flushing, periodic anode inspections, and valve testing—helps preserve geyser efficiency and prevent failures.
Technicians watch for signs of corrosion, excessive sediment buildup, and declining performance as indicators of aging or damage.
When repairs become frequent or efficiency drops beyond acceptable levels, replacement or upgrading should be considered.
Regular maintenance schedule (flushing, anode checks, valve testing)
Establishing a regular maintenance schedule assures a geyser operates safely and efficiently over its lifespan.
Routine tasks prevent failures and optimize performance. Recommendations include:
- Flush tank annually to remove accumulated sediment and restore heating efficiency.
- Inspect and replace sacrificial anode every 2–4 years based on wear to protect the tank.
- Test pressure relief and shutoff valves semiannually to assure proper operation and safety.
Signs of corrosion, sediment build-up, and performance decline
Following the maintenance schedule, attention must turn to signs that indicate underlying problems: corrosion, sediment accumulation, and declining performance.
Rust stains, pitted fittings, noisy heating cycles, reduced hot-water output, longer recovery times, and discolored or gritty water signal internal degradation.
Increased energy consumption and frequent thermostat cycling also point to efficiency loss.
Prompt diagnosis prevents failures and limits repair scope.
Replacement timeline and upgrade indicators
Lifecycle planning for a geyser centers on measurable thresholds rather than arbitrary dates: typical tank units reach the end of reliable service between 8 and 15 years depending on water quality, usage patterns, and maintenance history.
Replacement is advised when efficiency drops, repair costs exceed half of a new unit, frequent leaks or heater failure occur, or modern safety and energy standards promise clear savings.
Safety Risks and How to Prevent Them
The section addresses core safety risks associated with geyser installation, including carbon monoxide and gas leaks, and the ventilation safeguards required to mitigate them.
It also covers electrical hazards and grounding requirements as well as pressure-related dangers and proper relief valve practices.
Finally, legal obligations and insurance implications are outlined to guarantee compliance and risk transfer.
Carbon monoxide, gas leaks, and ventilation safeguards
Many incidents involving household geysers stem from carbon monoxide exposure, gas leaks, or inadequate ventilation, so installers and homeowners must prioritize detection and airflow measures.
Installers should guarantee proper flueing, sealed connections, and compliant combustion air provision.
Install and maintain certified CO and gas detectors, perform routine leak checks, keep vents unobstructed, and follow local codes.
Immediate evacuation and professional service on alarm activation is mandatory.
Electrical hazards and grounding requirements
Although primarily associated with water heating, geysers also pose significant electrical risks if wiring, connections, or protective devices are improper or degraded.
Technicians must confirm circuit breakers, residual-current devices, and proper conductor sizing are installed. Bonding and reliable grounding prevent shock and fire.
Regular inspections detect corrosion, loose terminals, or insulation failure. Disconnect power before service and follow local electrical codes.
Pressure-related dangers and relief valve best practices
Excessive pressure inside a geyser can cause catastrophic tank rupture or unintended discharge, so technicians must understand how temperature, trapped steam, and faulty controls contribute to overpressure.
Install properly sized pressure relief valves (PRVs), orient discharge piping to safe areas, test valves during commissioning and periodically, relieve thermal expansion with expansion tanks or backflow prevention arrangements, and replace corroded or seized relief devices promptly.
Legal and insurance considerations
While compliance with codes and manufacturer instructions reduces risk, legal and insurance consequences for improper geyser installation or maintenance can be severe.
Owners must use certified installers, retain receipts and inspection records, and guarantee permits where required.
Failure may void warranties, trigger claim denials, fines, or liability for damages and injuries.
Regular documented servicing and adherence to standards mitigate legal exposure and insurance disputes.
Cost Breakdown and Energy Savings Strategies
The article outlines the typical cost components of a geyser, including purchase, installation, maintenance, and ongoing energy expenses.
It then lists practical ways to reduce bills—such as adding insulation, using a timer, adjusting temperature settings, and selecting high-efficiency models.
Finally, it notes the importance of checking available rebates and incentives that can lower upfront and operating costs.
Typical installation and running cost components
A clear breakdown of costs helps homeowners assess both upfront and ongoing financial commitments when installing a geyser. Typical components include unit price, installation labour, permits, piping/electrical upgrades, and monthly energy and maintenance expenses. Understanding these aids budgeting and long-term planning.
| Item | Typical cost impact |
|---|---|
| Unit | High |
| Installation | Variable |
| Permits | Low |
| Upgrades | Medium |
| Running | Recurring |
Ways to reduce bills: insulation, timer use, temperature settings
Several straightforward measures can cut geyser-related bills by targeting heat loss and unnecessary runtime: improving tank and pipe insulation, scheduling heating with timers to match hot-water demand, and lowering thermostat settings to the minimum comfortable temperature.
Proper insulation reduces standby losses; timers prevent heating during low-use hours; modest thermostat reductions yield significant energy savings without impacting comfort.
Regular maintenance preserves efficiency.
Rebates, incentives, and choosing efficient models
Although upfront costs can deter upgrades, rebates and incentives often materially lower the barrier to purchasing high-efficiency geysers, making payback periods shorter and lifecycle costs clearer.
Governments, utilities, and manufacturers may offer tax credits, rebates, or trade-in programs.
Selecting ENERGY STAR or equivalent-rated units, comparing first cost versus projected energy savings, and documenting incentives optimizes total cost of ownership and reduces operating expenses.
Real-World Installation Scenarios and Examples
The section presents practical installation scenarios to illustrate how constraints and solutions differ between a small apartment, a high-demand family home, and retrofit versus new-build projects.
It compares space, venting and electrical limitations for compact units with sizing and system choices required for larger households.
It also highlights key considerations when adapting existing systems versus planning installations in new construction.
Small apartment installation: constraints and solutions
When space is limited and building systems are shared, installing a geyser in a small apartment requires careful assessment of available room, plumbing layout, electrical capacity, and ventilation options.
The installer should prefer compact or tankless units, verify shared riser access, confirm breaker and amp limits, route condensate and flue safely, obtain landlord and code approvals, and plan maintenance access without disrupting neighbors.
Family home with high demand: sizing and system choices
Because a family home with high hot-water demand must balance peak flow, recovery rate, and energy efficiency, selecting the right geyser starts with an accurate load analysis:
Determine simultaneous fixture use, hourly consumption, and desired temperature rise.
Choose between large-capacity storage, high-recovery electric, or tankless systems; consider hybrid heat-pump models.
Factor redundancy, distribution losses, and local fuel costs when specifying capacity and controls.
Retrofit vs new-build installation considerations
Having selected capacity and system type for a high-demand family home, installers and designers must then address how site conditions differ between retrofits and new-builds: existing plumbing routes, available electrical or gas infrastructure, venting options, and structural access all constrain retrofit choices, while new construction permits ideal placement, oversized service runs, and integrated controls.
Retrofit work demands compromises, tracer studies, and selective upgrades; new builds enable optimized layouts, dedicated circuits, and future-proofing.
Final Checklist Before You Finish the Job
Before leaving the site, the installer runs through a concise final checklist to confirm all essential tasks are completed.
- Verify safety measures and leave clear user guidance and documentation.
- Complete warranty registration and recommend a professional inspection.
Safety, documentation, and user guidance to provide
Conclude the installation by verifying safety systems, documenting work, and briefing the user on operation and maintenance.
Inspect valves, pressure relief, electrical connections and leak-free seals.
Record serial numbers, settings, test results and adjustments in a clear report.
Provide concise user instructions: normal operation, temperature control, emergency shutdown, routine maintenance schedule and contact information for service.
Guarantee user acknowledges receipt.
Warranty registration and professional inspection recommendations
After completing safety checks, documentation, and the user briefing, attention should turn to warranty registration and arranging any recommended professional inspections.
The installer should submit registration promptly, retain proof of purchase and installation details, and inform the owner of coverage terms.
Recommend a certified plumbing or gas inspector for pressure testing, venting verification, and periodic maintenance intervals to preserve warranty validity and guarantee safe operation.
Conclusion
A properly installed geyser transforms daily routines by delivering reliable hot water while conserving energy and enhancing safety. Following the outlined selection, preparation, and installation steps minimizes risks and long-term costs. Could anyone deny the value of careful planning and adherence to best practices? Ultimately, routine maintenance, correct sizing, and attention to safety details guarantee peak performance and peace of mind, making the effort invested in a proper installation well worth the outcome.