How to Fix a Shower Leaking Behind the Wall: Step-by-Step Repair Guide
If you’re dealing with a shower leak behind the wall, it often originates from the valve, cartridge, diverter, or supply lines, leading to damage in the framing, insulation, and drywall. To fix this leak, start by shutting off the water supply and electricity. Next, use moisture meters, dye tests, or infrared scans to identify the leak’s source. Once located, isolate the affected sections, replace any faulty valves or cartridges, and repair or replace any damaged fittings or pans. After addressing these issues, dry the area thoroughly and remediate any mold. Finally, pressure-test the system before sealing the wall back up. Follow this guide for detailed diagnostics, necessary tools, and tips for preventing future leaks.
What Causes a Shower to Leak Behind the Wall
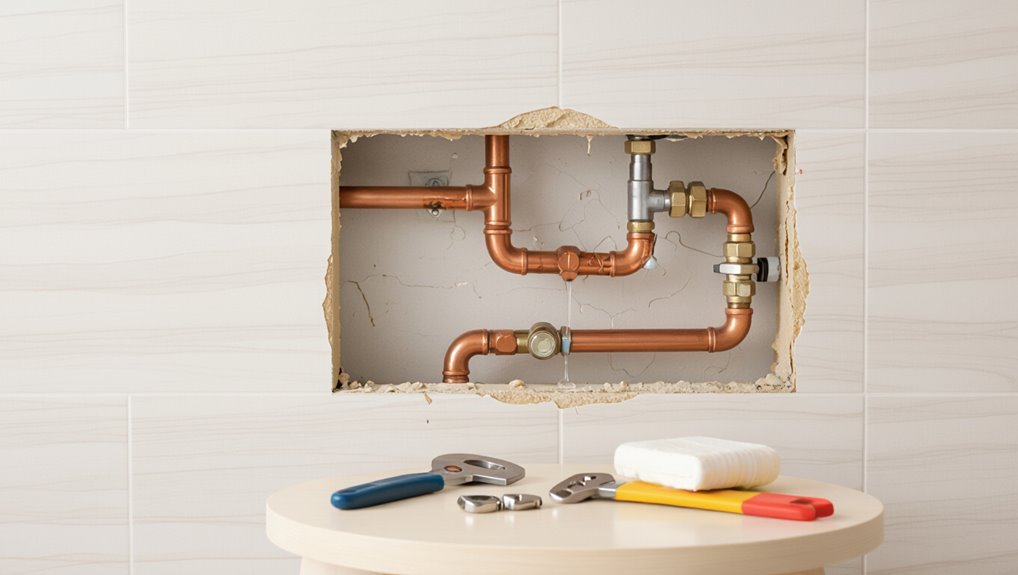
Behind-the-wall shower leaks often originate at the valve assembly, cartridge or diverter, or from deteriorated supply lines and fittings.
Once water escapes, it can track through studs and cavities, wetting drywall, insulation, and framing and causing mold or rot.
Persistent dampness, musty odors, bubbling or discoloration of adjacent walls or ceilings, and unexplained water on the floor suggest a concealed leak rather than a surface problem.
Common sources of behind-the-wall leaks (valve, cartridge, diverter, supply lines)
When water appears on a bathroom floor or stains the ceiling below, the culprit is often a failure in one of several hidden components: the shower valve assembly, a worn cartridge, a malfunctioning diverter, or compromised supply lines.
Technicians diagnosing how to fix shower leaking behind wall check valve seals, cartridge degradation, diverter wear, loose fittings, and corroded or burst supply tubing, isolating the specific source for targeted repair.
How water travels through wall cavities and damages materials
Water follows the path of least resistance through gaps, seams, and degraded materials in a wall cavity, migrating from the shower fixture into framing, insulation, and drywall.
Once inside, it soaks porous materials, weakens fasteners, and promotes mold.
Continuous moisture causes wood rot, insulation compaction, and plaster deterioration, enlarging pathways and accelerating spread until structural components and finishes require repair or replacement.
Signs that a leak is coming from behind the wall vs. surface leaks
As moisture spreads through framing and finishes, distinguishing leaks originating behind a wall from those confined to the shower surface becomes a practical diagnostic step.
Indicators of behind‑wall leaks include persistent dampness despite surface repairs, localized musty odors, staining or bulging drywall away from fixtures, and unexplained floor or ceiling water damage.
Surface leaks show visible grout or sealant failures and immediate pooling.
Immediate Safety and Damage-Containment Steps Before Repair
Before any repair is attempted, the individual shower shut-off and, if necessary, the whole-house water supply should be turned off to stop further leakage.
A quick check for electrical hazards near wet areas and removal of power to affected circuits can prevent shock or fire, while towels, buckets, and temporary seals can limit water spread and protect floors.
If the leak is uncontrolled, affects structural elements, or involves wiring, a professional emergency plumber should be contacted immediately.
Shut-off procedures for individual shower and whole-house water supply
Any leak repair starts by stopping the flow: locate and shut off the shower’s individual valve, then cut the main supply if the leak persists or the individual valve is inaccessible.
Confirm shutdown by running faucets and checking pressure. Close house valve at the meter or main; drain remaining water from low taps.
Tag valves and notify occupants before proceeding.
Power and electrical risk checks
If water has reached electrical fixtures or wiring, power sources must be isolated immediately to prevent shock and fire.
A qualified electrician should be contacted if there is any doubt.
Visually inspect accessible outlets, switches, and fixtures for corrosion or moisture without touching them.
Turn off breakers for affected areas and label them.
Do not restore power until repairs and drying are complete.
Temporary measures to limit water damage (towels, buckets, shutoff)
After isolating power and labeling breakers, attention should shift to stopping further water spread and protecting possessions.
Place towels and absorbent pads around the shower and under visible leaks. Set buckets beneath drips and empty frequently. Move rugs, electronics, and valuables out of the affected area.
Locate and close the shower shutoff or main water valve to halt flow until repairs proceed.
When to call a professional emergency plumber
Call a professional emergency plumber when the leak poses an immediate risk to safety, property, or structural integrity.
A licensed plumber should be contacted if water spreads uncontrollably, electrical fixtures are wet, mold appears extensively, ceiling or floor sagging occurs, or shutoff valves fail.
Prompt professional intervention prevents major structural damage, uncontrolled mold growth, and costly repairs beyond basic homeowner temporary measures.
Tools and Materials Needed for Diagnosing and Repairing a Behind-the-Wall Leak
A clear list of diagnostic and repair items helps streamline behind-the-wall leak work.
Essential diagnostic tools include a moisture meter, infrared camera, and pressure gauge, while plumbing repair tools range from pipe cutters and wrenches to tubing and a soldering kit.
Common replacement parts and finishing supplies include valves, cartridges, PEX fittings, shower pan materials, backer board, waterproof membrane, tile, and grout.
Diagnostic tools (moisture meter, infrared camera, pressure gauge)
Many homeowners will rely on three primary diagnostic tools—moisture meters, infrared cameras, and pressure gauges—to locate and assess behind-the-wall shower leaks.
Moisture meters quantify dampness in studs and drywall. Infrared cameras reveal cooler, wet areas and hidden moisture patterns. Pressure gauges test supply-line integrity, indicating drops that suggest active leaks.
Combined, they guide targeted access and repair decisions.
Plumbing repair tools (pipe cutters, wrench, tubing, soldering kit)
Armed with moisture readings, thermal images, and pressure test results, the technician moves from diagnosis to the physical work of plumbing repair, assembling the specific tools and materials needed to access and fix behind-the-wall leaks.
Essential items include pipe cutters for copper or PEX, adjustable and basin wrenches, tubing and fittings, a propane torch or soldering kit, flux, solder, plumber’s tape, and leak detection dye.
Replacement parts commonly required (valves, cartridges, PEX fittings, shower pan materials)
Begin by cataloging the replacement parts most likely needed to repair a behind-the-wall shower leak: common items include shower valves and cartridge assemblies, trim kits, and escutcheons;
PEX tubing, fittings, and crimp rings or push-fit connectors; corrosion-resistant nipples and adapters;
replacement shower pans or liners, drain assemblies and clamping rings;
O-rings, gaskets, plumber’s tape, and appropriate mounting hardware.
Wall repair and finishing supplies (backer board, waterproof membrane, tile, grout)
After securing the necessary valves, fittings, and pan components, attention turns to restoring the wall and finished surface once the plumbing is repaired.
Use cement backer board or moisture-resistant drywall as substrate. Apply a bonded waterproof membrane over seams.
Select tile compatible with wet areas; thin-set mortar secures tiles. Finish with epoxy or mold-resistant grout and sealant at joints for durable, watertight restoration.
Step-by-Step Diagnostic Process to Locate the Leak
The diagnostic process begins with a focused visual inspection of tiles, grout lines, and any ceiling or wall areas below the shower to spot stains, cracks, or missing grout.
Technicians then use moisture meters and infrared cameras to map wet areas and follow elevated moisture readings toward the source.
Isolating sections with pressure tests and targeted shutoffs helps determine whether the problem originates from supply plumbing, the drain, or the shower pan.
Visual inspection checklist (tiles, grout, grout lines, ceiling below)
When inspecting for a shower leak, a systematic visual checklist focuses on tiles, grout, grout lines, and the ceiling beneath to quickly narrow possible entry points.
Examine tile surfaces for cracks, loose or hollow-sounding tiles, and discoloration.
Inspect grout for gaps, crumbling, or missing sections.
Follow grout lines to corners, seams, and penetrations.
Check the ceiling below for stains, bubbling paint, or soft spots.
How to use a moisture meter and infrared camera effectively
Begin by powering up and calibrating both the moisture meter and the infrared camera according to the manufacturers’ instructions to guarantee reliable readings.
Scan the shower area systematically: meter for elevated moisture at grout, corners, and behind trim; camera for temperature anomalies indicating moisture paths.
Mark hotspots, record readings, and recheck after drying intervals to confirm persistent wet zones before planning repairs.
Isolating the leak: pressure testing and section-by-section isolation
Isolate the shower system into testable sections before applying pressure tests so that leaks can be traced to a specific component or area.
Shut off water, cap hot and cold lines, then pressurize individual segments (supply stub-outs, valve assembly, branch runs) with a calibrated gauge.
Monitor pressure decay and inspect accessible joints.
Record results, repeat as needed, and mark the failing section for targeted access and repair.
Identifying whether the leak is plumbing, drain, or shower pan related
How can one determine whether a shower leak originates from the plumbing, the drain assembly, or the shower pan?
The diagnostic process inspects symptoms: wet ceiling or wall below suggests plumbing; localized floor pooling or slow drain indicates drain assembly; widespread under-floor dampness or mortar bed saturation points to shower pan failure.
Confirm with targeted isolation, dye tests, and short-duration pressure checks.
Repair Path A Fixing a Leaky Shower Valve or Cartridge Behind the Wall
The technician first removes trim and escutcheon plates, following manufacturer instructions and shutting off water to access the valve safely.
Next, the technician replaces or rebuilds the cartridge or valve components, then re-seals the opening with appropriate gaskets, sealant, and waterproof backing.
Finally, the repair is pressure-tested and inspected for leaks before the wall is closed and trim reinstalled.
How to remove trim and access the valve safely
Begin by turning off the water supply and confirming no pressure remains in the lines before touching trim or opening the wall.
Remove escutcheon screws, pull trim plate gently, and detach handle per manufacturer instructions.
Support plaster or tile edges to prevent chipping.
Use a flashlight to inspect behind trim, note fasteners and sealant, and keep removed parts organized for reassembly.
Use protective eyewear.
Steps to replace or rebuild a valve/cartridge
Proceed with caution when replacing or rebuilding a shower valve or cartridge, since the task involves exposed plumbing, precise parts, and potential for leaks if reassembly is incorrect.
Shut off water, drain lines, and remove the old cartridge or valve body. Inspect seats, O-rings, and retaining clips.
Install correct replacement, lubricate seals, torque fasteners to spec, restore water, and test for proper operation and leaks.
Re-sealing and waterproofing the valve opening
After reinstalling the cartridge or valve body and confirming no internal leaks, attention shifts to sealing the wall opening to prevent moisture intrusion and structural damage.
Apply a continuous bead of approved silicone or urethane sealant around the valve flange.
Install a waterproof backer (foam or membrane) behind the trim plate if accessible, then fit a corrosion-resistant escutcheon, ensuring a tight, watertight perimeter.
Testing the repair before closing the wall
Pressurize the system and observe all accessible connections, trim plate areas, and the valve body for at least 15–30 minutes to confirm the repair holds under normal operating pressure.
Cycle hot and cold, operate diverter and shower head, and inspect for slow drips or wet spots.
Use a moisture meter or tissue to detect seepage.
Only close the wall when absolutely dry and leak-free.
Repair Path B Repairing Leaks in Supply Lines or Sweat/Solder Joints
Repair Path B addresses leaks in the supply lines and at sweat/solder joints, often hidden behind walls or access panels.
The discussion covers minimally invasive access, comparison of repair options (compression fittings, push-fit/PEX, and re-soldering copper), and procedures for pressure testing to confirm a fix.
It also outlines best practices for routing and supporting repaired pipes to prevent future stress and leaks.
Accessing concealed supply lines with minimal damage
When a shower’s supply lines or sweat joints are hidden behind finished walls or tile, the technician must locate the leak and create the smallest possible access opening to reach the damaged section.
Use noninvasive detection (moisture meter, borescope, thermal imaging), mark stud bays, cut through grout or drywall between studs, and preserve surrounding tile.
Support plumbing before repair and box the opening for neat patching.
Repair methods: compression fittings, sharkbite/PEX, soldering copper
With the leak exposed and the plumbing securely supported, the technician evaluates three common methods for restoring supply lines: compression fittings, push-to-connect (SharkBite) or PEX connections, and traditional soldering of copper joints.
Compression suits temporary or tight spaces; SharkBite/PEX offers speed and flexibility without heat; soldering yields durable, permanent copper repairs when accessibility and skill permit. Each method is chosen by pipe material and site constraints.
Pressure testing and leak confirmation
Begin by isolating the repaired section and pressurizing the line to confirm integrity before finishing the job.
Use a calibrated pressure gauge and a pump or water supply to reach normal system pressure plus a small safety margin.
Hold pressure for several minutes while inspecting joints and surrounding surfaces for seepage.
Record readings; any drop or visible dampness requires rework and repeat testing until stable.
Best practices for routing and supporting repaired pipes
Plan the new routing and supports to minimize stress on repair joints and allow future access.
Route supply lines with gentle bends, avoiding sharp elbows and contact with framing.
Secure pipes with cushioned clamps at regular intervals to prevent vibration and sagging.
Maintain clearance from electrical wiring and insulation.
Use accessible mounting points and label hidden shutoffs to simplify future maintenance and inspections.
Repair Path C Fixing a Damaged Shower Pan or Drain Causing Behind-the-Wall Leaks
The next step examines whether the leak originates from a compromised shower pan or a failing drain assembly by outlining simple tests and inspection signs.
It then compares limited pan patching versus complete pan replacement and explains correct procedures for installing a new prefabricated pan or constructing a tile mortar bed.
Finally, it covers re-bedding and waterproofing the drain flange and surrounding substrate to restore a watertight seal.
Determining whether the shower pan or drain is the culprit
Determining whether a shower pan or its drain is causing a leak requires systematic inspection of visible symptoms and simple diagnostic tests.
Observe water pooling, soft spots, or grout gaps for pan failure; check for corrosion, loose fittings, or wetness concentrated near the drain for drain faults.
Perform a dye test and isolate water sources.
Record findings to guide targeted repairs.
Options: pan patching vs. full pan replacement
Once inspection points to the shower pan as the leak source, a decision must be made between patching the existing pan or replacing it entirely.
Patching suits small, localized flaws when substrate and curb remain sound; it’s quicker and cheaper.
Full replacement is warranted for widespread damage, persistent leaks, or compromised framing.
Cost, longevity, access, and future risk determine the preferred path.
Proper installation of a new shower pan or tile mortar bed
Begin by verifying the subfloor and surrounding framing are fully dry, level, and free of mold or rot before installing a new shower pan or a mortar bed.
Select a compatible pan or mix deck to match drain location.
Ascertain a continuous slope to the drain, secure the pan to framing per manufacturer instructions, or pack mortar evenly with proper compression and cured drying times before proceeding.
Re-bedding and waterproofing the drain flange and surround
After verifying the pan or mortar bed is properly set and cured, attention shifts to the drain flange and the immediate surround, where leaks commonly originate.
Remove old flange sealant, inspect flange and clamping ring, and bed flange in non-sagging polymer-modified mortar or approved sealant.
Install waterproof membrane upturned over flange, integrate with clamping ring, and torque fasteners evenly.
Test for watertightness before finishing.
Wall Opening, Repair, and Waterproofing After Plumbing Fix
After the plumbing repair is complete, the wall is opened carefully to remove damaged drywall or tile backer, taking precautions to avoid electrical or vapor-barrier damage.
The exposed framing and insulation are inspected for rot and mold, with any compromised materials cut out and replaced.
New backer board is installed, a waterproof membrane applied, and tile, grout, and caulk techniques are used to restore a continuous, watertight finish.
How to safely cut and remove damaged drywall or tile backer
To access and replace water-damaged drywall or tile backer, the installer carefully defines the repair boundary, cutting back to solid, dry material and preserving as much surrounding substrate as possible. This controlled removal minimizes disruption, reduces the risk of spreading mold or compromising adjacent finishes, and creates a clean edge for backing and flashing to guarantee a watertight restoration.
The installer scores finishes, removes compromised panels, labels fasteners, and disposes of debris safely.
Inspecting framing and insulation for rot and mold
With the damaged drywall or tile backer removed and a clean boundary established, the installer inspects exposed framing and insulation for signs of rot, mold, or ongoing moisture intrusion.
Visual and tactile checks identify discolored, softened, or crumbly wood and damp, compacted, or stained insulation.
Suspect areas are probed, measured for moisture content, and documented to determine targeted removal, drying, and remediation steps.
Replacing backer board and installing waterproof membrane
Begin by fitting new cement backer board to the prepared opening, cutting panels to snugly span studs and align with remaining tile edges while maintaining a 1/8–1/4 inch gap at seams and a small clearance around fixtures.
Fasten with corrosion‑resistant screws, tape joints with alkali‑resistant mesh, apply thinset skim coat, then install a continuous waterproof membrane (sheet or liquid) overlapping seams and flashing all penetrations.
Tiling, grout, and caulk techniques to restore a watertight finish
Install tile so that edges align with existing work and grout joints match the original width and pattern, ensuring each piece seats firmly in the waterproofed substrate with full thinset contact.
Use staggered cuts to blend seams.
After curing, apply grout compatible with wet areas, tool joints flush, and wipe haze.
Finish by caulking movement joints with mildew-resistant silicone, tooled for a smooth, continuous bead.
Mold, Mildew, and Structural Remediation After a Leak
After a shower leak, the article outlines how to distinguish surface staining from active mold growth by examining texture, color, and musty odors and, if needed, testing.
It then summarizes safe remediation steps for small to medium areas—containment, protective gear, detergent or EPA-registered cleaners, and proper drying—and explains signs that sheathing or joists require replacement, such as rot, softening, or structural movement.
Finally, it emphasizes preventing recurrence through improved ventilation, repaired waterproofing, and routine inspections.
Identifying mold vs. simple staining
Distinguishing mold from simple staining is a critical step in post-leak assessment because the two look similar but require different responses.
Inspect for texture (fuzzy, slimy, or powdery suggests mold), color persistence after drying, musty odor, and recurring discoloration.
Test suspect areas with a tape lift or surface swab sent for lab analysis if uncertain.
Document extent and affected materials.
Safe mold remediation steps for small- to medium-sized areas
Before remediation begins, the responder should establish containment, personal protection, and a clear plan: seal the work area with plastic sheeting and negative air if possible, don appropriate PPE (N95 or higher respirator, gloves, eye protection, and disposable coveralls), and identify materials to be cleaned, removed, or discarded based on porosity and extent of contamination.
Remove non-salvageable materials, HEPA-vacuum surfaces, clean with detergent and appropriate biocide, dry thoroughly, and monitor moisture until safe.
When structural members need replacement
When structural members show significant mold growth, warping, decay, or a loss of load-carrying capacity, they must be evaluated and often replaced to restore safety and prevent recurrent contamination.
Replacement involves removing compromised framing, sheathing, and insulation; documenting conditions; installing equivalent or upgraded materials; ensuring proper fasteners and flashing; and verifying structural alignment.
Licensed contractors should perform load-bearing repairs and inspections.
Preventing future mold growth (ventilation, waterproofing)
After replacing or repairing compromised framing and sheathing, attention shifts to measures that prevent mold from returning: controlling moisture through effective ventilation and reliable waterproofing.
Install a properly sized exhaust fan vented outdoors, seal gaps, and guarantee continuous airflow.
Apply waterproof membranes behind tile, use cement backer board, slope shower pans correctly, and inspect seals regularly to catch failures early.
Testing, Final Checks, and Preventive Maintenance
A full system pressure and functional test should be performed to confirm repairs hold under normal and peak conditions.
A concise checklist can then verify waterproofing, tile integrity, and visible seal and grout condition.
Finally, routine maintenance tips and recommended inspection intervals—shorter for older plumbing—help prevent future behind-the-wall leaks.
How to perform a full system pressure and functional test
Begin by isolating the shower system and preparing gauges and flow meters to verify integrity and performance under controlled conditions.
Pressurize to recommended psi, monitor for drops over 15–30 minutes, and inspect all fittings, valves, and repair sites for seepage.
Operate valves, diverters, and showerhead to confirm proper flow and temperature stability.
Document results and remedy any detected leaks before restoring normal use.
Checklist to verify waterproofing and tile integrity
When waterproofing and tile work are complete, the checklist should guide a systematic verification of membrane continuity, tile adhesion, grout integrity, and drainage to guarantee long-term leak prevention.
Inspect seams, corners, and junctions for voids or pinholes; perform adhesion tests on sample tiles; verify grout cured uniformly and is crack-free; confirm weep holes and slopes direct water to the drain; document findings and corrective actions.
Routine maintenance tips to prevent future behind-the-wall leaks
Following the checklist for waterproofing and tile integrity, routine maintenance focuses on testing assemblies, performing final operational checks, and instituting preventive measures to stop hidden, behind-the-wall leaks.
Recommended actions include:
- Pressure-test valves and shower lines after repairs
- Inspect grout and caulk for gaps or deterioration
- Verify drain flow and secondary overflow function
- Exercise shutoff valves periodically
- Document findings and corrective actions for tracking
Recommended inspection intervals for older plumbing
How often should older plumbing be inspected to reliably catch failing components before they cause behind-the-wall leaks?
Inspections every 12 months are recommended for systems over 20 years old; semiannual checks serve high-use bathrooms or known problem areas.
Include visual exams, pressure tests, and moisture scans.
Replace compromised valves, connectors, or seals promptly.
Maintain records to track deterioration and schedule proactive repairs.
Cost Estimates, Timeframes, and When to Hire a Professional
Typical repair costs vary by type—replacing a valve often runs higher than fixing a supply line, while pan or wall repairs can be the most expensive.
DIY fixes may take an afternoon to a weekend, whereas professionals complete most jobs faster and include diagnostic time and warranty.
Immediate professional help is advised for hidden water damage, persistent leaks after attempted repairs, or any situation involving structural rot, mold, or compromised electrical components.
Typical cost ranges by repair type (valve, supply line, pan, wall repair)
When weighing repair options for a leaking shower, homeowners should expect distinct cost and time profiles for valve replacements, supply-line fixes, pan repairs, and wall restorations. Typical ranges: valves $150–$800, supply lines $100–$600, pans $300–$1,200, wall repair $200–$1,500. Decisions hinge on damage severity and access; professionals recommended for hidden or widespread leaks.
| Repair type | Typical cost | Emotional weight |
|---|---|---|
| Valve | $150–$800 | Anxiety |
| Supply line | $100–$600 | Urgency |
| Pan | $300–$1,200 | Frustration |
| Wall repair | $200–$1,500 | Relief/Stress |
Estimated time required for DIY vs. professional repairs
Although smaller fixes can often be completed in an afternoon, estimated timeframes vary widely: DIY valve or supply-line repairs commonly take 1–4 hours for someone with basic plumbing skills, while full pan replacements or extensive wall repairs may require several days including drying and tile work.
Professionals complete complex jobs faster—often 1–2 days for pan/tile work—but scheduling and inspections can extend total turnaround.
Red flags that mean you should call a licensed plumber or contractor
Warning signs that warrant a licensed professional should be treated seriously: pervasive water stains, persistent odors of mold or mildew, visible structural damage behind tiles or drywall, recurring leaks despite repeated repairs, sewage backflow, or shortages in water pressure affecting only the shower.
In such cases, hire a licensed plumber or contractor for inspection, moisture mapping, structural assessment, permit‑compliant repairs, and reliable cost and timeline estimates.
Common Mistakes to Avoid During Diagnosis and Repair
Common mistakes during shower leak diagnosis and repair often start with cutting access panels in the wrong place, which can complicate repairs and damage framing.
Using improper waterproofing or incompatible materials, skipping pressure tests, or rushing tile and grout curing are frequent causes of recurring leaks.
Failing to address insulation and ventilation problems can allow moisture to persist and undermine any repair work.
Cutting access panels in the wrong place
Where should an access panel be cut to inspect a leaking shower? The panel should align with plumbing fixtures and visible leak points, avoiding structural studs, electrical runs, and finished tile lines.
Cutting in the wrong place complicates repairs, increases patching difficulty, and risks hidden systems. Measure, locate pipes with a detector, and mark an access rectangle that minimizes damage while allowing clear inspection and repair.
Improper waterproofing or using wrong materials
Failing to waterproof correctly or selecting inappropriate materials often turns a simple shower repair into a recurring problem.
Moisture barriers, sealants, and backerboard must match conditions and local codes; ceramic adhesives and grout require compatibility with movement and wet environments.
Using non-waterproof drywall, indoor caulk, or weak membranes invites leaks, mold, and repeated demolition; choose rated products and follow manufacturer instructions.
Skipping pressure tests or rushing tile/grout curing
Skip pressure testing or rushing tile and grout curing, and early signs of a successful repair can be misleading.
Technicians who skip a full pressure test risk undetected leaks under thinset or behind backerboard.
Insufficient grout curing lets moisture penetrate joints, causing repeat failures.
Proper dwell times and systematic testing confirm integrity before restoration, preventing recurrent water damage and wasted labor.
Overlooking insulation and ventilation issues
Although often treated as secondary concerns, inadequate insulation and poor ventilation are frequent root causes of recurring shower leaks and hidden moisture damage.
Failure to address thermal bridging and trapped humidity encourages condensation, mold, and rot behind walls.
Inspect wall cavities, vapor barriers, and exhaust fan capacity; upgrade insulation, add ventilation or improve airflow as needed to prevent repeat failures and protect structural components.
Quick Reference Repair Decision Flowchart
A concise decision flowchart guides users through key choices: assess the leak’s source, evaluate skill and tool availability, and weigh repair scope.
If the problem is localized and the homeowner is confident, the chart points toward DIY minimal repairs; widespread damage or uncertain diagnosis directs toward professional full replacement.
The flowchart emphasizes safety, cost, and likelihood of long-term success to inform the final decision.
Decision steps to determine DIY vs. professional, minimal vs. full replacement
When deciding whether to tackle a leaking shower oneself or hire a pro, start by isolating the leak’s source, evaluating damage extent, and estimating skill, tools, and time available. Those factors determine if a targeted patch, component swap, or full replacement is appropriate.
- Confirm leak origin (fixture, pipe, pan)
- Assess mold, rot, structural harm
- Inventory tools and skills
- Estimate cost vs. risk
- Choose DIY patch, part swap, or pro replacement
Conclusion
A homeowner can address behind-the-wall shower leaks by understanding causes, containing damage, diagnosing carefully, and choosing the correct repair path — from valve cartridge replacement to more extensive pipe or pan fixes. After testing and preventive measures, costs and timeframes guide the decision to DIY or hire a pro. Who wants lingering moisture, mold, and escalating repair bills when prompt, methodical action prevents them? With patience and the right steps, leaks become manageable.