How to Run a CSST Gas Line Safely: Step-by-Step Guide for DIYers and Pros
To safely run a corrugated stainless steel tubing (CSST) gas line, follow the manufacturer’s instructions and adhere to local codes. Key steps include planning the gas line route, shutting off the gas supply, using approved fittings, maintaining proper bend radii, securing the tubing, and conducting pressure and leak tests with calibrated gauges or soap solutions. Additionally, ensure bonding and grounding to the electrical system, and check if permits and inspections are required in your area. Continue reading for detailed steps, necessary tools, and legal considerations.
What a CSST Gas Line Is and When It’s Used
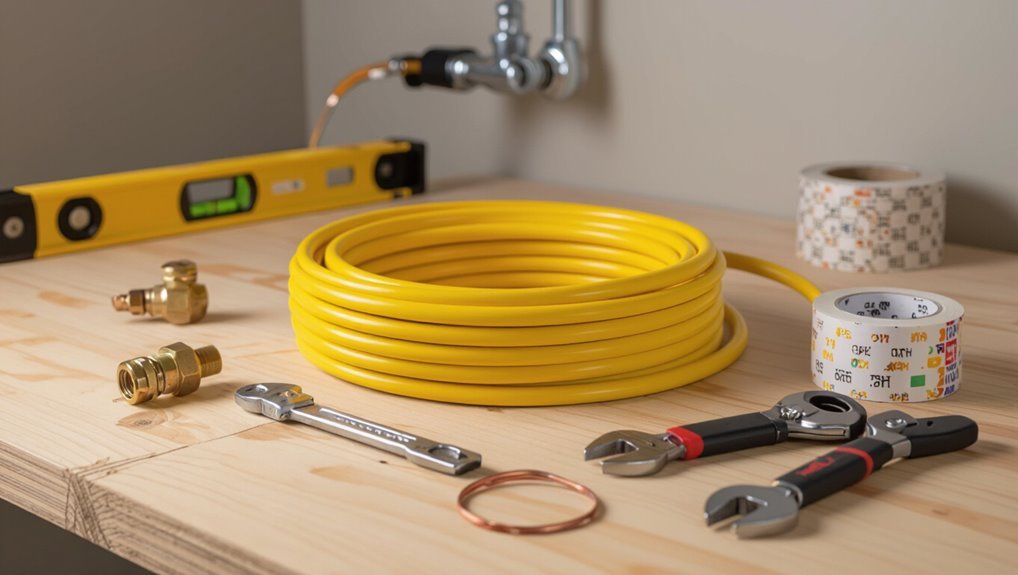
A CSST gas line is a flexible stainless-steel tubing system with a protective polymer jacket, brass or stainless fittings, and bonding/grounding provisions that supply natural gas or propane.
Unlike rigid black iron piping, CSST is lightweight, easier to route through structures, and requires specific fittings and bonding to address puncture and lightning concerns.
It is commonly used in residential and light commercial installations where flexibility and reduced joint count improve installation speed and accessibility.
Definition and core components of CSST
Corrugated stainless steel tubing (CSST) is a flexible, thin-walled gas delivery system composed of corrugated stainless steel jacketed in a protective polymer coating and commonly paired with brass or stainless fittings and bonding clamps.
It includes tubing, fittings, protective jacket, bonding wires, grounding clamps, and installation labels. Understanding these components is essential for DIYers learning how to run CSST gas line safely and compliantly.
Differences between CSST and black iron piping
Having outlined CSST’s components and installation accessories, it is helpful to contrast CSST with traditional black iron piping to show where each system is appropriate. CSST is flexible, lighter, and faster to install; black iron is rigid, durable, and familiar to many plumbers. Summary table:
| Feature | CSST | Black Iron |
|---|---|---|
| Flexibility | High | Low |
| Installation speed | Fast | Slower |
| Corrosion resistance | Better | Variable |
Typical applications in residential and light commercial settings
Flexibility and ease of routing make CSST well suited for supplying natural gas and propane to furnaces, water heaters, boilers, ranges, and dryers in single-family homes, multifamily units, and small commercial spaces; its bendable tubing simplifies installations in tight crawlspaces and finished basements where black iron would require more fittings and labor.
It also serves outdoor grills, standby generators, and garage heaters, reducing joint counts and installation time while meeting code when properly bonded and supported.
Is It Legal and Safe for DIYers to Work on CSST?
Whether homeowners may work on CSST depends on local building codes, permit and licensing requirements that vary by jurisdiction.
Many jurisdictions mandate a licensed plumber or gas fitter for installations, alterations, or any work that connects to the gas service.
Liability and insurance implications also favor using licensed professionals, since DIY work can void coverage or expose the homeowner to legal and safety risks.
Overview of local code, permits, and licensing requirements
Because CSST installation affects gas safety and fire risk, jurisdictions require specific permits, inspections, and licensed professionals for most work beyond basic appliance connections.
Codes vary by state and municipality; they define allowable DIY tasks, required materials, bonding/grounding, inspection timelines, and permit fees.
Failure to comply can void warranties, trigger fines, or create liability.
Confirm local requirements before starting any CSST project.
Situations that require a licensed plumber or gas fitter
When work involves modifying the service, running new main lines, altering meter sets, or tapping into pressurized piping, a licensed plumber or gas fitter is required by code in most jurisdictions.
Professionals must also handle complex relocations, appliance conversions, multi‑unit systems, commercial installations, and situations involving corrosion, suspected leaks, or structural penetrations.
Permit sign‑offs and pressure testing typically demand certified expertise.
Liability and insurance considerations for homeowner work
Although homeowners may feel capable of basic plumbing tasks, working on CSST carries legal and insurance implications that make DIY work risky.
Liability for improper installation, code violations, and resulting damage often falls on the homeowner. Many insurers deny claims for unpermitted or unlicensed gas work.
Confirm local regulations, obtain permits, document inspections, and verify policy coverage; hire licensed professionals when required.
Tools, Materials, and Safety Gear You Need
The section outlines the essential tools and testing equipment required to install and pressure-test CSST safely.
It identifies recommended materials, compatible fittings, and grounding components to guarantee code compliance and leak-free connections.
It also lists necessary personal protective equipment and emergency supplies to manage hazards during installation.
Required tools and testing equipment
A concise, well-organized set of tools and testing equipment is essential before beginning any CSST gas line installation.
The installer should gather items that enable accurate measurement, secure connections, and safe pressure testing while minimizing contamination or damage.
- Adjustable wrench and tubing cutter
- Pipe thread sealant and torque wrench
- Gas leak detector (sniffer)
- Manometer or pressure gauge
- Soap solution and brush
Recommended materials and compatible fittings
Materials selected for CSST installations must be listed and matched to the specific brand and code requirements to guarantee compatibility and long-term safety.
Compatible fittings, approved connector pieces, and manufacturer-approved clamps prevent leaks and voided warranties. Use listed pipe thread sealants and support hardware rated for gas service.
Verify corrosion-resistant finishes for the environment.
- CSST brand-specific fittings
- Approved connector couplers
- Flexible-to-rigid adapters
- Listed pipe thread sealant
- Corrosion-resistant clamps
Personal protective equipment and emergency supplies
After selecting compatible fittings and corrosion-resistant hardware, attention should turn to the personal protective equipment and emergency supplies required for safe CSST installation.
Proper PPE and readiness reduce injury and mitigate leaks. Essential items include:
- Safety glasses and face shield
- Flame-resistant gloves
- Respirator (organic vapor/particulate)
- Portable gas detector and leak spray
- Fire extinguisher (Class B/C)
Pre-Work Safety Checks and Planning
Before beginning any work, the technician locates and shuts off the main gas supply and verifies isolation with a meter or test gauge.
Existing CSST and piping are inspected for dents, nicks, loose fittings, or corrosion, and appliance requirements and total gas load are calculated to confirm adequate capacity.
Planned routes are marked, hazards are avoided, and joint locations are plotted to minimize bends and maintain access for future inspection.
How to locate and shut off the gas supply
Locate and confirm the main gas shutoff and meter before any work begins, as knowing the exact supply point and how to stop flow is essential for safety and emergency response.
Identify the meter location, note valve orientation, and verify shutoff tools fit. Notify occupants and the utility if needed.
Turn off supply, depressurize downstream lines, and tag the valve to prevent accidental reactivation.
Inspecting existing CSST or piping for damage
With the supply secured and lines depressurized, attention turns to a careful inspection of existing CSST and associated piping for signs of damage or deterioration.
Examine jacket integrity, fittings, bonding connections, visible kinks, abrasions, corrosion, and burn marks.
Verify flexible-to-rigid changes and seals.
Note any deformities, punctures, loose fittings, or missing bonding and document locations for repair or replacement before proceeding.
How to read appliance requirements and gas load calculations
When planning gas work, the technician reviews each appliance’s input rating, BTU or kW demand, and required inlet pressure to calculate the total load and determine proper pipe sizing and regulator settings.
They compile appliance nameplates, convert units consistently, account for diversity factors per code, sum peak demands, and compare to available supply pressure.
Calculations inform pipe diameter, regulator selection, and verification steps.
Marking routes, avoiding hazards, and planning joint locations
Before any cutting or assembly begins, the installer maps the CSST route on the structure using a clear, continuous line that marks pipe runs, fittings, and service entry points. This visual guide identifies floor joists, studs, soffits, and equipment locations while highlighting potential hazards such as electrical conduits, HVAC ductwork, water lines, and concealed structural elements.
Then they locate joints at accessible, supported points, avoid crossings, and note fastening and bonding needs.
Step-by-Step Installation and Modification Procedure
The procedure begins with preparing and securing the work area to prevent damage and guarantee safe access.
Technicians then measure, cut, and bend CSST using approved techniques, select and install certified fittings and connectors, and attach the line properly to appliances and existing piping.
Finally, bonding and grounding are completed per code to protect the system from electrical hazards.
Preparing and securing the work area
A clear, well-marked work area reduces hazards and streamlines the CSST gas line installation process.
The installer isolates the zone, posts warnings, and restricts access. Flammable materials and ignition sources are removed or shielded.
Adequate lighting and ventilation are established. Tools and fittings are organized for efficiency.
Emergency shutoff and fire extinguisher locations are verified before beginning work.
Cutting, measuring, and bending CSST safely
With the work area secured and hazards addressed, attention shifts to measuring, cutting, and bending CSST with precision and care.
Use accurate measurements, mark cuts clearly, and employ approved tubing cutters to avoid shavings.
Deburr edges, inspect for damage, and bend gradually using a manufacturer-recommended spring or bender to prevent kinks.
Maintain correct bend radius and re-measure before finalizing runs.
Choosing and installing approved fittings and connectors
Begin by selecting only fittings and connectors listed by the CSST manufacturer and certified to applicable gas codes, ensuring compatibility with the tubing material, system pressure, and designated fuel type.
Inspect components for damage, confirm thread types and torque specs, use manufacturer-approved connection devices where required, apply proper sealants if specified, and tighten to recommended torque.
Document part numbers and installation dates.
Proper attachment to appliances and other piping
Make certain each CSST connection to appliances or existing piping follows the manufacturer’s step-by-step procedure and local code requirements, verifying appliance inlet types, matching connector fittings, and confirming the system is depressurized before any work begins.
Use proper adapters, thread sealant where specified, torque fittings to recommended values, support lines to prevent strain, test joints for leaks, and document modifications for inspection.
Bonding and grounding requirements for CSST
After securing appliance connections and verifying fittings and pressure, attention shifts to bonding and grounding the CSST system to reduce lightning- and fault-related risks.
Install a listed bonding clamp on the CSST or attached metal pipe, connect with appropriately sized copper conductor to the building grounding electrode system, follow manufacturer and NEC specifications, and document connections for inspection and future maintenance.
Pressure testing the system for leaks
Pressure-test the completed CSST installation with inert gas to confirm system integrity before introducing natural gas.
Isolate appliance valves, pressurize to recommended test pressure, and monitor with a calibrated gauge.
Apply soap solution or electronic leak detector at fittings and joints.
Maintain pressure for specified duration; document readings.
Depressurize and repair any detected leaks, then repeat testing until stable, acceptable results are achieved.
Final hookup and restoring gas service
With a stable pressure reading and no detectable leaks, the installer proceeds to the final hookup and restoration of gas service.
Valves are set to operating positions, appliances are reconnected, and flexible connectors are secured.
The installer opens the main slowly, monitors gauges and appliance operation, checks for odors or irregularities, and documents pressures and actions.
A final safety briefing concludes the procedure.
Testing, Verification, and Code Compliance
The section outlines acceptable methods for leak testing and pressure-hold tests, emphasizing measurable criteria and safety limits.
It also covers required documentation, permit procedures, and a concise inspection checklist to guarantee traceability.
Finally, it explains how to respond to inspector or utility company requirements and incorporate their findings into final compliance.
Acceptable methods for leak testing and pressure-hold tests
Inspectors and installers verify CSST integrity using approved leak-detection methods and specified pressure-hold procedures to confirm system tightness before gas service is energized.
Acceptable tests include soap solution or electronic gas detectors for joints, and a calibrated manometer for pressure-hold testing at prescribed test pressures and durations per code.
Any leaks must be corrected and retested until readings remain stable and within allowable decay limits.
Documentation, permits, and inspection checklist
Several key documents and approved permits must be compiled and presented before and after CSST testing to demonstrate compliance with codes and to facilitate official inspection.
Required items include permit copies, manufacturer installation instructions, pressure-test logs with dates and tester initials, leak-detection results, grounding/bonding verification, material receipts, and a completed inspection checklist.
Retain records for code enforcement and future maintenance.
How to address inspector or utility company requirements
Addressing inspector or utility company requirements begins with understanding applicable codes and the specific documentation, testing, and verification procedures those authorities mandate.
Contractors should proactively review local gas codes, utility company standards, and manufacturer recommendations to align their testing protocols and evidence collection before inspection.
Perform required pressure and leak tests, record calibrated instrument readings, provide labeled diagrams, correct deficiencies promptly, and obtain written approval or tags.
Common Problems, Risks, and How to Avoid Them
Common issues with CSST installations include improper fittings, inadequate support, and incorrect routing, all of which can be prevented through adherence to manufacturer instructions and code-required installation practices.
Indicators of poor bonding or lightning vulnerability—such as loose bonding clamps, missing bonding conductors, or scorch marks—should prompt immediate inspection and corrective bonding or lightning protection measures.
To address leaks, fitting failures, and corrosion, routine pressure testing, visual inspections, and use of approved materials and protective coatings are recommended.
Frequent installation mistakes and how to prevent them
Mistakes during CSST installation—improper bonding, incorrect fittings, kinks or sharp bends, and inadequate clearances from heat sources—significantly increase leak and fire risks.
Installers should follow manufacturer instructions, use approved connectors, maintain bend radiuses, secure tubing, and verify clearances and pressure.
Common prevention steps include:
- Use manufacturer-approved fittings and tools
- Maintain minimum bend radii
- Avoid sharp edges and kinking
- Secure supports at proper intervals
- Follow pressure testing and leak-check procedures
Signs of improper bonding, lightning risk, and mitigation
Recognize that improper bonding of CSST creates a significant lightning-related hazard: when the metal jacket or tubing is not properly bonded to the building’s grounding system, a lightning strike or nearby surge can energize the gas piping, puncture the jacket, and ignite escaping gas.
Signs include scorch marks, arcing odors, loose or missing bonding clamps, and meter or panel lightning damage.
Mitigation: verify continuous bonding to code, use approved clamps, and consult a licensed electrician.
Troubleshooting leaks, fitting failures, and corrosion
Inspecting CSST for leaks, failing fittings, and corrosion is essential because these issues can lead to gas escapes, fires, or explosions if left unaddressed.
Use soap solution and electronic gas detector for leak checks, torque and replace damaged fittings, and inspect jacket and connectors for corrosion.
If detected, shut off gas, ventilate, and call a licensed technician; document and repair per code.
Maintenance and Long-Term Safety Practices
A clear maintenance plan includes a routine inspection schedule that checks for visible damage, loose fittings, corrosion, and proper bonding.
After renovations or appliance changes, the system should be visually rechecked and pressure-tested if any piping was moved or new connections added.
Any signs of leaks, damaged CSST, or uncertainty about alterations should prompt contacting a licensed gas professional for repairs or upgrades.
Routine inspection schedule and what to look for
When establishing a routine inspection schedule for CSST gas lines, owners should follow a consistent cadence—typically annual visual checks with a more thorough professional inspection every 3–5 years or after any seismic event, renovation, or evidence of a leak.
Inspections should document condition, connections, and clearances, noting damage, corrosion, abrasions, or unauthorized modifications.
- Check for visible damage or kinks
- Inspect fittings and bonding
- Verify labeling and clearances
- Smell and test for leaks
- Record dates and findings
What to do after renovations or appliance changes
After renovations or appliance changes, owners should promptly verify that CSST gas lines and their connections remain intact and compliant with local codes, prioritizing safety checks before restoring gas service.
Inspect visible tubing, fittings, bonding and grounding; check for new contact points or abrasions; confirm venting and clearances.
Perform a soap-bubble or approved leak test, document findings, and restore service only when no leaks or hazards are present.
When to call a professional for repairs or upgrades
Owners who lack the tools, training, or confidence to assess or repair CSST should engage a licensed gas professional for any suspected damage, persistent leaks, or modifications that affect piping, fittings, bonding, or electrical grounding.
Professionals should also be called for system extensions, appliance upgrades, corrosion, evidence of lightning damage, failed inspections, or when local codes require licensed work to guarantee compliance and long-term safety.
Cost Estimates, Time Requirements, and When to Hire a Pro
A concise cost comparison outlines typical material and tool expenses for a DIY CSST run versus labor and permit fees for professional installation.
Time estimates for common tasks—planning, cutting and fitting, pressure testing, and final inspections—help set realistic schedules.
A clear decision guide weighs complexity, local code requirements, and homeowner skill to indicate when hiring a licensed gas fitter is the safer choice.
Typical cost breakdown for DIY vs professional installation
Estimating expenses for installing a CSST gas line requires comparing materials, tools, permit fees, and labor versus the risks and certifications associated with professional service. DIY typically lowers direct costs (materials, fittings, tools) but adds permit risk and potential inspection failures. Professionals charge higher labor and certification fees but reduce liability and guarantee code compliance.
| Item | DIY Cost Range | Pro Cost Range |
|---|---|---|
| Materials | $50–$300 | Included/+$100 |
| Permits | $0–$200 | $50–$200 |
| Labor/Skill | Free–$500 | $300–$1,000 |
| Liability/Warranty | High risk | Lower risk |
Estimated time for common CSST tasks
Having compared DIY versus professional cost components, the next consideration is how long common CSST tasks actually take and when those durations justify hiring a pro.
Typical times:
- planning and permitting 1–3 hours,
- routing and securing lines 2–6 hours,
- fittings and pressure testing 1–2 hours,
- final inspections 0.5–2 hours.
Complex routing, multi-appliance runs, or unfamiliar code often extend durations and favor professional help.
Decision guide: DIY vs hiring a licensed gas fitter
When should a homeowner attempt a CSST gas-line project and when is a licensed gas fitter indispensable?
Homeowners may handle minor, permitted tasks with basic tools, clear access, and local code knowledge; expect modest material costs and a few hours.
Hire a licensed gas fitter for complex routes, concealed lines, multi-appliance systems, permit requirements, uncertain leak risk, or limited experience—higher labor cost but guaranteed safety and compliance.
Emergency Procedures and Legal Responsibilities
When a CSST line is suspected to be leaking or damaged, the homeowner should evacuate the area, avoid using electrical switches or open flames, and shut off the gas at the meter if it is safe to do so.
The situation must be reported immediately to the gas utility and emergency services so trained personnel can assess and secure the site.
After repairs, accurate records of inspections, notifications, and any contractor work should be kept to satisfy legal obligations and inform future maintenance.
Immediate steps for suspected gas leaks or damage
Shut off ignition sources and evacuate the area immediately if a gas odor, hissing sound, or physical damage to a CSST line is suspected.
Move occupants upwind and to a safe distance. Do not operate electrical switches, phones, or vehicles nearby.
Visually secure the scene without attempting repairs. Document visible damage and preserve the area for qualified technicians and authorities to assess safety and required remediation.
Reporting to utility and emergency services
After evacuating and securing the scene, notify the gas utility and emergency services immediately to report the suspected leak or damage.
Provide clear location details, description of odor or damage, and any actions taken.
Follow dispatcher instructions, avoid reentry until cleared, and cooperate with responders.
Document names, times, and incident numbers for legal compliance and follow-up investigations by authorities.
Recordkeeping and homeowner responsibilities after work
A homeowner should maintain a clear, organized record of all CSST gas line work, including copies of permits, contractor invoices, inspection reports, and any correspondence with utilities or emergency responders.
These documents support warranty claims, verify regulatory compliance, and provide critical evidence in the event of future leaks or legal disputes.
The homeowner must also schedule periodic inspections, retain emergency contact lists, and promptly report anomalies.
Additional Resources and Product Selection Tips
The section outlines how to select approved CSST brands and matching fittings to guarantee system compatibility and code compliance.
It directs readers to authoritative code references, manufacturer installation guides, and available training resources for correct application.
Recommended professional associations and certification programs are identified for those seeking validated expertise.
How to choose approved CSST brands and compatible fittings
Which manufacturers and fittings meet local codes and insurer requirements should be confirmed before purchasing CSST; approved brands typically publish compatibility lists and certification marks (e.g., CSA, UL) that indicate which connector types and junction fittings are tested for use with their tubing.
Buyers should verify listings, use matched-brand connectors, and avoid adaptations.
- Confirm certification marks
- Use manufacturer-listed fittings
- Match tubing and connectors
- Avoid generic adapters
- Retain documentation
Where to find code references, manufacturer instructions, and training
Where can contractors and homeowners locate reliable code references, manufacturer instructions, and training resources for CSST installation?
Consult local building departments for applicable codes and amendments.
Review manufacturer installation manuals and tech bulletins on official websites.
Access national model codes (e.g., NFPA, ICC) through authorized publishers.
Enroll in vendor or trade school workshops and online courses that provide hands-on CSST-specific instruction and documentation.
Recommended professional associations and certification programs
Following consultation of codes, manufacturers, and training options, contractors and homeowners should also consider membership in relevant professional associations and completion of recognized certification programs to reinforce expertise and access vetted resources.
Recommended organizations include NFPA, AGA/AGA-certified trainers, and local plumbing/gas associations; seek certifications from Accredited Training Centers, manufacturer-specific installers, and state licensing boards for continuing education, reciprocity, and credibility.
Conclusion
Like a careful seamstress stitching a delicate fabric, installing and maintaining CSST gas lines requires precision, respect for codes, and proper tools. Whether a DIYer or a professional, one must prioritize safety checks, correct bonding and grounding, and adherence to manufacturer and local regulations. Routine inspections, timely repairs, and knowing when to call a licensed plumber protect life and property. Following these practices guarantees reliable service and reduces risk, preserving peace of mind.