
How to Rough In a Bathtub: Step-by-Step Plumbing & Framing Guide
Roughing in a bathtub involves setting up the necessary plumbing and framing before finishing touches. This process includes measuring the tub footprint, reinforcing joists, and installing studs and blocking. Additionally, you’ll need to route the drain, waste, vent lines, and supply lines (using PEX, copper, or CPVC) to the valve, ensuring a 1/4″ per foot slope for proper drainage. After installation, test for leaks, verify that everything is level, and ensure compliance with local codes. Follow this guide for detailed steps on framing, plumbing tips, and inspection guidance.
Overview of Bathtub Rough-In: What It Means and Why It Matters
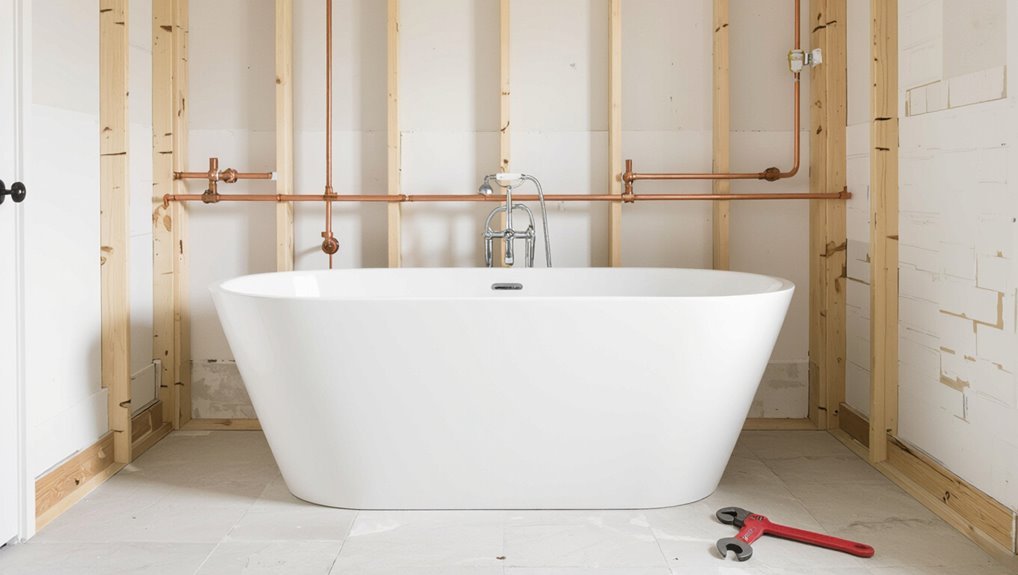
A bathtub rough-in refers to the initial framing and placement of plumbing and drainage stub-outs before walls and finishes are installed.
It must comply with local building codes and often requires permits to guarantee proper slope, venting, and trap placement.
Typical timelines range from a few hours to a couple of days depending on complexity, and while experienced homeowners can handle simple rough-ins, many projects benefit from a licensed plumber.
Definition of a bathtub rough-in
Bathtub rough-in refers to the foundational stage of plumbing and framing where drain, waste, vent, and water supply lines are positioned and secured before walls and fixtures are finished.
It defines pipe locations, fixture heights, slope for drainage, and structural supports.
Clear, accurate rough-in work is essential to avoid leaks, enable proper fixture installation, and guide contractors or DIYers learning how to rough in a bathtub.
Building codes and permit considerations
With pipe locations, slopes, and structural supports established during rough-in, adherence to local building codes and permitting requirements becomes the next practical concern.
Inspectors verify venting, trap placement, slope, fixture clearances, and structural alterations. Required permits document compliance and may mandate licensed contractors for specific work.
Failure to obtain permits risks fines, mandatory rework, or denial of future property claims; consult local authorities before proceeding.
Typical timelines and who should do it (DIY vs. pro)
Timelines for roughing in a bathtub typically span from one to three days for straightforward installs.
However, complex layouts or structural changes can extend the work to a week or more.
Homeowners with plumbing experience can handle simple rough-ins; however, licensed plumbers and framers are recommended for code compliance, unusual drains, relocations, or when permits are required to guarantee safety and inspection approval.
Materials and Tools Required for Roughing In a Bathtub
A clear inventory of required plumbing, framing, and fastening materials sets the foundation for a successful bathtub rough-in, including pipes, fittings, valves, traps, drain assemblies, studs, blocking, and subfloor materials.
Essential tools and accessories—cutters, drills, levels, measuring tools, a plumbing torch, and safety gear—should be listed and staged during site preparation.
A brief estimate of costs and budgeting tips helps prioritize purchases and avoid delays.
Plumbing materials (pipes, fittings, valves, trap, drain assembly)
Select durable, code-compliant plumbing materials before beginning the bathtub rough-in to guarantee a reliable, leak-free system.
Required items include copper, CPVC, PEX, or PVC supply and drain pipes; appropriate fittings and adapters; shutoff and mixing valves rated for tub/shower use; a P-trap or integral trap assembly; tub drain, overflow, and flange with gasket.
Include solder, crimp rings, or solvent cement.
Framing and structural materials (studs, blocking, subfloor materials)
Proper framing and sturdy structural materials are essential to support a bathtub’s weight, prevent deflection, and provide secure mounting for fixtures.
Use 2×4 or 2×6 studs per load requirements, install solid blocking at grab bars and apron supports, and guarantee rim joists tie into the layout.
Subfloor materials should be exterior-grade plywood or OSB with water-resistant underlayment and proper fastening.
Tools checklist (cutters, drills, levels, measuring tools, plumbing torch, etc.)
With framing and blocking in place to support the tub, attention shifts to assembling the tools and materials required to rough in the installation.
Essential items include pipe cutters, reciprocating and hole saws, power drill with bits, level and laser, tape measure and square, tubing bender, deburring tool, plumbing torch and solder, flux, fittings, PEX crimpers or press tool, sealant, and fastening hardware.
Safety gear and site preparation items
Before any pipes are cut or fittings set, workers should don and organize essential safety gear and prepare the work area to prevent accidents and protect finished surfaces.
Required items include safety glasses, N95 or respirator, hearing protection, gloves, steel-toe boots, and hard hats.
Site prep: drop cloths, masking tape, plastic sheeting, sandbags for containment, adequate lighting, and fire extinguisher.
Estimated costs and budgeting tips
Estimating the cost to rough in a bathtub typically ranges from modest DIY expenses for materials to higher sums when hiring a professional and accounting for unforeseen issues.
Key line items include rough plumbing components (pipes, fittings, valves), framing and support materials, drain and overflow assemblies, and any specialty tools or rental equipment.
- Materials: $150–$800
- Labor: $300–$1,200
- Permits/inspections: $50–$300
- Contingency: 10–20% of project cost
Pre-Installation Planning and Measurements
Before any rough-in work begins, the installer measures the room and bathtub footprint to confirm fit and clearances.
They locate existing plumbing to plan drain/waste/vent placement, map water supply routing with shutoffs, and assess floor load and subfloor condition for support.
A simple sketch and materials list are prepared to guide the installation and ordering.
Measuring the space and bathtub footprint
Accurate measurements of the room and the bathtub footprint are essential to guarantee the rough-in aligns with drain, supply, and framing locations.
Measure overall bathroom dimensions, wall-to-wall distances, alcove width, and floor level variance.
Record tub length, width, and required clearance around the unit.
Note threshold, access panels, and framing studs.
Create a scaled floor sketch with dimensioned tub placement.
Locating existing plumbing and determining new drain/waste/vent placement
Locating existing plumbing and planning new drain, waste, and vent (DWV) placement begins with a systematic survey of visible pipes, access panels, and the building’s DWV riser layout to determine feasible connection points and required reconfiguration.
Document pipe sizes, slopes, trap locations, and cleanout access. Measure distances from the tub outlet to vents and waste stacks, noting constraints for required fall, code clearances, and structural penetrations.
Determining water supply routing and shutoff locations
Several key measurements guide routing of the hot and cold supply lines and placement of shutoffs for a tub installation.
Measure wall cavity depth, stud spacing, and fixture centerline height from finished floor.
Plan shortest, accessible runs avoiding vents and drains.
Locate individual shutoffs within an adjacent service wall or mechanical chase, ensuring valve access panels align with finished wall surfaces and code clearance.
Checking floor load and subfloor condition
After routing supply lines and positioning shutoffs, attention turns to the structural readiness of the floor beneath the tub.
Inspect joist spacing, spans, and any signs of rot or deflection. Verify subfloor thickness and fastening; replace or sister compromised joists.
Calculate anticipated load including tub, water, and occupants to confirm floor can support it. Reinforce or add blocking where necessary.
Preparing a sketch and materials list
Before cutting or installing anything, the installer draws a measured sketch of the existing bathroom footprint showing wall locations, drain and supply stub locations, and critical clearances.
Then, the installer uses that sketch to generate a precise materials list. The sketch includes tub model dimensions, trap and vent positions, stud locations, and access panels.
Quantities for pipes, fittings, flange, fasteners, sealant, and framing lumber are specified.
Framing and Structural Preparations
Before new plumbing is set, the space must be prepared by removing existing fixtures and following a clear demolition checklist to expose framing and subfloor conditions.
Attention then turns to installing or resizing studs for tub alcoves, adding blocking for grab bars, faucets, and showerheads, and reinforcing floor joists where required.
Finally, moisture-resistant backing and any necessary subfloor repairs are installed to guarantee a stable, code-compliant base for the tub.
Removing old fixtures and demolition checklist
Begin by removing all plumbing fixtures, trim, and surrounding finishes to expose the tub cavity and nearby framing, taking care to shut off water and disconnect supply lines and drains.
Inspect for rot, mold, and structural damage. Label and cap disconnected lines.
Remove debris and salvage reusable materials. Document measurements, note venting and trap locations, and prepare a clear demolition punch list for the next phase.
Installing or modifying wall studs and framing for tub alcoves
Measure the tub and surrounding space, then assess existing studs and plates to determine whether new framing, reinforcing, or layout changes are needed for the alcove.
Cut and install king and jack studs for openings, set a solid bottom plate aligned to tub rim, and confirm wall depth matches tub flange.
Add a cripple or header where required and fasten to structural members for load transfer.
Adding blocking for grab bars, faucets, and showerheads
Several key blocking locations must be planned and installed within the stud cavity to provide secure mounting points for grab bars, tub/shower valves, spouts, and showerheads.
Install 2×4 or plywood blocks between studs at specified heights: grab bars (typically 33–36 inches and vertical as needed), valve and spout backing at valve rough-in, and upper showerhead backing.
Fasten tightly to studs for solid anchorage.
Ensuring floor support and reinforcing joists if needed
After installing solid blocking for fixtures and grab bars, attention shifts to the subfloor and joists to confirm they can carry a filled tub and live loads.
Inspect joist span, sizing, condition, and deflection; consult span tables.
Sister weakened joists, add rim or blocking, or install engineered beams as required.
Verify fastening, bearing points, and load paths before proceeding with tub placement.
Installing moisture-resistant backing and subfloor repairs
Before installing the tub, the subfloor and surrounding wall studs must be prepared with moisture-resistant backing and any necessary repairs to guarantee a stable, rot-resistant enclosure.
Damaged plywood or OSB is cut out, joist ends checked, and marine-grade or cement board installed over a water-resistant membrane.
Fasteners, seams, and penetrations are sealed; changes to tub flange and drain boxed accurately for long-term durability.
Roughing In the Drain and Waste Plumbing
The installer marks and test-fits the bathtub drain to establish exact alignment with the rough framing and waste outlet.
They then set the P-trap and trap arm to the waste stack, ensuring proper slope and fall for continuous drainage while tying into required vents.
Typical layouts for alcove, freestanding, and drop-in tubs are compared to determine pipe runs and vent connections.
Setting the bathtub drain location and test-fitting
Locate and mark the bathtub drain and waste positions precisely, then test-fit the drain assembly and trap to confirm alignment with the tub’s outlet and the home’s waste stack.
Check clearances for flooring, framing, and access panels.
Temporarily assemble components, noting required offsets and heights.
Adjust hole placement or stub depth as needed.
Verify smooth seat and rotation of the drain flange before permanence.
Installing the P-trap and trap arm to the waste stack
Begin by aligning the P-trap directly under the tub outlet and marking the trap arm path to the waste stack, ensuring the trap weir sits at the correct height to maintain proper trap seal and slope.
Cut pipe, deburr, dry-fit components, then cement or install solvent-weld fittings per code.
Secure trap and trap arm to framing with supports, verify clearance to access panels and other utilities.
Slope and fall requirements for drain pipes
When planning rough-in drainage, a consistent slope is essential to guarantee gravity carries wastewater and prevents standing water or sewer gases from entering the tub area.
Drain pipes typically require 1/4 inch per foot (2%) toward the waste stack for 1-1/2 to 2-inch lines; larger mains may use 1/8 inch per foot.
Maintain straight runs, avoid sags, and support piping at regular intervals.
Venting requirements and tying into existing vents
Proper venting complements accurate pipe slope by preventing siphonage of traps and allowing sewer gases to escape above the living space.
Vent sizing, distance to trap, and fitting types must meet local code. Tie new branches into existing vent stacks at approved locations and elevations, using sanitary tees or wyes as required.
Maintain continuous fall on waste lines and avoid creating wet vents beyond permitted fixtures.
Common drain layouts for alcove, freestanding, and drop-in tubs
Although each tub style shares the same basic requirement of a watertight connection and adequate fall, drain layouts differ to accommodate installation type, access, and overflow configuration. Alcove tubs use wall-side drains and hidden P-traps; freestanding require floor outlets and buried traps; drop-in rely on cabinet access and flexible connectors.
| Tub Type | Typical Drain Layout |
|---|---|
| Alcove | Wall outlet, accessible trap |
| Freestanding | Floor outlet, buried trap |
Roughing In the Water Supply Lines
Attention to the water supply layout determines final faucet performance and serviceability.
The contractor selects appropriate materials (PEX, copper, CPVC), routes separate hot and cold lines to the valve location, and positions piping for the diverter and spout height while installing shutoff valves and access panels.
After roughing, the system is pressure tested and inspected for leaks before closing walls.
Choosing supply line materials (PEX, copper, CPVC)
When selecting supply line material for a bathtub rough‑in, consider durability, ease of installation, cost, and local code requirements.
PEX offers flexibility, freeze resistance, and simple connections.
Copper provides longevity and heat tolerance but costs more and requires soldering.
CPVC is affordable and easy to glue but less heat‑resistant.
Choose based on budget, installer skill, building codes, and expected service life.
Routing hot and cold lines to the tub valve location
With the supply material selected, the next step is laying out and fastening the hot and cold lines to the tub valve location.
Measure runs, maintain straight paths, and minimize unnecessary bends. Secure lines to studs with proper clamps at code intervals, keeping hot and cold parallel and separated to reduce heat transfer.
Route with access for future adjustments and align at the valve inlet height.
Installing shutoff valves and access panels
Install isolation shutoff valves and access panels before closing walls to guarantee serviceability and code compliance.
Mount accessible keyed or quarter-turn shutoffs near the tub valve, securing to studs and labeling hot/cold.
Provide a removable access panel aligned with the valve location sized for comfortable reach.
Test for leaks, operate each valve, and document locations on rough‑in plans for future maintenance.
Positioning for tub/shower diverter and spout height
Proper placement of the tub/shower diverter and spout is critical for function and user comfort; the rough‑in should set the spout center roughly 6–8 inches above the finished tub rim and the diverter valve at a height that allows easy reach—typically 36–48 inches above the finished floor—while accounting for trim dimensions and escutcheon depth.
The installer aligns valves to framing, verifies clearances, and positions supply stubs for final trim and showerhead offsets.
Pressure testing and leak checking procedures
Begin pressure testing the rough‑in after all supply connections are made and temporary caps are secure.
The installer pressurizes the system with air or water to specified PSI, monitors gauges for a set hold period, and inspects joints, fittings, and fixtures for drops or visible leaks.
Any failure prompts isolation, repair, retest, and documentation before closing walls or proceeding.
Positioning and Securing the Tub
Before fastening, the tub is dry-fit to verify level, clearances, and alignment with the rough-in drain and overflow.
The installer then secures the flange to the framing and chooses between a mortar bed or the manufacturer’s recommended supports to stabilize the unit.
Final adjustments are made to guarantee proper alignment and access before wall finishes are installed.
Dry-fitting the tub and checking level and clearance
Set the tub into the alcove to verify fit, alignment, and clearances before any final connections are made.
Inspect gaps around sides and back, confirming access to drain, overflow and waste locations.
Use a level across rim and along length to check pitch; shim where necessary to maintain manufacturer-recommended slope and prevent rocking.
Mark reference points for final placement before removal.
Attaching the tub flange and securing to framing
Position the tub so its flange sits evenly against the surrounding studs and backerboard, aligning the marked reference points made during dry-fitting.
Fasten flange to studs with corrosion-resistant screws through reinforcement areas, spacing fasteners per manufacturer guidance.
Check level and plumb as each fastener is installed. Trim or shim framing where needed for even contact.
Seal flange-to-backerboard joints with appropriate waterproofing.
Mortar bed vs. manufacturer-recommended supports
When supporting a bathtub, installers must choose between a traditional mortar bed and the manufacturer’s recommended support system, since each method affects load distribution, leveling, and warranty compliance.
Mortar beds provide solid, customizable bearing and sound deadening but require cure time and skill.
Manufacturer supports (foam, brackets, molded bases) simplify installation, guarantee specified support points, and preserve warranties when installed per instructions.
Aligning drain and overflow to rough-in plumbing
Careful alignment of the tub’s drain and overflow to the rough-in plumbing guarantees reliable drainage and prevents leaks or strain on fittings.
The tub is set into position, checking offsets and heights against the drain stub and overflow tube.
Shims or blocking establish level and support while ensuring flange and gasket compression.
Trim or adjust piping as needed before final securing.
Final adjustments before wall finishes
Set the tub into its final location, verify level and plumb, and secure it to framing or blocking so it will not shift during wall finishing.
Check clearances to studs and access panels.
Tighten mounting flanges or brackets evenly without distorting the shell.
Reconfirm drain and overflow alignment, gently shim where needed, and fasten anchoring screws.
Record positions before drywall or backer installation.
Coordination with Wall Finishes and Fixtures
The installer should plan backing and appropriate wallboard placement around the tub to support fixtures and tile.
Waterproofing membranes and sealant details must be coordinated with fixture locations and marked for spout, faucet trim, and showerhead rough‑ins.
Provision for access panels or removable sections should be noted to allow future maintenance.
Backing and wallboard considerations around tub area
When coordinating backing and wallboard around a tub, installers must plan for the final wall finish and the locations of fixtures so that blocking, waterproofing substrates, and tile backer extend to correct heights and align with trim and plumbing rough-ins.
Backing should be sized and located for grab bars, valves, and accessories. Wallboard type and fastener spacing must suit moisture exposure and tile or paint finish.
Waterproofing methods and membranes to plan for
Because waterproofing choices must tie directly to the planned wall finish and fixture locations, installers should decide membrane type and coverage before installing drywall or tile backer.
Liquid-applied membranes, sheet membranes, and surface-applied waterproof boards each have different termination, overlap, and fastening requirements that affect trim heights, trim gaps, and placement of grab-bar backing.
Specify waterproofing extent: full-height shower walls, tub surround splash zones, floor pans, and connections to adjacent finishes.
Marking locations for faucet trim, spout, and showerhead
Begin by locating and clearly marking the exact centerlines and finished-surface offsets for the faucet trim, spout, and showerhead on the studs or backer before installing wall finishes.
Note vertical heights relative to the tub rim, hot/cold handle spacing, spout projection, and showerhead reach.
Use durable, visible marks and reference measurements on framing to guarantee precise alignment with finished tile or panels.
Access panels and future maintenance access
After marking fixture locations, consideration must immediately turn to access panels and future maintenance access to guarantee servicing can occur without damaging finished walls or tile.
Plans should include removable panels at valve and trap locations, coordinate panel placement with studs and tile layout, and use recessed access boxes where possible.
Label and document access points for installers and homeowners to simplify future repairs.
Common Problems and How to Avoid Them
Common rough‑in errors include misaligned drain and overflow connections, inadequate subfloor support or tub lippage, improper venting causing slow drains, and leaks from poorly executed joints or incorrect slope.
The section outlines practical prevention measures and straightforward troubleshooting steps for each issue. Readers are guided to verify measurements, reinforce supports, guarantee correct pipe pitch and venting, and test joints before finishing.
Misaligned drain and overflow connections
Misaligned drain and overflow connections can prevent a bathtub from sealing properly, causing leaks, slow drainage, or difficulty installing trim and access panels.
To avoid misalignment, verify rough-in heights and centerlines against manufacturer templates, pre-fit assemblies, and maintain rigid support for pipes.
Use adjustable fittings and shims during framing, test with temporary seals, and correct offsets before finishing walls or setting the tub.
Insufficient floor support or lippage
Insufficient floor support or uneven tile lippage can cause a bathtub to sit out of plane, leading to flexing, cracked tile, grout failure, and standing water at the tub edge.
Inspect joist spans, add blocking or plywood stiffeners, and use a level during tile setting.
Guarantee substrate flatness and follow tile manufacturer tolerances.
Correct support prevents movement, prolongs sealant life, and maintains drainage slope.
Improper venting and slow drains
Many installation issues stem from improper venting and slow drains, which lead to gurgling, slow water removal, sewer smells, and occasional backups.
Technicians should verify vent connection, pipe size, and unobstructed vents tied to the stack.
Install accessible cleanouts, maintain trap integrity, and avoid long horizontal runs without slope.
Pre-test drainage before finishing to catch blockages or venting mistakes early.
Leaks at joints and poor slope
Addressing leaks at joints and incorrect slope early prevents water damage and functional failures in a bathtub rough-in.
Faulty joint seals, loose fittings, and inadequate piping alignment cause seepage and odor.
Excessive or insufficient slope leads to standing water or slow drainage, stressing connections.
Accurate measurements, proper support, and quality materials minimize risks before finishing, preserving system integrity and longevity.
Solutions and troubleshooting steps
Having identified joint leaks and improper slope as primary causes of water damage and poor drainage, the next section outlines practical solutions and troubleshooting steps to prevent and fix these issues.
It recommends verification, correction, and maintenance actions:
- Inspect and tighten or replace faulty fittings.
- Re-seal joints with appropriate compound.
- Regrade waste line to proper slope.
- Pressure-test system before wall closure.
Code Compliance, Inspections, and Final Testing
The contractor notes common inspection checkpoints for bathtub rough‑in, including fixture placement, venting, trap configuration, and proper slope.
Required tests—pipe pressure tests, water supply activation, and drain/waste flow checks—are run and recorded before walls are closed.
Clear documentation and timely communication with the inspector determine whether a licensed plumber must be called to correct code violations.
Typical inspection checkpoints for rough-in plumbing
When a bathtub rough-in is inspected, reviewers focus on key items that confirm code compliance and functional readiness before walls are closed.
Inspectors verify trap and vent placement, proper slope of drain lines, secure fixture supports, correct pipe materials and joint types, accessible cleanouts, correct waste and overflow alignment, proper water supply shutoffs, and adherence to clearances and framing penetrations.
Required tests: pressure, water supply, and drainage tests
Begin required testing by performing pressure, water supply, and drainage checks to confirm the rough-in meets code and will function under real-world conditions.
Conduct a hydrostatic or air pressure test on supply lines, verify hot and cold delivery at fixture locations, and run drainage and trap seal tests to detect leaks, slow flow, or venting issues.
Repair failures and retest until passing.
Documentation and communicating with inspectors
Adequate documentation and clear communication with inspectors guarantee the rough-in’s compliance and streamline final approval.
Provide complete plans, permit numbers, component specifications, and test results.
Record inspection dates, corrective actions, and sign-offs.
Respond promptly to inspector requests, supply access, and clarify discrepancies with concise evidence.
Maintain organized files for handover and future maintenance, ensuring traceability and regulatory adherence.
When to call a licensed plumber
Following organized documentation and prompt inspector communication, the decision to call a licensed plumber hinges on specific code-related milestones and testing outcomes during the rough-in.
A licensed plumber should be summoned for failed pressure or leak tests, complex venting or trap issues, code violations identified by inspectors, final connection of fixtures to supply and waste, and to certify compliance prior to drywall and final inspection.
Post-Rough-In Checklist Before Finishing
After rough-in, a concise checklist confirms the tub is level, clearances meet specifications, and fastenings are secure.
The water supply shutoffs should be tested, clearly labeled, and accessible.
The installer then verifies waterproofing changes and prepares the surrounding surfaces for tile, surround, or enclosure installation.
Re-checking level, clearances, and fastening
A final inspection focuses on three essentials: confirming the tub sits perfectly level, verifying clearances for faucets, drain access, and surrounding finishes, and ensuring fasteners secure the unit without causing stress or distortion.
The installer rechecks with a spirit level, measures clearances against plans and code, tightens or adjusts mounting hardware, and documents any deviations for correction before wall finishes or fixtures are installed.
Verifying water supply shutoffs and labeling
With level, clearances, and fastenings confirmed, attention shifts to the water supply shutoffs and their labeling before finishing begins.
Inspect each shutoff for proper operation, verify hot and cold orientation, and confirm accessible placement.
Test for leaks under pressure, document valve types and locations, and affix durable labels.
Record shutoff map in project notes for future maintenance and emergency access.
Ensuring proper waterproofing transitions
Several key junctions between tub, surround, and floor demand careful inspection to guarantee waterproofing continuity before finishing begins.
The inspector verifies flange-to-wall seals, membrane overlaps, and floor connections for intact adhesion and correct slope.
Penetrations for drains, faucets, and overflow require durable sealing and backing.
Any gaps or compromised seams must be repaired or reinforced with compatible waterproofing materials prior to wall or floor finishes.
Preparing for tile, surround, or enclosure installation
Following confirmation that flanges, membranes, and penetrations are sealed and contiguous, attention shifts to the checklist items that precede tiling, surround mounting, or enclosure installation.
Verify stud alignment, blocking locations, and wall plumb for secure grab bars and panels. Confirm drain and overflow final heights, test for leaks, and guarantee substrate flatness and moisture-readings meet manufacturer specifications before proceeding with adhesive, backerboard, or enclosure anchoring.
Time-Saving Tips, Best Practices, and Pro Shortcuts
Experienced installers recommend starting with prefabricated rough-in kits when appropriate, then planning supply and drain routes to minimize bends and travel distance.
They favor simple layout strategies that avoid common DIY mistakes—improper slopes, unsecured connections, and cramped access—while choosing durable materials and proven techniques to extend service life.
Quick, repeatable shortcuts and organized staging of parts save time without sacrificing long-term performance.
Prefabricated rough-in kits and when to use them
Prefabricated rough-in kits consolidate the drain, overflow, and mounting components into a matched set that simplifies layout and speeds installation.
They suit standard tubs, remodels with tight timelines, and installers seeking consistent fittings.
Use when framing and stub locations match kit specifications; avoid when custom tub dimensions, unique drain positions, or advanced access requirements demand bespoke solutions or flexible routing alternatives.
Efficient routing strategies for supply and drain
Plan supply and drain routes with the end layout in mind to minimize bends, fittings, and changes in elevation.
Position supply runs along studs, group hot and cold lines, and keep accessible shutoffs.
Use straight, continuous drain falls to maintain 1/4″ per foot slope and avoid unnecessary junctions.
Pre-measure, mark stud bays, and prefer long runs over multiple short connections to save time.
Avoiding common DIY pitfalls
After laying out supply and drain runs with minimal bends and proper slope, attention shifts to common DIY pitfalls that slow projects or cause failures.
Avoid overcutting studs, misaligning stub-outs, and neglecting access panels. Use proper fastening, test for leaks before closing walls, and mark drain invert clearly.
Prioritize accurate measurements, appropriate support, and corrective pauses rather than rushed fixes.
Materials and techniques that improve longevity
Select durable materials and proven techniques to reduce callbacks and extend fixture life: use PVC or ABS for drain and vent runs with solvent-welded joints, prefer PEX for supply lines to resist freezing and scaling, and install a brass or stainless-steel tub spout and valves to avoid premature corrosion.
Recommended practices:
- Insulate PEX at exterior walls.
- Slope drains correctly.
- Use corrosion-resistant fasteners.
- Test under pressure.
Conclusion
The rough-in phase serves as the project’s skeleton, providing the unseen support that determines final form and function. With careful measurements, sturdy framing, and correctly pitched drain and waste lines, the tub will sit securely and perform reliably. Attention to codes, inspections, and a final leak test prevents future failures. Like a map drawn before a journey, a precise rough-in guides each subsequent step, saving time, money, and frustration as finishing work proceeds.
