How to Find the Sewer Line in Your Basement: Step-by-Step Guide for Homeowners
To locate the sewer line in your basement, start by identifying visible drains and cleanouts. Trace the pipe runs along walls and ceilings to find exit points. Use tools like a flashlight, tape measure, plumb bob, or stud finder, along with nonstaining dye or a drain camera for accurate confirmation. Follow the fixture drains and conduct simple flow tests to map out connections. Mark the route and document the materials and slopes. For detailed methods, tool comparisons, and guidance on when to call a professional, continue reading.
What a Basement Sewer Line Is and Why Locating It Matters
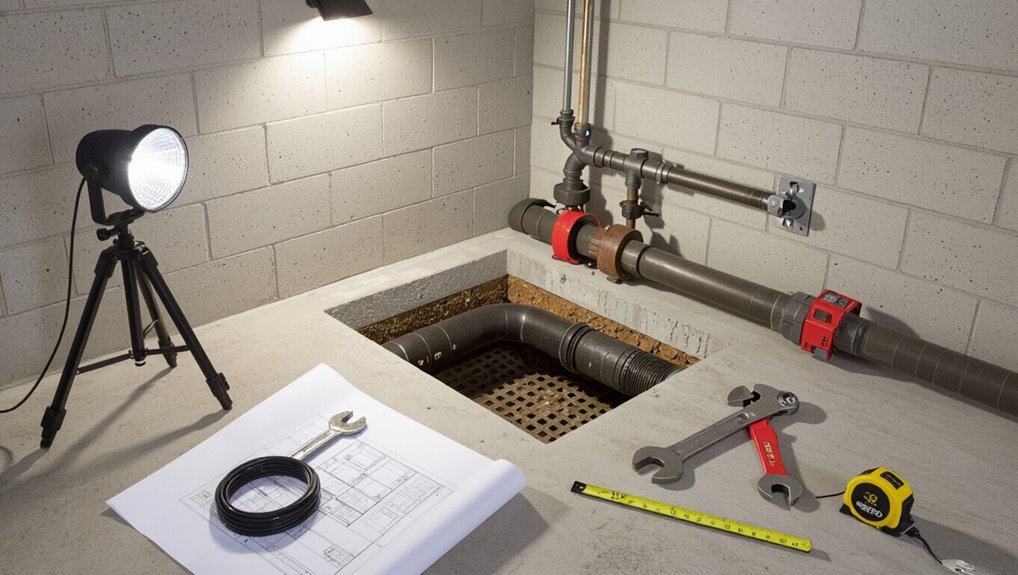
A basement sewer line is the main drainpipe that carries household wastewater from fixtures to the municipal system or a septic tank, and it must remain clear and properly pitched to function.
Unidentified or poorly located sewer lines can lead to backups, slow drains, foul odors, and costly structural damage if repairs are delayed.
Homeowners can trace obvious lines for basic inspections or minor clogs, but persistent issues, suspected breaks, or anything requiring excavation should prompt a professional inspection.
Definition and function of the sewer line in a house
Sewer lines in a house are the main underground pipes that carry wastewater from fixtures and drains to the municipal system or a septic tank; in a basement, the term refers specifically to the segment that connects lower-level drains (floor drains, laundry, sump pumps, and any basement bathroom) to that main line.
It transports sewage, vents gases, and prevents backups—central to how to find sewer line in basement.
Common problems linked to unidentified sewer lines
Many homeowners overlook the exact location of the basement sewer line until a problem forces attention.
Unidentified sewer lines increase risks: delayed leak detection, unnoticed blockages causing backups, improper renovations that damage pipes, and difficulty coordinating repairs or inspections.
Unexpected water or sewage incursions can cause structural damage, mold growth, and higher remediation costs.
Clear identification reduces emergency response time and prevents avoidable expenses.
When to locate the sewer line yourself vs. call a professional
Homeowners should weigh the complexity of the task, the risks involved, and their own tools and experience before deciding whether to locate a basement sewer line themselves or call a professional.
DIY is reasonable for simple visual checks, accessible pipes, and basic probing with proper protective gear.
Call a professional for buried lines, suspected breaks, complex layouts, odors, repeated backups, or when specialized cameras and permits are needed.
Quick answer: How to find the sewer line location in your basement (at a glance)
A quick way to spot the basement sewer line is to follow the largest drain or soil pipe from fixtures down to the main stack and towards the exterior wall or floor drain.
Before inspecting, the person should shut off water, open windows for ventilation, and wear gloves and eye protection.
If sewer odors, backups, or pipe damage are suspected, a professional should be contacted rather than attempting extensive DIY work.
One-line summary of the fastest detection method
Locate the sewer line quickly by following the straightest, lowest-running pipe from the main drain stack toward the exterior foundation wall.
Visually trace that pipe to where it exits the basement or meets a cleanout. Note pipe size, slope, and any cast-iron or PVC joins.
Confirm direction with fixtures’ branch lines; the main sewer typically runs perpendicular to interior joists and toward the street.
Safety precautions to take before investigating
Before inspecting, guarantee basic safety steps are completed: shut off power to any nearby outlets or sump pumps, ventilate the area to disperse sewer gases, and put on protective gear—gloves, eye protection, and an N95 or better respirator if odors are strong.
Confirm adequate lighting, use GFCI-protected extension cords, keep a phone nearby, avoid confined-space entry alone, and call a professional for hazardous conditions.
Tools and materials you may need
The homeowner should assemble a mix of basic tools—flashlight, tape measure, plumb bob, marker—and plumbing-specific items such as a drain camera, sewer snake, water meter, and test dye.
Appropriate safety equipment (gloves, mask, eyewear) is essential before any inspection or work begins.
For larger or specialized devices, renting or hiring a professional is recommended.
Basic homeowner tools (flashlight, tape measure, plumb bob, marker)
A few basic tools make tracing a sewer line in a basement straightforward: a bright flashlight to inspect dark crawl spaces, a tape measure for determining distances from fixtures and walls, a plumb bob to establish precise vertical alignments, and a marker to note reference points on floors or walls.
These simple items enable accurate visual checks, layout measurements, vertical drops verification, and clear temporary markings.
Plumbing-specific tools (drain camera, sewer snake, water meter, test dye)
Once basic visual checks and measurements are done, more specialized equipment is needed to locate and evaluate a sewer line accurately.
A drain camera inspects pipe interiors and pinpoints blockages; a sewer snake clears obstructions and confirms path.
A water meter detects unexpected flows; test dye reveals connections and leaks.
These plumbing-specific tools provide diagnostic accuracy beyond simple homeowner instruments.
Safety equipment (gloves, mask, eyewear)
Several essential items protect anyone working near a basement sewer line: nitrile or latex gloves to prevent direct contact with contaminants, a respirator or at least an N95 mask to guard against mold spores and sewer gases, and shatter-resistant safety glasses to block splashes and debris.
Additional recommendations include disposable coveralls, waterproof boots, and keeping a first aid kit and hand sanitizer nearby for immediate decontamination.
When to rent or hire specialized equipment
Determine whether specialized tools are necessary before starting: simple inspections and minor repairs often require only basic hand tools, while locating a buried or complex sewer line typically calls for rented or professional equipment such as pipe locators, inspection cameras, or hydro-jetters.
Rent when occasional use is needed; hire a pro for advanced diagnostics, confined spaces, permits, or when safety and warranty considerations outweigh DIY cost.
Step-by-step process to locate the basement sewer line
The process begins by identifying likely exit points and any wall or floor penetrations that could house the sewer line.
From there, tracing lines from fixtures—toilets, floor drains, sinks, and laundry drains—and following the main drain visually and by touch will reveal the pipe route.
A plumb bob or stud finder can map the path through walls and ceilings, and water flow tests with dye confirm which fixtures connect to the line.
Step 1 Identify likely exit points and wall/floor penetrations
Begin by surveying visible plumbing fixtures, floor drains, and appliance connections to establish where waste pipes converge; these clues narrow the search to likely exit points and any wall or floor penetrations.
Next, inspect foundation walls and floor joints for pipe sleeves, cutouts, or patched areas. Note utility chases and exterior cleanouts, and mark probable penetration locations before tracing interior runs.
Step 2 Trace from fixtures: toilets, floor drains, sinks, and laundry drains
With likely exit points and penetrations marked, attention shifts to following individual fixture drains to where they join the main sewer line.
The inspector traces visible trap arms and drain lines from toilets, floor drains, sinks, and laundry tubs, noting pipe material, diameter, slope, and fittings.
Connections, cleanouts, and soil stacks are identified and mapped for the next tracing phase.
Step 3 Follow the main drain pipe in the basement visually and by touch
Move along the basement ceiling and walls, scanning for a continuous horizontal or slightly sloped run of larger-diameter pipe that collects the branch lines and heads toward the soil stack or exterior wall.
Follow it visually, noting joints, cleanouts and hangers.
Then use gloved hands to feel for pipe continuity, changes in diameter, and secure attachments, marking the route with removable tape for later reference.
Step 4 Use a plumb bob or stud finder to map pipe path through walls/ceiling
To pinpoint where the sewer line passes through ceilings or walls, employ a plumb bob or a stud finder to project and trace the pipe’s vertical alignment from visible runs.
Drop the plumb line from a known pipe center, mark floor and ceiling points, then transfer measurements to studs.
A stud finder detects framing and wiring, helping avoid drilling into hidden obstacles while mapping the pipe route.
Step 5 Use water flow tests and dye to confirm connections
After mapping the pipe’s path through ceilings and studs, the next step verifies which fixtures actually feed into that line using water flow tests and dye.
Run one fixture at a time while an assistant watches accessible cleanouts or drain openings for discharge.
Pour nonstaining fluorescent dye into fixtures; observe color at the cleanout.
Record which fixtures connect and note any unexpected backflow.
Step 6 Run a camera inspection to confirm orientation and depth
Begin a camera inspection by feeding a sewer camera through the nearest cleanout or access point to trace the line’s orientation and measure depth.
Record continuous video while advancing slowly, noting junctions, bends, and offsets.
Use the camera’s distance counter and any built‑in sonar or laser depth tools to log depth changes.
Stop at obstructions or where external mapping begins.
Step 7 Mark and document the final sewer line route for future reference
With the camera inspection complete and depth and orientation confirmed, the final route should be clearly marked and fully documented for future reference.
The person records line depth, bearing, landmarks, and distances from fixed points. Photographs, a scaled sketch, GPS or tape measurements, and printouts of video timestamps are stored with date and operator notes.
Copies go to homeowner files and contractor records.
How to interpret common signs and measurements
The next section explains how to read common signs and measurements to pinpoint the sewer line.
It covers identifying pipe materials and sizes and what those clues suggest, evaluating flow direction and slope, and correlating the basement layout with the sewer’s backyard exit.
Practical examples and simple measuring techniques are provided to make those determinations clear.
Identifying pipe materials and sizes and what they imply
Many basements contain a mix of pipe types—cast iron, clay, PVC, ABS, and galvanized steel—each with distinct appearances, joint styles, and typical diameters that offer clues about age, condition, and capacity.
Recognizing worn flanges, rust, hairline cracks, pipe thickness, and the presence of threaded versus hubbed connections helps determine whether a section is original, been repaired, or needs replacement.
Measuring outside diameters (commonly 2–4 inches for drains, 3–6 inches for main sewer lines) and noting slope and fixture ties informs whether the line meets code and can handle current household demand.
Identifying markings, colors, and connector types narrows likely material; larger, heavier pipes usually indicate main lines while thinner plastic denotes later repairs or branches, guiding inspection and replacement decisions.
Determining flow direction and slope of the sewer line
Although visual cues and simple measurements suffice in most basements, interpreting flow direction and slope of a sewer line requires observing multiple indicators—pipe pitch, inlet and outlet elevations, flow marks, and fixture tie-ins—to form a reliable picture.
Inspect low points, slope toward the main, note residue lines or mineral deposits, check cleanouts and vent orientation, and measure rise over run to calculate pitch (typically 1/4″ per foot minimum).
Recognizing backyard exit/location relative to basement layout
When locating where a basement sewer line exits to the backyard, start by aligning internal pipe runs with exterior features—floor drains, laundry or utility sinks, and nearby cleanouts typically trace a path toward the yard outlet.
Measure straight-line distances from fixtures to the exterior wall, note sewer pipe depth changes, locate visible yard vents or inspection ports, and compare with municipal sewer main positions to predict the exit point.
Problems you might encounter and how to handle them
Unexpected complications can arise when pipes are hidden behind finished walls or buried under concrete, requiring inspection openings or non‑invasive imaging.
Multiple branch lines, ambiguous connections, persistent odors, slow drains, or backups during testing can obscure the source and often call for methodical tracing or a plumber’s camera.
Determining whether lines lead to the municipal sewer or a septic system is essential for permitting, repair options, and appropriate handling.
Hidden or concealed pipes behind finished walls or under concrete
Many basements conceal sewer pipes behind drywall or beneath concrete slabs, creating challenges for location and access.
Homeowners should use camera inspections, stud-finders with metal detection, or floor-scan services to pinpoint lines.
When cutting is required, mark utilities, hire licensed contractors, and obtain permits.
Temporary patches and targeted access points minimize disruption; document locations for future reference.
Multiple branch lines or ambiguous connections
After locating the main run behind walls or under slabs, homeowners often confront multiple branch lines or ambiguous connections that complicate repairs and reroutes.
Map visible branches, label fixtures they serve, and trace each line with an inspection camera or dye test.
When configuration remains unclear, consult a licensed plumber for accurate mapping, code-compliant rerouting, or targeted excavation to avoid damaging other services.
Foul smells, slow drains, or backups during testing
When testing sewer lines, foul odors, slow drains, or backups often indicate partial blockages, damaged seals, or improper venting that require prompt identification.
Use targeted tests such as flushing isolated fixtures, running water through individual branches, and applying a nonstaining dye or smoke test to pinpoint the affected segment before attempting repairs.
Document findings, clear localized clogs with a drain snake or hydrojet, and reseal suspect joints.
When traces lead to the municipal sewer vs. a septic system
If trace testing indicates the issue lies beyond the property boundary, distinguishing between a municipal sewer connection and a private septic system is critical because responsibility, repair options, and regulatory requirements differ markedly.
Homeowners should expect different diagnostic steps, potential permits, and billing or service procedures depending on which system is implicated.
Municipal issues require utility contact, possible mainline repairs, and permit fees; septic faults mean contacting a licensed pumper/contractor, tank inspection, and on-site repairs.
Safety, legal, and municipal considerations
Before attempting to expose or alter a sewer line, the homeowner should confirm local permit and code requirements to avoid fines or mandated repairs.
Care must be taken to protect potable water and prevent cross-contamination when working near supply lines or fittings.
If there is any uncertainty about regulations, utility locations, or safe handling of sewage, a licensed plumber or utility locator should be contacted.
Permit and code issues for exposing or modifying sewer lines
Although uncovering or altering a sewer line can seem straightforward, it triggers a web of safety rules, building codes, and municipal permit requirements that must be observed to avoid fines, liability, or unsafe conditions.
Homeowners should verify local permitting, required inspections, licensed-plumber mandates, and code-compliant materials and methods.
Failure to comply can void insurance, incur penalties, or force costly corrective work ordered by authorities.
Protecting potable water and avoiding cross-contamination
Permitting and code compliance also intersect with rules that protect drinking water when sewer work is exposed or modified.
Homeowners must prevent cross-connections, maintain required air gaps, and avoid backflow risks during inspection or repair.
Contaminated water carries health and legal liability; municipalities may require testing, temporary shutoffs, or approved backflow prevention devices.
Document compliance and follow inspector directions.
When to call a licensed plumber or utility locator
Recognize situations that require professional help: suspected sewer line breaks, repeated backups, foul odors that persist after basic cleaning, unknown pipe locations before digging, and any work that triggers local permitting.
A licensed plumber or utility locator guarantees safe diagnostics, prevents damage to buried utilities, adheres to codes, and obtains necessary permits.
Call professionals for camera inspections, trenching, or when liability or municipal rules apply.
Tools and service comparison for locating sewer lines
A concise comparison of available tools and professional services helps determine the best approach based on budget, required accuracy, and user skill. The following quick reference highlights typical trade-offs so readers can match needs to options. Professionals and DIYers should weigh cost against precision and training before choosing a method.
| Item | Typical trade-off |
|---|---|
| Dye/Test kits | Low cost — low accuracy |
| Inspection camera | Moderate cost — moderate accuracy |
| Electronic locator | Higher cost — high accuracy |
| Professional service | Highest cost — highest accuracy |
| DIY methods | Lowest cost — variable accuracy |
Visual comparison of cost, accuracy, and required skill for each method
Several common approaches—visual inspection, probing, electronic locators, camera inspection, and professional tracing services—differ markedly in cost, accuracy, and required skill.
Visual inspection is cheapest but least accurate; probing is low-cost, moderate skill, variable accuracy.
Electronic locators cost more, require training, and improve precision.
Camera inspection offers high accuracy and moderate-to-high cost.
Professional tracing yields best accuracy, highest cost, and no homeowner skill required.
Preventive steps and documentation after locating the sewer line
After locating the sewer line, the homeowner should mark and map its exact position and store that information with property records.
Simple precautions during renovations—such as keeping a clear buffer zone and notifying contractors of the line—help prevent accidental damage.
Regular visual inspections and occasional professional checks maintain access and reduce the risk of costly repairs.
Marking, mapping, and storing the location information
Once the sewer line has been identified, homeowners should create clear, durable records that make future access and maintenance straightforward.
Mark the line’s path on basement walls or floor with weatherproof paint or engraved tags.
Produce a simple scaled sketch showing distances to fixed landmarks, note pipe depth and material, photograph markers, and store digital and physical copies with home maintenance files and utility records.
Best practices to avoid future damage during renovations
With the sewer line clearly marked and documented, homeowners should take specific precautions before any remodeling or structural work to prevent accidental damage.
Contractors must review plans and utility maps, expose and protect the line when digging, use noninvasive anchoring and fasteners, and install barriers or warning tapes.
Updated records and photos should accompany permits to guarantee future crews respect the line location.
Routine checks and maintenance tips to keep the sewer line accessible
Although locating the sewer line is only the first step, routine checks and concise documentation are essential to keep it accessible and protected over time.
Periodic inspections, clearing vegetation, verifying cleanout caps, and checking for shifts or odors prevent issues.
Record locations, measurements, photos, and service dates.
Share documentation with contractors and store copies with home maintenance records for quick reference during repairs.
Troubleshooting checklist and quick fixes
When a basement sewer issue appears, the homeowner should act quickly to limit damage and health risks. Common immediate steps include stopping water flow, containing contaminated water, and noting the problem for the plumber.
Quick temporary measures while awaiting repair can include:
- Shutting off the main water supply and blocking affected drains with plugs or towels
- Placing buckets and absorbent materials to capture leaks and prevent spread
- Using a wet/dry vacuum or pumps cautiously to remove standing sewage only if safe to do so
Immediate actions for visible leaks or backups
Inspect the scene immediately for active leaks, pooling water, foul odors, or slow drains to determine whether the issue is localized or indicates a sewer backup.
Shut off water to affected fixtures, avoid using toilets and drains, and clear nearby belongings to prevent damage.
Note drain behavior, take photos, and ventilate the area.
Contact a licensed plumber promptly; avoid DIY sewer entry.
Temporary measures while waiting for professional repair
After contacting a plumber and securing the area, homeowners can take short-term steps to limit damage and improve safety while waiting for repair.
Remove standing water with a wet/dry vacuum, elevate belongings, use fans and dehumidifiers, and block off affected rooms.
Avoid chemical drain cleaners, stop using plumbing fixtures connected to the sewer, and document damage with photos for insurance and the technician.
Signs it’s time to hire a professional and what to expect
When persistent backups, foul odors, or uneven floors suggest a deep blockage or collapse, a professional may recommend a camera inspection, excavation, or full pipe replacement.
Homeowners should ask plumbers about diagnosis methods, expected timelines, permits, warranty coverage, and whether trenchless options are available.
Quotes should itemize inspection fees, labor, materials, permit costs, and any conditional charges for unforeseen repairs.
Situations requiring camera inspection, excavation, or replacement
Recognize persistent signs—recurrent backups, slow drains throughout the house, sewage odors in the basement, unexplained sinkholes or soggy patches in the yard, or multiple fixtures backing up simultaneously—as indicators that a professional camera inspection, excavation, or full sewer-line replacement may be necessary;
a licensed plumber will use diagnostic cameras to locate blockages or damage and then recommend targeted repairs or replacement based on pipe condition, age, and repairability.
Immediate action prevents worsening damage.
What questions to ask plumbers and what quotes should include
Following confirmation from a camera inspection or recommendation for excavation or replacement, homeowners should prepare focused questions for plumbers and know what items must appear on written quotes.
Ask about licensing, insurance, detailed scope, materials, timeline, permit responsibilities, cleanup, warranties, and contingency costs.
Quotes should list labor, materials, permits, start/completion dates, payment schedule, warranty terms, and conditions for change orders.
Conclusion
Like a thread through a woven rug, the buried pipe guides care through the basement’s pattern; finding it turns guesswork into design. Homeowners become gardeners of their home’s roots, mapping channels that carry waste away and peace back in. With tools, measurements, and a patient eye, the route reveals itself; with records and routine care, the line stays a quiet current, unseen but essential, keeping the household whole and steady.