How to Handle Gas Piping Safely: A Step-by-Step Guide for Homeowners and DIYers
Homeowners and experienced DIYers should prioritize safety when handling gas piping. While simple tasks like replacing flexible connectors or shutting off valves can often be performed by competent individuals, more complex tasks such as routing new lines, altering meters, or conducting pressure tests require a licensed professional. Always adhere to local codes, obtain necessary permits, and use the right materials. Before starting any work, shut off the gas, confirm zero pressure, and conduct leak tests afterward. If you suspect a leak, contact your supplier or emergency services immediately. Detailed safety steps follow to guide you through the process.
Overview of Gas Piping Safety for Homeowners and DIYers
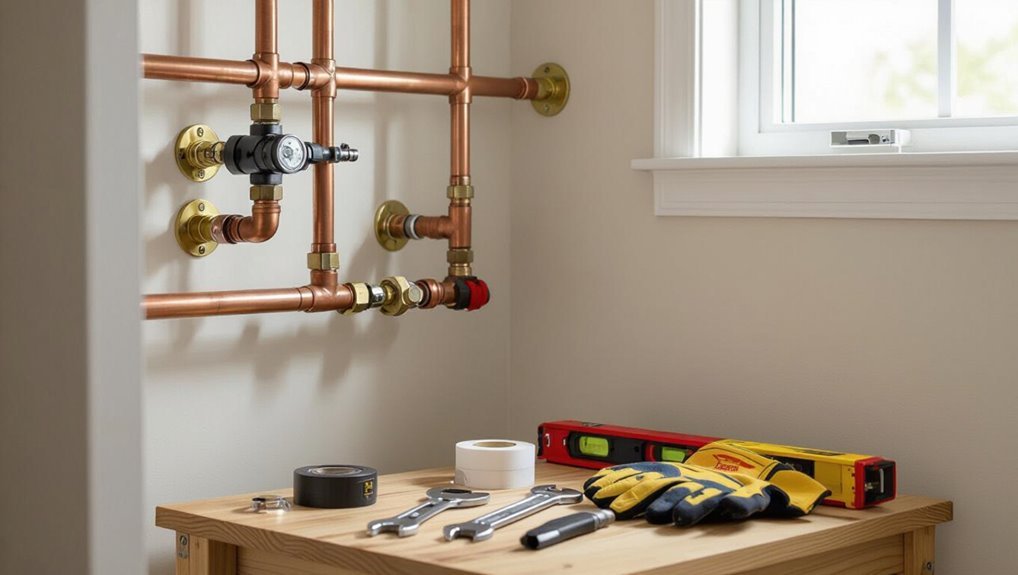
Proper gas piping is essential to prevent leaks, fires, and code violations that endanger occupants and properties.
Homeowners may handle simple tasks like appliance connections only if they have the correct tools, knowledge, and local permits, but more complex installations, line alterations, or any work involving gas shutoffs should be left to licensed professionals.
A brief checklist—confirm permits, stop if testing reveals a leak or unclear piping, and call an expert for pressure testing or system modifications—helps decide when to quit and get help.
Why proper gas piping matters for safety and compliance
Understandably, correct gas piping prevents immediate hazards like leaks and fires and reduces long-term risks such as carbon monoxide exposure and structural damage.
Proper installation and maintenance guarantee code compliance, reliable appliance performance, and lower insurance liabilities.
Homeowners following guidance on how to handle gas piping safely reduce accidental injuries, costly repairs, and regulatory violations while preserving property value and occupant health.
Who should attempt DIY gas work and when to call a professional
Having established why correct gas piping matters for safety and compliance, the next question for homeowners is which tasks can reasonably be handled as DIY and which require a licensed professional.
Simple actions—turning off valves, replacing flexible connectors, or tightening fittings on accessible appliances—may suit experienced DIYers.
Complex work—routing new lines, modifying meter connections, or anything requiring permits—demands a licensed gas professional.
Quick checklist: When to stop and get expert help
When should a homeowner stop and call a licensed gas professional?
If gas smell, hissing, or visible leaks occur; when altering main lines, meter, or regulators; if appliances show yellow flames, soot, or pilot issues; after seismic damage or suspected corrosion; when permits or inspections are required; if unsure about fittings, pressure testing, or code compliance.
When in doubt, defer to a certified technician.
Types of Gas and Common Home Gas Systems
Homes typically use either natural gas or propane, each with different pressures and fitting requirements that influence piping choices.
Common appliances—furnaces, water heaters, stoves, dryers and outdoor grills—require specific connection types and shutoffs.
Piping materials vary (black iron, CSST, copper, polyethylene) and are selected based on fuel type, location, and code requirements.
Natural gas vs. propane: differences affecting piping and fittings
Although both natural gas and propane serve similar household functions, they differ markedly in composition, pressure, energy content, and physical state—factors that determine appropriate piping materials, pressure regulators, fittings, and installation practices.
Natural gas is lower pressure, delivered via utility lines; propane is stored liquefied at higher pressure, requiring heavier gauges, vapor-specific regulators, brass fittings rated for LPG, and stricter leak prevention.
Typical home gas appliances and their connection types
Because most residences rely on gas for heating, cooking, and hot water, typical household systems include furnaces, boilers, water heaters, cooktops/ranges, fireplaces, and clothes dryers, each requiring specific connection types and components.
Connections vary by appliance: rigid pipe to stationary units, flexible connectors for dryers and ranges, appliance shutoff valves, pressure regulators, drip legs, and proper venting and combustion air provisions.
Materials used in gas piping (black iron, CSST, copper, polyethylene)
After outlining common appliances and their connection requirements, attention turns to the materials used for gas distribution lines: black iron (steel), corrugated stainless steel tubing (CSST), copper, and polyethylene (PE).
- Black iron: durable, threaded joints, common for mains.
- CSST: flexible, requires bonding/grounding.
- Copper: limited use, susceptible to corrosion in some areas.
- PE: used underground, joined by approved fittings.
Legal Requirements, Permits, and Codes
Before beginning any gas piping work, the article advises checking local building codes and applicable gas standards to guarantee compliance.
It notes that most jurisdictions require permits and staged inspections for gas projects, and outlines the typical permit process.
The piece also warns that improper DIY gas work can affect liability and insurance coverage, so homeowners should verify policy terms and consider hiring licensed professionals.
Building codes and gas standards to check locally
When preparing any gas-piping project, homeowners and contractors must first identify the applicable local building codes, gas standards, and permit requirements that govern installation, modification, and inspection.
These rules vary by municipality and can supersede national guidelines.
Check local amendments to the International Fuel Gas Code, national standards like ANSI/CSA, appliance clearances, allowable materials, venting rules, pressure testing criteria, and any jurisdictional licensing requirements.
Permit process and required inspections for gas work
Although gas work may seem straightforward, the permit process and mandated inspections establish legal, safety, and accountability frameworks that must be followed. Homeowners and contractors are required to obtain the appropriate permits, submit plans or scope-of-work details, and schedule inspections at specified stages to verify compliance with local codes and pressure-testing standards.
Authorities typically require permit approval before starting, midwork inspections for buried or concealed piping, and final certification.
Liability and insurance considerations for DIY gas projects
Any person considering DIY gas work must understand that legal liability and insurance coverage frequently restrict or prohibit unlicensed installation and repairs.
Homeowner responsibility includes verifying local codes, obtaining permits, and confirming inspections to maintain coverage. Insurance claims may be denied for unauthorized alterations causing damage or injury.
Consulting insurers and licensed professionals clarifies obligations, mitigates financial risk, and guarantees compliance with statutory requirements.
Tools, Safety Gear, and Materials Needed
The section outlines the essential tools for cutting, threading, joining, and testing gas pipes, including pipe cutters, threaders, fittings wrenches, and pressure gauges.
It also reviews required personal protective equipment and ventilation practices to minimize exposure to gas and fumes.
Guidance for selecting compatible fittings and sealants for different pipe materials is provided so connections remain gas-tight and code-compliant.
Essential tools for cutting, threading, joining, and testing gas pipes
A concise, well-chosen set of tools, safety gear, and materials is essential for cutting, threading, joining, and testing gas pipes to guarantee work is accurate and hazards are minimized.
Recommended essentials include pipe cutters, threaders, joining tools, and gas test equipment; appropriate sealants and approved fittings; leak detection solution; and secure supports and clamps.
- Pipe cutters and deburring tools
- Threading dies and wrenches
- Thread sealant, fittings, joining kits
- Pressure gauge and leak detector
Personal protective equipment and ventilation requirements
After assembling the cutting, threading, and testing tools, attention shifts to personal protective equipment and ventilation to protect workers from physical injuries and gas exposure.
Workers should wear impact gloves, safety glasses, flame-resistant clothing, and respirators when required.
Guarantee forced-air ventilation or exhaust fans in confined spaces and continuous fresh-air monitoring for leaks.
- Gloves
- Eye protection
- Respiratory protection
- Mechanical ventilation
How to choose the right fittings and sealants for each pipe material
Selecting appropriate fittings and sealants requires matching material compatibility, pressure ratings, and service conditions to guarantee leak-free, safe joints.
For steel, use threaded black-iron fittings with gas-rated pipe dope; for copper, use flare or compression fittings approved for gas and PTFE tape where specified.
For CSST, follow manufacturer-approved fittings and sealants.
Always verify certifications, temperature range, and local code acceptance before installation.
Preparing for a Gas Piping Project
Before work begins, the project scope is assessed by measuring pipe runs, calculating appliance load, and mapping the proposed layout.
The gas supply is then shut off and verified at zero pressure to guarantee a safe starting point.
Finally, the workspace is prepared and coordination with utility providers is confirmed to prevent interruptions and hazards.
How to assess the scope: measuring runs, calculating load, and mapping layout
When preparing a gas piping project, a clear assessment of scope begins with precise measurements of pipe runs, accurate calculation of appliance load, and a detailed layout map that identifies routes, junctions, and service access points.
The assessor notes run lengths, vertical rises, fittings and pressure drops, sums appliance BTU demand, selects pipe sizes, and marks shutoff, meter, and appliance locations for permit-ready plans.
Shutting off gas safely and verifying zero pressure
With the layout and load confirmed, the next step is to shut off the gas and verify zero pressure to guarantee a safe work environment.
Locate and turn off the main valve, bleed downstream pressure via appliance valves or bleed ports, and use a manometer or pressure gauge at the test point.
Confirm zero reading, tag the shutoff, and document status before beginning work.
Preparing the workspace and coordinating with utility providers
Several key steps guarantee the workspace is safe and service interruptions are coordinated: secure a clear perimeter, remove ignition sources and combustible materials, post hazard notices and barriers, and confirm utility shutdowns and access with the gas provider and other utilities.
Arrange permits, schedule qualified utility representatives, establish emergency contact procedures, provide adequate ventilation and lighting, and verify all workers understand isolation points and re-energization protocols.
Step-by-Step Guide to Installing or Modifying Gas Piping
The sequence begins with planning and accurately marking the route for new or replacement piping to avoid obstructions and maintain proper clearances.
Next come material-specific steps: cutting and preparing pipe ends, selecting appropriate joining methods (threaded, welded, crimped, or flared), and installing shutoff valves, regulators, and appliances.
Finally, the system is secured with supports and fastenings to prevent stress, movement, and vibration that could compromise joints.
Planning and marking the route for new or replacement piping
Begin by surveying the work area to determine the most direct, accessible, and code-compliant path for the new or replacement gas piping.
Identify obstacles, clearance requirements, support and vent locations, and existing utilities. Mark the route with chalk or tape, noting distances, fixture connections, and valve positions.
Verify local codes, building cavities, and required supports before cutting or drilling.
Cutting and preparing pipe ends for joining (by material)
Cut pipe ends squarely and burr-free, tailored to the specific material—black steel, CSST, copper, or polyethylene—so joints seal reliably and assemblies align with code.
Use appropriate cutters: pipe vise and hacksaw or powered saw for steel, specialized tubing cutters for copper, CSST shears per manufacturer, and polyethylene pipe cutters.
Deburr, ream, clean, and inspect for damage; measure twice, cut once.
Joining methods: threaded, welded, crimped, and flared connections
Select the appropriate joining method—threaded, welded, crimped, or flared—based on pipe material, system pressure, accessibility, and code requirements.
Each method demands specific tools, skills, and inspection:
- threaded for black iron/NPT,
- welded for permanent steel runs,
- crimped for corrugated stainless tubing with fittings,
- flared for soft copper tubing.
Confirm proper sealing, torque, and leak testing per code.
- Threaded
- Welded
- Crimped
- Flared
Installing shutoff valves, regulators, and appliances
Installers must place shutoff valves, regulators, and appliances in a sequence that guarantees safe isolation, correct pressure regulation, and convenient maintenance access while complying with applicable codes.
They select valves rated for gas type, mount regulators downstream of service with correct venting and relief, locate appliance shutoffs within reach, test for leaks, label components, and document settings and clearances for inspection and future service.
Supporting and securing piping to prevent stress and vibration
Support piping at regular intervals and anchor runs to prevent sagging, vibration, and stress transfer to fittings and appliances.
Use appropriate hangers, clamps, and vibration isolators for material and size, avoiding overtightening.
Provide rigid support near connections, appliances, and changes in direction.
Allow controlled movement for thermal expansion, maintain clearances from combustibles, and follow local code spacing and support specifications.
Pressure testing and leak detection procedures
After securing and anchoring the piping to prevent movement and stress, the next priority is verifying system integrity through pressure testing and leak detection.
The installer isolates the section, caps outlets, and applies regulated test pressure with an approved gauge and manometer.
Monitor for pressure decay over the required interval.
Perform soap or electronic sniffing at joints.
Record results and correct any leaks before restoring service.
Commissioning the system and first-time appliance startup
Begin commissioning by confirming that all pressure tests passed, all leak repairs were completed, and that the system has been purged of air and contaminants according to code and manufacturer procedures.
Then verify regulator settings, inlet pressures, and correct appliance fittings. Open valves slowly, monitor for leaks and proper burner operation, check venting, and record readings.
Only permit occupant use after final inspection and documentation.
How to Perform Safe Leak Detection and Emergency Response
Recognition of a gas leak begins with sensory cues—unusual odors, hissing sounds, or appliances behaving oddly—and should prompt immediate investigation.
Detection methods include soapy water for visible fittings, chemical sniffers, and calibrated electronic gas detectors to pinpoint leaks safely.
If a leak is suspected, occupants should evacuate, shut off gas at the meter if trained and it is safe to do so, isolate affected sections, and contact emergency services and the gas supplier.
Recognizing gas leak signs: odor, sound, and appliance behavior
A persistent, unusual smell—often described as rotten eggs—along with hissing noises or sudden changes in appliance flames are primary indicators of a natural gas leak.
Additional signs include dead vegetation near outdoor lines, unexplained dizziness or nausea, and pilot lights extinguishing or sputtering.
Observing multiple signs warrants immediate evacuation, shutting off gas at the meter if trained, and contacting emergency services.
Using soap solution, chemical sniffers, and electronic gas detectors
When checking for a suspected gas leak, trained individuals should use a tiered approach—starting with a simple soap solution for visible fittings, moving to chemical sniffers for localized testing, and relying on calibrated electronic gas detectors for broader or less obvious leaks.
Each method requires correct application, appropriate personal protective measures, and adherence to manufacturer and safety guidelines to avoid false readings or unsafe exposure.
- Inspect visible joints with soap solution.
- Use chemical sniffers for targeted areas.
- Deploy calibrated electronic detectors for wider surveys.
- Record readings, follow calibration and PPE protocols.
Immediate steps to take if you suspect a leak
After confirming suspected leaks with soap, sniffers, or electronic detectors, the next actions center on immediate safety and containment to protect people and property.
Evacuate occupants to fresh air without creating sparks, shut off electrical devices from a safe distance, ventilate enclosed spaces by opening windows and doors, and call the gas company and emergency services.
Do not re-enter until professionals declare it safe.
How to isolate sections and turn off gas at the meter
Locate the main shutoff and any appliance-specific valves before attempting isolation so sections can be closed methodically to stop gas flow and limit the area affected.
The meter shutoff requires the correct wrench and may be controlled by the utility; only qualified persons should operate if unfamiliar.
Close downstream appliance valves first, then the meter.
Ventilate, evacuate if odor persists, and notify the gas company immediately.
Common Problems, Causes, and How to Fix Them
Common problems in gas piping commonly stem from installation mistakes, such as incorrect pipe sizing, poor support, or inadequate venting, and should be prevented by following codes and manufacturer instructions.
Corrosion, improper fittings, and thread-sealant errors can lead to leaks and are addressed by selecting compatible materials, using proper joint techniques, and applying approved sealants.
Troubleshooting pressure loss and appliance performance issues requires systematic pressure testing, inspection of regulators and valves, and verification of appliance inlet pressures.
Typical installation mistakes and how to avoid them
Many installation errors stem from improper planning, incorrect material selection, or rushed workmanship; recognizing these root causes helps prevent leaks, pressure loss, and safety hazards.
- Incorrect pipe sizing — causes pressure drop; calculate loads and follow codes.
- Poor joint alignment — stresses fittings; support and align before joining.
- Insufficient support/clamping — causes sagging; install supports per spacing requirements.
- Ignoring venting and access — hampers maintenance; plan accessible routes and shutoffs.
Corrosion, improper fittings, and thread sealant errors
Corrosion, mismatched or damaged fittings, and improper use of thread sealants are frequent sources of gas-line failure that compromise system integrity and safety.
Inspect for rust, pitting, and loose or cross-threaded joints. Replace corroded pipe and use compatible fittings.
Apply gas-rated thread compound or PTFE tape correctly, avoid excess, and torque to specification.
Always pressure-test after repairs and document work.
Troubleshooting pressure loss and appliance performance issues
When a gas system exhibits pressure loss or appliances underperform, systematic diagnosis isolates whether the issue stems from supply, piping, or the appliance itself.
Technicians check meter readings, regulator function, and upstream supply. Inspect piping for leaks, blockages, kinks, or undersized runs and verify proper pressure at appliance inlet.
Fixes include clearing obstructions, replacing regulators, repairing leaks, and resizing lines per code.
When to Hire a Licensed Professional
Certain gas piping tasks—such as installing or relocating lines, attaching appliances, or repairing suspected leaks—should always be handled by licensed plumbers or gas fitters.
Readers are advised to verify qualifications, certifications, and references before hiring and to confirm insurance and local licensing.
A professional inspection typically includes leak testing, pressure checks, code compliance verification, and a written report or handoff detailing work performed and any follow-up needed.
Tasks that should always be performed by licensed plumbers or gas fitters
Recognize that gas work carries inherent risks and legal requirements that place responsibility on qualified professionals.
Licensed plumbers or gas fitters possess the training, tools, and certifications necessary to perform complex or hazardous tasks safely and to code.
Tasks they must handle include new gas line installations, mains connections, major reroutes, appliance hookups requiring permits, leak diagnosis and repair, pressure testing, and obtaining required inspections.
How to vet professionals: qualifications, certifications, and references
How should a homeowner determine whether a gas tradesperson is properly qualified?
Homeowners should verify licensing, confirm relevant certifications, review insurance, and check recent references.
Ask for license numbers, proof of gas-safe training, liability and workers’ comp coverage, and contactable recent clients.
Prefer tradespeople with local regulatory registration and clear written estimates.
- Verify license number
- Confirm certifications
- Check insurance
- Contact references
What to expect during a professional inspection and handoff
After confirming credentials and references, a homeowner should understand what a licensed gas professional will do during an inspection and handoff so expectations are clear and the process goes smoothly.
The inspector will verify code compliance, test for leaks, confirm proper fittings and ventilation, document findings, and provide a written report with recommendations.
The professional will demonstrate shutoff locations and explain maintenance and emergency procedures.
Maintenance, Inspection, and Long-Term Safety Practices
Homeowners should perform basic routine checks—visual inspections of lines and fittings, appliance connections, and audible or olfactory checks for leaks—at least annually and after any major weather event.
Seasonal adjustments and a fresh inspection after renovations or appliance changes help catch shifted lines, new penetrations, or altered ventilation.
Detailed records of permits, as-built diagrams, and maintenance logs should be kept and updated to support safe long-term management and professional assessments.
Routine checks homeowners should perform and recommended frequency
A few simple, regular checks can catch early signs of gas-piping problems before they become hazardous.
Homeowners should inspect visible pipes, fittings, valves, and meter areas; listen/smell for leaks; verify appliance connections; and monitor for corrosion or damage.
Recommended frequency balances safety and practicality:
- Visual pipe inspection — monthly
- Smell/listen check — weekly
- Appliance connection check — quarterly
- Professional inspection — annually
Seasonal considerations and changes after renovations
Routine checks provide a baseline for safe gas-piping performance, but seasonal shifts and post-renovation work introduce new variables that require focused attention.
Temperature changes can stress fittings and cause condensation; winter freeze risks and summer settling demand targeted inspections.
After renovations, verify line integrity, venting clearances, and appliance connections; pressure-test altered runs and correct any corrosion, looseness, or odor immediately.
Recordkeeping: permits, diagrams, and maintenance logs
Why is meticulous recordkeeping essential for gas-piping safety?
Accurate permits, as-built diagrams, and maintenance logs create an audit trail for compliance, future work, and emergency response.
Proper files document inspections, repairs, pressure tests, and contractor credentials.
Accessible, dated records reduce risk, clarify responsibilities, streamline permits for alterations, and support liability protection.
Regularly update and store records offsite or digitally with backups.
Cost Estimates and Timeframes for Common Gas Piping Projects
Cost and time are key considerations when planning gas piping work, with DIY efforts typically costing less upfront but often taking longer and carrying greater risk compared with professional installation. The following table summarizes typical cost ranges, expected timelines, and factors that can extend duration for common projects. Readers should compare these estimates and timeline drivers when deciding whether to hire a licensed contractor.
| Project type | Typical cost range | Typical timeframe |
|---|---|---|
| Appliance hookup (DIY) | $50–$300 | 1–4 hours |
| Appliance hookup (pro) | $150–$600 | 1–3 hours |
| Line extension (single run) | $200–$1,200 | 2–8 hours |
| Line extension with permits | $500–$2,500 | 1–3 days |
| Complex reroute or retrofit | $800–$5,000+ | Several days–weeks |
Typical cost ranges for DIY vs. professional installation
How much a gas piping job will run depends on scope, materials, local labor rates, and whether the work is DIY or performed by a licensed professional.
DIY savings often appear in labor costs but still require permits, specialized fittings, and leak testing—typically $50–$500 for small runs.
Professional installation commonly ranges $300–$2,500+ depending on complexity, certification, and warranty.
Expected project timelines and factors that affect duration
Timelines for gas piping projects vary widely based on scope, permitting, and site conditions.
Simple appliance hookups often finish in a few hours; kitchen or bathroom reroutes require a day.
Whole‑house upgrades, meter relocations, or trenching can take days to weeks, especially with inspections, permit delays, weather, or concealed obstructions.
Skilled labor, material availability, and coordination with utilities also influence duration.
Useful Resources and Reference Materials
The article points readers to sources for local code information, manufacturer manuals, and training programs to guarantee work complies with regulations.
It also lists recommended tools, gas detectors, and protective equipment suitable for homeowners.
Finally, trusted suppliers and where to verify product specifications are highlighted to aid safe purchasing decisions.
Where to find local code information, manufacturer manuals, and training
Reliable information sources for gas piping—local codes, manufacturer manuals, and accredited training—form the foundation of safe installation and maintenance.
Homeowners should consult municipal building departments or state websites for code requirements, download product manuals from manufacturers’ sites, and verify certification bodies (e.g., ICC, NATE) for courses.
Local trade schools, community colleges, and licensed contractors offer practical, code-aligned training and continuing education.
Recommended tools, detectors, and suppliers for homeowners
Several essential tools and detectors help homeowners assess and maintain gas piping safety without replacing professional inspections.
Recommended items include leak detectors, combustible gas meters, handheld soap testers, and adjustable wrench sets.
Purchase from reputable suppliers, HVAC distributors, major home centers, or certified online retailers.
Regular calibration, batteries, and manufacturer guides are essential for reliable operation.
- Leak detector
- Combustible gas meter
- Soap test kit
- Adjustable wrench set
Conclusion
Like a careful map drawn before a journey, this guide leaves readers standing at a sturdy threshold: pipes routed with intent, codes observed, and risks respected. The hum of appliances becomes a measured rhythm rather than a warning bell when tools, permits, and judgement are aligned. When uncertainty clouds the way, a licensed hand steadies the path. With regular inspections and prudent maintenance, the home’s gas system remains a quietly tended hearth rather than a hidden peril.