How to Set Up a Sprinkler System Timer: Step-by-Step Guide for Reliable Lawn Watering
To set up a sprinkler system timer for reliable lawn watering, follow these key steps: First, select a timer compatible with your number of zones and desired features. Next, map your valves and run outdoor-rated low-voltage wires to the controller. Mount the unit securely and ensure it’s grounded. Connect the common and zone leads, then set the current time and date. Assign watering programs, and test each zone for proper coverage and any leaks. Finally, program adjustments for seasonal changes, rain delays, and cycle-and-soak runs to maximize efficiency. For further assistance, refer to detailed setup, troubleshooting, and maintenance guides.
How a Sprinkler System Timer Improves Lawn Watering Reliability
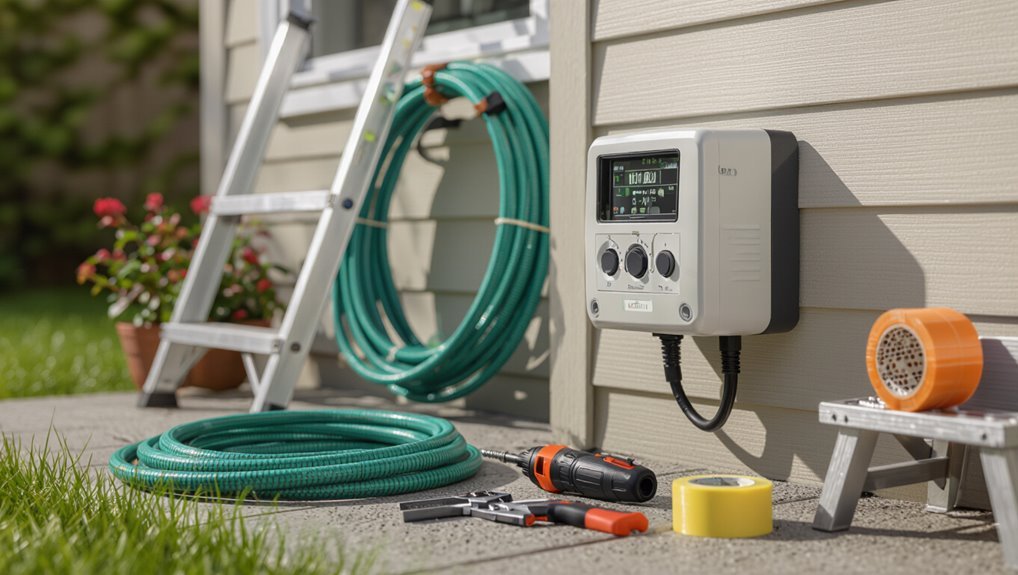
A sprinkler system timer provides consistent, automated irrigation that conserves water and promotes healthier turf by delivering the right amount at the right times.
It prevents missed or excessive watering caused by human error, vacation, or busy schedules.
Common scenarios where timers solve problems include early-morning watering for evapotranspiration control and staggered zone scheduling to avoid low pressure or runoff.
Benefits of using an automatic timer for irrigation
Installing an automatic timer transforms lawn watering from a chore into a reliable, hands-off routine by delivering consistent, scheduled irrigation without manual intervention.
It guarantees uniform coverage, reduces overwatering, and adapts to programmed schedules for peak efficiency.
Users following guidance on how to set up sprinkler system timer gain water savings, healthier turf, and dependable timing that frees time and minimizes human error.
Common scenarios where timers solve watering problems
Timers resolve common watering problems by enforcing consistent schedules, preventing missed cycles, and adapting runtimes to changing conditions.
They address absentee homeowners, uneven coverage from manual watering, and overwatering during rainy periods via rain-sensor integration.
Timers minimize water waste, prevent plant stress from irregular irrigation, and support seasonal adjustments.
Routine programming also simplifies adjustments for new plantings, drought restrictions, or lawn renovation projects.
Quick Setup Overview: What to Expect Before You Start
A brief setup typically takes 30–90 minutes and requires basic tools such as a screwdriver, adjustable wrench, wire strippers, and the timer unit.
Before beginning, the installer should shut off the irrigation water supply and cut power to any electrical components to prevent injury or equipment damage.
Basic safety gear—gloves and eye protection—is recommended while handling wiring and valves.
Typical time required and tools needed
Expect to spend about one to three hours for a basic timer setup—longer if the controller needs wiring changes or zoning adjustments.
Typical tasks include mounting the controller, connecting zone wires, programming schedules, and testing heads.
Required tools: screwdriver set, wire stripper/crimper, voltage tester, tape measure, waterproof sealant, and replacement wire or connectors.
Allow extra time for troubleshooting.
Safety precautions and turning off water/electricity
Shut off the main water supply and cut power to the controller before any hands-on work begins to prevent flooding, electrical shock, or damage to the system.
Verify isolation with a multimeter and open a nearby valve to relieve pressure.
Wear gloves and eye protection, keep children and pets away, and label disconnected wires.
Restore utilities only after testing for leaks and proper operation.
Choosing the Right Sprinkler Timer for Your Yard
Choosing the right sprinkler timer begins with comparing types—mechanical, basic digital, and smart Wi‑Fi models—each offering different levels of control.
Key features to evaluate include number of zones supported, program flexibility, weather integration, and battery backup.
The chosen unit should match the total number of irrigation zones and be compatible with the valve types and wiring already installed.
Types of timers (mechanical, digital, smart/Wi’Fi)
A sprinkler timer can be mechanical, digital, or smart/Wi‑Fi, and each type offers distinct trade‑offs in cost, ease of use, and control capabilities.
Mechanical timers are simple and inexpensive; digital units add programming precision; smart/Wi‑Fi enable remote control and adjustments.
Consider reliability, installation complexity, and integration with existing valves.
- Simplicity
- Precision
- Remote access
- Reliability
- Installation complexity
Key features to compare (zones, program flexibility, weather integration, battery backup)
After comparing mechanical, digital, and smart/Wi‑Fi timers, attention turns to the specific features that determine how well a controller will meet a yard’s needs. Compare zone capacity, flexible programming, weather-based adjustments, and battery backup reliability to guarantee uninterrupted, efficient irrigation.
| Feature | Why it matters |
|---|---|
| Zones | Matches system size |
| Programming | Custom schedules |
| Weather integration | Saves water |
| Battery backup | Maintains settings |
How to match timer capacity to your irrigation zones and valve types
When matching a timer to an irrigation system, count active zones and note valve types first to guarantee compatibility and future expandability.
Select a timer with equal or greater zone capacity than current needs; modular or expandable controllers suit phased installs.
Verify compatibility with solenoid voltages (24VAC common), master valves, and pump start relays.
Plan spare channels for landscape changes.
Pre-Installation Checklist
Before installing a timer, the layout of irrigation zones and the locations of corresponding valves should be clearly mapped.
Water pressure and flow rate need to be measured to guarantee the system and chosen timer can operate all zones as planned.
Existing controller compatibility and the available electrical supply must be identified to prevent wiring or power issues during installation.
Mapping your irrigation zones and valves
A clear map of the yard’s irrigation zones and valve locations is essential for an efficient sprinkler timer installation.
The installer labels each zone by plant type, sun exposure, and run-time needs. Valve locations, pipe routes, and controller wire paths are plotted.
Note manual shutoffs and backflow devices. Keep a copy near the controller and a digital version for future adjustments.
Verifying water pressure and flow rate
Because available water pressure and flow determine zone capacity and run times, the installer measures both at the irrigation connection before selecting the controller and programming schedules.
Using a pressure gauge at the connection and a timed bucket test at an accessible outlet, the installer records static and dynamic pressure and gallons per minute.
These values guide sprinkler head selection, zone grouping, and realistic run-time calculations.
Identifying existing controller compatibility and electrical supply
When evaluating an existing irrigation controller and electrical supply, the installer documents model compatibility, terminal assignments, transformer voltage, and the condition of wiring and breakers to guarantee safe integration with the new timer.
They compare wire colors and gauge to schematic requirements, verify 24VAC transformer output and fuse status, check for shared circuits, and note any corrosion or loose connections needing repair before installation.
Step-by-Step Wiring and Mounting Instructions
The section explains how to select and prepare a suitable mounting location for the controller and secure the timer unit.
It then covers routing and organizing low-voltage wiring from the controller to each valve, including labeling and terminating zone wires and the common conductor at the correct terminals.
Finally, it describes proper grounding and methods to protect splices and connections from moisture.
Preparing the controller location and mounting the timer unit
Select a dry, accessible spot near the main water supply and a grounded electrical outlet, ensuring the controller will be protected from direct sunlight, flooding, and physical damage.
Verify surface is level and sturdy; mark mounting holes using the template. Install anchors or screws appropriate for the wall material.
Mount the timer securely, confirm clearance for the cover and connections, and label the unit location for maintenance.
Running and organizing low-voltage wires to valves
Begin by planning wire routes from the controller to each valve, keeping runs as direct as possible while avoiding hazards such as sharp edges, heat sources, and high-voltage lines.
Use outdoor-rated, stranded low-voltage cable, secure with staples or conduit, label each cable at both ends, leave service loops at valves and the controller, and protect buried runs with sleeve conduit where exposed to wear.
Connecting common wire and zone wires to terminals
With wires routed and labeled, connect the common (C) conductor and each zone lead to their matching terminals on the controller, ensuring a clean, secure connection for reliable operation.
Strip insulation minimally, insert conductors fully, and tighten terminal screws firmly without over-torquing.
Verify each zone number matches the controller display.
Re-check continuity and snugness before closing the enclosure.
Grounding and protecting connections against moisture
Proper grounding and moisture protection are essential to prevent electrical faults and corrosion at the controller and valve connections.
The installer should attach the controller’s grounding conductor to a dedicated grounding screw or bus, bond any metal enclosures to the same ground, and route ground wires with continuous, low-resistance paths back to the service grounding electrode.
Use heat-shrink tubing, silicone-filled wire connectors, and weatherproof junction boxes; apply waterproof cable glands and slope enclosures to shed water.
Programming Your Sprinkler Timer for Reliable Watering
Next, the timer is configured with the correct current time, date, and seasonal settings to guarantee schedules run as meant.
Each irrigation zone is then assigned specific run durations, frequencies, and start times, with cycle-and-soak or single-run options chosen to prevent runoff.
Finally, rain delay, freeze sensors, and weather-based adjustments are enabled to suspend or modify watering during adverse conditions.
Setting current time, date, and seasonal settings
When should the timer’s clock and calendar be set to confirm accurate watering cycles?
The installer sets the current time and date immediately after power-up or battery replacement.
Accurate clock/calendar confirms programs run as scheduled and seasonal adjustments apply correctly.
Enter daylight saving rules, local time zone, and the current date.
Set seasonal adjustment percentage to reflect local evapotranspiration trends.
Creating zone schedules: duration, frequency, and start times
Begin by deciding each zone’s run time, how often it will water, and the start times that fit local conditions and plant needs.
Assign durations based on soil type and plant water needs, set frequencies considering rainfall and season, and stagger start times to prevent excessive pressure draw.
Save and review schedules, then monitor moisture and adjust durations or frequency as plants and weather dictate.
Using cycle and soak vs single-run scheduling
Although both cycle-and-soak and single-run methods deliver the same total water volume, they differ in how that water infiltrates soil and how effectively roots absorb it.
Cycle-and-soak breaks a zone’s total run time into shorter intervals with soak periods in between to reduce runoff on compacted or sloped ground, while single-run applies the full duration in one continuous session suitable for well-draining, level areas.
Cycle-and-soak favors deep penetration without runoff; single-run is simpler and efficient where percolation is rapid.
Enabling rain delay, freeze sensors, and weather adjustments
After choosing between cycle-and-soak and single-run schedules based on soil and slope, the controller’s smart safety features become the next priority: rain delays, freeze sensors, and weather-based adjustments prevent unnecessary watering and protect plants from damage.
Enable rain delay to pause programs after storms, connect freeze sensors to halt operation at low temps, and activate weather-based adjustments or ET sensors for automatic runtime reductions.
Integrating Smart Features and Remote Control
Modern sprinkler timers can connect to a home Wi-Fi network to enable remote access and real-time control.
Users manage schedules through mobile apps or voice assistants, making on-the-fly changes simple and centralized.
Integrating weather-based adjustments and evapotranspiration (ET) data optimizes watering by reducing unnecessary runs after rain or during low-evaporation periods.
Connecting Wi’Fi timers to your home network
Connecting a Wi‑Fi sprinkler timer to the home network allows users to control watering schedules remotely, receive status alerts, and integrate the system with voice assistants or weather-based adjustments.
The installer should verify router compatibility (2.4 GHz vs. 5 GHz), position the timer for strong signal, secure credentials during setup, update firmware, and test connectivity and zone activation before finalizing installation to guarantee reliable operation.
Using apps and voice assistants for schedule management
Use smartphone apps and voice assistants to manage sprinkler schedules from anywhere, adjusting start times, run durations, and seasonal settings without visiting the controller.
The system can run manual cycles, pause watering, and switch zones via app or voice command. Notifications report failures or conflicts.
Account permissions allow shared control for household members. Secure accounts with strong passwords and enable two-factor authentication.
Benefits of weather-based adjustments and evapotranspiration (ET) data
When equipped to adjust watering based on local weather and evapotranspiration (ET) data, a sprinkler controller can considerably reduce overwatering by tailoring run times to actual plant and soil moisture needs; this leads to more efficient water use, healthier turf and landscapes, and lower utility costs.
Automated ET-driven schedules reduce manual checks, react to rain and heat, prevent runoff, and support regulatory compliance and sustainability goals.
Testing and Troubleshooting After Installation
After installation, a manual test run of each zone should be performed to inspect head rotation, spray patterns, pressure, and leaks.
Common wiring and valve problems—such as loose connections, corroded terminals, or stuck solenoids—can usually be identified and corrected with a multimeter check and simple repairs or replacements.
If coverage is uneven, diagnosing blockages, nozzle sizes, and soil absorption will guide appropriate adjustments to run times and emitter selections.
Manual test run for each zone and what to inspect
Start each zone with a manual test run to verify operation and reveal issues that automatic cycles might mask.
Observe sprinkler head patterns, spray distance, and uniform coverage. Note misaligned, clogged, or broken heads and low-pressure signs.
Check for leaks at fittings and valves, puddling, or overspray onto hardscapes.
Record adjustments and retest until each zone achieves full, even coverage.
Common wiring and valve issues and how to fix them
Begin troubleshooting by inspecting wiring and valve operation methodically, since electrical faults and valve malfunctions are the most common causes of zone failures.
Check for loose or corroded connections, damaged insulation, stuck solenoids, incorrect valve sequencing, and transformer issues.
Repair or replace faulty wires, clean terminals, replace solenoids, confirm correct zone mapping, and test voltage to restore reliable operation.
- Loose terminals
- Corrosion
- Frayed wires
- Stuck solenoids
- Incorrect mapping
Diagnosing uneven watering and adjusting run times
With wiring and valve faults resolved, attention shifts to how water is distributed across zones to confirm coverage matches landscape needs.
Inspect soaked areas, dry patches, and runoff during test cycles. Measure precipitation rates per zone, then adjust run times and nozzle types accordingly.
Re-run tests after changes, staggering schedules to prevent saturation and verify uniform soil moisture across the yard.
Seasonal Maintenance and Adjustments
Seasonal changes require regular schedule adjustments to match plant water needs and local weather patterns.
Before freezing temperatures arrive, the system should be winterized and the controller protected to prevent damage.
Routine checks of batteries, backup power sources, and firmware guarantee reliable operation year-round.
Adjusting schedules for seasonal changes and lawn needs
Adjust irrigation schedules as temperatures and rainfall patterns shift to maintain turf health and conserve water.
The controller should be reprogrammed monthly or after significant weather changes: shorten runtimes during cool, wet periods; increase frequency during heatwaves or establishment of new sod.
Account for soil type, slope, and plant species.
Monitor moisture and adjust cycles to prevent runoff and overwatering.
Winterizing the system and protecting the controller
Although temperatures fall and irrigation needs drop, winterizing the sprinkler system and protecting the controller is essential to prevent freeze damage and costly repairs.
Drain or blow out lines, shut off and insulate valves, and remove or elevate exposed backflow devices.
Store removable controllers indoors or use a weatherproof enclosure.
Label components and schedule spring reactivation to verify operation and repair leaks.
Routine checks: batteries, backup power, and firmware updates
Check batteries, confirm backup power sources, and install firmware updates regularly to keep the sprinkler timer reliable and responsive.
Routine inspection guarantees fresh replacement cells, functioning battery compartments, and operational UPS or auxiliary power during outages.
Verify firmware versions via the manufacturer app or controller interface, apply official patches promptly, and document changes.
Schedule quarterly checks and after storms to prevent lapses and preserve programmed schedules.
Cost, Warranty, and When to Call a Professional
Typical cost ranges for installing a sprinkler timer vary widely, with DIY setups often costing under a few hundred dollars while professional installation can run into the high hundreds or more depending on system complexity.
Warranty terms and available support resources should be checked before purchase to confirm coverage for parts, labor, and remote support.
A licensed irrigation technician should be contacted for persistent leaks, electrical issues, complex zoning, or when local codes and permits are involved.
Typical cost ranges for DIY vs professional installation
Installation costs vary widely depending on system complexity and whether a homeowner handles the work or hires a pro. Typical DIY expenses cover timers, valves, pipe, and fittings ($50–$400). Professional installation often adds labor and permits ($300–$2,500). Budgeting considers lawn size, zones, and materials.
| Option | Typical cost |
|---|---|
| Basic DIY | $50–$200 |
| Advanced DIY | $200–$400 |
| Professional small | $300–$800 |
| Professional full | $800–$2,500 |
Warranty considerations and support resources
Many sprinkler timers and components carry manufacturer warranties that cover defects for a set period—usually one to five years—so homeowners should verify warranty length, what parts are included, and any conditions that void coverage (such as improper installation or winter damage).
Register products, retain receipts, and document installations.
Seek manufacturer tech support, authorized service centers, or retailer return policies before incurring repair or replacement costs.
Signs you should hire a licensed irrigation technician
After checking warranties and support options, homeowners should recognize when problems exceed routine timer adjustments and call a licensed irrigation technician.
Persistent leaks, electrical faults, inconsistent zone activation, or repeated system failures justify professional assessment.
Technicians provide accurate diagnostics, code-compliant repairs, and warranty-covered parts.
Consider labor rates, emergency fees, and certification; obtain written estimates and verify licensing before authorizing work.
Practical Tips to Maximize Efficiency and Save Water
The guide recommends scheduling watering for early morning to reduce evaporation and fungal risk.
It suggests tailoring run times by zone—shorter cycles for beds and shrubs, longer for turf—to match root depth and soil type.
Simple hardware upgrades like pressure regulators, check valves, and converting sections to drip irrigation can noticeably improve efficiency and reduce water use.
Watering time-of-day recommendations
When is the best time to run a sprinkler for maximum efficiency?
Early morning, typically between dawn and mid-morning, minimizes evaporation and fungal risk while allowing leaves to dry.
Late evening increases disease potential.
Midday watering wastes water to heat-driven evaporation.
Adjust schedules seasonally: cooler mornings in summer, slightly later starts in spring or fall to avoid frost and heavy overnight moisture.
Zone-specific run time suggestions for turf, shrubs, and beds
Although plants in a landscape share the same weather, each zone requires tailored run times based on plant type, root depth, and soil: shallow-rooted turf needs frequent, shorter cycles to promote surface root health, while deeper-rooted shrubs and perennials benefit from less frequent, longer cycles that push water into the active root zone.
Beds with mixed plantings should be scheduled conservatively or divided into microzones so water is applied according to the most sensitive species.
- Turf: short, repeat cycles
- Shrubs: longer, deeper irrigation
- Perennials: adjust seasonally
- Clay soils: reduce frequency, increase duration
- Sandy soils: increase frequency, shorter runs
Simple upgrades that improve performance (pressure regulators, check valves, drip conversion)
Small hardware changes can yield large savings and more reliable irrigation performance.
Installing pressure regulators prevents misting and uneven coverage by matching sprinkler output to design pressure.
Check valves stop low-head drainage and zone flooding after shutdown.
Converting suitable areas to drip irrigation reduces water use, targets roots, and lowers runtime.
These upgrades enhance timer effectiveness and prolong system components with minimal cost.
Real-World Example Schedules for Common Yard Types
The article now presents concrete timer schedules tailored to typical properties: a compact urban lawn with short run times, a medium suburban yard serving turf, shrubs and flowerbeds, and a large estate requiring extended cycles and multiple controllers.
Each example includes suggested start times, durations and frequency to match plant water needs and local constraints. Readers can compare these templates to their own sites and adapt runtimes accordingly.
Small urban lawn sample schedule
For a compact urban lawn, a simple, efficient timer schedule balances water needs with local restrictions and limited root depth: zoning the area into one or two short-duration cycles applied early morning three times per week helps promote deep rooting while minimizing runoff and evaporation.
Typical setting: two zones, 8–12 minutes each, start at 5:30 AM, skip rainy days, adjust seasonally.
Medium suburban yard with multiple plant types
Moving from a compact urban lawn to a medium suburban yard requires recalibrating schedules to accommodate greater area and plant diversity.
Zones separate turf, flower beds, shrubs and trees; turf runs shorter, more frequent cycles, beds receive deeper, less frequent watering.
Early morning start times reduce evaporation. Adjust durations by soil type and slope, and program seasonal changes to prevent over- or under-watering.
Large property with long run times and multiple controllers
Scale irrigation planning to match a large property’s extended run times and multiple controllers, organizing zones by water type and proximity to controllers to minimize overlap and pressure loss.
Assign controller schedules to balance peak demand, staggering start times and using cycle-and-soak for deep-rooted areas.
Prioritize meter and pump capacity checks, pressure regulation, and seasonal adjustments to conserve water and maintain uniform coverage across extensive landscapes.
Conclusion
A properly installed sprinkler timer transforms lawn care, boosting watering consistency and saving time. Studies show smart controllers can reduce outdoor water use by up to 30%, illustrating clear environmental and cost benefits. By choosing the right unit, following simple wiring and seasonal checks, and adjusting schedules to local needs, homeowners reliably preserve healthy turf. When complexity or leaks arise, professional help guarantees long-term performance and peace of mind.