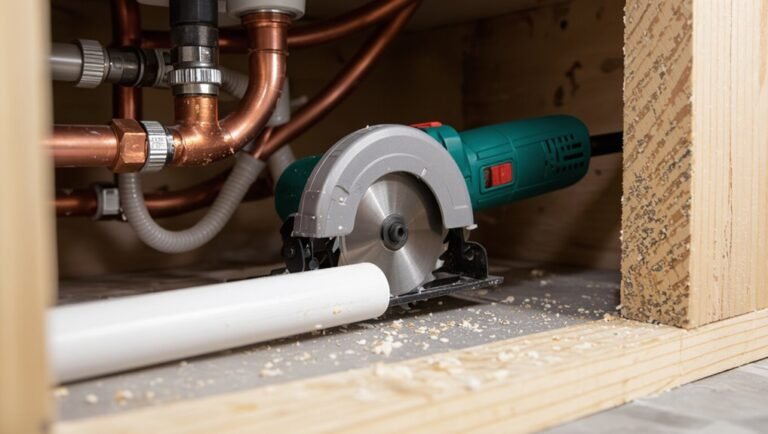
How to Reset a Grinder Pump Alarm: Step-by-Step Troubleshooting Guide
To reset a grinder pump alarm, first isolate the power and follow lockout/tagout procedures. Begin by inspecting the floats and checking the control panel for any issues. Clear any debris from the impeller and discharge, and verify the breakers and wiring with a multimeter. If available, use the manual reset option. After resetting, monitor the pump’s cycles and temperatures closely. For further assistance, consider deeper diagnostics, preventive maintenance, or contacting a professional if the problem persists.
What a Grinder Pump Alarm Means and When to Reset It
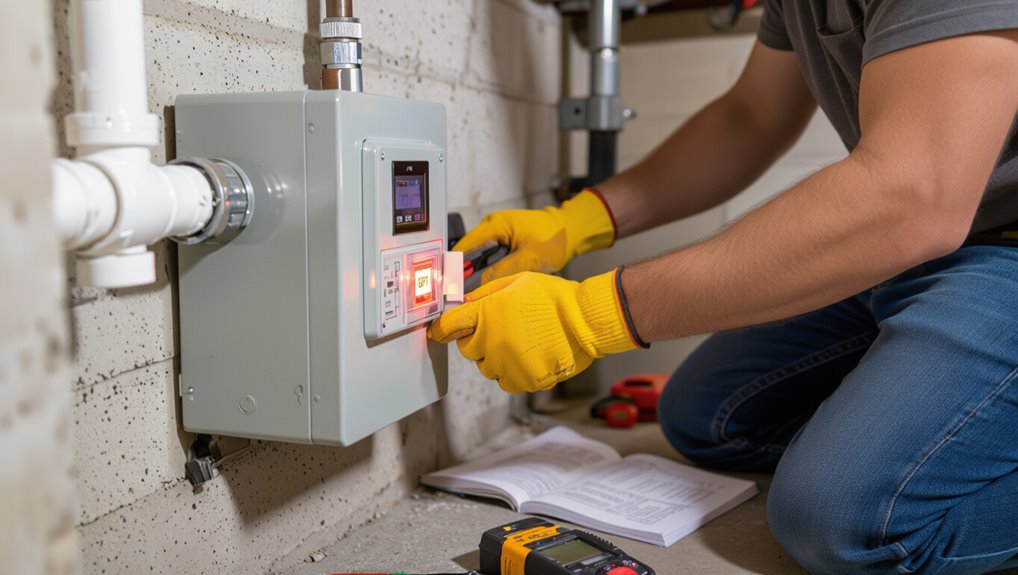
A grinder pump alarm typically signals issues such as motor overload, blocked impellers, or loss of power and should prompt an evaluation of the probable cause.
Before attempting a reset, the operator must follow safety precautions like turning off power, wearing protective gear, and ensuring the area is ventilated.
A short checklist of necessary tools and materials—insulated gloves, basic hand tools, and a flashlight—prepares the person to perform a safe reset if appropriate.
Common causes of grinder pump alarms
When a grinder pump alarm sounds, it signals an abnormal condition in the system that may range from simple power or float-switch issues to serious mechanical blockages or motor failures.
Understanding these common causes helps determine whether the alarm requires an immediate reset, professional service, or routine troubleshooting.
Common causes include power outages, tripped breakers, stuck or damaged floats, clogged impellers, failed motors, and sensor faults—guiding how to reset grinder pump alarm.
Safety precautions before attempting a reset
Having identified common causes of grinder pump alarms—from power issues and float faults to clogs and motor failures—the next step is to address safety before attempting any reset.
Confirm power is disconnected and locked out, verify dry, well-lit conditions, use insulated protection, avoid confined-space entry, and maintain proper ventilation.
Follow manufacturer warnings and local codes; if unsure, contact a qualified technician.
Tools and materials needed for resetting
Checklist clarity helps guarantee the reset proceeds safely and effectively: necessary items include insulated gloves, safety glasses, a multimeter for verifying power, basic hand tools (screwdrivers, pliers, wrench set), replacement fuses or circuit breakers, spare float switches or sensor components if applicable, a flashlight or work light, and manufacturer-specified parts and documentation.
Additional essentials: lockout/tagout supplies, clean rags, corrosion inhibitor, and a portable voltage tester.
Quick steps to safely reset a grinder pump alarm
The technician first verifies the alarm source by reading panel indicators and any error codes.
If the fault appears transient, the control panel is power-cycled and the manual reset button or switch is used as instructed.
The pump is then restarted and monitored to confirm normal operation before leaving the site.
Verifying the alarm source and reading indicators
Begin by confirming the alarm’s origin before touching any controls: visually inspect the pump station for obvious faults (tripped breakers, external damage, or flooding).
Then approach the control panel to note the type and pattern of indicators—steady or flashing lights, audible tone, and any digital error codes.
Record indicator patterns, check label meanings in the manual, and isolate whether alarm is local or remote before further action.
Power-cycling the control panel
Power-cycle the control panel only after confirming it is safe to do so and having documented the alarm indicators; this brief interruption can clear transient faults and reset internal logic without altering programmed settings.
Isolate power at the designated breaker or disconnect, wait 30–60 seconds, then restore power.
Observe startup sequences and alarm lamps. If alarm persists, record new observations and proceed with further diagnostics or contact qualified service.
Using the manual reset button or switch
Several grinder pump control panels include a dedicated manual reset button or switch that allows a technician to clear alarms after hazards have been addressed.
The technician must verify isolation and safe conditions, depress or toggle the reset as indicated, then wait for indicator lights or audible confirmation.
If the alarm persists, do not repeatedly reset; document the event and proceed with further diagnostics.
Restarting the pump and confirming normal operation
After confirming hazards are cleared and any manual reset has been performed, restart the grinder pump by restoring power and engaging the control according to the manufacturer’s procedure.
Then monitor motor current, float/sensor signals, and discharge flow for several minutes to verify normal cycling and absence of alarms.
If readings remain stable and no alarms recur, document the restart, note observations, and schedule follow-up inspection.
Detailed step-by-step troubleshooting before resetting
Before attempting a reset, a systematic inspection should be performed to identify the underlying cause of the alarm. This includes checking the control panel and float switches, clearing any clogged or jammed grinder components, and inspecting discharge lines and check valves for blockages.
Electrical checks—testing connections, breakers, and measuring motor current and voltage—should follow to confirm the pump is safe to restart.
Inspecting the control panel and float switches
Begin the inspection at the control panel, where visual clues and indicator lights often reveal the cause of an alarm.
Observe LED status, audible alarms, and fault codes.
Verify wiring terminals for corrosion or looseness.
Confirm power supply voltage and proper breaker position.
Inspect float switch wiring and mounts for damage, entanglement, or stuck positions, and gently test float movement for free travel.
Checking for clogged or jammed grinder components
Inspect the grinder assembly for obstructions and mechanical binding, since debris or foreign objects are a common cause of alarms and impaired operation.
Power down and lock out before removing the access cover.
Visually and manually check the cutter, impeller, and housing for rags, wipes, or mineral buildup.
Clear obstructions, rotate the shaft to confirm free movement, then reassemble and restore power.
Examining discharge lines and check valves for blockages
Check the discharge piping and check valve assembly for restrictions or malfunction that could impede flow and trigger the alarm.
Inspect visible piping for kinks, collapsed sections, or debris buildup.
Open cleanouts safely and flush lines to verify flow.
Remove and inspect the check valve for stuck flapper or spring corrosion.
Replace damaged components and reassemble, testing for restored unobstructed discharge.
Testing electrical connections and circuit breakers
Verify electrical integrity and breaker status before attempting any alarm reset to rule out power-related causes.
Inspect panel for tripped breakers and reset only after confirming no faults.
Check tightness and corrosion at terminal lugs, conduit entries, and pump control wiring.
Look for burned insulation or loose neutrals.
Restore power and observe alarm behavior; document any intermittent connections for further repair.
Measuring pump motor current and voltage
Having confirmed the electrical supply and corrected any breaker or wiring faults, the technician proceeds to measure the pump motor’s current and voltage to identify electrical or motor issues before attempting an alarm reset.
Using a clamp meter and multimeter, they record running and start currents, compare to nameplate values, check phase balance and voltage under load, and note deviations indicating overloads, shorts, or failing windings.
When a simple reset won’t fix the alarm
If a reset fails to silence the alarm, mechanical failures such as damaged impellers, worn seals, or seized bearings should be considered.
The problem may instead stem from a faulty float switch, corroded or broken wiring, or evidence of sewage backup and system overload.
Persistent issues or signs of internal damage warrant contacting a licensed pump technician for inspection and repairs.
Diagnosing mechanical failures (impeller, seals, bearings)
Inspecting mechanical components becomes necessary when electronic resets and basic troubleshooting fail to silence a grinder pump alarm.
Technicians check the impeller for clogs, damage, or free rotation; examine seals for leakage or corrosion; and assess bearings for noise, play, or overheating.
Documented findings guide repair or replacement, ensuring safe isolation, proper reassembly, and verification of pump operation before restoring normal service.
Identifying float switch malfunctions or wiring faults
Several clear signs point to float switch malfunction or wiring faults when a grinder pump alarm persists after basic resets and mechanical checks.
Intermittent alarms, failure to change state when tank level varies, or erratic relay clicking suggest float or connection issues.
Inspect float for obstruction, corrosion, or water intrusion.
Test continuity and switch operation with a multimeter.
Check wire insulation, secure terminals, and junction boxes.
Recognizing sewage backup or system overload conditions
Recognize that a persistent grinder pump alarm unresponsive to resets may indicate sewage backing into the system or an overload condition demanding immediate attention.
Observable signs include slow drains, sewage odors, wet flooring near pump or cleanouts, and unusually frequent pump cycling.
Overload may stem from excessive solids, excessive inflow, or impeller strain.
Document symptoms, avoid further use, and prepare information for professional repair.
When to call a licensed pump technician
When a grinder pump alarm persists after attempted resets, a licensed pump technician should be contacted promptly to diagnose and repair the underlying issue. Persistent alarms can indicate mechanical failure, electrical faults, control module problems, or conditions that may cause sewage backup and property damage.
Technicians assess motor, impeller, float switches, wiring, and alarms. They perform safe electrical tests, replace components, and guarantee system integrity to prevent recurrence.
Preventive maintenance to avoid future alarms
A straightforward preventive maintenance plan can reduce the frequency of grinder pump alarms.
It should outline a regular inspection schedule with a concise checklist, recommend usage practices that minimize clogs and mechanical stress, and list essential replacement parts and supplies to keep on hand.
Following these measures helps identify issues early and keeps the pump operating reliably.
Regular inspection schedule and checklist
Establishing a consistent inspection schedule and concise checklist reduces the likelihood of grinder pump alarms by ensuring wear, blockages, and sensor issues are identified early.
Inspections should occur at fixed intervals—monthly for high-use systems, quarterly for typical residential setups—and include visual checks, float and alarm tests, discharge line inspections, and documentation of pump run times and any anomalies.
- Verify float movement and alarm function.
- Inspect discharge line and connections.
- Record run times, vibrations, odors, and corrective actions.
Proper usage practices to reduce clogs and damage
Building on regular inspections, proper usage practices further reduce clogs and mechanical wear by limiting what enters the grinder pump and how the system is used.
Recommended actions focus on source control, operator habits, and flow management.
- Dispose non-biodegradables, grease, and textiles elsewhere.
- Avoid excessive flushes; space heavy wastewater events.
- Educate users on do’s/don’ts and report odors or noises promptly.
Recommended parts and supplies to keep on hand
Several essential parts and supplies should be kept on hand to minimize downtime and prevent future grinder pump alarms.
Spare floats, a replacement control box or relay, inline fuses, and a calibrated multimeter enable quick diagnostics.
Keep a gasket and sealant kit, non-clogging replacement impeller, and nitrile gloves.
Maintain basic hand tools, a flashlight, and manufacturer’s manual for reference.
Common mistakes to avoid during reset and troubleshooting
Common errors during grinder pump alarm resets include resetting without addressing underlying faults, which often leads to repeat failures.
Technicians sometimes bypass safety features or float switches, compromising system protection.
Working on the pump without disconnecting power creates a serious electrocution and injury risk.
Resetting without addressing root causes
Ignore shortcut fixes that merely silence the alarm; resetting a grinder pump without identifying and resolving the underlying cause often leads to repeated failures and greater damage.
Technicians should document symptoms, inspect for clogs, mechanical wear, electrical faults, and sensor issues before reset.
Temporary resets mask problems, increase repair costs, risk environmental contamination, and shorten equipment lifespan; diagnose first, then reset.
Bypassing safety features or float switches
After documenting symptoms and inspecting for blockages or faults, technicians must resist the temptation to bypass safety features or float switches to silence a grinder pump alarm.
Circumventing these devices hides true faults, voids warranties, and risks sewage backups or equipment damage.
Proper troubleshooting isolates causes, replaces or adjusts faulty floats, and restores designated protections rather than creating temporary, unsafe workarounds.
Working on the pump without disconnecting power
Technicians must never work on a grinder pump while it remains energized; performing adjustments, inspections, or repairs with power connected risks fatal electric shock, unexpected motor starts, and damage to control components.
Always isolate and lock out the power, verify de-energized status with a tester, and tag equipment.
Failure to follow lockout/tagout procedures endangers personnel and can void warranties or regulatory compliance.
Typical costs and parts for repairs vs. replacement
Typical repairs for a grinder pump—such as replacing floats, seals, or check valves—often range from $150 to $800 in parts and labor, while motor or control panel work can push costs higher.
If failures are frequent, corrosion is extensive, or repair estimates approach half the price of a new unit, replacement becomes the more economical choice.
The article will compare specific part prices and decision checkpoints to help determine when to repair versus replace.
Cost range for common repairs
When evaluating grinder pump alarm repairs, owners should weigh parts and labor costs against the unit’s age and condition to decide whether repair or replacement is more economical. Typical repair items include float switches ($50–$200), control panels ($150–$600), and motor or seal repairs ($300–$1,200). Labor varies by region and complexity.
| Part | Typical Cost | Notes |
|---|---|---|
| Float switch | $50–$200 | Simple replacement |
| Control panel | $150–$600 | Diagnostics often needed |
| Motor/seal | $300–$1,200 | Major repair or rebuild |
Signs that replacement is more economical than repair
Consider replacement when repair expenses approach or exceed half the cost of a new grinder pump, especially if multiple components—like the control panel, motor, and seals—are failing or have already been replaced.
Frequent failures, extensive corrosion, unavailable parts, or warranties nearing expiration favor replacement. Typical repair parts (macerator, float switch, bearings) can total hundreds; a new unit may provide longer-term reliability and warranty coverage.
Real-world scenarios and stepwise solutions
Three common causes of grinder pump alarms—sudden power outage, persistent clogging, and intermittent float switch failure—are presented with practical step-by-step responses.
For a power outage, the procedure covers safety checks, manual reset steps, and when to call the utility.
For clogging and float issues, the focus is on inspection, clearing or replacing parts, and testing to confirm normal operation.
Scenario: Alarm triggered by sudden power outage
If a grinder pump alarm sounds immediately after a power outage, the most likely causes are a temporary loss of mains supply or a brief surge that left the control circuitry in a fault state.
The operator should treat the event as transient while verifying system integrity. Inspect breakers, main disconnect and control panel for visible faults, reset the alarm per manufacturer steps, then monitor voltage and pump operation before returning to normal service.
Scenario: Alarm due to persistent clogging
After ruling out temporary power faults, attention should shift to mechanical causes when an alarm persists—most commonly grinding mechanism blockages or restricted discharge lines.
Inspect intake and cutter assembly after de-energizing and isolating power. Clear visible debris, flush lines, and check impeller rotation.
If clog recurs, examine upstream sources, install screens or grinder upgrades, and consult a technician for persistent obstructions.
Scenario: Alarm from intermittent float switch failure
Investigate intermittent float switch failures by focusing on inconsistent electrical signals and mechanical stickiness that cause false alarms or missed activations.
Diagnose with a multimeter for open/closed continuity while moving the float; inspect wiring, connectors, and pigtails for corrosion or chafing.
Clean or replace the float assembly, secure wiring, and verify operation through multiple cycles.
Document findings and schedule periodic checks.
Final verification and monitoring after reset
After reset, the technician should observe pump cycles safely over a 24 to 48 hour period, keeping a safe distance and using any installed monitoring tools.
All alarm occurrences, cycle patterns, and maintenance actions should be logged with timestamps and brief notes.
This record will support trend analysis and inform whether further intervention or routine follow-up is required.
How to observe pump cycles safely for 24 to 48 hours
Begin by scheduling a continuous 24 to 48‑hour observation period immediately following the reset to confirm stable operation and catch intermittent faults.
Monitor cycle frequency, runtime, and audible/vibrational anomalies at regular intervals.
Verify float switch behavior and alarm indicators without intervening unless unsafe.
Record unusual patterns and temperature changes.
Ascertain safe access, PPE, and lockout/tagout procedures during all inspections.
Logging alarms and maintenance actions
A concise, chronological log of all alarms and maintenance actions provides the definitive record for final verification and ongoing monitoring after a reset.
The technician records timestamps, alarm codes, diagnostics, and corrective steps, then notes component replacements and outcomes.
Entries support trend analysis, warranty claims, and regulatory compliance.
- Timestamped alarm details
- Action taken and technician ID
- Follow-up observations and status
Conclusion
To sum up, the grinder pump alarm serves as a reliable early-warning bell, signaling issues that range from simple power glitches to mechanical failures. After following safe reset steps and systematic troubleshooting, most minor alarms are resolved; persistent or recurrent alarms indicate deeper faults needing professional repair or replacement. Regular maintenance and sensible precautions reduce future incidents. Ultimately, careful diagnostics and timely action keep the system running smoothly and prevent small problems from becoming costly emergencies.