How to Reset Bradford White Water Heater: Step-by-Step Troubleshooting Guide
To reset your Bradford White water heater, first ensure safety by cutting power at the breaker for electric units or shutting the gas valve for gas models. For electric units, once the power is off, press the upper reset button, then restore power to test. For gas units, turn the valve to OFF, wait a moment, then set it to PILOT and hold while igniting. If the heater trips again, check the thermostats, heating elements, and valves, and consider flushing out any sediment. For further troubleshooting, maintenance tips, and when to seek professional help, additional guidance is available.
What to Do When Your Bradford White Water Heater Needs a Reset
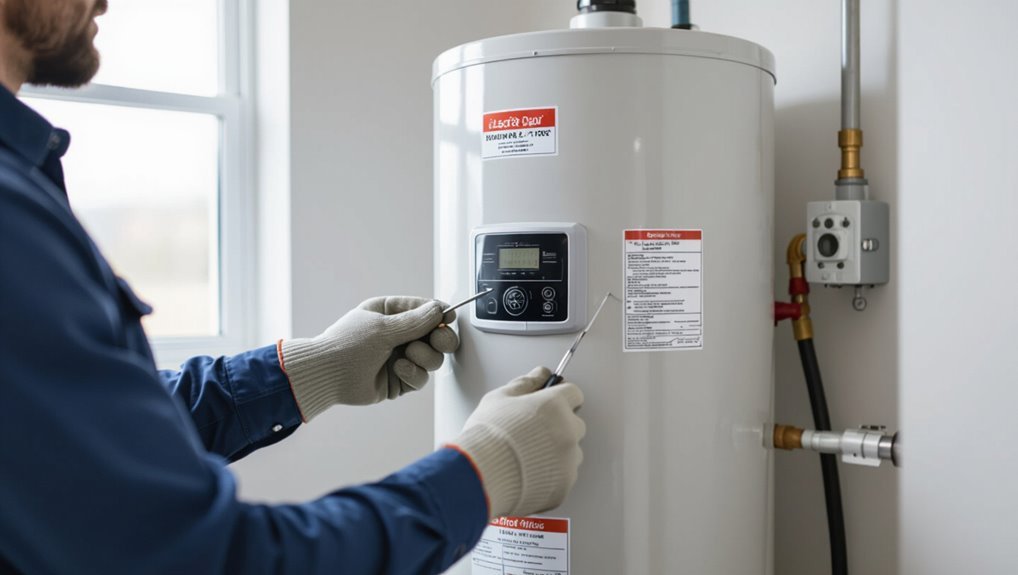
Common indicators that a Bradford White water heater may need a reset include loss of hot water, intermittent heating, error codes on the control panel, or a tripped high-limit switch.
Before attempting any reset, the technician or homeowner should shut off power (or gas), allow the unit to cool, and follow basic electrical and gas safety practices.
If uncertainty remains or warning lights persist, professional service should be sought.
Recognizing common signs that indicate a reset is needed
A homeowner can spot several clear indicators that a Bradford White water heater may need a reset: persistent lack of hot water, the pilot light repeatedly going out, error codes displayed on electronic models, or unusual noises such as popping and banging.
Technicians advise documenting symptoms before attempting how to reset bradford white water heater steps, noting error code numbers, frequency of failures, and any recent service or power interruptions.
Safety precautions before attempting a reset
Before attempting a reset, the homeowner should guarantee basic safety checks are completed to prevent injury or equipment damage.
The individual must shut off power at the breaker, confirm fuel supply is off for gas units, close water supply if needed, ventilate the area, and wear protective gloves and eyewear.
If unsure, contact a qualified technician before proceeding.
Quick Reset Procedure for Electric Bradford White Water Heaters
The reset button on an electric Bradford White water heater is typically located behind the upper access panel and requires removing the cover and any insulation to reach it.
The procedure involves turning power off, pressing the reset button firmly, restoring power, and observing the unit for proper operation.
If the button will not stay engaged, check for tripped breakers, faulty thermostats, or signs of a short or overheating element that may need professional inspection.
Location of the reset button and access steps
Locating the high-limit reset button on an electric Bradford White water heater is straightforward: it sits behind the access panel on the thermostat assembly, typically midway up the tank.
To access it, shut power at the breaker, remove the cover and insulation, and expose the thermostat housing. The red reset button is visible and recessed; note panel screws and insulation placement for reassembly.
Step-by-step electric reset process
Begin the reset by ensuring the unit is de-energized at the circuit breaker and the access panel and insulation have been removed to expose the thermostat housing and the recessed red high-limit reset button.
Follow these steps precisely:
- Press the red button firmly until it clicks, then release.
- Replace insulation and access panel.
- Restore power at the breaker and verify heating resumes.
What to check if the reset button won’t stay engaged
If the red high-limit reset button repeatedly pops back out after being pressed, inspect a short list of common causes before replacing components:
Check for power cycling or loose wiring at the thermostat and junction box, test thermostats and elements for short circuits, verify thermostat mounting and insulation, look for sediment buildup causing overheating, and confirm proper element resistance.
Address identified faults, then retest reset engagement.
Quick Reset Procedure for Gas Bradford White Water Heaters
The section outlines the typical location of controls and the pilot assembly on gas Bradford White water heaters to help users identify key components quickly.
It then summarizes a concise step-by-step procedure for shutting off the gas, relighting the pilot, and restoring normal operation.
Finally, it notes clear indicators for when to stop attempts and shut off the gas and call a professional.
Controls and pilot assembly location
A compact control console and a pilot assembly are located near the base of gas Bradford White water heaters, typically on the front lower access panel. This placement consolidates the thermostat, gas control valve, ignitor or pilot light, and reset switch into a single serviceable area for quick troubleshooting and resetting.
Visible labels, access screws, and a small viewing port aid identification. Periodic visual inspection verifies integrity.
Step-by-step gas pilot reset and relighting process
When troubleshooting a cold tank or a pilot outage, the technician should follow a clear, safety-first sequence to reset and relight the gas pilot on a Bradford White water heater.
Inspect for leaks, odor, or damage before proceeding.
- Turn thermostat to OFF, wait five minutes, then set gas control to PILOT.
- Hold pilot button, depress igniter until flame stabilizes.
- Release, set thermostat to desired temperature, observe for steady operation.
When to shut off the gas and call a professional
Shut off the gas supply immediately and contact a qualified technician if persistent pilot outages, visible gas leaks, unexplained burner noises, or repeated trips of the gas control occur despite following the reset procedure.
The technician should inspect gas lines, valve integrity, thermocouple/pilot assembly, and combustion venting.
Do not attempt repairs beyond basic relighting; leave diagnostics, parts replacement, and leak remediation to certified professionals.
Troubleshooting Before and After Reset
Before attempting a reset, the technician checks power and thermostat settings and verifies the gas supply and pilot light.
They inspect for common faults such as tripped breakers, failed heating elements, and thermostat malfunctions, documenting any anomalies.
After a reset, they use a multimeter with proper safety precautions to confirm component function and isolate remaining issues.
Testing power and thermostat settings
Start by verifying that the water heater is receiving proper electrical power and that thermostat settings are within range.
Confirm power at the breaker panel and guarantee the unit’s reset button isn’t tripped.
Check thermostat temperature for expected setpoint, adjusting slightly if needed.
After changes, allow time for temperature stabilization and monitor for consistent heating before proceeding with additional troubleshooting or reset steps.
Inspecting and diagnosing common faults (tripped breakers, faulty elements, thermostat issues)
Inspect the electrical supply, heating elements, and thermostats methodically to pinpoint common faults that can mimic control or reset failures.
Check for tripped breakers and loose connections at the breaker panel.
Test each element with a multimeter for continuity and grounding.
Verify thermostat settings and sensor continuity.
Replace failed elements or thermostats and tighten wiring before attempting a control reset.
Diagnosing gas supply and pilot light problems
Several key checks help determine whether a Bradford White water heater’s gas supply or pilot light is causing operation issues.
Technicians should confirm the gas shutoff is open, inspect the gas line for leaks or odor, verify house gas service, and guarantee the pilot assembly is clean and properly positioned.
If the pilot won’t light or stays out, consult a qualified service professional.
Using a multimeter safely to test components
Technicians should power down the water heater and follow lockout/tagout procedures before using a multimeter to check thermostats, limit switches, gas valves, and igniters. This prevents live-circuit contact and guarantees accurate readings both before and after a reset.
They must verify meter function, select appropriate range, use insulated probes, confirm continuity and voltage against specifications, document results, and restore power only after securing panels.
Common Causes of Repeated Trips and How to Fix Them
Repeated trips of a Bradford White water heater often stem from a few identifiable faults: sediment buildup causing overheating, a failed high‑limit thermostat or reset button, electrical wiring or breaker problems, and gas valve or thermocouple failures.
Recommended remedies include tank flushing and cleaning to remove sediment, replacing the high‑limit thermostat or reset button, inspecting and repairing wiring or swapping faulty breakers, and testing then replacing a defective gas valve or thermocouple.
The following sections outline step‑by‑step inspection and replacement guidance for each cause.
Sediment buildup and tank overheating cleaning and flushing steps
Sediment accumulating in the bottom of a Bradford White tank reduces heating efficiency and can cause localized overheating that trips the high-limit or thermal cutoff.
Periodic flushing and targeted cleaning restore heat transfer and prevent trips.
Steps:
- Drain tank partially, flushing until runoff clears.
- Agitate sediment with garden hose or flush valve.
- Rinse, refill, purge air, then test for normal operation.
Failed high-limit thermostat or reset button replacements
Inspecting the high-limit thermostat and its manual reset button is a critical step when trips keep occurring despite proper maintenance.
A failed thermostat or worn reset switch can falsely detect overtemperature and cut power. Verify continuity with a multimeter, replace the faulty high-limit assembly or reset button with manufacturer-approved parts, and retest.
Document findings and dates for warranty and future troubleshooting.
Electrical wiring issues and breaker replacements
Check the wiring and breaker when trips persist despite proper component checks, since loose connections, undersized conductors, corroded terminals, or a failing circuit breaker are common culprits that can cause nuisance trips or unsafe overheating.
Inspect wiring for burns, tighten terminals, verify conductor size matches heater amperage, and replace corroded leads.
Replace a weak or tripping breaker with a code-compliant unit and retest.
Gas valve or thermocouple failures and replacement guidance
If electrical faults have been ruled out or repaired but trips continue, attention should turn to the gas control valve and thermocouple assembly, since failures there commonly produce shutdowns or unreliable pilot operation.
Inspect for corrosion, loose fittings, or a weak thermocouple voltage. Test and replace the thermocouple or gas valve per manufacturer instructions; always shut off gas and follow safety protocols or hire a qualified technician.
When to Replace Parts vs Replace the Unit
The section outlines clear indicators for when a single component—such as a thermostat, heating element, or pressure relief valve—can be replaced to restore proper function.
It also covers warning signs that the entire Bradford White unit has reached the end of its useful life and should be replaced.
Finally, it provides rough cost ranges and expected lifespans to help weigh repair versus replacement.
Signs a component replacement will suffice
When a Bradford White water heater exhibits localized faults—such as a leaking temperature-pressure relief valve, a failed heating element, or a malfunctioning thermostat—these issues often indicate that replacing the specific component will restore reliable operation without replacing the entire unit.
Other signs include isolated electrical failures, single-element faults, or minor corrosion confined to serviceable parts; repair cost remains low relative to unit age.
Signs that the water heater should be replaced
Decisive signs that replacement of the entire Bradford White water heater is warranted include chronic leaks, extensive tank corrosion or pitting, frequent costly repairs, or loss of capacity and efficiency despite component fixes.
Additional indicators include persistent sediment buildup causing noise and overheating, repeated failure of heating elements or thermostats, worsening water discoloration, and structural damage to connections or insulation that compromises safety and reliable operation.
Estimated costs and lifespan considerations
Although individual parts can often be repaired or replaced at lower upfront cost, the decision to invest in new components versus a full Bradford White unit hinges on age, repair frequency, and cost-effectiveness: repairs are sensible for isolated failures on units under 8–10 years with otherwise good condition, while repeated breakdowns, major tank corrosion, or repair bills approaching 50% or more of replacement cost indicate replacement is the more economical long-term choice.
| Item | Typical cost range | Action guideline |
|---|---|---|
| Thermostat/element | $50–$200 | Repair if <50% replacement |
| Anode rod | $30–$100 | Replace regularly |
| Tank leak | $200–$1,000+ | Replace if corroded |
| New unit | $800–$2,500+ | Replace when frequent failures |
Preventive Maintenance to Avoid Future Resets
Preventive maintenance reduces the likelihood of trips and resets by addressing common causes such as sediment buildup and corrosion.
A clear routine should cover regular tank flushing, anode rod inspection and replacement intervals, recommended thermostat settings, and seasonal checks with periodic professional inspections.
Concise instructions and a maintenance schedule help homeowners prevent issues before they require a reset.
Regular flushing schedule and how to do it
A simple, consistent flushing schedule keeps a Bradford White water heater operating efficiently and reduces the need for future resets.
Flush sediment quarterly for hard-water areas or annually for soft-water regions. Brief steps: shut power/gas, attach hose to drain valve, open hot tap and drain until clear.
- Inspect drain flow for debris.
- Refill and restore power.
- Verify temperature and pressure.
Anode rod inspection and replacement frequency
After flushing and checking the drain, attention should turn to the anode rod, which protects the tank from corrosion by sacrificing itself to attract corrosive elements in the water.
Inspect annually for heavy pitting, thinning, or coating. Replace if more than 50% depleted or showing significant corrosion.
Typical replacement interval is every 3–5 years, shorter in soft or aggressive water conditions.
Recommended thermostat and temperature settings
Several simple thermostat and temperature settings can considerably reduce the likelihood of future resets and extend heater lifespan.
Recommend maintaining water temperature at 120°F (49°C) for safety and efficiency, lowering during vacations or low demand.
Use consistent settings across multiple thermostats, verify calibration periodically, and enable ECO or energy-saving modes if available.
Avoid setting above 130°F to prevent stress and scalding risks.
Seasonal checks and professional inspection timeline
Maintaining recommended thermostat settings pairs with routine seasonal checks to keep a Bradford White water heater operating reliably and to reduce reset incidents.
Inspect pressure relief valve, anode rod, drain valve, and burner or element quarterly; flush sediment annually.
Verify venting and combustion air before cold season.
Schedule a professional inspection every 2–3 years or sooner if performance, leaks, or repeated resets occur.
Tools, Parts, and Safety Gear Needed
A concise checklist of tools, parts, and safety gear helps guarantee a smooth Bradford White water heater reset and any minor repairs.
Essential hand tools, a multimeter, and common replacement parts like pressure relief valves or thermostats are noted alongside model-specific components.
Personal protective equipment—gloves, eye protection, and a gas leak detector for gas models—plus basic safety tips are recommended before starting work.
Essential tools for reset and basic repairs
Proper preparation begins with assembling the right tools, replacement parts, and safety gear before attempting a Bradford White water heater reset or minor repair.
Essential items include hand tools, diagnostic devices, and basic PPE to safely access controls and test components.
- Multimeter, adjustable wrench, screwdrivers
- Flashlight, pliers, Teflon tape
- Safety glasses, gloves, dust mask
Common replacement parts for Bradford White models
Common replacement parts for Bradford White models include thermostats, heating elements, gas control valves, anode rods, and temperature and pressure relief (TPR) valves, each selected to match the heater’s model and fuel type.
Commonly needed components also include drain valves, dip tubes, and control boards.
Typical replacements to visualize:
- Heating element and gasket set
- Anode rod and wrench
- Gas control valve assembly
Personal protective equipment and safety tips
Wear appropriate personal protective equipment and organize safety tools before attempting any work on a Bradford White water heater.
The technician should use insulated gloves, safety goggles, long sleeves, and slip-resistant footwear. A voltage tester, wrench set, and fire extinguisher must be accessible.
Confirm gas is shut off and power disconnected, ventilate the area, and follow manufacturer warnings and local codes to prevent injury or damage.
Step-by-Step Checklist for Homeowners
A concise checklist guides homeowners through the reset process in three phases: pre-reset safety, the reset and immediate functional tests, and post-reset monitoring.
Each phase lists clear actions and simple checks to confirm safe operation and performance. Following this sequence reduces risk and helps identify persistent issues that may require professional service.
Pre-reset safety checklist
Before attempting a reset, homeowners should complete a concise safety checklist to prevent injury or equipment damage:
- Turn off power (breaker or gas) and verify with a non-contact tester; shut water supply if leaks are present.
- Ventilate the area and remove flammable materials within several feet of the heater.
- Inspect for corrosion, visible leaks, or loose connections; document concerns for professional repair.
Reset and immediate tests checklist
With the safety checklist completed and any concerns noted, proceed to reset the unit and run immediate tests to confirm normal operation.
Observe indicator lights, listen for unusual noises, and guarantee no leaks. Restore power and fuel, press the reset, then verify pilot/ignition.
- Confirm power and gas valves open.
- Press reset and watch ignition sequence.
- Check for leaks, noises, normal temperature rise.
Post-reset monitoring checklist
1. After reset, the homeowner observes system behavior for 24–48 hours to confirm stability.
Monitor temperature consistency, pilot/burner cycles, and any error lights or noises.
Check for leaks and adequate hot water flow.
Record observations and compare to normal operation; if anomalies persist, contact a qualified technician.
- Temperature stability
- Leak and flow check
- Error indicators
When to Call a Licensed Technician
If a water heater exhibits severe leaks, gas smells, overheating, or electrical faults, a licensed technician should be contacted immediately.
Homeowners should be prepared to describe symptoms, recent resets, and any unusual noises or odors to help the technician triage the issue.
The technician will perform a safety assessment, diagnose underlying causes, and outline required repairs or replacements with an estimate.
Emergency situations requiring professional help
When visible flames, persistent gas odors, significant leaking, or electrical malfunctions occur, a licensed technician should be contacted immediately; these conditions indicate hazards beyond routine maintenance and require professional diagnosis and repair to guarantee safety and code compliance.
Additionally, unexplained pressure relief valve discharges, severe corrosion, or repeated failures after resets demand prompt professional assessment to prevent property damage, injury, or regulatory violations.
How to describe the problem to get effective service
How should the homeowner summarize the issue to guarantee a technician diagnoses it quickly and accurately?
The homeowner should state model and age, describe observed symptoms (no hot water, leaks, noises, error codes), note recent resets or adjustments, list gas/electric status and pilot condition, mention water temperature and pressure changes, and report any odors or discoloration.
Include photos or videos if available.
What to expect from a professional diagnosis and repair
After the homeowner provides a clear summary of model, age, symptoms, and any recent adjustments, a licensed technician will perform a systematic diagnosis and explain the findings and recommended repairs.
They will inspect safety controls, thermostats, ignition systems, and plumbing; test for leaks, pressure, and sediment; provide cost estimates, timeline, and warranty details; and obtain consent before proceeding with repairs or recommending replacement.
Conclusion
When a Bradford White water heater requires a reset, one may gently nudge the appliance back toward normalcy rather than confront a crisis. Following the simple procedures and prudent checks outlined, homeowners can often restore warm-water comfort with minimal fuss. If repeated interruptions persist or caution advises, professional hands offer steadier resolution. Regular, thoughtful upkeep softens future surprises, keeping the system humming and household routines pleasantly uninterrupted.