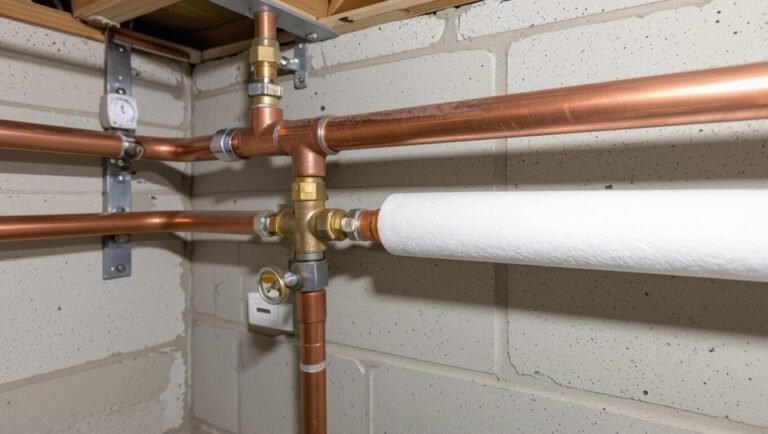
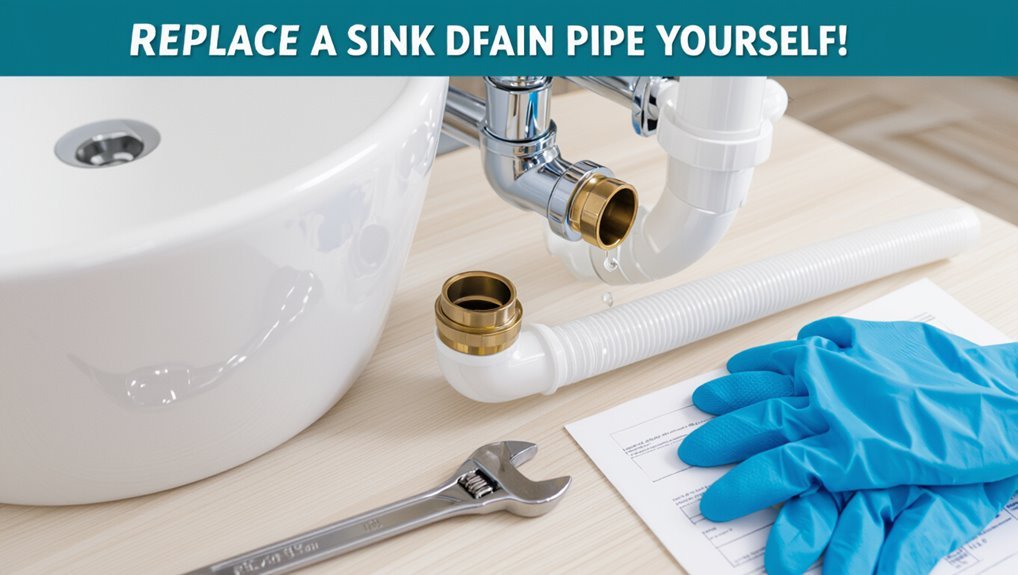
How to Replace a Sink Drain Pipe: Easy DIY Guide for Beginners
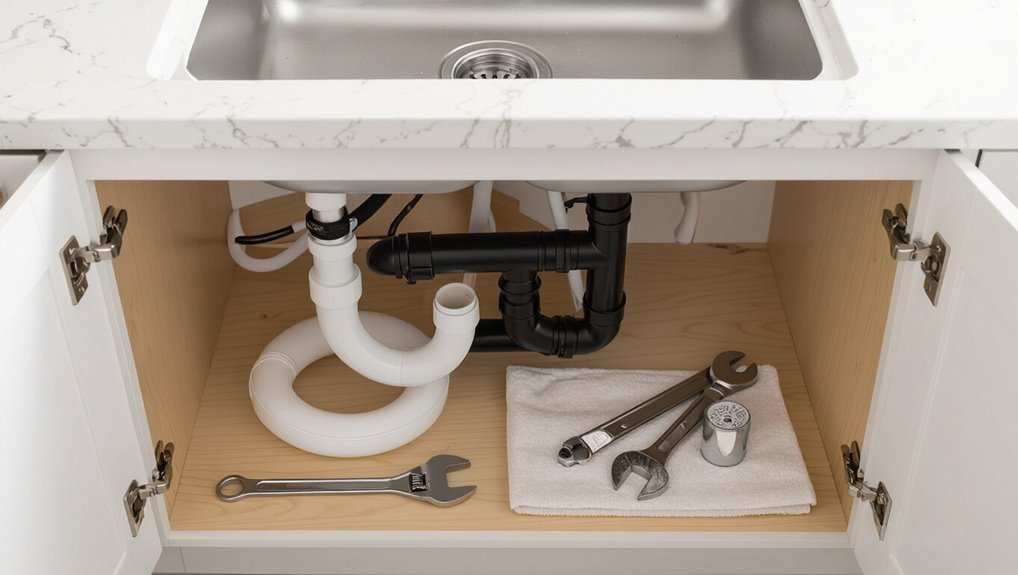
Replacing a sink drain pipe is a straightforward DIY task that most homeowners can handle with basic tools and materials. Start by shutting off the water supply and placing a bucket underneath to catch any drips. Use pliers or a basin wrench to loosen the slip nuts, then remove the tailpiece and P-trap. Replace these components with matching new parts, ensuring you use fresh washers and Teflon tape for a secure seal. Tighten all joints by hand and give them an additional quarter turn, then check for leaks. If you encounter any issues, additional guidance is available for troubleshooting, selecting the right parts, and knowing when to contact a professional.
Quick Answer: Can You Replace a Sink Drain Pipe Yourself?
In many cases, a homeowner can replace a sink drain pipe themselves: the task typically involves basic tools, accessible parts, and straightforward steps like removing the tailpiece, swapping trap components, and reinstalling slip nuts and washers.
A competent DIYer familiar with simple plumbing can complete the job in under an hour for common configurations, provided fittings match and seals are intact.
Challenges include corroded connections, hidden leaks, unusual fittings, or limited access beneath the sink.
When corrosion, damaged drain assemblies, or complex venting are present, or when local codes apply, seeking a professional plumber guarantees a safe, code-compliant repair.
Tools You’ll Need to Replace a Sink Drain Pipe
To replace a sink drain pipe, the homeowner will need a set of essential hand tools such as adjustable wrenches, pliers, and a pipe wrench for stubborn fittings.
Sealing materials and connectors—plumber’s putty, Teflon tape, rubber gaskets, and appropriate slip nuts or compression fittings—ensure watertight joints.
Preparing these items ahead of time streamlines the repair and reduces the risk of leaks.
Essential Hand Tools
Gather the basic hand tools listed below before starting work on a sink drain pipe to keep the job efficient and safe. A concise set speeds removal, inspection, and reassembly while reducing slips and damage.
Include tools sized for household plumbing and a reliable flashlight for under-sink visibility. Keep a small bucket and rag handy to catch drips.
Inspect tools for wear before use to prevent rounding nuts or stripped fittings. Proper grips and adjustable heads minimize force and protect pipe finishes.
Replace any damaged tools to make certain controlled, precise work throughout the drain replacement process.
- Adjustable wrench
- Basin wrench
- Slip-joint pliers
- Pipe cutter or hacksaw
- Flashlight
Sealing And Connectors
Why are proper seals and connectors essential when replacing a sink drain pipe? Proper seals prevent leaks and water damage while connectors guarantee a secure, aligned join between pipe sections and fixtures.
Common items include plumber’s putty, silicone sealant, rubber gaskets, washers, and compression rings. Brass or plastic slip-joint nuts, tailpiece connectors, and PVC couplings match pipe material and size. Thread tape (PTFE) helps threaded fittings seal.
Selecting compatible materials and inspecting for cracks or warping before installation reduces failure risk. Tightening to manufacturer torque and testing for leaks completes a reliable, long-lasting drain connection.
What Parts and Materials to Buy for Most Sink Drains
Most sink drain replacements require a few standard parts: a strainer assembly, tailpiece, trap (P-trap) and slip-joint nuts and washers; PVC or ABS pipe and solvent or threaded adapters may be needed to match existing plumbing.
Necessary purchases typically include durable materials sized to the sink and local code. Basic tools and consumables should be on hand to guarantee a clean install.
- Strainer assembly with gasket
- Tailpiece (metal or plastic)
- P-trap kit with nuts and washers
- PVC/ABS pipe and couplings or threaded adapters
- Plumber’s putty, tape, and solvent cement
How to Identify Your Sink Drain Type
How can a homeowner quickly tell which drain parts are present and what type they have?
A brief inspection under the sink reveals common configurations: a straight tailpiece descending from the sink drain, a curved P‑trap connecting to a horizontal trap arm, or a S‑shape/seat-type trap in older installations.
Look for slip nuts and washers (metal or plastic) versus threaded or soldered joints.
Materials indicate type: PVC/P‑trap plastic, chrome-plated brass, or cast iron.
Measure diameters (typically 1¼” or 1½”) and note whether an overflow or pop-up assembly links into the drain.
Photograph fittings before disassembly.
When to Replace the Tailpiece vs. P‑Trap vs. Trap Arm
Decisions about replacing sink drain components hinge on where the problem originates. A cracked or clogged tailpiece often calls for replacement to restore flow, while persistent leaks or visible corrosion in the P‑trap indicate the trap itself should be swapped.
Misaligned or sagging trap arms that prevent proper drainage or seal warrant attention and possible replacement.
Tailpiece Damage Or Clogs
When a sink drain begins to leak or clog, identifying whether the problem lies in the tailpiece, the P‑trap, or the trap arm is essential for an effective repair.
The tailpiece, directly below the sink, often accumulates debris or suffers impact damage; it is replaced if visibly dented, cracked, or obstructed near the sink outlet. Small clogs may clear with a brush; persistent blockages or damaged threads require replacement. Evaluate connections and alignment before replacing downstream components. Consider material compatibility and slip‑joint nut condition when swapping parts.
- Visible cracks or dents on the tailpiece
- Debris near the sink outlet
- Stripped threads at the joint
- Misalignment causing leaks
- Failed slip‑joint seals
P‑Trap Leaks Or Corrosion
After inspecting the tailpiece for visible damage or debris, attention shifts to the P‑trap and trap arm to determine the true source of leaks or corrosion.
The P‑trap, often plastic or metal, commonly corrodes at joints or bottom curve; replace it if cracks, pitting, or persistent wetness appear. If corrosion is confined to slip nut threads or washer seating, swapping seals and tightening may suffice. Metal traps with extensive rust warrant full replacement.
Compare lengths and diameters before removing parts to ascertain compatible replacements. When leak origin remains ambiguous, replace the most compromised component first, then retest for leaks.
Trap Arm Alignment Issues
In evaluating trap arm alignment, focus first on the angle and distance between the tailpiece, P‑trap inlet, and wall outlet to determine which component is causing strain or misfit. The observer checks for twisting, gaps, or forced bends. Replace the tailpiece if its length or angle prevents a straight connection to the P‑trap. Replace the P‑trap when corrosion or deformation prevents a proper seal. Replace the trap arm when wall outlet position requires an adjustable or longer piece. Proper alignment prevents leaks and stress.
- Measure clearances and angles
- Inspect joints for tension
- Test dry-fit before sealing
- Use slip‑joint fittings when possible
- Replace only necessary parts
How to Tell If Only the Trap Needs Replacing
How can a homeowner determine whether the visible trap is the sole problem rather than a deeper drain issue?
Inspect for obvious damage: cracks, corrosion, loose slip nuts, or persistent clogs that clear when the trap is removed.
If water backs up only when the trap is reinstalled and the tailpiece and trap arm appear clear, the trap likely causes the issue.
Check odor sources—persistent sewer smell after cleaning the trap suggests deeper blockage.
Run water and listen for gurgling from other fixtures; gurgling indicates downstream or venting issues.
When in doubt, remove the trap and test flow before replacing further components.
How to Spot a Leak Versus Normal Condensation
The distinction between a true water leak and normal condensation often rests on pattern and timing.
Leaks typically produce steady drips, pooling, stains, or damp spots that worsen with use, while condensation forms thin, temporary beads that appear when cold pipes meet warm, humid air.
Noting odor, residue, and whether moisture reappears after drying helps identify the cause.
Water Leak Indicators
Frequently, distinguishing an actual leak from ordinary condensation requires close inspection of patterns, timing, and context.
Observable indicators of a water leak include consistent pooling, spreading stains, and dampness that worsens over time rather than appearing only with temperature changes.
Additional signs include warped cabinet surfaces, persistent musty odors, and unexplained increases in water usage.
Quick checks can confirm active leaks before replacing drain components.
- Constant dripping or steady puddles
- Stains that expand or darken over days
- Softened wood or swelling under the sink
- Persistent mold or musty smell
- Rising water bills without visible cause
Condensation Characteristics
Feeling dampness but unsure whether it’s condensation or a leak can be resolved by observing where, when, and how moisture appears. The guide explains signs: condensation forms on cold pipe surfaces during high humidity and disappears as temperatures equalize, while leaks produce steady drips, pooling, or stains. Check odor, timing (after shower vs. constant), and texture (beads vs. streams). Temporary condensation often coincides with use; persistent wetness suggests a seal failure. Use simple tests: dry area, monitor, or wrap insulation. If uncertain, replace or tighten fittings to prevent water damage.
| Sign | Condensation | Leak |
|---|---|---|
| Pattern | Beads | Streams |
| Timing | When humid | Constant |
| Location | Cold surfaces | Seals/joints |
| Odor | None | Musty |
How to Know When to Replace the Tailpiece, Trap, or Wall Pipe
Inspecting a sink’s tailpiece, trap, and wall pipe for replacement begins with identifying signs of functional failure: persistent leaks, visible corrosion, recurring clogs that clearing doesn’t fix, or water discoloration. The assessment focuses on integrity and function. Replace components when deformation, fractures, or stripped threads impede sealing, when flexible parts harden or crack, or when odors persist despite clearing. Consider material age—plastic becomes brittle; metal may pit. Match replacement to existing drainage layout and discharge height to avoid alignment issues.
- Persistent dripping after tightening
- Visible rust, pitting, or flaking
- Recurrent blockages in same location
- Loose or damaged connections
- Sewage smell remaining
Safety Steps to Take Before You Start
Before beginning any work on the sink drain, make certain the water supply and disposal systems are isolated: shut off the sink’s shutoff valves, run the faucet to relieve residual water, and place a bucket under the trap to catch remaining fluid.
Confirm power is disconnected for any disposal or under-sink lighting to prevent accidental activation.
Wear safety goggles and nitrile gloves to protect eyes and skin from chemicals, debris, and bacteria.
Make certain adequate ventilation if chemical cleaners were used previously.
Keep a flashlight, adjustable wrench, and rags within reach.
Maintain a clear, dry workspace to reduce slips and tool misplacement.
How to Shut Off the Water and Clear the Area
Before beginning the drain pipe replacement, the homeowner should locate and shut off the sink’s water supply valves to stop both hot and cold flow.
Next, the area under the sink should be emptied of cleaning products, towels, and loose items to provide a clear workspace.
A bucket and towels left in place will catch any residual water and protect the cabinet.
Turn Off Water Supply
Shut off the sink’s water supply to prevent leaks and make the workspace safe: locate the shutoff valves under the sink—usually small, round or levered valves on the hot and cold lines—and turn them clockwise until they stop.
Verify closure by turning the faucet on briefly; no water should flow. Keep a bucket and towel nearby for residual drips. Wear gloves and eye protection. Confirm main house shutoff location in case local valves fail.
- Locate hot and cold shutoffs
- Turn valves clockwise fully
- Test faucet for zero flow
- Place a bucket under pipes
- Note main shutoff position
Clear Under-Sink Space
With the water supply secured, clear the area under the sink to create a safe, accessible workspace: remove stored items, place a waterproof mat or towel on the cabinet floor, and set a bucket beneath the drain pipes to catch residual water.
Make certain adequate lighting with a flashlight or work light. Lay out tools and replacement parts on a nearby tray for easy reach. Disconnect any obstructing hoses or organizers temporarily.
Wear gloves and eye protection before touching plumbing. Inspect for leaks, corrosion, or mold and address issues before continuing. Keep a phone nearby for reference or emergency assistance.
How to Protect Cabinets and Clean the Workspace
To protect cabinets and keep the workspace orderly, cover cabinet bottoms and shelving with a waterproof drop cloth or heavy-duty plastic sheeting secured with painter’s tape, then place a padded mat or folded towels under the sink area to catch drips and prevent scratches from tools.
The technician collects small parts in labeled containers, wipes surfaces with a mild cleaner after work, and ventilates the area. Waste is bagged and removed immediately. Routine inspection for moisture prevents damage. Tools are organized on a pegboard or tray to avoid clutter and accidental knocks.
- Lay out drop cloths
- Use padded support
- Contain fasteners
- Wipe surfaces
- Remove debris
How to Remove the Old P‑Trap Step by Step
Having prepared the cabinet and organized tools, the technician begins removing the old P-trap by first placing a bucket beneath the trap to catch water, then loosening the slip nuts at each end using channel-lock pliers or by hand if plastic fittings permit.
Once nuts are loosened, the trap is gently lowered, allowing residual water to drain into the bucket. The technician inspects washers and threads for damage, clears debris, and detaches the trap arm from the wall stub. All removed parts are placed on a tray for disposal or reuse. The area is wiped dry and checked for remaining leaks.
How to Disconnect a Slip‑Joint Nut Without Tools
Loosen the slip‑joint nut by hand, turning it counterclockwise while stabilizing the trap arm to prevent twisting the drain line.
Fingers work best when grime is cleared and the nut is accessible.
If tight, wiggle the nut back and forth to break the seal.
Support the trap to catch residual water and keep alignment for reassembly.
- Clear visible debris and dry the nut
- Use a rag for extra grip if needed
- Apply steady, controlled pressure
- Rotate in short increments to avoid stripping
- Pull the trap down gently once the nut frees
Work patiently to avoid damaging plastic fittings.
How to Handle Corroded or Seized Fittings
If a slip‑joint nut will not budge by hand, the next concern is dealing with corroded or seized fittings that resist normal removal.
First, apply penetrating oil to threads and allow time to soak; repeat as needed.
Use two appropriately sized wrenches to avoid twisting pipe sections—one to hold the stationary fitting, the other to turn the nut.
Tap lightly with a hammer to break rust bonds, working progressively.
For stubborn metal parts, heat can expand metal briefly, but avoid nearby plastic or seals.
If damage occurs or parts remain immovable, replace the affected fitting or call a plumber.
Remove Glued or Soldered Connections
The article explains how to determine whether a joint is glued or soldered by inspecting the material, residue, and nearby fittings.
It outlines safe removal techniques for each bond type, such as using solvent or heat with appropriate tools and protective gear.
Emphasis is placed on preventing damage to surrounding pipes and ensuring proper ventilation and fire safety when working with heat or chemicals.
Identify Bond Type
Before attempting removal, inspect the joint to determine whether the connection is bonded with solder, solvent cement, or a mechanical fitting. The installer’s method dictates tools and precautions. Visual and tactile clues reveal bond type: shiny fillets and copper coloring suggest solder; matte, often discolored plastic with residue implies solvent cement; threaded collars, nuts, or compression rings indicate mechanical fittings. Confirm by tracing pipe material and joint shape, avoiding guesses. If uncertain, photograph and consult a reference or professional.
- Look for a smooth metallic bead (solder)
- Check for softened or glued plastic seams
- Locate nuts or compression rings
- Note pipe material (copper, PVC, ABS)
- Photograph doubtful joints for reference
Safe Removal Techniques
When confronting glued or soldered sink drain connections, proceed methodically to separate parts without damaging adjoining pipes or fixtures.
Assess material and joint type before applying heat or solvents.
For glued PVC, soften adhesive with manufacturer-recommended solvent and pry gently with plastic wedges; avoid metal tools that gouge.
For soldered copper, heat joints evenly with a propane torch until solder liquefies, then twist fittings apart with proper wrenches while protecting nearby seals and plastic components with heat shields.
Cool and clean surfaces promptly, removing residual flux or glue.
Inspect for corrosion or warping and replace compromised sections rather than forcing reuse.
How to Measure for a Replacement Drain Pipe
Starting at the trap and working outward, measure the vertical drop from the sink tailpiece to the trap inlet, then record the horizontal distance to the wall or waste line center; these two dimensions, plus the diameter of the existing pipes (typically 1 1/4″ or 1 1/2″), determine the replacement drain’s required length and fittings.
A straight tape measure and a marker simplify notes. Measure fittings, slip-joint nuts, and any offset elbows. Note clearances under the cabinet for installation.
- Vertical drop: tailpiece to trap inlet
- Horizontal reach: trap to wall/waste center
- Pipe diameter
- Existing fitting types
- Under-cabinet clearance
How to Choose the Correct P‑Trap Material (PVC vs. Metal)
Select a P‑trap material based on durability, cost, compatibility with existing piping, and local code requirements.
PVC offers corrosion resistance, lower cost, lighter weight, and easier cutting and gluing for DIYers; it suits most residential sinks and resists household chemicals.
Metal traps, typically chrome‑plated brass or stainless steel, provide superior strength, heat resistance, and a more finished appearance under exposed sinks; they may better match existing metal drain assemblies.
Consider thread types and slip‑joint compatibility to avoid adapters.
Verify local plumbing codes and longevity expectations before choosing; prioritize a material that balances budget, appearance, and maintenance needs.
How to Pick the Right Trap Size and Diameter
After choosing between PVC and metal for a P‑trap, attention turns to sizing: the trap’s diameter and overall dimensions must match the sink drain, trap arm, and building code specifications to guarantee proper flow and prevent siphoning.
The installer measures tailpiece and trap arm diameters, confirms common sizes (1¼”, 1½”, 2″), and assures trap depth fits cabinet clearance.
Longer trap arms may need larger diameters.
Code requirements for slope and cleanout access are checked.
Proper sizing avoids clogs and odor issues.
- Measure sink tailpiece
- Verify trap arm length
- Match standard diameters
- Check cabinet clearance
- Confirm local codes
How to Match Thread Types and Trap Adapters
When fitting a new trap, matching the thread types and trap adapters guarantees a leak‑free connection between the sink tailpiece, trap, and drain line.
Identify thread types—NPT (tapered) versus straight pipe threads—and measure diameters with calipers or compare fittings.
Use matching female/male threads and apply appropriate tape or sealant on tapered threads only.
For slip‑joint traps, confirm nut size and washer thickness.
When shifting between materials (metal to PVC), select purpose‑made trap adapters that convert thread style and size; tighten by hand then snug with a wrench to avoid distortion.
Inspect for alignment before final tightening and test for leaks.
How to Cut and Dry‑Fit PVC Drain Pieces
Before cutting, the installer measures and marks each PVC piece to ensure accurate lengths and proper alignment with the trap and wall outlet.
Cuts should be made cleanly and square with a fine-tooth saw or PVC cutter to prevent gaps and uneven joints.
All components are dry‑fitted and adjusted until the assembly sits correctly before any solvent cement is applied.
Measure And Mark
Measure twice and cut once is good advice when laying out PVC drain pieces: precise measurements and clear marks prevent leaks and fit issues later.
The installer measures pipe runs, account for fittings and slip-joint movement, and marks cut lines with a fine marker.
Dry-fitting confirms alignment and reach before permanent assembly.
Key checks include seat depth in fittings, overlap allowance for solvent welds, and clearance around traps.
- Verify total run length including fittings
- Mark both pipe and fitting position
- Note orientation for trap arm and cleanout
- Use a straightedge for accurate lines
- Recheck fit before cutting
Cut Cleanly And Square
Cut each PVC piece with a sharp, fine-toothed handsaw or PVC tubing cutter so the end is square and burr-free. After cutting, file or deburr the edge with a utility knife or fine rasp to remove shards and ensure snug fittings. Verify lengths against marks and check alignment visually. Keep cuts perpendicular to the pipe axis; slight angles cause leaks or misalignment. Clean cut faces with a cloth and primer-ready cleaner. Handle pieces gently to avoid nicks. The following quick reference helps guarantee consistent results:
| Check | Action |
|---|---|
| Tool | Use fine-toothed saw/cutter |
| Edge | Deburr and file |
| Angle | Ensure 90° cut |
| Clean | Wipe residue |
| Fit | Confirm length and alignment |
Dry‑Fit Before Gluing
Dry‑fit each PVC section in place to confirm alignment, fit, and clearance before applying primer or cement.
The installer tests connections, checks for proper slope, and marks cut points.
Adjustments are made now to avoid rework; fittings should seat fully without force.
Confirm trap orientation and access panels.
Once satisfied, disassemble in the same order for cleaning and priming.
- Verify pipe lengths and angles
- Make certain correct trap placement and slope
- Check clearance around cabinets and fixtures
- Mark pipes for repeatable assembly
- Rehearse assembly sequence before gluing
How to Assemble a Slip‑Joint P‑Trap Correctly
When assembling a slip‑joint P‑trap, the installer first makes sure all mating surfaces are clean and that the trap’s washers and nuts are the correct size for the tailpiece and trap arm.
The tailpiece is inserted through the sink tailpiece nut and washer, tightened finger‑tight, aligning threads without cross‑threading.
The trap bend is oriented so its outlet lines up with the trap arm; the slip nut and washer are slid onto the trap arm and engaged.
Adjustments are made for slope and clearance, then nuts are snugged evenly.
Connections are tested by filling the sink and checking for leaks, retightening as needed.
How to Install a Trap Primer or Air Gap If Required
If local code or the fixture layout requires it, a trap primer or an air gap is added after the P‑trap is assembled to prevent sewer gas backflow or to protect potable water from contamination.
The installer verifies local code, selects the correct device, locates a connection point, secures fittings, and tests for proper operation.
Common steps include:
- Confirming code and manufacturer instructions.
- Positioning the primer or air gap near the trap or fixture.
- Installing supply or vent connections per instructions.
- Securing all fittings and checking for leaks.
- Testing operation and adjusting as needed for compliance.
How to Connect the Tailpiece to the Sink Drain
The tailpiece should be aligned straight under the sink drain so the connection seats evenly.
The slip nut is then tightened by hand and finished with a wrench for a snug, but not over-torqued, fit.
Finally, the connection is tested with a water run to check for any leaks.
Align Tailpiece With Drain
Position the tailpiece so its slip nut and washer align squarely with the sink drain outlet before attempting to join them. The installer inspects the washer orientation, checks for debris, and makes sure the tailpiece sits straight without twisting.
Gentle adjustments center the tailpiece within the drain opening to prevent future leaks or strain.
- Verify washer faces the sink flange correctly
- Hold tailpiece vertical, not angled
- Slide nut up snugly, but do not tighten yet
- Confirm tailpiece length clears the trap connection
- Recheck alignment after hand seating the washer
Tighten Slip Nut Securely
Hand-tighten the slip nut until the washer seats firmly against the sink flange, then secure it with a wrench using short, controlled turns to avoid over-tightening. The installer watches alignment and feels resistance change; torque should be modest. A snug connection prevents movement while preserving gasket integrity. If using metal parts, protect finishes with a rag under the wrench. Recheck visual seating and guarantee the tailpiece remains straight; adjust the nut slightly if the washer bulges. Stop when the connection feels solid without forcing. Emotional reassurance comes from calm, measured actions and visible, tidy hardware.
| Calm | Confident | Satisfied |
|---|---|---|
| Steady | Assured | Relieved |
| Careful | Precise | Proud |
Check For Any Leaks
Often a quick visual and tactile inspection reveals whether the tailpiece connection is watertight. The person checks under the sink with a dry towel, runs water for several minutes, and watches for drips at the slip nut and flange. If moisture appears, tightening or reseating the washer is needed. Persistent leaks require disassembly and inspection for damaged parts or misalignment.
- Run full flow for at least one minute
- Inspect slip nut, washer, and tailpiece seam
- Feel for slow seepage with a dry paper towel
- Check above the sink flange for hairline leaks
- Re-torque and re-test if needed
How to Seal Threaded Connections Properly
When joining threaded drain fittings, create a reliable seal by cleaning threads, applying the appropriate sealant, and tightening to the correct torque; this prevents leaks without stressing the metal.
Remove old tape, debris, and corrosion with a wire brush and solvent.
For metal threads, wrap PTFE tape clockwise two to three turns or brush on a pipe thread compound rated for potable water.
For plastic-to-metal connections, prefer compound over tape if manufacturer advises.
Assemble by hand, then tighten with wrench until snug plus a quarter turn; avoid over‑tightening.
Test under pressure and re‑adjust if minor seepage appears.
How to Solvent‑Weld PVC Joints Safely
Before joining PVC pieces, make sure the work area is well‑ventilated and free of ignition sources, then verify pipe and fitting surfaces are clean, dry, and cut square; proper preparation prevents weak bonds and hazardous fume exposure.
The method requires solvent cement and primer rated for the pipe. Apply primer to both socket and pipe, then a thin, even layer of cement. Insert pipe with a quarter‑turn twist to distribute cement, hold for 30 seconds, and wipe excess. Allow full cure per manufacturer before pressurizing. Careful technique guarantees durable, leak‑free joints.
- Use approved primer and cement
- Wear gloves and eye protection
- Work outdoors or with ventilation
- Cut and deburr squarely
- Follow cure times
How to Reinstall Chrome or Metal Trap Components
The installer first inspects and cleans threads on chrome or metal trap components to remove debris and old sealant.
Next the parts are aligned and slip nuts are hand‑tightened, then snugged with a wrench to secure proper fit without over‑torquing.
Finally the assembly is tested under water to check for leaks and corrected if any seepage appears.
Inspect And Clean Threads
How should the threads on chrome or metal trap components be inspected and prepared for reassembly? A technician examines threads for damage, corrosion, and debris before reassembly. Cleaning and light repair guarantee a secure, leak-free fit without addressing nut alignment or final tightening.
- Visually inspect for nicks, cross-threading, or stripped sections
- Remove mineral buildup with a brass brush or soft steel wool
- Degrease threads using a mild solvent and lint-free cloth
- Lightly file burrs with a fine flat file if needed
- Apply a small amount of plumber’s grease to protect threads and aid seating
Align And Tighten Slip Nuts
With hands steady and parts clean, the technician aligns the tailpiece, trap bend, and trap arm so the slip nuts and washers slip on straight and seat evenly.
Each washer faces the correct direction, compressing against metal without folding. The technician hand‑threads slip nuts until finger‑tight, ensuring threads engage smoothly.
A wrench is then used to snug nuts an additional quarter to half turn; excessive torque is avoided to prevent crushing washers or stripping threads.
Alignment is rechecked to confirm no binding or stress on joints. Excess length is adjusted so the trap sits level and maintains proper slope toward the drain.
Test For Leaks
Standing ready with a basin of water and a towel, the technician first inspects all chrome or metal trap components for correct seating before running water. They hand-tighten slip nuts, verify washers lie flat, and confirm alignment with the tailpiece and wall outlet.
To test for leaks:
- Slowly run water, watching all joints closely
- Fill basin to check for steady drainage and seepage
- Use a paper towel to detect small drips at seams
- Tighten only as needed to avoid overtightening chrome fittings
- Recheck after several minutes to verify no slow leaks
If leaks persist, disassemble and reseat components.
How to Adjust and Align the Trap for a Tight Fit
Aligning the trap begins by loosely assembling the tailpiece, slip nuts, and trap arm so the pieces can be adjusted without strain; the plumber then checks that the trap sits level and lines up with the wall outlet while keeping threads clean and packing material in place.
The plumber adjusts horizontal and vertical offsets by rotating the trap and sliding connections to eliminate stress.
When alignment is achieved, slip nuts are hand-tightened, then given a slight wrench snug—avoiding overtightening that deforms washers.
Finally, clearances are verified so the trap does not contact cabinetry or obstruct access, ensuring durable, serviceable positioning.
How to Test for Leaks After Installation
After reassembling the trap, the technician performs a careful visual inspection beneath the sink to check for any visible drips or moisture.
Next, hot and cold water are run at normal and increased pressure while observing joints and connections for leaks.
Any sign of seepage is noted so fittings can be tightened or seals replaced before finishing the job.
Visual Inspection Under Sink
Begin by clearing the area beneath the sink and shining a flashlight into tight corners to get an unobstructed view of all connections and joints. The inspector checks fittings, slip nuts, and seals for moisture, corrosion, or misalignment.
With towels placed underneath, gentle pressure is applied to trap areas to reveal seepage. Any dampness is noted and photographed for reference.
After confirming dry fittings, run brief water tests while observing for new drips. If leaks appear, tighten fittings incrementally or replace faulty washers. Maintain good ventilation to dry remaining damp spots and prevent mold.
- Inspect all joints closely
- Feel for dampness
- Look for corrosion
- Photograph problem areas
- Retest after adjustments
Water Flow And Pressure
When testing water flow and pressure to check for leaks after installation, the inspector runs the faucet at full and partial flow, observing all joints and connections for steady drips or sudden weeps while noting pressure behavior.
The inspector checks for pressure fluctuations that might indicate partial blockages or trapped air.
Cold and hot supplies are tested separately.
A dry paper towel or tissue is held to suspect fittings to detect minute seepage.
The trap and tailpiece are watched while flow continues and after shutoff to reveal slow leaks.
Any detected leak prompts tightening, reseating, or replacement and a retest until dry.
How to Tighten Without Over‑Torquing Fittings
To tighten fittings without over‑torquing, a technician should apply steady, controlled force and stop as soon as resistance increases noticeably; overtightening can strip threads or crush seals.
Use the correct wrench and hand-start threads to guarantee alignment.
Tighten in small increments, testing for leaks after each change.
When using sealant tape or compound, apply sparingly to avoid excess buildup that prevents proper seating.
- Choose the proper tool size
- Hand-tighten before using tools
- Use calibrated torque if available
- Inspect washers and seats for damage
- Recheck after a short test run
How to Fix Common Alignment Problems
Address common misalignments by first identifying the specific issue—offset trap arms, tilted tailpieces, or uneven slip-joint connections—then correcting each with targeted adjustments.
Measure clearances and loosen slip nuts slightly to realign parts without stressing fittings.
If the trap arm is offset, use an adjustable trap or add a short extension to regain proper slope.
Straighten tilt by trimming a tailpiece or replacing bent sections; make certain the tailpiece seats squarely into the sink strainer.
Re-seat washers and hand-tighten slip joints, then snug with a wrench.
Confirm alignment visually and by running water to check for leaks before final tightening.
How to Stop Gurgling or Slow Drainage After Replacement
Occasionally, gurgling or slow drainage appears after replacing a sink drain due to trapped air, partial blockages, or improper venting and pitch. The installer should inspect trap orientation, guarantee correct pipe slope, and confirm venting is unobstructed. Tighten fittings to prevent air locks and reseal joints if needed. Test flow with water and observe vents for bubbling.
- Check P-trap alignment and orientation
- Verify 1/4″ per foot slope on drain pipe
- Inspect vent stack for obstructions
- Tighten slip nuts and compression fittings
- Re-seat or replace gaskets to prevent air leaks
If issues persist, consult a plumber.
How to Clear Clogs Encountered During Replacement
When a clog is discovered during a sink drain replacement, the installer should pause work and identify the blockage type and location before proceeding.
Visual inspection with a flashlight and removal of the trap often reveals hair, grease, or small objects.
Use a plumber’s snake to break up or retrieve debris; feed it slowly and rotate to avoid pipe damage.
For greasy buildup, scrape accessible surfaces and flush with hot water.
Avoid chemical drain cleaners that can harm pipes and finishes.
After clearing, run water to confirm flow, reassemble fittings with new washers if needed, and check for leaks.
How to Handle Unpleasant Odors After Reassembly
After reassembly, any lingering odors often point to issues in the P-trap that can retain debris and sewage gases.
The tailpiece should be cleaned of buildup and inspected for leaks or missed connections.
Finally, check that venting is clear and seals are tight to prevent pressure-related smells and air ingress.
Check The P-Trap
Inspect the P-trap for dents, misalignment, or trapped debris that can allow sewer gases to escape after reassembly.
The P-trap should form a continuous, sealed bend; any gap or crushed section compromises the seal and causes odors. Recommended quick checks and actions:
- Verify slip-nut tightness without overtightening.
- Make sure washers are seated and undamaged.
- Look for hair, grease, or small objects lodged inside.
- Replace a visibly corroded or misshapen trap.
- Test with a small water run to confirm odor-free drainage.
Document findings, make minimal repairs immediately, and retest to confirm the issue is resolved.
Clean The Tailpiece
Clean the tailpiece thoroughly to remove trapped debris and buildup that can emit odors once the drain is reassembled. One should detach the tailpiece, inspect inside light and mirror, scrub with a bottle brush and mild detergent, and rinse with hot water. For persistent smells, apply a paste of baking soda and water, let sit 15 minutes, then flush. Reinspect before reassembly to make certain no residue remains. After reassembly, run water and observe. The table summarizes quick checks and remedies.
| Issue | Action |
|---|---|
| Light residue | Brush + hot rinse |
| Stubborn odor | Baking soda paste |
Ventilation And Seals
Proper ventilation and intact seals are essential to prevent lingering sewer odors after a sink drain is reassembled; gaps in seals or blocked vents can allow gases to escape into the room even when the trap contains water.
Inspect slip nuts, washers, and tailpiece connections for tightness and proper placement. Check the P-trap for correct slope and water retention. Verify vent pipe unobstructed; birds, debris, or ice can block airflow. If odors persist, test with smoke or soapy water to find leaks, then replace faulty seals or add plumber’s putty or silicone where appropriate.
- Tighten slip nuts
- Replace worn washers
- Make sure trap holds water
- Clear vent obstructions
- Seal any detected leaks
Replace a Pop‑Up Drain Assembly While You’re at It
While replacing the trap and tailpiece, also swap the pop-up drain assembly to guarantee a tight seal and smooth operation.
The old assembly is removed from above and below the sink: detach the lift rod, unscrew the retaining nut, and lift out the stopper.
Clean the sink flange and apply plumber’s putty or a new rubber gasket per manufacturer instructions.
Insert the new assembly, tighten the locknut hand‑tight then quarter turn with a wrench to avoid overtightening.
Reconnect the lift rod and test operation and seal by filling the basin and checking for leaks.
Adjust linkage for full open and close.
How to Replace a Wall‑Mounted Trap Safely in Residential Sinks
Before starting, the installer gathers necessary tools and personal protective gear such as gloves, safety glasses, adjustable wrenches, and a bucket.
They shut off the water supply and place towels or a pan under the trap to catch residual water.
Finally, the old wall-mounted trap is unfastened, inspected for damage, and replaced with a properly sized trap using new washers and secure fittings.
Tools And Safety Gear
When tackling a wall-mounted trap replacement, having the right tools and safety gear limits mistakes and prevents injury. The installer should prepare compact, reliable tools and protective equipment to work efficiently in confined spaces while avoiding hazards from sharp edges, debris, and residual wastewater.
- Adjustable wrench and basin wrench for confined nuts
- Slip-joint pliers for gripping and aligning pipes
- Bucket and absorbent towels to catch spills
- Chemical-resistant gloves and safety glasses for protection
- Flashlight or headlamp for visibility
Selecting quality tools and PPE reduces delays and guarantees a controlled, safer repair process.
Turn Off Water Supply
Shut off the water supply to the sink to prevent leaks and contamination during the trap replacement.
The person locates the shutoff valves under the sink or the home’s main valve if absent.
They turn each valve clockwise until fully closed, then open the faucet to relieve residual pressure and drain remaining water.
If valves are stiff, penetrating oil and careful force are used; if leaking or seized, the main supply is used and a plumber consulted.
A small bucket and towels are placed beneath the work area.
The person verifies dryness before proceeding to remove and replace the trap.
Remove And Replace Trap
A wall-mounted trap replacement requires care and the right tools to prevent leaks and damage to the drain line. The technician loosens slip nuts, supports the trap, and inspects for corrosion or misalignment.
After removing the old trap, clean thread seats and test fit the new unit. Use appropriate washers and thread tape where metal joins plastic to guarantee a seal. Tighten nuts by hand, then snug with a wrench; avoid over-tightening.
- Shut off water and place a bucket beneath
- Loosen slip nuts, hold trap securely
- Inspect and clean mating surfaces
- Install new trap with correct washers
- Test for leaks and adjust as needed
How to Adapt an Old Drain to Modern PVC Parts
Older metal sink drains often need conversion pieces to join with modern PVC systems; measuring thread size, identifying male versus female connections, and checking for corrosion first determines whether an adapter, slip-joint coupling, or replacement tailpiece is required.
The technician selects a brass or stainless adapter that matches thread pitch and diameter, applies plumber’s tape to tapered threads, and hand-tightens before a final wrench snug.
For slip-joint connections, a PVC slip nut and washer replace worn parts.
If the tailpiece is severely corroded, cutting back to solid metal and installing a PVC-compatible tailpiece with a threaded adapter guarantees a leak-free changeover.
How to Comply With Local Plumbing Codes for Traps
How should a trap be installed to meet local plumbing codes? The installer must guarantee correct trap type, depth, slope, and venting per jurisdictional rules. Clear compliance prevents odors, backflow, and fines.
Typical requirements include:
- Use approved trap materials and sizes matching fixture type.
- Maintain required trap seal depth (usually 2–4 inches) to prevent siphoning.
- Assure proper trap arm length and slope toward the drain (¼” per foot).
- Verify venting location and size to avoid trap siphonage.
- Seal joints with code-approved fittings and test for leaks per local inspection procedures.
Consult local code documents for exact specifications.
How to Know When to Call a Professional Plumber
When should a homeowner call a professional plumber? A professional is advised when leaks persist after tightening or replacing parts, when water damage, mold, or structural concerns appear, or when drain issues stem from main line blockages.
Call when unfamiliar tools or soldering, complex trap configurations, or code interpretation are required. Also seek help for recurring clogs despite snaking, unusual odors indicating venting problems, or when multiple fixtures are affected.
Emergencies—visible flooding, burst pipes, or sewage backups—demand immediate professional response. Hiring a licensed plumber reduces risk, guarantees code compliance, and protects warranties and property value.
How Much a DIY Replacement Typically Saves
After deciding that a professional plumber is not required, a homeowner can expect substantial savings by replacing a sink drain pipe themselves.
Typical DIY costs include parts and minimal tools, while labor charges are avoided. Savings vary with complexity but commonly range from 60–85% compared to a service call. Consider material choices and whether existing tools are on hand.
- Replacement parts: $10–$40
- Basic tools (if needed): $15–$60
- Professional service: $100–$300+
- Typical DIY total: $25–$100
- Estimated savings: $75–$200+
These figures are averages; local prices affect exact savings.
How to Avoid Mistakes That Cause Leaks Later
To prevent future leaks, the installer should measure pipe lengths and fittings carefully to guarantee proper alignment.
New seals and washers must be used rather than reusing old, compressed components.
Fasten connections by hand, then run a water test and re-tighten only if needed.
Properly Measure Pipes
Measure each pipe twice before cutting to guarantee fittings align and joints seal properly. Accurate measurements prevent gaps, overcuts, and stress that cause leaks. Use a tape measure, mark with a fine marker, and account for socket or slip joint depth.
Dry-fit components to confirm alignment before final cuts. Note material-specific allowances for PVC, ABS, or metal.
- Measure length from center of trap to wall entry
- Include overlap for compression nut or slip joint
- Record each dimension before cutting
- Re-measure after truncating nearby irregularities
- Label pieces for reassembly order
Use Fresh Seals And Washers
When replacing a sink drain pipe, always install new seals and washers rather than reusing old ones to guarantee a watertight connection; worn, compressed, or hardened components commonly fail even if fittings appear snug.
The installer selects correct-size rubber gaskets and flat washers matching pipe diameter and fitting types.
Inspect plastic or metal seats for corrosion and replace any damaged components.
Use mild lubricant or plumber’s grease sparingly to aid seating without causing slippage.
Keep replacement parts clean and free of debris during assembly.
Label and organize old parts for reference, then dispose of them to avoid accidental reuse.
Hand-Tighten Then Test
After replacing seals and washers, the installer hand-tightens slip nuts and compression fittings until they seat, then runs a focused leak test.
The installer avoids tools for final turns to prevent over-compression, inspects alignment, and confirms threads are engaged.
Water is applied in stages to reveal slow leaks.
If seepage appears, the nut is loosened, the joint is reset, and tightened by hand again.
- Tighten by hand until snug
- Check alignment before final seating
- Test with low-flow, then full-flow
- Re-seat joint if any drip shows
- Replace components if leaks persist
How to Maintain Your New Drain Pipe for Longevity
Regularly inspecting the new drain pipe helps prevent minor issues from becoming costly repairs; a quick monthly check for leaks, corrosion, and loose connections keeps the system functioning and identifies problems early.
After inspections, clear slow drains with a plunger or a biodegradable enzyme cleaner to avoid harsh chemicals that damage seals. Tighten fittings as needed, but avoid overtightening plastic nuts. Wipe visible metal parts dry to slow corrosion and apply plumber’s grease to threads when reassembling.
Address small leaks promptly by replacing washers or slip-joint nuts.
Keep a simple maintenance log noting dates and actions for future reference.
How to Store Leftover Parts and Extra Seals
Keeping a small kit of leftover parts and extra seals near the sink extends the life of the repair and speeds future fixes.
A compact, labeled container protects components from moisture, dust, and loss.
Separate seals by size and material in small resealable bags and note installation date on each.
Store basic tools—pipe wrench, plumber’s tape, spare washers—so minor adjustments are immediate.
Periodically inspect the kit for corrosion or degraded rubber and replace items as needed.
Clearly labeled contents save time and frustration during emergencies or future upgrades.
- Small labeled container
- Resealable bags for seals
- Date labels
- Basic tools included
- Periodic inspection schedule
How to Troubleshoot a Persistent Leak After Replacement
What might be causing a leak to continue after a drain replacement? Possible causes include improperly seated gaskets, loose slip nuts, misaligned tailpiece or trap, cracked fittings, or damaged sink flange.
First, dry the area and run a focused test with a cup of water to locate the source. Tighten connections incrementally; avoid overtightening plastic parts.
Re-seat or replace worn gaskets and apply plumber’s putty or silicone where appropriate. Inspect pipe threads and replace stripped components.
If the leak persists, check for hairline cracks in the sink or corrosion at hidden joints. Consider professional help for inaccessible or structural issues.
How to Document the Repair for Future Reference
After completing the repair, document the work clearly so future users can understand what was done, why, and how to maintain it.
The technician records parts, dates, and observations, noting any nonstandard fittings or deviations from instructions.
Photos show before, during, and after states; measurements and torque or tightening notes aid repeats.
Store documentation near the sink and digitally with searchable filenames and backup.
Include warranty and supplier contacts.
- Parts used with model numbers
- Stepwise notes and troubleshooting tips
- Date, time, and performer name
- Clear photos with labels
- Maintenance schedule and inspection reminders
How to Upgrade to a Space‑Saving Trap for Small Cabinets
Having documented the repair and gathered photos, parts, and maintenance notes, the technician can consider upgrading the drain assembly to a space‑saving trap to free cabinet room and improve access. The technician selects a compact P‑trap or bottle trap, verifies sink tailpiece alignment, measures clearance for disposal and supply lines, and confirms trap material compatibility. Installation follows seal, hand‑tighten, and leak‑test steps. The revised layout simplifies future servicing and preserves under‑sink storage. A brief parts checklist aids replication.
| Item | Benefit | Note |
|---|---|---|
| Compact P‑trap | More space | Align tailpiece |
| Bottle trap | Sleek | Check venting |
| Slip nuts | Toolless | Replace washers |
| Extension | Adjust length | Trim carefully |
How to Recycle Old Metal and PVC Plumbing Parts
Sorting old plumbing parts by material provides the quickest path to responsible disposal and recycling.
The writer recommends separating metal fittings, copper, brass, stainless steel, and PVC to streamline reuse, donation, or scrap processing.
Local recycling centers accept clean metals; PVC recycling varies by region and may require special facilities.
Remove nonmetallic seals and foam before drop‑off.
Document quantities and take photos for scrap yards or reuse groups.
- Clean metal fittings for scrap yards
- Bundle copper and brass separately
- Verify PVC acceptance locally
- Donate reusable parts to community groups
- Dispose contaminated items per local rules
How to Get Replacement Parts Quickly When You’re Missing One
Locate the missing piece fast by identifying the exact part type and size—measure threads, diameters, and any markings—then check nearby sources such as local hardware stores, plumbing supply houses, online retailers, and community swap groups to compare availability and lead times.
Photograph the part and bring measurements to shops to speed matching.
Prioritize common fittings (slip nuts, tailpieces, trap seals) that are often stocked.
Use expedited shipping or same-day local pickup when time matters.
Consider universal replacement kits or adjustable fittings as temporary fixes.
Keep receipts and note model numbers for future reference and easier reorders.
Conclusion
Replacing a sink drain pipe is an achievable DIY for most homeowners with basic tools, patience, and this guide. Some may worry they’ll make leaks worse — starting with a small section (tailpiece or P‑trap) and using new washers and hand‑tightened slip nuts minimizes risk and lets you test for leaks before finishing. Document parts and measurements for future ease; if uncertain, stop and consult a plumber to avoid costly damage.