How to Replace RV Water Heater Anode Rod: Step-by-Step DIY Guide for Beginners
To replace your RV water heater anode rod, follow these simple steps: First, ensure the power and gas are turned off, then drain the tank and relieve any pressure. Next, remove the access panel and use a wrench or extractor to take out the old rod. Inspect the threads for any damage, then install the new rod with the appropriate gasket and sealant, tightening it according to the manufacturer’s specifications. Finally, refill the tank, vent any trapped air, and test for leaks and heating efficiency. For additional tips on specific models, troubleshooting, and maintenance, continue reading.
What Replacing an RV Water Heater Anode Rod Involves
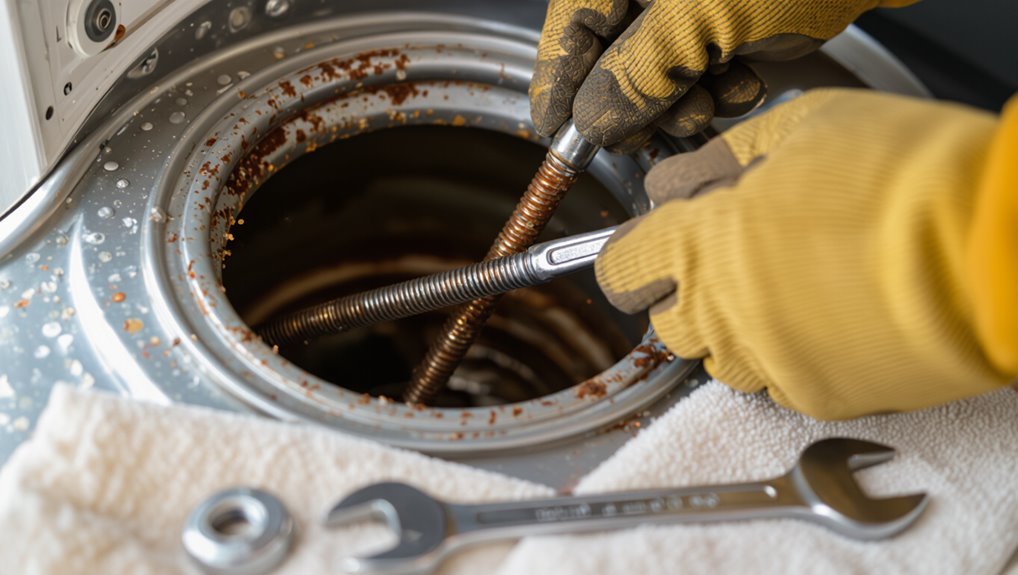
The anode rod protects the RV water heater tank by corroding preferentially to metal surfaces, extending the tank’s service life.
Signs that the rod needs replacement include disintegration, foul-smelling water, or accelerated tank corrosion.
Replacing it typically involves draining the tank, removing the old rod, installing a new one, and can take roughly one to two hours depending on access and experience.
Purpose of the anode rod in RV water heaters
Understanding an anode rod’s purpose clarifies why replacing it is a critical part of RV water heater maintenance.
The anode rod sacrificially corrodes to protect the steel tank from rust and electrochemical damage. Regular replacement prevents tank failure, prolongs heater life, and maintains water quality.
Guides on how to replace RV water heater anode rod focus on access, safety, and correct replacement procedures.
Signs the anode rod needs replacement
Recognize several clear indicators that an RV water heater’s anode rod needs replacement: foul or metallic-smelling water, increased sediment or rust-colored particles in hot water, persistent corrosion visible on the rod when inspected, reduced hot water quality or taste changes, and evidence of accelerated tank corrosion such as pitting or flaking.
Regular checks reveal deterioration before failure.
Overview of the replacement process and time required
Replacing an RV water heater anode rod typically involves draining the tank, locating and removing the old rod, installing a new rod with the proper sealant or washer, and refilling and testing the system for leaks and proper operation.
The task generally takes one to two hours for a DIYer with basic tools. Time varies with access, corrosion, and required parts or seals.
Tools and Materials Needed
A concise list of essential tools—wrenches, socket set, Teflon tape, and a torque wrench or breaker bar—prepares one to remove and install an anode rod.
Guidance follows on selecting a replacement rod by length, thread type, and material (magnesium, aluminum, or zinc) to match the tank and water conditions.
A brief mention of optional items such as a rod extractor, pipe sealant, and protective gloves covers additions that simplify the job.
Essential tools list
Preparation for replacing an RV water heater anode rod requires a short list of specific tools and materials to guarantee the job is safe and efficient.
Essential items include basic hand tools, safety gear, and replacement parts to access and remove the rod without damage.
- Adjustable wrench or socket set
- Screwdrivers (flat and Phillips)
- Teflon tape and sealant
- Work gloves and safety glasses
- Torque wrench
Replacement anode rod options and how to choose the right size and material
After assembling the basic tools and safety gear, the next step is selecting the appropriate replacement anode rod; choices vary by material (magnesium, aluminum, or zinc/aluminum hybrid) and by length and diameter to match the heater’s fittings and tank depth.
Magnesium offers best protection for fresh water, aluminum suits softened or alkaline water, hybrids resist sulfate corrosion.
Measure thread type and rod length before purchasing.
Optional items that make the job easier
Consider gathering a few optional tools and materials that streamline anode rod replacement and reduce effort: a specialized anode-socket or adjustable basin wrench speeds removal in tight spaces, a length gauge or tape prevents buying the wrong-size rod, thread sealant or plumber’s tape guarantees a watertight fit, and a grinding brush or rust-penetrating spray helps free stubborn threads.
Additionally, a drip pan, rags, and gloves keep the work area clean and safe.
Safety Precautions Before You Start
Before beginning, power and gas supplies must be shut off and secured to prevent electrical shock or fuel leaks.
The water heater should be drained and system pressure relieved to avoid scalding and water spray.
Appropriate PPE (gloves, eye protection) and a clear, well-ventilated workspace should be established.
Disconnecting power and gas safely
Shut off all electrical power to the water heater and close the propane or natural gas supply valve before any work begins; this prevents accidental ignition and electrical shock while the anode rod is accessed.
Verify power is off at the breaker and confirm gas valve fully closed.
Use a non-contact tester and a gas leak detector or soapy water to guarantee no residual electricity or leaks remain.
Draining the water heater and relieving pressure
Drain the tank and relieve built-up pressure to prevent scalding and water damage during the anode rod replacement.
Close the cold-water inlet, open a hot faucet inside the RV to vent, and attach a hose to the heater drain valve.
Open the drain and allow water to run to a safe location.
Confirm tank emptiness and pressure release before proceeding.
Personal protective equipment and workspace setup
With the tank emptied and pressure relieved, attention shifts to personal protective equipment and preparing the work area.
The technician dons safety glasses, gloves, and sturdy clothing; a dust mask if corrosion or debris is present.
Guarantee adequate lighting, stable footing, and clear access to tools.
Lay absorbent pads for spills, position a bucket for drainage, and keep a fire extinguisher nearby.
Step-by-Step Replacement Procedure
The procedure begins by locating the anode rod on common RV water heater models and preparing the unit for service.
The tank is drained, the rod is removed step-by-step, and the interior and surrounding components are inspected for corrosion or damage.
A new anode rod is installed with proper sealing and torque to guarantee a reliable, leak-free fit.
Locate the anode rod on common RV water heater models
Begin by identifying the water heater model and its mounting location within the RV, since anode rod access varies by manufacturer and installation style.
Locate rods on common models: tank-style units often have a hex plug on the top or side, while small vertical or tankless heaters may use side access panels or require removal of an exterior service cover.
Check manuals and fittings.
Drain the tank and prepare for rod removal
After locating the anode rod access point on the specific RV water heater, the tank must be drained and the system prepared for safe rod removal.
The technician shuts off power and water, opens a hot faucet, attaches a hose to the drain valve, and empties the tank; pressure is relieved and the area is readied for rod extraction.
- Shut off power and water
- Open hot faucet
- Attach drain hose
- Empty tank fully
- Relieve pressure
Remove the old anode rod step-by-step
With the tank drained and pressure relieved, the technician prepares to extract the corroded anode rod by first locating the access port and clearing surrounding space for tools.
A visual inspection identifies rod type and condition so appropriate sockets or wrenches are selected before loosening.
The technician loosens the hex head, supports the rod, threads it out steadily, removes scale, and disposes of the spent rod.
Inspect the tank and surrounding components for corrosion or damage
Once the anode rod has been removed, the technician conducts a careful inspection of the tank interior and exterior, as well as nearby fittings and connections, to identify any signs of corrosion, pitting, leaks, or structural damage.
Any scale buildup, loose or corroded fittings, sacrificial metal remnants, or compromised seals are noted.
Photos and measurements document findings for repair decisions before proceeding.
Install the new anode rod with correct torque and sealing
Begin by preparing the replacement anode rod, new gasket or Teflon tape, and a calibrated torque wrench set to the manufacturer’s specified value.
Insert the anode rod straight, hand-tighten to seat the gasket, then use the torque wrench to apply specified torque.
Confirm sealing compound or tape is correctly applied and no cross-threading occurs.
Wipe excess sealant and verify alignment before proceeding.
Refill, repressurize, and test the water heater for leaks and proper operation
After the anode rod is torqued and the seal checked, the next step is to restore water service and pressurize the tank for leak testing and operation checks.
Open cold supply slowly, vent air via a hot faucet until steady flow, inspect fittings for drips, tighten if needed.
Reconnect power/propane, activate heater, verify heating cycle and pressure relief valve function before final use.
Model-Specific Variations and Tips
Model differences affect anode access and replacement: electric, gas, and combination heaters each use different mounting and service approaches.
Some units allow access through an exterior panel while others require tank entry to reach the anode.
Additionally, certain models have integrated, non-serviceable anodes versus threaded, replaceable ones, so inspection of the specific heater type is essential before starting work.
Differences for electric vs. gas vs. combination RV water heaters
Several key differences affect how anode rod replacement is approached for electric, gas, and combination RV water heaters, driven by access points, heating components, and tank design.
Electric units often require panel removal around elements; gas models need caution near burners and gas lines; combination heaters blend both constraints and may have tighter clearances.
Tools, sealing methods, and safety steps vary accordingly.
Access panel vs. inside-tank anode rod locations
Different heater types influence where anode rods are placed and how they are reached: some manufacturers mount the rod behind an exterior access panel for straightforward removal, while others position it inside the tank—accessible only by draining and removing internal components or by disassembling the heater.
Owners should consult the manual, verify required tools, and plan for tank draining, ventilation, and safe disposal of old rods before attempting replacement.
When anode rods are integrated vs. replaceable
Although some RV water heaters include factory-installed, nonserviceable anode assemblies, others feature threaded or removable rods designed for routine replacement. Owners should identify which configuration their specific unit uses before attempting maintenance.
Integrated assemblies often require tank replacement or manufacturer service, while replaceable rods allow DIY removal with basic tools.
Consult the manual, parts diagrams, and model-specific forums for correct procedures and compatible replacement rods.
Common Problems and How to Troubleshoot
Common issues include seized anode rods that require penetrating oil, heat, or extractor tools for removal.
Stripped threads or damaged fittings are addressed with thread repair kits, replacement unions, or welded/epoxy fixes as appropriate.
Persistent odors or accelerated corrosion after replacement suggest installation errors, water chemistry problems, or a failed anode that warrant testing and corrective measures.
Stuck or seized anode rod removal techniques
When an RV water heater’s anode rod becomes stuck or seized, removing it requires careful technique to avoid damage to the tank or fittings.
Apply penetrating oil, let it soak, then use a long breaker bar or cheater pipe for controlled torque.
Tap the hex gently with a hammer to break corrosion.
If still immobile, alternate heating and cooling cycles on the fitting to loosen corrosion before retrying.
Dealing with stripped threads or damaged fittings
Inspect the threads and fittings carefully for rounded, cross-threaded, or corroded areas before attempting removal or replacement; damaged threads compromise seals and can lead to leaks or tank injury if forced.
If threads are slightly damaged, use a thread chaser or die to restore them; replace severely damaged fittings or install a threaded sleeve/repair insert.
Verify seals with appropriate tape or sealant and test for leaks.
Persistent odors or rapid corrosion after replacement
Persistent odors or accelerated corrosion shortly after anode rod replacement indicate an underlying chemical or installation issue rather than normal wear.
The guide recommends checking water chemistry (chloramines, high dissolved solids), verifying correct anode material and polarity, ensuring tight electrical bonding, and confirming proper sealing to prevent oxygen ingress.
If problems persist, flush system, test water, and consult a professional to prevent tank failure.
Maintenance Schedule and Longevity
Owners are advised to inspect the anode rod at least once per season and plan replacement every 1–3 years depending on condition.
Water chemistry (hardness, chlorides) and heavy usage accelerate corrosion and shorten rod life.
Keeping dated inspection notes and including the rod check in seasonal RV maintenance helps track wear and prevent tank damage.
How often to inspect and replace the anode rod
Typically, the anode rod should be checked annually and replaced every 2–4 years depending on water quality and usage.
Inspection frequency may increase if the RV is used heavily or stored long-term. During checks, assess corrosion, remaining core, and any visible damage.
Replace when wear compromises protection. Keep records of inspection dates and replacements for consistent maintenance tracking.
Factors that shorten anode rod life (water chemistry, usage)
After establishing a regular inspection and replacement rhythm, attention should turn to specific factors that accelerate anode rod deterioration.
Hard water with high mineral content, low pH (acidic) conditions, and chloride or sulfate ions increase corrosion.
Frequent hot-water use, long tank exposure times, and intermittent winterization cycles also hasten consumption.
Galvanic corrosion from dissimilar metals and stray electrical currents further reduce lifespan.
Record-keeping and seasonal maintenance for RV owners
Good record-keeping secures proactive care and extends the service life of an RV water heater. Owners should log inspection dates, anode replacements, water quality tests, and winterization steps.
A seasonal checklist—flush tank in spring, inspect sacrificial rod mid-season, winterize before storage—reduces corrosion risk.
Consistent records reveal trends, justify part replacement, and guarantee timely maintenance, improving reliability and longevity.
Cost Considerations and When to Call a Professional
Typical part and labor costs for an RV water heater anode rod replacement range from inexpensive DIY parts to higher fees when professional labor is required.
Complex issues—corroded fittings, damaged tanks, hard-to-access installations, or warranty-covered systems—warrant hiring a technician.
Simple precautions and proper tools can reduce expenses safely for competent owners who follow manufacturer guidance.
Typical part and labor costs
Many RV owners can expect to spend between $15 and $60 for a replacement anode rod. Typical DIY cost includes the rod plus basic tools; average time is 30–90 minutes. Labor at a shop ranges $75–$150 per hour if they perform the swap.
| Item | Typical Cost | Notes |
|---|---|---|
| Anode rod | $15–$60 | Material dependent |
| DIY tools | $0–$30 | If not already owned |
| Shop labor | $75–$150/hr | May include diagnostics |
Situations that require professional service
When corrosion has advanced beyond the anode rod or when tank damage, leaks, electrical faults, or compromised pressure relief valves are suspected, professional service is advisable to accurately diagnose and safely repair the system.
Hire a qualified RV technician for complex welding, tank replacement, gas or electric element repairs, sealed-system diagnostics, or persistent odor and contamination issues that suggest internal corrosion or microbial growth.
DIY cost-saving tips without compromising safety
A homeowner can save substantially by replacing an RV water heater anode rod themselves while still prioritizing safety and system integrity.
Careful preparation, the right tools, and clear limits on what tasks to attempt keep costs down without increasing risk.
Buy quality replacement parts, borrow specialty tools, follow manufacturer procedures, and document steps.
Call a professional for leaks, electrical issues, tank damage, or uncertain diagnostics to avoid costly mistakes.
Additional Preventive Measures to Protect Your RV Water Heater
Beyond anode replacement, the article outlines water treatment options that lessen corrosion and protect tank interiors.
It compares sacrificial rod alternatives and their compatibility with different tank materials.
It also notes practical upgrades and modifications that can extend tank life and improve reliability.
Water treatment options to reduce corrosion
Several practical water treatment strategies can particularly slow corrosion and extend an RV water heater’s lifespan.
Installing a point-of-entry sediment filter removes abrasive particles; a carbon filter improves taste and reduces chlorine-driven corrosion.
Regularly testing and adjusting water hardness with a softening cartridge or portable softener lowers scale formation.
Adding a neutralizing filter or pH adjuster protects metal surfaces from acidic water.
Sacrificial rod alternatives and compatibility
When sacrificial anode rods prove unsuitable due to space constraints, water chemistry, or user preference, alternative corrosion-control methods can provide comparable protection if chosen for compatibility with the RV water heater’s materials and operating conditions.
Cathodic protection systems, zinc-magnesium blends, powered anodes, and dielectric isolation fittings each suit different tanks and water types; selection should match tank metal, electrical grounding, and maintenance capabilities.
Upgrades and modifications to extend tank life
If sacrificial rods or powered anodes are unsuitable, owners can pursue targeted upgrades and modifications to extend an RV water heater’s service life.
Options include installing corrosion-resistant liners, upgrading to stainless steel or glass-lined tanks, adding inline water filters and water softeners, insulating the tank and plumbing, and replacing sacrificial fasteners with stainless hardware.
Each modification reduces corrosion, sediment, and thermal stress, prolonging tank integrity.
Conclusion
Replacing the RV water heater anode rod protects the tank from corrosion and extends service life. The guide’s clear steps, tools, and safety tips equip any novice to complete the job, though model quirks may demand extra care. If difficulties arise, professional help is prudent. Regular inspection and timely replacement keep systems reliable—think of the anode as a knight’s shield in an age of smartphones, sacrificially preserving the tank so it serves longer and better.