How to Repair a Chip in a Porcelain Sink: Step-by-Step Fixes That Last
To effectively repair a chip in a porcelain sink, begin by thoroughly cleaning the area to eliminate soap, oils, and loose glaze. For small surface chips, use color-matched epoxy or porcelain filler, applying it in thin layers and smoothing it out before curing, sanding, and polishing to achieve a glossy finish. For larger or deeper chips, utilize layered bonding primer or epoxy, taking care to fill, shape, and apply multiple glaze coats with full curing in between. Proper preparation, color matching, and patience are key to ensuring a durable repair. Continue reading for detailed step-by-step techniques, a comprehensive tool list, and troubleshooting tips.
What to Expect When Repairing a Chip in a Porcelain Sink
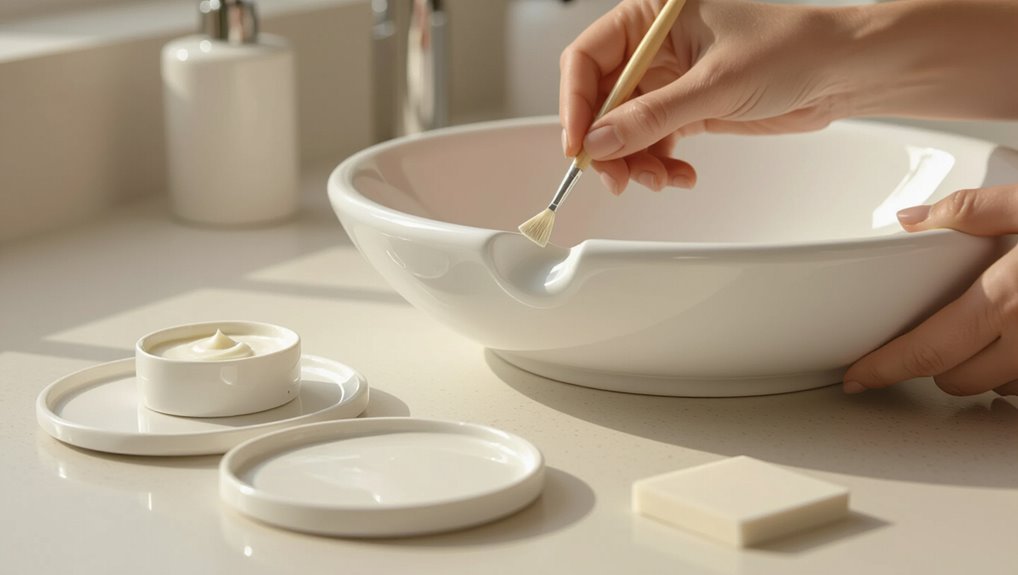
Chips in porcelain sinks most often result from dropped cookware, hard impacts, or thermal shock.
The size and depth of a chip determine whether a simple fill-and-glaze repair will restore appearance and durability or whether structural damage requires more extensive work.
In some cases—large, deep, or undermined chips—replacement of the sink is the more reliable long-term solution.
Typical causes of chips in porcelain sinks
Several common factors lead to chips in porcelain sinks, usually involving impact, thermal stress, or wear.
Drops of heavy cookware, sudden temperature changes from boiling water or ice, and long-term abrasion around drains and edges create weak spots.
Poor installation or underlying structural movement can expose glaze.
Recognizing causes helps determine precautions and informs steps on how to repair chip in porcelain sink.
How big and deep chips affect repair options and durability
Size and depth determine both the choice of repair method and the likely lifespan of the fix.
Small, shallow chips suit epoxy or porcelain touch-up kits and usually return durable, nearly invisible results.
Larger or deep chips require filling, layering, or professional refinishing; these repairs are more complex and may show texture differences.
Deeper damage reduces long-term durability and increases likelihood of future maintenance.
When replacement is preferable to repair
When is replacement the better choice?
Replacement is preferable when chips expose rusting metal, penetrate through porcelain to substrate, are numerous or widespread, or when structural cracks compromise bowl integrity.
Severe staining, recurring damage, or mismatched finish after multiple repairs also justify replacement.
Cost comparisons, long-term durability, and desired aesthetics guide the decision; replacement guarantees uniform appearance and lasting reliability.
Materials, Tools, and Safety Precautions
A concise list of essential materials and tools is presented to complete a porcelain sink chip repair effectively.
Optional professional-grade tools and finishes are noted for improved durability and aesthetics.
Recommended safety gear and ventilation practices are explained to minimize exposure to dust, fumes, and chemical irritants.
List of essential materials and tools
Before beginning the repair, gather the specific materials, select the proper tools, and note basic safety precautions to guarantee the job is efficient and safe.
Necessary items include cleaners, filler, and finish materials; basic tools and PPE; and cleanup supplies.
- Cotton rags and isopropyl alcohol
- Porcelain repair filler or epoxy
- Fine-grit sandpaper
- Small applicator tools (spatula, brush)
- Nitrile gloves and eye protection
Optional tools for professional-quality results
For a professional-quality porcelain sink repair, consider adding precision tools and finishing supplies that improve control and durability without being strictly necessary; examples include a variable-speed rotary tool with fine grinding bits for shaping the filler, microfiles and needle-nose dental picks for refining edges, a small heat gun for accelerating epoxy cure, and touch-up porcelain enamel pens or spray enamels for color-matching and a smooth gloss finish.
These optional tools speed work, improve finish consistency, and help achieve near-professional results when used carefully.
Safety gear and ventilation guidelines
Adding precision tools improves results but also increases exposure to dust, fumes, and small flying debris, so proper personal protective equipment and ventilation are necessary.
Wear safety goggles, a NIOSH-rated respirator for solvent and particulate protection, cut-resistant gloves, and hearing protection during power tool use.
Guarantee cross-ventilation, use a HEPA-filter fan if available, and avoid confined-space repairs until adequate airflow is established.
Preparing the Sink for a Lasting Repair
Before any filler is applied, the damaged area should be thoroughly cleaned and degreased to guarantee adhesion and to reveal the true extent of the chip.
The technician documents chip size, depth, and surrounding glaze condition, then carefully sands and bevels the edges to create a stable profile without cracking adjacent porcelain.
Finally, the rest of the sink and fixtures are masked and protected to prevent accidental damage or contamination during repair.
How to clean and degrease the damaged area
Cleaning and degreasing the chipped area is a critical step that secures adhesives and touch-up compounds bond properly to the porcelain surface.
The area should be rinsed, dried, then wiped with a lint-free cloth soaked in isopropyl alcohol or a dedicated degreaser.
Remove loose debris with a soft brush, avoid abrasive pads, and confirm the surface is completely dry before proceeding to repairs.
How to assess and document chip size, depth, and surrounding glaze
Inspect the chip carefully to determine its length, width, and depth, noting whether it penetrates just the glaze or extends into the porcelain body.
Measure dimensions with a ruler or caliper, photograph from multiple angles with a scale, and record observations: exposed underlayer, hairline cracks, and glaze condition.
Log findings for material selection and repair technique decisions.
Steps to sand and bevel edges without causing more damage
Begin by stabilizing the work area and protecting adjacent surfaces with tape and drop cloths.
Then gently remove loose glaze and grit from the chip using a soft brush or vacuum.
Lightly sand chip edges with fine-grit (320–600) wet sandpaper, keeping motions circular and minimal.
Bevel a shallow chamfer to feather glaze shifts, rinsing frequently to check progress and prevent overheating or scratches.
Masking and protecting the rest of the sink and fixtures
Several layers of protection should be applied before any filler or paint touches the porcelain to prevent accidental damage and guarantee clean lines.
Painter’s tape outlines the chip and shields adjacent glaze; plastic sheeting or paper covers basin areas and countertops. Fixtures receive tape or removable film; drains are plugged.
Edges of tape are pressed firmly. Protective layers are inspected and replaced if loose before repairs begin.
Step-by-Step Repair for Small Surface Chips (Quick Fix)
The technician selects a porcelain repair kit or a compatible epoxy and prepares a small mixing surface.
The filler is mixed and tinted to match the sink glaze, then applied, smoothed, and built up in thin layers.
After recommended curing times, an initial inspection verifies adhesion and surface finish before any final polishing.
Selecting the right porcelain repair kit or epoxy
When choosing a porcelain repair kit or epoxy for a small surface chip, prioritize compatibility with glazed porcelain and color-matching options to guarantee a discreet, durable repair.
Evaluate cure time, abrasion resistance, and recommended substrate (porcelain vs. ceramic). Prefer kits that include fine applicators and clear instructions.
Confirm waterproof and heat-resistant properties for sinks. Check customer reviews and manufacturer warranty before purchasing.
Mixing and tinting the filler to match glaze color
After selecting a compatible repair kit and confirming waterproof, heat-resistant properties, attention turns to preparing the filler for an invisible finish.
The technician measures resin and hardener per instructions, then adds tiny pigment drops until the hue matches surrounding glaze under natural light.
Small test dots are cured on scrap, adjusted incrementally, and mixed thoroughly to guarantee uniform color and consistent curing.
Applying filler, smoothing, and building layers
Begin by cleaning the chip and surrounding glaze with rubbing alcohol, ensuring no dust, soap residue, or oils remain that could prevent adhesion.
Apply a thin layer of color-matched epoxy or porcelain filler with a small spatula, overfilling slightly. Smooth with a damp cotton swab or fingertip.
Build successive thin layers, allowing each to level, until flush with the surrounding glaze.
Finish by gently sanding smooth.
Curing times and initial inspections
Several factors determine the curing time of epoxy or porcelain filler, including product formulation, layer thickness, ambient temperature, and humidity.
The repairer should allow manufacturer-recommended full cure before sanding or glazing—typically several hours to 48 hours.
Initial inspection confirms hardness, adhesion, and absence of shrinkage or bubbles.
If defects appear, reapply or touch up; otherwise proceed with final sanding and finish.
Step-by-Step Repair for Larger or Deep Chips (Durable Fix)
For larger or deep chips, a durable repair begins by filling voids with a bonding primer or layered epoxy to rebuild the substrate.
Edges and undercuts are reinforced to guarantee strong adhesion before the patch is shaped and sanded flush with the surrounding porcelain.
Finally, a multiple-coat glazing technique is applied to match the finish and restore a seamless surface.
Filling deep voids with bonding primer or layered epoxy
When a chip exposes a deep void or underlayer in a porcelain sink, restoring structural integrity requires filling the cavity before surface refinishing. This is typically done with a bonding primer for porous substrates or with layered epoxy for larger gaps, ensuring each application adheres and cures fully to prevent future delamination.
The technician applies primer or successive thin epoxy layers, allowing full cure and light sanding between coats for a stable, flush fill.
Reinforcing edges and undercuts for adhesion
Reinforce the chip’s perimeter and any undercuts to create a reliable bonding surface before filling; this involves cleaning and roughening the exposed edges, removing loose glaze or frit, and, if necessary, beveling sharp edges to allow repair material to key into the substrate.
Apply a thin coat of epoxy or bonding primer into undercuts, embed fiberglass or mesh where large voids exist, and cure per manufacturer instructions.
Shaping, sanding, and achieving flush surface
With the perimeter stabilized and any embedded mesh cured, the next stage focuses on building the repair up to, and then level with, the surrounding glaze.
Apply thin layers of epoxy or filler, allowing full cure between passes. Gradually shape with a sharp blade or rasp, then wet-sand through grits from 220 to 600 until the patch is smooth and flawlessly flush.
Multiple-coat glazing technique for seamless finish
Begin by applying successive thin coats of touch-up glaze or epoxy-based porcelain coating to recreate the sink’s original gloss and color depth.
Allow proper flash time between layers, lightly sanding with fine grit to remove dust nibs.
Build translucency gradually, matching hue and sheen.
Finish with a final clear glaze layer, cure fully per manufacturer instructions for a durable, seamless repair.
Color Matching and Finishing Techniques
Color matching and finishing are critical to making a repaired area visually disappear.
The discussion covers blending tints and glazes to match common sink colors, ways to recreate the original gloss and texture, and when to choose touch-up porcelain paint versus a spray-on glaze.
Clear criteria for selecting materials and application techniques help guarantee a seamless, long-lasting result.
How to blend tints and glazes for different sink colors
Matching tints and glazes for a porcelain sink requires careful observation and measured adjustments to achieve a seamless repair.
The technician samples base tones, then adds small increments of tint to match hue and undertone. Test swatches on a hidden area, curing between layers.
Use translucent glazes to modulate depth, blend edges feathered into original finish, and note ratios for future touch-ups.
Achieving gloss and texture consistent with original porcelain
After achieving a close hue and undertone match with tints and glazes, attention turns to replicating the sink’s surface sheen and tactile finish so the repair disappears at normal viewing distances.
The technician compares gloss level with a gloss meter or visual check, applies thin progressive coats, and textures with fine abrasives or stippling between layers.
Final polish blends repaired area into surrounding porcelain.
Using touch-up porcelain paint versus spray glazing
Decide between touch-up porcelain paint and spray glazing by weighing control against coverage: touch-up paint offers precise application for small chips and fine edge work, while spray glazing provides uniform finish and depth for larger repairs.
Color matching is critical; blend pigments in small increments, test on scrap, and consider gloss level.
Use appropriate primers, multiple thin layers, and proper curing for durable, seamless results.
Curing, Polishing, and Final Inspection
Recommended curing schedules for common repair products are outlined first, noting ambient temperature and humidity effects on full cure times.
Next, wet sanding and sequential polishing steps are described to restore smoothness and sheen without abrading surrounding glaze.
Finally, simple tests for durability and water resistance—light impact, adhesion check, and immersion or drip testing—are recommended before declaring the repair complete.
Recommended curing schedules for common repair products
Typically, manufacturers and experienced restorers provide specific curing windows for each product—epoxy fillers, acrylic touch-up paints, and clear topcoats—because proper cure time affects hardness, adhesion, and polishability.
Epoxy fillers: 24–72 hours full cure, surface tack-free in 2–6 hours.
Acrylic touch-ups: 8–24 hours dry, 48 hours for handling.
Clear topcoats: 24–48 hours initial cure, 7 days full chemical resistance.
Wet sanding and polishing steps for shine and smoothness
Begin wet sanding only after the repair materials have reached their recommended tack‑free state and any manufacturer cure windows have elapsed to avoid pulling compound from the chip.
Use progressively finer wet sandpapers (400, 800, 1200 grit), keep the surface lubricated, feather edges, then switch to polishing pads with a nonabrasive porcelain polish.
Inspect under bright light, remove residue, and confirm a uniform gloss.
How to test durability and water resistance after repair
Allow the repaired area to complete its full cure before stressing it—follow the product’s specified cure time plus any recommended post-cure period to guarantee maximum hardness and adhesion.
Test durability by applying moderate pressure with a blunt object, checking for cracks or flex.
Verify water resistance by running warm water and soap, inspecting seams for seepage.
Record findings and retouch if necessary.
Common Problems and How to Fix Them
Common issues include filler cracking or shrinking, visible color mismatches or patch lines, and adhesion failures.
Each problem has distinct causes—improper mixing or curing, incorrect color matching or inadequate blending, and surface contamination or insufficient bonding—and specific remedies.
The following section outlines how to diagnose these faults and apply targeted rework steps.
Repair filler cracking or shrinking causes and remedies
Several factors can cause repair filler on a porcelain sink to crack or shrink, most often improper surface preparation, incompatible materials, or environmental stresses like temperature swings and moisture exposure.
To remedy this, remove failing filler, roughen and clean the void, use a compatible epoxy or porcelain repair compound, apply in thin layers, cure per manufacturer instructions, and minimize moisture and thermal cycling during drying.
Color mismatch or obvious patch lines blending fixes
After addressing cracking or shrinkage, attention turns to color mismatch and visible patch lines, which undermine a repair’s appearance even when structurally sound.
Remedies include precise color matching with porcelain repair kits, tinting in thin layers, feathering edges with fine sanding, and using gloss or matte topcoats to match sheen.
Test blends on scrap before final application to guarantee seamless integration.
Adhesion failure troubleshooting and rework steps
When a repair peels, flakes, or fails to bond, diagnosing adhesion problems quickly prevents further damage and simplifies rework.
Inspect substrate for contamination, moisture, or old finish. Remove failed material, sand to keyed profile, and clean with acetone.
Verify compatibility of filler and glaze. Reapply primer or bonding agent if needed, cure per instructions, and test adhesion before final touch-up.
Maintenance and Prevention to Keep Repairs Lasting
After a chip has been repaired, regular cleaning with nonabrasive cleaners and soft cloths helps protect the patched area and the surrounding glaze.
Adopting preventive habits—such as using sink mats, avoiding heavy impacts, and handling cookware carefully—reduces the risk of future chips.
When wear appears, assess whether a periodic touch-up will suffice or if repeated damage indicates the need for a full re-glaze.
Cleaning and care tips to protect repaired area
Keep the repaired area clean and dry to preserve the bond and finish: regular gentle cleaning, prompt removal of abrasive particles, and avoiding harsh chemicals will reduce wear and discoloration.
Use soft cloths, mild pH-neutral cleaners, and nonabrasive sponges. Rinse thoroughly and dry after use.
Inspect periodically for cracks or lifting; address minor issues promptly to maintain integrity and appearance.
Preventive habits to avoid future chips
Several simple habits considerably reduce the risk of future chips in a porcelain sink: using a sink mat or soft grid, handling heavy or sharp objects with care, and avoiding sudden temperature shocks from boiling water or ice.
Regular inspections spot hairline cracks early. Use soft cleaning tools, avoid dropping cookware, lift large items instead of dragging, and keep faucet hardware secured to prevent accidental impacts.
Periodic touch-up vs. full re-glaze considerations
When is a simple touch-up sufficient and when does a full re-glaze become necessary?
A touch-up suits small, isolated chips, minor surface scratches, or fading glaze, providing quick cosmetic restoration.
A full re-glaze is warranted for widespread crazing, multiple chips, structural damage, or persistent stains.
Consider longevity, cost, and appearance: touch-ups are cheaper short-term; re-glaze delivers uniform, durable results.
Cost, Time, and When to Call a Professional
Typical do-it-yourself repairs for porcelain sink chips usually cost a few dollars to under $50 and can take from 30 minutes to a few hours depending on cure times.
Professional help is recommended when chips are large, numerous, affect structural integrity, or when underlying rust or plumbing issues are present.
When hired, refinishing services commonly provide color-matched repairs, surface smoothing, and a warranty, with labor and materials often costing several hundred dollars and requiring one to two days for completion.
Typical DIY costs and time estimates
Although small chips can often be repaired for minimal expense, costs and time vary with damage extent and chosen method. Typical DIY repairs use epoxy kits or porcelain touch-up paint; expect $10–$40 and 30–120 minutes. Complex fills or color-matching take longer.
| Item | Cost | Time |
|---|---|---|
| Touch-up kit | $10–$25 | 30–60 min |
| Epoxy fill | $15–$40 | 45–120 min |
| Sand/finish | $0–$10 | 15–45 min |
Signs you should hire a pro or consider replacement
Small DIY chips can be inexpensive and quick to fix, but homeowners should recognize signs that a professional repair or full sink replacement is more appropriate.
Seek pro help when chips expose metal, cover large or multiple areas, cause leaks, or compromise structural integrity.
Consider replacement if extensive staining, recurring damage, or cost of repeated repairs approaches replacement price and expected lifespan.
What to expect from professional refinishing services
When chips, stains, or worn glazing exceed simple touch-up repairs, homeowners should expect professional refinishing services to assess the damage, provide a cost estimate, and outline a timeline for restoring the sink’s surface.
Technicians typically charge $150–$600 depending on scope, complete work in a few hours to a day, and recommend professional intervention for widespread damage, structural issues, or recurring chips.
Real-World Examples and Case Scenarios
Several concise case scenarios illustrate typical outcomes: a small chip repaired step-by-step with accompanying photos, a deep chip treated with layered fills and a timeline of drying and finishing, and an instance where an initial repair failed and required corrective measures.
Each example highlights materials used, time invested, and visual results to set realistic expectations. Readers can compare these scenarios to their own damage to decide whether to attempt a DIY fix or seek professional help.
Small chip successfully repaired step sequence and photos
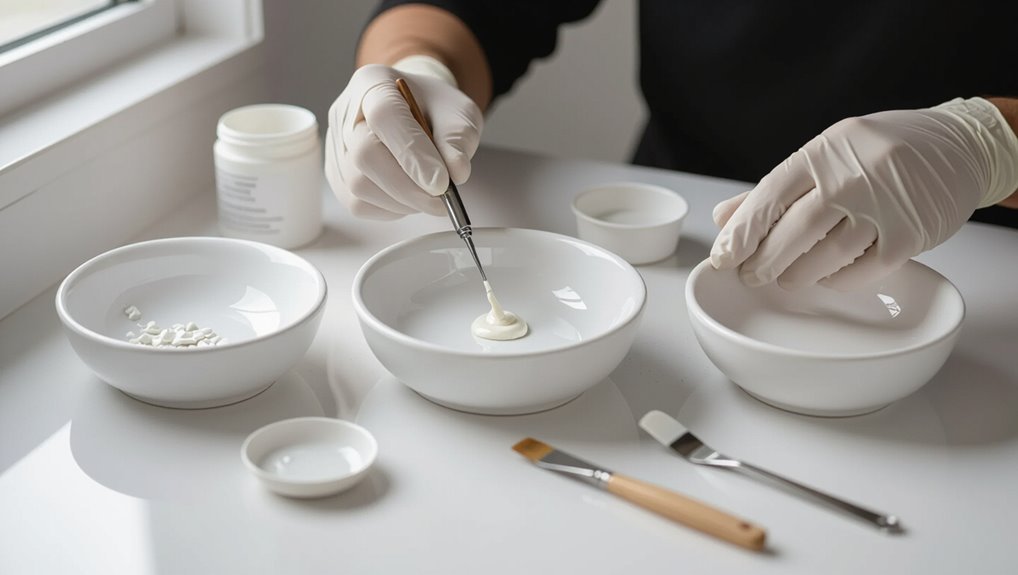
A homeowner documented the step-by-step repair of a chip in a porcelain sink, illustrating the exact sequence of cleaning, sanding, filling, curing, and finishing that produced a seamless result.
Photographs captured each phase: initial damage, degreased surface, fine sanding, epoxy fill smoothed flush, cured surface sanded, touch-up glaze applied, final polish.
The repair restored appearance and function without replacement.
Deep chip requiring layered repair timeline and outcomes
Begin by evaluating depth and extent: deep porcelain sink chips often penetrate glaze and body layers, necessitating a layered repair that addresses structural voids, bonding interfaces, and aesthetic finish.
Typical timeline spans cleaning, filler build-up in 1–2 sessions, curing 24–48 hours, sanding and contouring, then topcoat and polish.
Outcomes ranged from near-invisible restorations to detectable texture differences depending on material match.
When a repair failed and how it was corrected
Failures in layered porcelain-sink repairs most often stemmed from improper bonding to the sink body, insufficient filling of deep voids, or premature sanding and coating before full cure.
In one case, technicians stripped the failed layers, cleaned and etched the glaze, rebuilt cores in thinner increments with epoxy filler, allowed full cure, then sanded and matched glaze—resulting in durable adhesion and restored appearance.
Quick Reference: Repair Checklist and Product Recommendations
Several concise steps summarize the porcelain-sink chip repair process and the essential products needed to complete it successfully.
A compact checklist guides prep, bonding, filling, sanding, and finishing; recommended items guarantee durability and color match.
- Cleanser and degreaser
- Epoxy or porcelain repair kit
- Color-matching touch-up paint
- Fine-grit sandpaper and polishing compound
- Small applicators and protective gloves
Conclusion
With a gentle touch and a bit of patience, the chipped porcelain is given a discreet second chance. Small imperfections can be soothed with simple steps, while deeper wounds ask for careful restoration. Following safety-minded preparations and proven techniques helps preserve the sink’s quiet dignity. Routine care wards off future sorrow, and when the damage feels beyond comfort, a skilled hand will restore both function and the calm appearance that makes the kitchen or bathroom feel whole again.