
How to Replace a Kitchen Faucet Sprayer: Step-by-Step Guide for DIY Repairs
To replace a kitchen faucet sprayer, start by identifying the components: the spray head, hose, diverter, weight, and supply connections. First, turn off the water supply and relieve any pressure. Then, remove the old sprayer head and hose, inspecting the fittings for cleanliness. Install the new assembly using plumber’s tape and O-rings, and reconnect the under-sink components. Finally, test for leaks, check the spray pattern, and ensure the hose retracts properly, tightening any loose parts as necessary. Follow the step-by-step guidance, troubleshooting tips, and maintenance advice for a successful DIY repair.
What Replacing a Kitchen Faucet Sprayer Involves
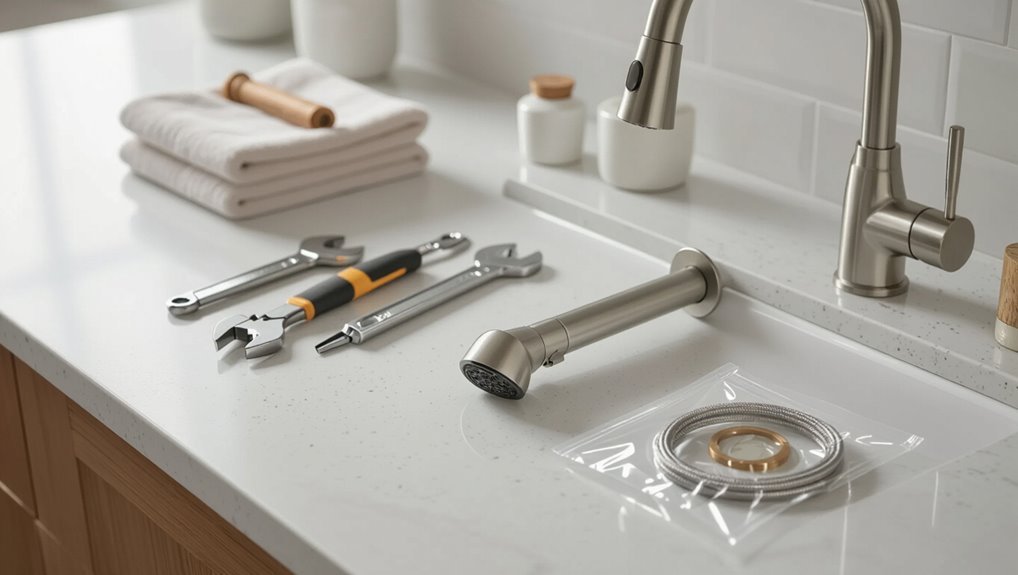
Replacing a kitchen faucet sprayer typically involves identifying the sprayer head, hose, and diverter and understanding their roles in water flow and spray modes.
The process includes removing the old components, matching and installing compatible replacements, and testing for leaks and proper operation.
Common signs that replacement is needed include persistent leaks, reduced water pressure or erratic spray patterns, and visible wear or mineral buildup.
Quick overview of parts and functions
Although the task is straightforward, it requires knowing the main components: the spray head, hose, diverter/valve, weight, and supply connections.
The spray head directs flow; the hose links head to faucet; the diverter/valve routes water between spout and sprayer; the weight retracts the hose; supply connections secure water lines.
This overview frames how to replace a kitchen faucet sprayer efficiently.
Signs you need to replace the sprayer
When should a kitchen faucet sprayer be replaced? Signs include persistent leaks despite tightening, low or uneven water pressure, sputtering or spurting, damaged hose or cracked nozzle, frequent clogging after cleaning, and a trigger that sticks or fails.
Corrosion, mineral buildup beyond cleaning, or visible deterioration of seals and fittings also indicate replacement is more practical than repair.
Tools and Materials Required
A concise list of essential tools — adjustable wrench, pliers, screwdriver, plumber’s tape and a bucket — helps prepare for the task.
The types of replacement sprayers (matching finish, hose length, and connection type) and guidance for choosing the correct model are outlined next.
Optional supplies such as new mounting hardware, sealant, and a flashlight can simplify installation and prevent delays.
Essential tools checklist
One clear checklist of tools and materials guarantees the replacement proceeds efficiently and without unnecessary trips to the hardware store.
The list focuses on essentials for removing the old sprayer, installing the new one, and testing connections. Safety items and small parts are included to prevent delays.
- Adjustable wrench, basin wrench
- Phillips/flat screwdriver set
- Plumber’s tape, replacement O-rings
- Bucket, clean cloths and gloves
Replacement sprayer types and how to choose one
Selecting the right replacement sprayer depends on fit, function, and finish: compatibility with the existing faucet’s mounting and hose connections, the spray pattern and flow control desired, and a finish that matches or resists the kitchen’s wear. Choose matching connection size, single- or dual-mode spray, and durable finish. Compare options:
| Feature | Consideration |
|---|---|
| Connection | Thread size, adapter need |
| Spray | Stream vs. spray |
| Finish | Corrosion resistance |
Optional supplies for easier installation
Prepare a small kit of optional supplies to streamline the replacement: a basin wrench for tight spaces, plumber’s tape for leak-proof threads, a few nylon hose clamps or zip ties to secure hoses, a silicone or rubber O-ring kit to replace worn seals, and a small container to hold screws and adapters.
Also include a flashlight, small adjustable wrench, rag, and mild lubricant for smoother assembly.
Preparing for the Job
Before beginning work, the person should turn off the water supply and open the faucet to relieve pressure.
The area under and around the sink should be cleared and surfaces protected to prevent damage from tools or stray water.
They should then inspect the sprayer to determine whether it is integrated into the faucet or mounted as a separate unit with its own connections.
Safety precautions and shutting off water
A few simple safety steps reduce the risk of injury and water damage when replacing a kitchen faucet sprayer.
Wear gloves and safety glasses, disconnect electrical devices nearby, and keep a towel handy for spills.
Locate and shut off the water supply valves under the sink, or the home’s main shutoff if necessary.
Verify flow is off by testing the faucet before proceeding.
Clearing the workspace and protecting cabinetry
Clear the area under and around the sink, removing cleaning supplies, trash, and loose tools so there is unobstructed access to the cabinet interior.
Lay down a waterproof mat or towels to catch drips.
Protect cabinetry edges with painter’s tape and cardboard to prevent scratches.
Keep a small bucket and flashlight within reach.
Arrange removed items nearby for easy replacement.
How to identify whether the sprayer is part of the faucet assembly or a separate unit
How can one tell if the sprayer is integrated into the faucet or installed as a separate unit?
Examine the countertop: an integrated sprayer shares the main spout and control body; a separate unit has its own hole, hose and trigger beside the faucet.
Inspect beneath the sink for distinct hoses and separate shutoff connections; consult model documentation or manufacturer markings for confirmation.
Step-by-Step Replacement Procedure
The replacement procedure proceeds through five clear steps beginning with shutting off the water and relieving pressure.
Next, the old sprayer head and hose are removed, inspected, and connections cleaned before fitting the new head and hose.
The process finishes by reconnecting under-sink components and securing all fittings.
Step 1 Turn off water and relieve pressure
Shut off the water supply to the faucet by closing the hot and cold shutoff valves located under the sink or, if absent, by turning off the main house valve; this prevents flow during the replacement.
Open the faucet to drain residual water and relieve pressure.
Place a towel and a bucket under the work area to catch drips and protect cabinet surfaces before proceeding.
Step 2 Remove the old sprayer head and hose
With the water off and pressure relieved, attention shifts to removing the old sprayer head and hose.
The sprayer head is unscrewed counterclockwise; stubborn fittings may require pliers with tape to protect finishes.
Feed the hose back through the faucet or deck opening while guiding any retaining clips free.
Disconnect the hose from the diverter or check valve and set old parts aside for disposal.
Step 3 Inspect and clean the sprayer hose and connections
Inspect the exposed hose and fittings for wear, mineral buildup, and damage before installing any new components.
The person checks ferrules, threads, and O-rings for cracks or corrosion.
Mineral deposits are softened with vinegar and brushed gently; debris is rinsed away.
Damaged seals or badly kinked hose sections are noted for replacement.
Connections are dried and prepared for reassembly.
Step 4 Install new sprayer head and connect hose
Begin by aligning the new sprayer head with the hose end and confirming the correct orientation of any built-in check valve or swivel joint.
Thread or push the connector onto the hose per manufacturer instructions, ensuring any O-ring or gasket seats properly. Hand-tighten, then snug with pliers without over-torquing.
Test the connection by gently pulling the hose to verify secure attachment.
Step 5 Reconnect under-sink components and secure fittings
After confirming the sprayer head is securely attached, attention shifts to reassembling the under-sink components and tightening all fittings.
Reconnect the hose to the diverter or faucet shank, route it without kinks, and seat any washers. Hand-tighten connectors, then finish with an adjustable wrench—avoid overtightening.
Reinstall clips, mounting hardware, and the sink flange, ensuring all parts are aligned and secure.
Step 6 Turn water back on and test for leaks and proper function
Open the shutoff valves slowly and restore water flow to the faucet, watching the supply lines and newly connected fittings for any signs of dripping.
Operate the sprayer and faucet through hot and cold cycles, checking for steady pressure, proper return hose function, and spray pattern.
Tighten any leaking connections, recheck after a few minutes, and confirm all valves and trim are secure and dry.
Troubleshooting During and After Installation
Common problems that arise during or after replacing a kitchen faucet sprayer include loose fittings, incorrect hose routing, and worn seals, each with straightforward fixes.
To diagnose leaks and low pressure, the technician checks connections, inspects aerators and cartridges, and measures flow to isolate the source.
If the sprayer won’t retract or becomes stuck, the installer examines the weight placement, cleans debris from the hose and guide, and guarantees the hose is properly seated.
Common installation problems and fixes
Encountering issues during or after installing a kitchen faucet sprayer is normal; this section outlines typical problems and straightforward fixes to restore proper function.
- Misaligned nozzle — loosen, realign, retighten mounting nut.
- Hose binding — check routing, remove kinks, add swivel clip.
- Loose connections — tighten supply and spray fittings, replace worn washers.
- Trigger sticking — clean debris, lubricate O-rings, replace damaged valve components.
How to diagnose leaks and low pressure
Diagnose leaks and low pressure methodically by isolating the symptom, inspecting visible connections, and testing water flow under controlled conditions.
Check supply shutoffs, hose fittings, and O-rings for drips. Remove aerator and sprayer head to test flow; flush lines to clear debris.
Verify shutoff valves fully open and cartridge alignment. Record findings, tighten or replace faulty parts, then retest for consistent pressure.
When the sprayer won’t retract or gets stuck
If the sprayer fails to retract or becomes stuck, begin by isolating mechanical and routing issues before assuming a water-pressure or cartridge problem.
Inspect the hose for kinks, tangled sections, or snagged mounting clips beneath the sink.
Verify the weight is properly positioned and tightened.
Clean guide channels and lubricate lightly.
Replace a damaged hose or reposition the weight to restore smooth retraction.
Compatibility and Upgrade Considerations
Before selecting a replacement, the installer checks thread sizes, fitting types, and hose lengths to guarantee proper fit and water flow.
Consideration is given to upgrading to a high‑pressure or pulldown sprayer for improved performance and reach.
If fittings are incompatible, the valve body is corroded, or the faucet design limits upgrades, replacing the entire faucet may be the better option.
Matching threads, fittings, and hose lengths
Several small measurements determine whether a replacement sprayer will fit: thread size and type (usually NPT or BSP in supply connections, and metric or UNC/UNF for some fixtures), fitting style (male vs. female, quick-connect vs. compression), and hose length and diameter needed to reach the valve without kinking.
Verify thread pitch with a gauge, match connector type, and confirm hose reach and inner diameter for proper flow.
Upgrading to a high-pressure or pulldown sprayer
After verifying thread types, connector styles, and hose reach, homeowners often consider upgrading to a high-pressure or pulldown sprayer for improved performance and ergonomics.
Assess water pressure compatibility, spray head diameter, and weight of pulldown hoses so the existing mounting and valve can support them.
Confirm flow restrictor compliance and swivel clearance to guarantee smooth operation without altering the faucet body.
When to replace the entire faucet instead of just the sprayer
When compatibility issues, persistent leaks, or widespread corrosion affect more than just the sprayer head, replacing the entire faucet becomes the practical choice; evaluating thread types, valve condition, mounting stability, and overall age will reveal whether a simple swap will suffice or if a full replacement prevents repeated repairs and performance compromises.
If valves, seals, or internal cartridges fail, or finishes and mounting are compromised, replace.
Maintenance Tips to Extend Sprayer Life
Regular cleaning to remove mineral deposits and buildup helps maintain spray performance and prevents clogging.
Periodic inspections of hoses, fittings, and seals can identify wear before it leads to failure.
Addressing minor issues promptly with simple repairs extends the sprayer’s service life and reduces the need for replacement.
Regular cleaning and mineral deposit removal
Inspecting and cleaning the sprayer routinely prevents buildup that impairs flow and causes leaks.
Weekly wipe-downs and monthly deep cleans dissolve mineral deposits. Soak removable parts in vinegar, brush aerator screens, and flush lines after reassembly. Follow manufacturer guidance for finishes to avoid damage.
- Soak parts in white vinegar
- Brush aerator/screens
- Flush hose and head
- Dry and reassemble
Preventive checks and small repairs to avoid future replacements
Perform routine checks and address minor issues promptly to keep a kitchen sprayer functioning longer and delay replacement.
Inspect hoses, connections, and the spray head for leaks, wear, or mineral buildup.
Tighten fittings, replace worn O-rings, and lubricate moving parts with plumber-approved grease.
Test spray pressure and handle function after adjustments.
Schedule monthly quick inspections to catch problems early.
Cost, Time Estimates, and When to Call a Professional
Typical parts for a kitchen faucet sprayer cost between $15 and $75, with professional labor raising total expenses considerably.
A straightforward DIY replacement usually takes 30–90 minutes, while complications can extend the job.
If there is persistent leaking, damaged valve seats, corroded connections, or uncertainty about water shutoff, a licensed plumber should be contacted.
Typical costs for parts and DIY vs. hiring a plumber
When deciding whether to tackle a faucet sprayer replacement personally or hire a plumber, cost and time estimates are the primary considerations. Parts typically range $10–$60; labor adds $80–$200. DIY saves money but requires basic tools and confidence. Hire a plumber for complicated fittings or leaks.
| Item | DIY Cost | Pro Cost |
|---|---|---|
| Sprayer kit | $10–$60 | $10–$60 |
| Labor | $0 | $80–$200 |
Estimated time for the average replacement
Most single-handle kitchen faucet sprayer replacements take about 30–60 minutes for someone with basic tools and experience; full replacements for double-handle or pull-down systems typically require 1–2 hours.
Time varies with accessibility, corrosion, and unexpected complications. Allow extra time for removing deposits, matching parts, and testing for leaks.
Preparing tools and shutting off water beforehand speeds the process.
Signs you should seek professional help
How can a homeowner tell if a faucet sprayer job has gone beyond DIY?
Persistent leaks, damaged supply lines, corroded valves, or unclear fittings indicate professional attention.
If attempts exceed estimated time, require specialized tools, or involve shutoff complications, call a plumber.
Expect service costs; weigh labor fees versus replacement value.
Safety concerns, water damage risk, or failed repairs justify hiring a pro.
Quick Reference: Step Checklist for DIY Replacement
Begin by gathering basic tools and the replacement sprayer so everything needed is at hand: adjustable wrench, basin wrench or pliers, bucket, towels, plumber’s tape, and the new sprayer assembly with hoses.
Then follow a concise sequence to complete the swap safely and efficiently.
- Turn off water and relieve pressure.
- Disconnect old sprayer and hoses.
- Install new sprayer, use plumber’s tape.
- Test for leaks and secure fittings.
Conclusion
The final twist arrives as the last wrench turns and the new sprayer hums to life—water unfurls in a steady, gleaming ribbon, the leak finally silenced. Hands step back, countertop clear, tools neatly stacked like evidence of a quiet conquest. Yet the real reveal lingers in the small details: a smooth handle, a secure hose, a promise of fewer surprises. For the careful DIYer, this modest victory quietly reshapes future kitchen moments.


