How to Repair Polybutylene Pipe: Step-by-Step Fixes, Costs, and When to Replace
To repair polybutylene pipe, start by assessing the damage and shutting off the water supply. For small leaks, use temporary clamps, epoxy putty, or sleeve repairs. For more significant damage, cut out the affected section and replace it with approved compression or crimp fittings. Costs can vary from affordable DIY kits to full repipe expenses. This guide will provide detailed step-by-step methods, cost estimates, and advice on when a complete replacement is necessary.
What Polybutylene Pipe Is and Why It Fails
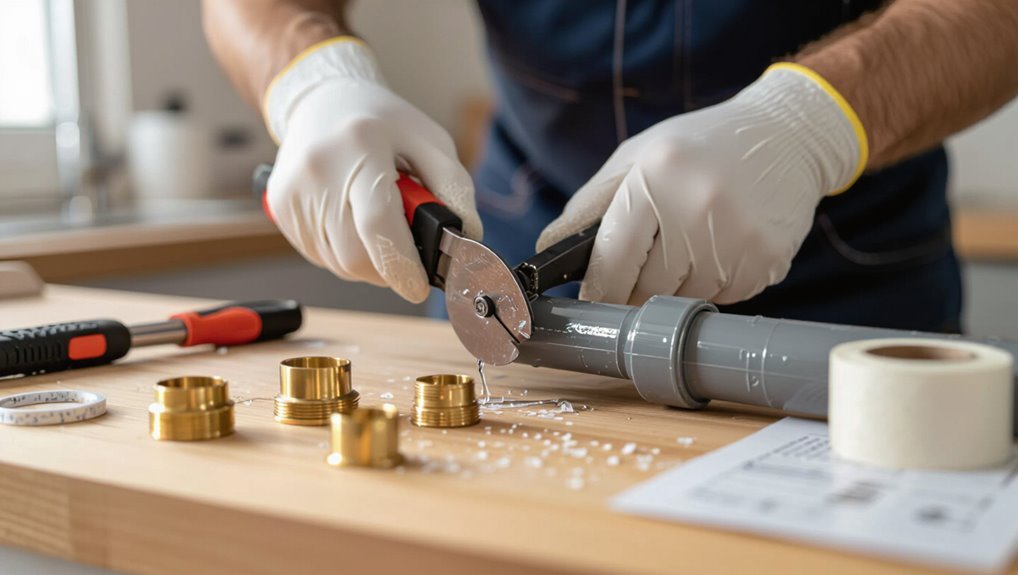
Polybutylene is a grayish-blue plastic piping material once widely used in residential water supply lines for its low cost and flexibility.
Over time it commonly fails due to oxidation and chemical degradation that cause brittleness, and because metal or plastic fittings can corrode or separate.
Typical signs in a home include visible cracks or discoloration, frequent leaks at joints, reduced water pressure, and staining or damp spots near concealed runs.
Composition and common uses in residential plumbing
A flexible, grayish plastic tubing introduced in the late 1970s, polybutylene pipe is composed primarily of a polymer called polybutylene (PB-1) blended with stabilizers and plasticizers to improve flexibility and ease of installation.
Commonly used for cold and hot water distribution, branch lines, and retrofit projects, it pairs with crimp or compression fittings.
Guidance on how to repair polybutylene pipe focuses on compatible clamps and replacement sections.
Typical failure modes (brittleness, oxidation, fittings corrosion)
After outlining its composition and common uses, attention turns to why this material often fails in service.
Polybutylene degrades through embrittlement from UV and age, oxidative attack by chlorinated water, and stress cracking.
Fittings—particularly copper-to-polybutylene connections and crimped or plastic connectors—corrode or separate, causing leaks.
Combined chemical and mechanical deterioration shortens service life and undermines joint integrity.
Signs of polybutylene pipe problems in a home
Homeowners may notice subtle indicators that piping made from polybutylene is failing before a catastrophic leak occurs. Discolored water, reduced pressure, and occasional drips signal deterioration.
Gray or brittle tubing, chalky residue at joints, and corroded metal fittings indicate chemical attack. Unexplained high water bills or mildew from hidden moisture also suggest hidden leaks.
Prompt inspection prevents major damage.
How to Assess Whether Repair or Replacement Is Best
A simple visual inspection checklist helps a homeowner note leaks, bulges, discoloration, corrosion at fittings, and the pipe’s accessibility.
If signs indicate active leakage, widespread deterioration, unclear pipe routing, or the homeowner is uncomfortable performing checks, a professional plumber should be contacted for a formal assessment.
The decision between repair and full replacement depends on pipe age, extent and location of damage, remaining service life, and any insurance or code requirements.
Visual inspection checklist for homeowners
Visual inspection begins with a systematic sweep of accessible piping and connections to identify signs that favor repair versus replacement.
Check for bulging, cracking, white powdery deposits, persistent dampness, and multiple patch sites.
Note discoloration, corrosion at fittings, water pressure loss, and frequency of leaks.
Photograph findings, record locations and dates, and prioritize sections showing progressive deterioration or repeated failures.
When to call a professional plumber
When is a professional needed?
A licensed plumber should be contacted when leaks are persistent, repairs require soldering or specialty fittings, water damage is evident, shutoff valves fail, or multiple joints are affected.
Professionals provide accurate diagnosis, code-compliant solutions, reliable warranties, and safe handling of pressurized systems.
Homeowners uncertain about scope or safety should opt for professional assessment.
Factors that determine repairability vs full replacement (age, extent of damage, location, insurance)
Although some isolated leaks can be patched, determining whether a polybutylene plumbing system should be repaired or fully replaced hinges on a few clear factors: the pipe’s age, the extent and pattern of damage, the location of affected runs, and any insurance or code considerations.
Older, widespread degradation or multiple inaccessible leaks favor replacement; localized, recent failures in accessible sections may justify targeted repairs if insurers and local codes permit.
Quick Emergency Fixes to Stop Immediate Leaks
For active polybutylene leaks, immediate steps include shutting off water, applying clamps or rubber patches, and molding epoxy putty over the breach to slow or stop flow.
Commercial pipe repair kits can be used safely if instructions are followed, the surface is cleaned, and pressure is relieved before application.
These measures are temporary—appropriate for short-term containment or until a professional replacement can be completed—and their limitations include reduced longevity and uncertain performance under pressure.
Temporary measures for active leaks (shutoff, clamps, epoxy putty)
Shut off the water supply immediately and isolate the affected section to limit damage while arranging a repair.
For small active leaks, apply a rubber pad and hose clamp or specialty pipe clamp to compress the breach.
Epoxy putty can seal hairline cracks after drying; follow cure times and apply on clean, dry surfaces.
These are temporary measures until permanent replacement or professional repair.
Using pipe repair kits safely
Apply a pipe repair kit only as a true emergency stopgap, following the manufacturer’s instructions and observing safety precautions such as turning off electrical power near wet areas and wearing gloves and eye protection.
Confirm surfaces are clean and dry, cut away damaged material per directions, clamp or brace fittings as recommended, allow proper cure time, test under low pressure, and replace the section permanently when practical.
When temporary fixes are acceptable and their limitations
A handful of quick temporary fixes can stop immediate leaks long enough to protect property and buy time for a proper repair.
These measures—epoxy putty, silicone tape, hose clamps with rubber, or pipe wraps—are acceptable only for emergencies. They slow leaks and prevent water damage but do not restore long-term integrity; permanent replacement or certified repair must follow promptly to avoid failure and liability.
Step-by-Step Repair Methods for Polybutylene Pipe
The following concise methods outline common approaches to repairing polybutylene pipe.
- Replace a short damaged section with CPVC or PEX.
- Use connecting fittings to tie polybutylene into modern piping systems.
- Clamp-and-sleeve repairs for pinhole leaks.
- Epoxy or resin-based internal pipe coatings.
Each method will be presented with required tools, step-by-step actions, and key precautions.
Method 1 Replace a short damaged section with CPVC or PEX
The section lists the specific tools and materials required for replacing a short polybutylene section with CPVC or PEX, including cutters, deburring tools, fittings, and clamps or crimp rings.
It then outlines the step-by-step procedure: isolate and drain the line, cut and deburr the damaged pipe, insert and secure the chosen fittings, and support the new segment.
Finally, the repair is tested under pressure and inspected for leaks before restoring normal use.
Tools and materials needed
Several basic tools and specific materials are required to replace a short section of polybutylene with CPVC or PEX.
Required items include pipe cutters, deburring tool, adjustable wrench, crimp or cinch tool (for PEX), flux and torch or primer/solvent cement (for CPVC), appropriate fittings and couplings, replacement CPVC or PEX tubing, measuring tape, marker, and safety gear (gloves, goggles).
Step-by-step procedure (cutting, deburring, inserting fittings, securing connections)
Begin by shutting off the water supply and draining the line to create a dry, safe workspace; then measure and mark the section of polybutylene to be removed, allowing enough extra length for fittings and straight cuts.
Cut squarely, deburr and chamfer pipe ends, slide on compression or crimp fittings (appropriate for CPVC/PEX), insert pipes fully, then tighten or crimp per manufacturer torque/specifications.
Testing the repair for leaks
Once fittings are installed and connections secured, proceed to test the repair for leaks before restoring regular service.
The technician slowly restores water pressure, inspects joints and fittings for visible drips, and monitors pressure for several minutes.
Any leak prompts depressurization, tightening or redoing the joint, and retesting.
After a sustained dry test, the system is returned to normal use with documented observations.
Method 2 Use transition fittings to tie polybutylene into modern piping systems
This section outlines how approved change fittings connect polybutylene to contemporary materials and notes common warranty considerations.
It then summarizes the step-by-step installation process, including pipe preparation, fitting selection, and proper torque or crimping methods.
Finally, it covers recommended pressure-testing procedures to verify leak-free joints before restoring service.
Types of approved transition fittings and warranties
Several manufacturers produce conversion fittings specifically rated for joining polybutylene (PB) to copper, PEX, or CPVC.
These fittings are typically made from brass, plastic, or stainless steel and are approved by plumbing codes when installed per instructions.
Approved types include crimped PEX adapters, compression-style PB-to-metal unions, and barbed insert fittings.
Factory warranties vary; verify duration, coverage for leaks, and installation conditions.
Installation steps and pressure testing
After selecting an approved fitting and confirming warranty and compatibility, the installer prepares for the physical connection and pressure testing.
They cut, deburr, and clean polybutylene and mating pipe ends, install interface fittings per manufacturer torque/specs, secure supports, and restore system fill.
A hydrostatic or pneumatic pressure test follows, held for specified duration while inspecting joints for leaks; document results and release to service.
Method 3 Clamp-and-sleeve repairs for pinhole leaks
Clamp-and-sleeve repairs are recommended for localized pinhole leaks where the surrounding polybutylene is sound and a full pipe replacement is not immediately feasible.
The procedure typically involves cleaning and drying the pipe, sliding a rubber sleeve over the damaged area, and securing stainless-steel clamps on each side to compress a watertight seal.
Properly installed clamps can provide several years of reliable service, though expected lifespan varies with water chemistry and pressure and should be monitored for corrosion or re-leakage.
When to use clamp repairs
Decide to use a clamp repair when the leak is a small, isolated pinhole and the surrounding pipe is structurally sound; this method is best for quick, localized fixes rather than long-term solutions for extensively degraded polybutylene lines.
Suitable when access is limited, pressure is moderate, and surrounding fittings are intact.
Avoid if corrosion, multiple leaks, or brittle material suggest imminent failure; consider replacement instead.
Installation steps and expected lifespan
If the leak meets the criteria for a clamp repair—single pinhole, sound surrounding pipe, moderate pressure—a clamp-and-sleeve installation proceeds in a few precise steps.
The installer cleans and dries the area, slides the rubber sleeve over the defect, positions the metal clamp, and tightens bolts to specified torque.
Properly executed, lifespan typically spans 5–15 years depending on water chemistry and system stress.
Method 4 Epoxy or resin-based internal pipe coatings
Epoxy or resin-based internal coatings are suitable for long runs of polybutylene pipe with multiple small leaks or where invasive replacement is impractical. However, they require clean, dry surfaces and access for insertion equipment.
The application typically involves flushing and prepping the line, introducing a measured resin or epoxy via a pigging or spray system, and ensuring full coverage before isolation.
Cure time depends on the product and temperature, ranging from a few hours to several days, and must be confirmed before restoring normal water pressure.
Applicable scenarios and prep requirements
When evaluating whether an epoxy or resin-based internal coating is appropriate, consider the pipe’s condition, access, and planned lifespan of the repair.
Suitable scenarios include intact but deteriorating polybutylene with multiple small leaks, inaccessible fittings where replacement is impractical, or interim fixes pending full replacement.
Preparation requires clean, dry surfaces, isolation of flow, removal of loose debris, and verification of compatible substrate and fittings.
Application process and curing time
Begin the application by confirming the system is isolated, fully drained, and accessible for the coating rig. Then follow the manufacturer’s mixing, pumping, and lining sequence precisely to guarantee uniform coverage.
Technicians inject resin at specified pressure and speed, rotating or advancing the liner to avoid voids. Adhere to recommended ambient and pipe temperatures.
Curing ranges from minutes to 24 hours; full service reinstatement follows manufacturer timelines.
Tools, Materials, and Safety Precautions
A concise checklist of tools—pipe cutters, deburring tools, crimping or compression fittings, soldering kit for copper, and leak-testing equipment—helps both DIYers and professionals prepare for repairs.
The section compares replacement materials (PEX, CPVC, and copper), noting pros, cons, and compatibility with existing fittings.
It also outlines essential safety gear and procedures: shut off water, relieve system pressure, use gloves and eye protection, and follow adhesive and soldering precautions.
Comprehensive tools checklist for DIY and pro jobs
Several essential hand and power tools, select replacement parts, and strict safety gear form the foundation of any successful polybutylene pipe repair—whether tackled by a knowledgeable DIYer or a licensed plumber.
Checklist: pipe cutter, deburring tool, crimp/press tools, adjustable wrench, tubing clamps, inspection flashlight, leak detector, replacement fittings, primer/cleaner, compatible adhesives, gloves, eye protection, respirator, fire extinguisher, and sturdy work light.
Recommended replacement materials (PEX vs CPVC vs Copper)
Choosing a replacement material—PEX, CPVC, or copper—depends on factors like budget, local code, water chemistry, installation skill, and long-term performance expectations.
PEX is flexible, fast to install, and freeze-resistant but may have UV and fitting limitations.
CPVC is rigid, affordable, and chemical-resistant.
Copper offers durability and heat tolerance but costs more and requires soldering; code and water quality often dictate choice.
Safety gear and safe working practices (shutting off water, relieving pressure, handling adhesives)
With the replacement material selected, attention shifts to the gear and procedures that keep the job safe and controlled.
Workers don chemical-resistant gloves, eye protection, and masks for solvent vapors.
Shut off main water, open faucets to relieve pressure, and drain lines.
Use proper ventilation when applying adhesives and primers, follow manufacturer cure times, and dispose of rags and containers per local regulations.
Typical Costs and Time Estimates
A comparison of expenses highlights that DIY repairs typically cost less in materials but may increase risk and labor time, while hiring a professional raises upfront costs for labor and warranty.
Typical price ranges vary from minor section replacements (often a few hundred dollars) to whole-house repiping (several thousand dollars), depending on materials and home size.
Time estimates also span from a few hours for simple repairs to multiple days for full repipes, influencing total labor and disruption.
Cost breakdown for DIY repairs vs professional service
Several common factors determine whether a DIY repair or professional service is more economical for polybutylene pipe issues. Time, skill level, parts cost, and risk of failure influence choice. DIY saves labor but may require tools; professionals charge labor and warranty.
| Item | DIY (est.) | Professional (est.) |
|---|---|---|
| Materials | $20–$100 | $40–$150 |
| Time | 1–4 hrs | 1–3 hrs |
Average cost to replace sections vs whole-house repiping
Replacing only damaged runs of polybutylene pipe typically costs far less than full-house repiping, often ranging from a few hundred to a couple thousand dollars depending on length, fittings, and access.
Whole-house replacement commonly falls between $3,000 and $10,000 or more, influenced by house size, number of fixtures, and local labor rates.
Selective replacement suits localized failures; full repiping prevents future leaks and may reduce insurance issues.
Time estimates for common repair and replacement jobs
Many common polybutylene pipe jobs—from patching a short run to full-house repiping—have predictable time frames tied to scope and access.
Small repairs (sectional replacements, leak clamps) typically require 1–4 hours.
Multi-room reroutes or partial repipes take 1–3 days.
Complete home repiping usually spans 2–5 days, depending on wall access, fittings, and inspections; permits can extend schedules.
How to Find and Vet a Qualified Plumber
Finding a qualified plumber begins with targeted questions about experience with polybutylene repairs, timelines, materials, and references.
Verify licenses, relevant certifications, general liability and workers’ compensation insurance, and whether the work carries a written warranty.
Watch for red flags—no written estimate, high-pressure sales, or vague answers—and obtain at least two to three written estimates for comparison.
Questions to ask prospective contractors
When interviewing prospective contractors, homeowners should prepare a concise list of questions that reveal experience, licensing, and approach to polybutylene pipe repair.
Ask about specific past polybutylene jobs, preferred repair versus replacement methods, timeline, materials proposed, and references from similar projects.
Request written estimates and clarification on subcontractors used.
Confirm communication expectations and contingency plans for unexpected findings.
Certifications, insurance, and warranty considerations
After gathering answers about experience, methods, and references, the next step is to verify a contractor’s credentials, insurance, and warranties to reduce liability and guarantee workmanship.
Confirm state plumbing license, manufacturer certifications for polybutylene repairs, and trade association memberships.
Request proof of general liability and workers’ compensation insurance.
Obtain written warranties detailing scope and duration, and document warranty transferability and claim procedures before hiring.
Red flags and how to get multiple estimates
Why question one estimate when multiple bids reveal cost ranges, scope differences, and potential warning signs.
Homeowners should obtain at least three written estimates, compare itemized costs, timelines, and materials.
Red flags include vague scopes, unusually low prices, high-pressure sales, lack of references, or missing permits.
Verify licenses, insurance, and online reviews before hiring to guarantee informed selection and fair pricing.
Long-Term Solutions and Preventive Measures
When whole-house repiping is recommended, the homeowner should consider long-term options rather than repeated repairs.
Choosing durable replacement materials—such as copper, PEX, or CPVC—can improve longevity and reduce risk of future failure.
Regular maintenance, including pressure checks, scheduled inspections, and prompt repair of small drips, helps prevent new leaks.
When whole-house repiping is recommended
In many cases, whole-house repiping is recommended when polybutylene lines show extensive degradation, repeated leaks, or when the system’s age and material guarantee future failures.
Homeowners should consider repiping if repairs are frequent, insurance limits coverage, water quality is compromised, or resale value is affected.
A thorough replacement reduces risk, minimizes ongoing maintenance, and restores reliable plumbing performance.
Best piping materials for replacement and longevity
Select plumbing materials based on durability, compatibility with local water chemistry, and installation practicality to guarantee long-term performance after replacing polybutylene.
Copper, PEX, and CPVC are common choices: copper offers longevity and heat resistance; PEX provides flexibility and freeze tolerance; CPVC suits hot-water lines in compatible systems.
Choose certified fittings, follow code, and prioritize proven warranties for lasting results.
Maintenance tips to prevent future leaks
After replacing polybutylene with a durable material such as copper, PEX, or CPVC, ongoing maintenance helps preserve system integrity and prevent future leaks.
Regular inspections, annual pressure tests, prompt repair of minor drips, corrosion checks at fittings, insulating pipes against freezing, and flushing sediment from water heaters and lines reduce stress and extend service life.
Keep clear records of maintenance actions.
Real-World Scenarios and Decision Examples
The following scenarios present typical decisions and outcomes for homeowners facing polybutylene pipe issues.
- Small localized leak: assess, isolate, repair, test.
- Repeated leaks in multiple locations: evaluate extent, cost-compare repairs vs full replacement, schedule replacement, confirm warranty.
- Selling a home: disclose presence, obtain remediation estimates, consider replacement or escrow options, provide documentation.
Small localized leak step-by-step decision and repair
When a small, localized leak appears in a polybutylene line, a clear, stepwise approach helps determine whether a targeted repair or full replacement is appropriate.
This section presents decision points, required materials, and practical repair methods illustrated by real-world examples so a homeowner or technician can proceed with confidence.
Inspect age and damage, shut water, cut back to sound pipe, deburr, fit compatible coupler or brass repair sleeve, pressure-test, document and monitor.
Repeated leaks in multiple locations replacement scenario
Multiple recurring leaks along a polybutylene run usually indicate systemic failure rather than isolated defects, prompting replacement rather than piecemeal repairs.
In such cases, evaluating full-run replacement cost, access complexity, and disruption is prudent.
Persistent leaks raise risk of hidden water damage and insurance complications.
A thorough replacement minimizes repeat work, long-term maintenance, and liability compared with repeated spot fixes.
Selling a home with polybutylene disclosure and remediation options
Following repeated leaks and a decision to pursue full replacement rather than spot repairs, sellers face specific disclosure obligations and market choices when polybutylene is present.
Sellers must disclose known issues, provide documentation of repairs or replacements, and may offer price reductions, escrow holds, or contractor credits.
Full replacement often increases buyer confidence and saleability; partial fixes can limit offers and prolong negotiation.
Summary Action Plan for Homeowners
When a polybutylene leak is found, the homeowner should immediately shut off the main water supply, contain any water, and document the damage for insurance.
Next steps include applying a temporary repair to stop active leaks while evaluating whether a full replacement is warranted.
Finally, a clear checklist for scheduling and overseeing a repipe—gathering estimates, verifying contractor credentials, and setting a timeline—helps guarantee the long-term solution is executed properly.
Immediate steps to take when a leak is discovered
Shut off the main water supply and power to nearby appliances, then assess visible damage and contain the leak with buckets or towels while protecting valuables and electrical items.
Next, document the leak with photos, note the pipe location and leak size, and move furniture away.
Call a licensed plumber for assessment, inform the insurer if damage is significant, and avoid using affected fixtures.
Short-term repairs vs planning for replacement
Although short-term fixes can stop a leak and limit damage, homeowners should treat them as temporary measures while planning a full polybutylene replacement.
Quick repairs (clamps, epoxy, or push-fit couplings) buy time but do not address the underlying material failure, so a clear timeline, budget estimate, and contractor selection process should be set in motion immediately.
Prioritize safety, document repairs, and allocate contingency funds.
Checklist for scheduling and overseeing a repipe project
After arranging immediate repairs and establishing a replacement timeline, homeowners should follow a concise checklist to schedule and oversee the repipe.
Verify contractor licenses and insurance, obtain multiple bids, confirm materials and scope, agree on start/end dates, demand a written contract and payment schedule, plan access and temporary water, secure permits, arrange inspections, document progress, and retain warranties and final invoices for records.
Conclusion
Like a weathered bridge that can be patched for storms but not trusted indefinitely, polybutylene plumbing requires pragmatic decisions. Homeowners should weigh immediate fixes against full replacement based on leak severity, pipe condition, cost, and future risk. Emergency patches buy time; professional replacement provides lasting safety. Prioritize qualified plumbers, durable materials, and preventive upkeep to avoid repeat failures and protect home value and occupants’ health over the long term.