How to Remove Mold From Silicone Sealant Quickly and Safely
To quickly and safely remove mold from silicone sealant, start by wearing gloves, eye protection, and a mask, while ensuring proper ventilation. Test any cleaning solution on a hidden area first. Effective options include diluted bleach, 3% hydrogen peroxide, undiluted vinegar, or a baking soda paste. Apply your chosen solution, let it sit, gently scrub with a soft brush, then rinse and dry thoroughly. If stains persist or the sealant is damaged, consider replacing it. Follow these steps for a cleaner, mold-free sealant.
What Causes Mold on Silicone Sealant and Why It Needs Immediate Attention
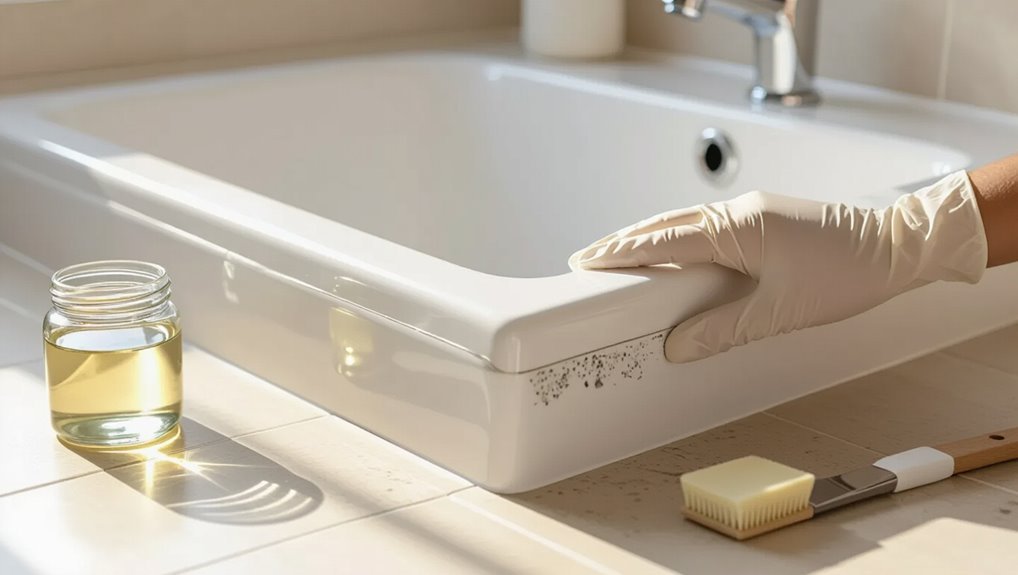
Mold commonly establishes on silicone sealant where moisture, warmth, and organic residue create a suitable environment for spores to colonize.
It poses health risks such as allergic reactions and respiratory irritation, and it can degrade sealant and surrounding fixtures if left unchecked.
When staining, cracking, or persistent regrowth occurs despite cleaning, replacement of the sealant is recommended rather than continued remediation.
How mold grows on silicone sealant
When exposed to moisture, warmth, and organic residues, silicone sealant becomes a prime surface for fungal colonization. Airborne spores settle into microscopic pits and the thin biofilm that forms on aging sealant, where they absorb nutrients and multiply.
Growth accelerates in poorly ventilated areas, aided by soap scum and grime. Understanding this process helps guide how to remove mold from silicone sealant effectively and promptly.
Health risks and damage to fixtures
A dark, spreading stain on silicone sealant signals more than cosmetic decay; it poses respiratory risks—especially for people with asthma, allergies, or weakened immune systems—and can release irritant spores and microbial fragments into indoor air.
Left unchecked, mold degrades sealant elasticity, undermines watertight joints, promotes substrate rot and corrosion, and increases cleaning difficulty and potential for costly repairs.
When to replace sealant instead of cleaning
Persistent staining and loss of elasticity signal that cleaning may no longer suffice; repeated mold growth often indicates underlying sealant failure rather than surface contamination.
Replacement is advised when sealant cracks, pulls away, smells persistently musty, or mold returns within weeks despite proper cleaning.
Substrate deterioration, chronic moisture intrusion, or extensive discoloration also justify full removal and reapplication to restore waterproofing and hygiene.
Quick Safety Precautions Before You Start
Before beginning mold removal, the reader should assemble personal protective equipment including gloves, eye protection, and a suitable respirator.
The work area must be well ventilated and arranged to limit moisture and airborne spores.
Surrounding surfaces and fixtures should be covered or masked to prevent damage from cleaners and dislodged mold.
Personal protective equipment checklist
Wear appropriate personal protective equipment to minimize exposure to mold spores, chemical cleaners, and sharp tools during removal.
Recommended items: N95 or higher respirator, chemical-resistant gloves (nitrile), eye protection (goggles), long-sleeved clothing, disposable coveralls or washable garments, and closed-toe shoes.
Keep a first-aid kit nearby and replace contaminated PPE promptly. Dispose of single-use items safely.
Ventilation and room preparation
Make certain the work area is well-ventilated and isolated from the rest of the home to reduce mold spore and fume spread: open windows, run an exhaust fan or portable air mover, and seal door gaps with tape.
Turn off HVAC to prevent circulation. Remove pets and people. Keep a clear pathway for exiting.
Place a waste container and cleaning supplies nearby to minimize movement.
Protecting surrounding surfaces and fixtures
A few simple precautions will protect tiles, countertops, fixtures, and nearby finishes from chemical splashes, debris, and accidental cuts:
Cover surfaces with plastic sheeting and secure edges with painter’s tape.
Remove or mask hardware and trim.
Place absorbent towels under the work area.
Use a drop cloth to catch debris.
Keep cleaners off grout and metal; rinse promptly if contact occurs.
Fast-Acting Methods to Remove Mold from Silicone Sealant
Several fast-acting options can remove mold from silicone sealant, each with different effectiveness and safety considerations.
Recommended approaches include:
- Bleach solution
- White or distilled vinegar
- Hydrogen peroxide
- Baking soda paste (and commercial cleaners as an alternative)
Selection should match the sealant condition and proper protective measures.
Using household bleach solution
Apply household bleach solution to quickly kill surface mold on silicone sealant, as its active ingredient (sodium hypochlorite) breaks down mold cells and lightens staining.
Use a diluted mix (one part bleach to ten parts water), apply briefly with a sponge, rinse thoroughly, and ventilate the area.
Wear gloves and eye protection; avoid prolonged contact to prevent sealant degradation and respiratory irritation.
Applying white vinegar or distilled vinegar
Following bleach as a potent chemical option, white or distilled vinegar offers a milder, fast-acting alternative for removing surface mold from silicone sealant.
Apply undiluted vinegar in a spray bottle, soak for 30–60 minutes, then scrub gently with a soft brush.
Rinse thoroughly, allow to dry, and repeat if staining persists.
Vinegar is non-toxic and safe for frequent use.
Hydrogen peroxide treatment
Use hydrogen peroxide as a safe, fast-acting oxidizer to break down mold and lighten stains on silicone sealant.
Apply 3% solution in a spray bottle, let sit 10–15 minutes, then scrub gently with a soft brush. Rinse thoroughly and dry.
Repeat if needed.
Wear gloves and guarantee ventilation; avoid mixing with bleach or other cleaners.
Baking soda paste method
Mix baking soda into a thick paste with water to create an abrasive, mildly alkaline cleaner that lifts mold and grime from silicone sealant without harsh chemicals.
Apply paste to affected areas, scrub gently with a soft brush or cloth, let sit 10–15 minutes, then rinse thoroughly.
Repeat for stubborn stains and dry sealant completely to inhibit regrowth.
Commercial mold removers and mildew cleaners (usage and safety)
Choose a commercial mold remover or mildew cleaner formulated for silicone and nonporous surfaces to get fast results without damaging the sealant.
Read labels, follow dilution and contact-time instructions, and test an inconspicuous area first.
Use gloves, eye protection, and adequate ventilation. Avoid mixing chemicals.
Rinse thoroughly and dry. Repeat only if necessary; replace severely deteriorated sealant.
Tools and Supplies You’ll Need
A concise list of essential tools and supplies sets the stage for effective mold removal from silicone sealant.
Recommended brushes, scrapers, and applicators for loosening and extracting mold are described, along with the types of protective gear—gloves, goggles, and masks—and cleanup materials needed.
The following section specifies tool choices and safety items to minimize damage and exposure.
Recommended brushes, scrapers, and applicators
Gathering the right brushes, scrapers, and applicators streamlines mold removal from silicone sealant and reduces the risk of damage to surrounding surfaces.
Recommended tools focus on precision and gentle removal:
- Nylon-bristle toothbrush for scrubbing grooves.
- Soft-bristled grout brush for broader coverage.
- Plastic or silicone scrapers to lift softened sealant.
- Small angled spatula or putty knife for tight corners and edges.
Best protective gear and cleanup materials
Wear appropriate protective gear and prepare cleanup materials before tackling mold on silicone sealant to prevent exposure and contain contaminated debris.
Gloves, eye protection, and an N95 mask reduce inhalation and contact risks. Use disposable rags and a sealable bag for waste.
Follow with ventilation and a mild disinfectant.
- N95 mask
- Chemical-resistant gloves
- Safety goggles
- Disposable rags and bag
Detailed Step-by-Step Cleaning Process for Best Results
The following steps outline a straightforward cleaning routine, starting with surface preparation and an initial wipe to remove loose debris.
Next, the chosen treatment is applied with appropriate dwell time and followed by gentle scrubbing that protects the silicone.
Finally, thorough rinsing, complete drying, and simple post-clean checks guarantee lasting results.
Surface preparation and preliminary cleaning
Begin by clearing the work area of loose items and ensuring adequate ventilation to reduce airborne spores and fumes.
The person dons gloves, eye protection and a mask. They dry-clean visible debris with a soft brush, then wipe surfaces with a mild detergent solution to remove soap scum and grime.
Finally, rinse with clean water and let the area air-dry before treatment.
Applying chosen treatment and dwell times
Select the appropriate cleaning agent for the mold type and surface—commercial mold remover, diluted bleach (no more than 1 cup bleach to 1 gallon water), hydrogen peroxide, or a specialized biocide—and apply it evenly to the silicone using a spray bottle or foam applicator so the sealant is fully wetted without excess runoff.
Allow manufacturer-recommended or conservative dwell times (5–15 minutes), monitoring for color change and avoiding surface drying; reapply if needed.
Scrubbing technique without damaging silicone
After allowing the chosen treatment to dwell and observing any color changes, attention turns to scrubbing the silicone without causing damage.
Use a soft-bristled brush or microfiber pad, working gently along the bead’s length. Apply light, consistent pressure and short strokes to lift mold.
Avoid metal tools, abrasive pads, or harsh scraping. Inspect frequently and stop when stains loosen.
Rinsing, drying, and post-clean steps
Flush the treated silicone thoroughly with clean water to remove residue from cleaners and loosened mold, directing a gentle stream along the bead to avoid pushing contaminants into gaps.
Pat dry with a lint-free cloth, then air-dry fully.
Inspect for remaining stains; repeat targeted cleaning if needed.
Apply a mildew-resistant sealant or mold inhibitor and ventilate the area to prevent recurrence.
When Mold Persists: Repair and Replacement Options
If mold returns after cleaning or the sealant is cracking, discoloring, or losing adhesion, a full removal and replacement should be considered.
Proper removal requires the right tools and solvents to avoid damaging surrounding surfaces while fully stripping old silicone.
When re-caulking, selecting a mold-resistant silicone formulated for the environment and following correct application and tooling techniques guarantees a durable, mildew-resistant seal.
How to assess if sealant needs full removal
When mold returns despite multiple cleanings, determine whether the silicone sealant requires full removal by inspecting the extent of discoloration, testing for softening or crumbling, and checking for underlying substrate damage or persistent odor.
Localized surface staining can often be treated, but widespread penetration, brittle or gummy sealant, or growth beneath the bead indicate replacement is necessary.
Assess surrounding grout, substrate integrity, and recurring moisture sources before deciding.
How to remove old silicone safely (tools and solvents)
Begin removal with a clear plan: gather the right tools (utility knife, silicone scraper or razor blade, needle-nose pliers, stiff brush), protective gear (gloves, eye protection, mask), and appropriate solvents (silicone caulk remover or isopropyl alcohol for softened residue).
Then ventilate the area and isolate adjacent surfaces to protect finishes.
Work methodically: cut bead edges, lift softened silicone with pliers, scrape residue, apply solvent sparingly, and clean with brush and mild detergent.
Re-caulking: choosing the right silicone and application tips
Once the old silicone has been removed and the joint cleaned and dried, attention turns to selecting an appropriate replacement sealant and applying it correctly.
Choose a mildew-resistant, bathroom-grade silicone labeled for wet areas and compatible surfaces.
Use painter’s tape for neat edges, apply a smooth continuous bead, tool it within minutes, and allow full cure per manufacturer instructions before exposing to moisture.
Preventing Mold Recurrence on Silicone Sealant
Preventing mold recurrence on silicone sealant requires controlling dampness through improved ventilation and humidity reduction.
A regular cleaning schedule and simple maintenance—such as wiping seals dry and inspecting for damage—helps interrupt regrowth.
Where appropriate, using antimicrobial silicone or topical treatments can provide added protection.
Improving ventilation and reducing humidity
Improve airflow and control indoor moisture to make the environment inhospitable to mold growth on silicone sealant.
Use exhaust fans in bathrooms and kitchens, open windows when weather permits, and run dehumidifiers to maintain relative humidity below 50%.
Confirm vents and ductwork are unobstructed, repair leaks promptly, and allow surfaces to dry fully after use to discourage mold recurrence.
Regular cleaning schedule and maintenance tips
Establishing a simple, consistent cleaning schedule is the most effective way to keep mold from returning to silicone sealant. A routine prevents buildup and catches stains early.
- Weekly wipe with mild detergent and warm water.
- Monthly inspection for cracks or discoloration.
- Promptly dry areas after use.
- Reapply silicone sealant where gaps or deterioration appear.
Antimicrobial silicone and treatments to consider
Although routine cleaning reduces mold, choosing antimicrobial silicone or applying protective treatments provides an extra layer of defense by inhibiting microbial growth at the sealant surface.
Antimicrobial-grade sealants contain biocides that limit colonization. Additionally, surface coatings or silicone-compatible sprays can add residual protection.
Selection should prioritize labeled longevity, bathroom suitability, and compatibility with existing sealant; follow manufacturer instructions for application and safe handling.
Common Mistakes to Avoid When Cleaning Moldy Sealant
Care should be taken to avoid using metal scrapers, abrasive pads, or strong solvents that can cut or weaken silicone sealant.
Mixing different cleaning agents, especially bleach with ammonia or acids, can create toxic fumes and should be avoided.
If mold has penetrated the sealant or the joint shows signs of failure, full removal and replacement is often necessary rather than repeated surface cleaning.
Damaging silicone by using wrong tools or chemicals
Using abrasive tools or harsh chemicals can permanently damage silicone sealant, turning a repair into a replacement job.
Scrubbing with metal brushes or razor blades tears the surface, allowing moisture and mold to return.
Strong acids or undiluted solvents degrade elasticity, causing cracking and loss of adhesion.
Use soft brushes and manufacturer-approved cleaners to preserve sealant integrity and prolong service life.
Mixing cleaners and dangerous chemical interactions
When mixed, common household cleaners can produce reactions that release toxic gases or create corrosive solutions, posing serious health and material risks.
Users should never combine bleach with ammonia, acids, or alcohols. Even diluted acids reacting with oxidizers generate hazardous fumes and damage sealant or grout.
Proper ventilation, reading labels, and using single-product treatments prevent dangerous interactions and unintended surface degradation.
Skipping full removal when replacement is required
Overlooking the need to remove and replace silicone sealant can leave mold roots and degraded material behind, assuring recurrent growth and wasted cleaning effort.
Attempting surface-only cleaning ignores embedded spores and compromised seal integrity. Proper removal, substrate inspection, thorough drying, and new sealant application assure lasting remediation.
Skipping these steps risks persistent odors, health hazards, and premature failure of repairs.
Quick Comparison of Cleaning Methods and Effectiveness
A concise comparison helps readers weigh effectiveness, safety, speed, and cost when choosing a cleaning method for moldy silicone sealant. The following table summarizes key trade-offs for common approaches. This overview sets up more detailed guidance in later sections.
| Method | Notes |
|---|---|
| Bleach | Highly effective on surface mold; harsh fumes and can discolor; moderate speed; low cost |
| Vinegar | Mildly effective; safer and non-toxic; slower; very low cost |
| Hydrogen Peroxide | Effective and safer than bleach; moderate speed; low cost |
| Commercial Mold Remover | Often fast and effective; variable safety and cost; follow label instructions |
Effectiveness, safety, speed, and cost comparison
Although many options exist for cleaning mold from silicone sealant, they differ markedly in effectiveness, safety, speed, and cost.
Bleach kills mold quickly but can damage sealant and irritate lungs; vinegar is safer and inexpensive but slower and less potent; hydrogen peroxide balances effectiveness and safety at moderate cost; commercial cleaners are fast and reliable but pricier; physical scrubbing is cheap and safe but labor-intensive.
Signs of Successful Remediation and When to Call a Professional
Successful remediation is signaled by the absence of visible mold staining and any musty or chemical odors after the area dries.
Persistent discoloration, recurrent growth within weeks, widespread contamination beyond the sealant, or health symptoms among occupants indicate that over-the-counter treatments were insufficient.
In those scenarios, a professional remediator or contractor should be consulted to assess underlying moisture problems and perform safe, thorough removal.
Visual and odor indicators of thorough cleaning
How can one tell when mold has been removed from silicone sealant?
Visual signs include uniform, stain-free silicone with no black or green specks and intact bead texture.
Odor indicators show absence of musty or damp smells after drying and ventilation.
Residual discoloration, persistent odor, or recurring spots signal incomplete cleaning and may require further assessment.
Scenarios that warrant professional mold remediation or contractors
Clear visual and odor cues can indicate a job well done, but certain situations exceed routine cleaning and call for professional mold remediation or a contractor.
Persistent or widespread growth, recurring mold after repairs, mold inside walls or ceilings, water-source issues, health symptoms among occupants, or large affected areas (>10 square feet) require trained assessment, containment, and remediation to guarantee safety and prevent recurrence.
Conclusion
In summary, addressing mold on silicone sealant invites a gentle reclaiming of the space: what began as harmless discoloration often signals lingering moisture and neglect. Acting promptly with safe, effective methods restores both function and peace of mind, while simple preventive habits hush a return. If stains persist or sealant softens, professional care discreetly steps in to guarantee lasting renewal, preserving the home’s quiet integrity and comfort.