How to Repair a Cracked Toilet Tank: Step-by-Step Fixes, Temporary Patches, and When to Replace
If you have a cracked toilet tank, you need to assess the size, location, and leakage to determine whether to repair or replace it. Start by shutting off the water supply, draining the tank, and containing any drips. For temporary fixes, waterproof tape, epoxy putty, or clamps can provide short-term stability. For permanent repairs, consider using a two-part epoxy or a fiberglass wrap. However, if the crack is large or spreading, replacing the tank or the entire toilet is usually necessary. Costs and efforts will vary based on the method chosen, and further guidance is available for step-by-step procedures and options.
How to Know If a Toilet Tank Crack Needs Repair or Replacement
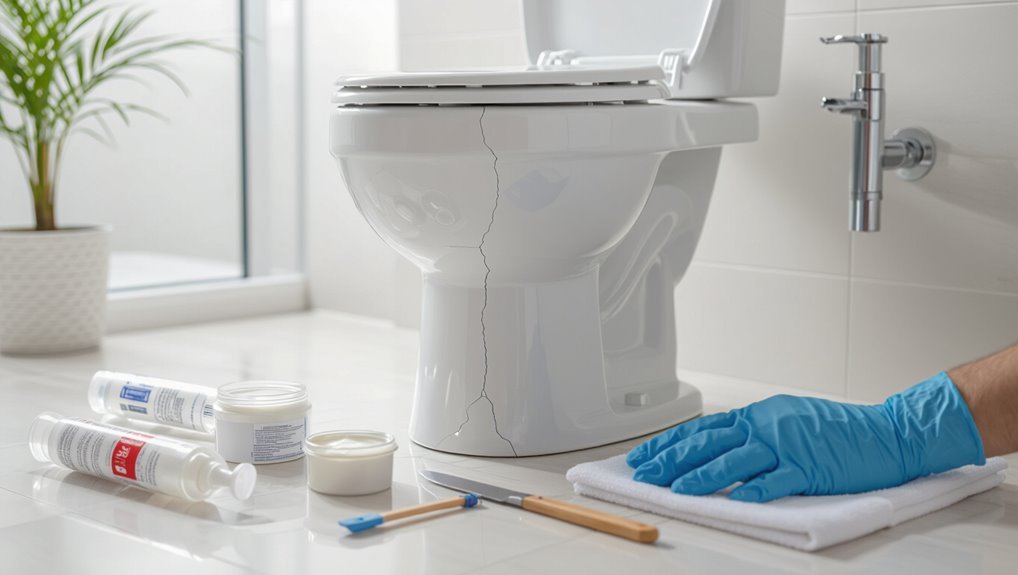
Recognizing whether a cracked toilet tank requires repair or full replacement begins with spotting common signs like unexplained water on the floor, slow leaks, or visible hairline fractures.
Evaluating the crack type—superficial hairline versus structural splits—helps determine if a patch will hold or if the porcelain is compromised.
Safety concerns and potential water damage to flooring or walls should tip the decision toward replacement when leaks are persistent or the crack crosses mounting areas.
Common signs of a cracked toilet tank
How can a homeowner tell when a toilet tank crack requires repair or full replacement?
Visible water on the floor, continuous leaking, slow refills, or staining around the base indicate issues.
Sounds of escaping water, worsening gaps at seams, or loss of internal pressure suggest urgency.
Clear inspection guides decisions about how to repair cracked toilet tank components versus replacing the entire unit.
Types of cracks and what they mean (hairline vs. structural)
After identifying signs that a tank is compromised, the next step is to distinguish the type of crack present: hairline fractures versus structural breaks.
Hairline cracks are thin, superficial hair-like lines often confined to glaze or ceramic surface with minimal leakage risk.
Structural breaks are wider, jagged, or extend through the tank wall, threaten integrity, and often cause persistent leaks or sudden failure requiring decisive action.
When a crack is repairable versus when replacement is safer
When is a cracked toilet tank a fixable nuisance and when is it a safety risk that demands replacement?
Minor hairline cracks that do not leak and are distant from mounting points often respond to epoxy or silicone sealing.
Deep, widening, or rim-adjacent fractures, persistent leaks, or damage affecting bolts or structural integrity indicate replacement is the safer, long-term solution.
Safety and water-damage risks to consider
Although a small hairline fissure may seem harmless, the primary concern is water escape that can cause immediate flooding or slow, hidden damage to surrounding structures.
Assess risks: leaks can rot subflooring, encourage mold, corrode fixtures, and weaken drywall.
Immediate action prevents escalation; isolate water, monitor moisture, and consider replacement when leaks are persistent, extensive, or threaten structural integrity.
Immediate Steps to Take When You Discover a Cracked Tank
Upon discovering a cracked toilet tank, the first step is to shut off the water supply and flush the tank to minimize standing water and prevent flooding.
Next, place towels or a waterproof barrier around the base and on the floor to protect surrounding surfaces while containing any leaks.
Finally, gather essential tools and materials—adjustable wrench, bucket, sponge, waterproof tape or epoxy, and replacement parts—before beginning any temporary or permanent repairs.
How to stop water flow and prevent flooding
Act quickly to minimize water loss and damage by shutting off the toilet’s supply valve and isolating the fixture.
Next, flush to drain the tank and bowl; press the fill valve or lift the float to stop residual flow.
If the valve leaks, close the home’s main water shutoff.
Place a bucket under connections, and monitor for continued seepage while arranging repairs.
Temporary emergency measures to protect flooring and surrounding areas
Several quick steps can limit water damage to floors and adjacent areas after a cracked toilet tank is found: place absorbent towels or old rags around the base, use a shallow pan to catch drips, lift rugs and move furniture away, elevate wooden items, and block runoff with rolled towels.
If water spreads, mop and dry promptly to prevent staining and warping.
Tools and materials to gather before repair
After containing immediate leaks and protecting nearby items, attention turns to assembling the tools and materials needed for repair.
Gather rubber gloves, eye protection, adjustable wrench, screwdriver, utility knife, clean rags, sandpaper, and a putty knife.
Select appropriate repair products: epoxy putty formulated for porcelain, plumber’s silicone sealant, and replacement tank bolts or gasket kits.
A bucket and towel complete the set.
Temporary Patch Options (Short-Term Fixes)
Temporary, short-term fixes can stop leaks and buy time before a permanent repair or replacement is completed.
The following options explain practical patching methods, brief application steps, and when to resort to bypassing the tank entirely. Each method is designed only as a stopgap and should be followed by a proper repair plan.
- Waterproof tape and silicone patches: how to apply
- Epoxy putty temporary patch: step-by-step
- Plastic brace or clamp methods for hairline cracks
- When to use a bucket or shut-off valve as a temporary workaround
Waterproof tape and silicone patches how to apply
Apply waterproof tape or silicone patches only as a short-term measure to stop small leaks and buy time before a proper repair or replacement.
Clean and dry the tank surface thoroughly, roughen enamel gently for adhesion, then apply tape firmly or press a cured silicone patch over the crack, smoothing edges to seal.
Monitor for continued leakage and arrange permanent repair promptly.
Epoxy putty temporary patch step-by-step
If waterproof tape or silicone patches provide only a short reprieve, epoxy putty offers a stronger temporary patch that can bond to porcelain and resist water pressure for several days to weeks.
Surfaces must be dry and clean; knead putty to uniform color, press into the crack, smooth edges, and allow full cure per instructions.
Test for leaks before refilling the tank.
Plastic brace or clamp methods for hairline cracks
Reinforce hairline cracks with a plastic brace or clamp designed to hold porcelain edges together until a permanent repair can be made.
Select a non‑marring clamp sized for the tank, pad contact points, and tighten gradually to close the crack without over‑stressing porcelain.
Monitor for leaks, replace padding if compressed, and treat this strictly as a short‑term stabilizer pending epoxy repair or full tank replacement.
When to use a bucket or shut-off valve as a temporary workaround
After stabilizing a hairline crack with a brace or clamp, a temporary workaround such as a shut-off valve or a bucket can control water flow until a permanent repair is made.
Use the shut-off valve when the crack leaks slowly and the fixture must remain usable; employ a bucket when leaks are intermittent or the valve is inaccessible.
Both are short-term, monitoring required.
Permanent Repair Methods
Permanent repairs prioritize durability and proper preparation to guarantee a lasting fix.
The discussion covers surface prep and crack marking, epoxy and fiberglass techniques, liner replacement where applicable, and final sealing and testing.
Clear steps and cure times are emphasized to guide safe, effective restoration.
- Preparing the tank: draining, cleaning, and marking the crack
- Two-part epoxy for ceramic/porcelain tanks: materials and cure time
- Fiberglass-reinforced repair: when and how to use it
- Replacing the inner tank liner and re-sealing/testing after repair
Preparing the tank: draining, cleaning, and marking the crack
Begin by shutting off the water supply and flushing the toilet until the tank is empty to eliminate pressure and residual water.
Remove remaining moisture with a sponge and towel, then detach the tank lid and set it aside safely.
Clean the crack and surrounding area with mild detergent, rinse and dry.
Use a pencil or washable marker to outline the crack for accurate repair alignment.
Using two-part epoxy for ceramic/porcelain tanks materials and cure time
Select a high-quality two-part epoxy formulated for ceramic or porcelain repair, ensuring it is waterproof and rated for potable-water contact if the tank will hold water.
Gather epoxy resin and hardener, mixing tools, fine applicator, and disposable gloves.
Clean, dry, and abrade the area lightly.
Apply mixed epoxy into the crack, smooth flush, and allow full cure per manufacturer instructions—typically 24–72 hours—before refilling.
Fiberglass-reinforced repair method when and how to use it
If two-part epoxy alone may not restore structural integrity for larger or stress-prone fractures, a fiberglass-reinforced repair provides added strength and longevity.
The method layers fiberglass cloth saturated with epoxy over a cleaned, dried crack, extending beyond damage for load distribution.
Once cured, sand and paint or glaze to match.
Suitable for non-porous tank exteriors; guarantee watertight seal and follow safety precautions.
Replacing the inner tank liner (for toilet models with removable liners)
For toilet models designed with removable inner liners, replacing the liner offers a permanent, factory-level solution when cracks compromise the tank’s structural integrity or watertightness.
Technician removes tank hardware, detaches the old liner, and fits a manufacturer-approved replacement, ensuring alignment of flush mechanisms and inlet/outlet ports.
This restores original specifications; use model-specific parts and follow manufacturer torque and clearance guidelines.
Re-sealing and testing after repair
Begin by thoroughly cleaning and drying the repaired area to guarantee proper adhesion of sealing materials: remove old sealant, dust, and residue with a non-abrasive cleaner and allow full evaporation.
Apply appropriate epoxy or silicone sealant per manufacturer instructions, smoothing joints and overlaps.
Cure fully, refill the tank, inspect for leaks during several flush cycles, and retighten fittings as needed.
Replacing a Toilet Tank or Entire Toilet: When and How
When repair is impractical or recurring leaks, extensive damage, or obsolescence are present, replacement becomes the recommended course.
The discussion covers how to select a compatible replacement tank or a full toilet, a clear step-by-step removal and installation process, and a straightforward cost comparison of repair versus partial or full replacement.
Practical guidance and decision criteria help determine whether to replace just the tank or the entire fixture.
Signs replacement is the best option
How can a homeowner tell if a cracked toilet tank warrants repair or full replacement?
Persistent leaks, large or spreading cracks, structural instability, internal component corrosion, repeated repairs, or chronic mold and water damage indicate replacement.
If the bowl and tank are mismatched, or parts are obsolete and unavailable, replacing the tank or entire toilet is usually more reliable, cost-effective, and safer long-term than continued patching.
Choosing a compatible replacement tank or full toilet
Select a compatible replacement by matching the tank’s mounting layout, bolt spacing, flush valve size, and water line location to the existing bowl or by choosing a complete toilet that fits the bathroom’s rough-in dimensions, style, and flushing requirements.
Verify flange height, trapway type, and bowl compatibility.
Consider water usage, ADA or comfort-height needs, material finish, and manufacturer warranty before purchasing to guarantee proper fit and performance.
Step-by-step guide to removing and installing a replacement tank
Begin by shutting off the water at the shutoff valve and flushing the toilet to drain the tank.
Then sponge out remaining water and disconnect the refill line and supply tube; this prepares the fixture for safe removal without leaking.
Remove tank-to-bowl bolts, lift off tank with a helper, replace gasket and bolts, set new tank, hand-tighten bolts evenly, reconnect supply, turn on water, and test for leaks.
Cost comparison: repair vs. partial replacement vs. full replacement
While a visible crack might suggest an immediate fix, decisions between repairing a tank, replacing just the tank, or installing an entirely new toilet should be driven by cost, age, and long-term reliability; repair often costs the least up front but may be short lived, tank-only replacement adds moderate expense with improved parts and warranty, and full toilet replacement carries the highest initial cost yet can eliminate recurrent problems and offer water-efficiency gains that offset expenses over time.
| Option | Typical cost/benefit |
|---|---|
| Repair | Low cost, short term |
| Tank replacement | Moderate cost, better warranty |
| Full replacement | High cost, long-term savings |
| Recommendation | Choose by age, leak severity, efficiency |
Materials, Tools, and Products Recommended
The section outlines recommended repair kits, epoxies, tub-safe silicones, and specialized tapes that are suitable for sealing or reinforcing cracked toilet tanks.
It also provides a concise tools checklist for common DIY fixes, including cleaners, sandpaper, applicators, and basic plumbing tools.
Finally, guidance is given on warning signs and situations when a professional plumber should be called.
List of repair kits, epoxies, silicones, and tapes suitable for tanks
A concise, purpose-focused list of materials helps homeowners and technicians choose the right repair path for a cracked toilet tank.
Recommended products focus on adhesion, water resistance, and ceramic compatibility.
- Two-part marine epoxy (clear, waterproof, food-safe options).
- Silicone sealant rated for bathrooms and ceramics (mold-resistant).
- Porcelain repair kits with pigment and filler.
- Waterproof PVC/duct tape or emergency tank repair tape for temporary patches.
Tools checklist for DIY repairs
After selecting appropriate repair materials like epoxy, silicone, or a porcelain kit, attention shifts to the tools that make a safe, durable repair possible.
The DIYer needs concise, reliable gear to prepare, apply, and finish the patch without causing further damage.
- Safety gloves, goggles, and mask
- Sandpaper and scraper
- Mixing sticks, spreader, and disposable tray
- Adjustable wrench and plumber’s tape
When to call a professional plumber
When should a homeowner escalate a cracked toilet tank repair to a licensed plumber?
A professional is advised for extensive fractures, internal hairline cracks leaking continuously, structural tank failure, recurring seal or flush valve problems, or unknown water damage to floors/walls.
They provide diagnostic tools, replacement tanks, bolted coupling kits, and certified installation ensuring code compliance, reliable seals, and warranty-backed repairs.
Troubleshooting and Preventing Future Cracks
Common causes of repair failure include improper surface preparation, using the wrong adhesive, and neglecting mounting hardware. These should be addressed to guarantee lasting results.
Routine maintenance—monitoring water quality, tightening or replacing corroded tank bolts, and advising proper seat use—reduces stress on the tank and the chance of new cracks.
After a repair, periodic inspections for hairline fractures, leaks, and seal integrity will catch problems early and guide timely follow-up.
Common repair failures and how to avoid them
Mistakes during repair often stem from misdiagnosis, improper materials, or rushed techniques, and recognizing these patterns helps prevent repeat failures.
Common failures include using incompatible sealants, ignoring structural cracks, poor surface preparation, and overtightening fittings.
To avoid them, confirm crack type, select rated adhesives, clean and dry surfaces thoroughly, follow cure times, and test gently before full use to guarantee a durable repair.
Maintenance tips to prevent tank cracking (water quality, tank bolts, and seat usage)
After addressing repair failures and their causes, attention shifts to preventative maintenance to reduce the risk of future tank cracks.
Regular water testing and softening prevent mineral buildup and brittle glaze.
Inspect and replace corroded tank bolts and washers to avoid stress points.
Advise gentle toilet seat use and proper installation to prevent localized impacts.
Schedule periodic visual checks for hairline damage.
How to monitor repaired tanks over time
Regular, scheduled inspections help guarantee a repaired toilet tank remains sound and any developing issues are caught early.
Inspect for hairline leaks, dampness, stains, and new cracks monthly.
Verify bolt tightness and gasket condition, monitor refill behavior and water level, and note noises or movement.
Record observations and act on changes promptly to prevent recurrence or escalation requiring replacement.
Estimated Time, Difficulty, and Cost for Each Repair Option
This section summarizes expected time and skill requirements for common repair options in a quick-reference format.
It also outlines typical cost ranges for DIY fixes versus hiring a professional, highlighting where savings or added expense usually occur.
Readers can use the comparison to choose the approach that matches their ability and budget.
Quick-reference comparison of time and skill level
When evaluating repair options for a cracked toilet tank, homeowners should quickly compare estimated time, required skill level, and likely cost to choose the most appropriate approach. Below is a concise quick-reference to guide decisions, balancing urgency and ability.
| Option | Time | Skill |
|---|---|---|
| Epoxy patch | 30–60 min | Low |
| Fiberglass wrap | 1–2 hrs | Moderate |
| Tank replacement | 2–4 hrs | High |
| Call pro | Varies | Professional |
Typical cost ranges for DIY vs. professional repairs
After comparing time and skill for each repair, cost becomes the deciding factor for many homeowners; typical ranges differ sharply between DIY approaches and hiring a professional.
DIY patch kits and epoxy typically cost $10–$40 and take 30–90 minutes for moderate skill.
Replacing a tank or hiring a plumber ranges $150–$450+, with 1–3 hours labor and higher skill and warranty benefits.
Photo Guide and Visual Indicators
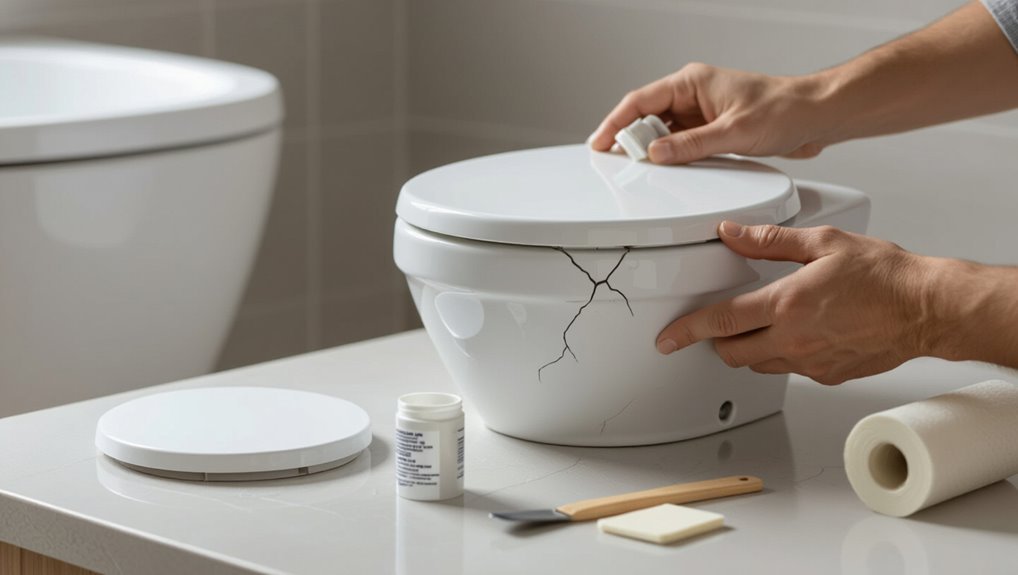
Photographs illustrate common crack types and key stages of each repair method to help readers recognize what they are facing.
Close-up images highlight hairline fractures, through-cracks, and stress lines so the appropriate fix can be chosen.
Before-and-after examples demonstrate expected results and help set realistic expectations for workmanship and appearance.
Images to identify crack types and repair steps
How can images clarify the type and severity of a toilet tank crack?
Photographs and close-ups distinguish hairline, surface, structural, and hidden cracks, showing length, width, and leak paths.
Annotated images indicate repair steps: cleaning, epoxy application, reinforcement, or replacement zones.
Visual cues—moisture, staining, and porcelain displacement—guide prioritization and safety precautions before attempting fixes.
Before-and-after repair examples
Several clear before-and-after photo pairs illustrate typical outcomes of toilet tank repairs, showing the original defect, the repair process, and the finished result.
Captions note crack type, materials used (epoxy, silicone, patch kit), cure time, and water-test outcome.
Close-ups highlight sealed seams and internal reinforcement.
Visual indicators include absence of hairline leaks, consistent flush performance, and no staining or mineral lines post-repair.
Conclusion
Careful consideration clarifies whether a cracked cistern can continue; quick containment, cautious caulking, and competent clamping create calm. Temporary tapes, thoughtful epoxy, and patient patching provide short-term protection, while prudent professional replacement prevents persistent problems. Maintenance-minded measures — mindful mounting, moderated maneuvers, and minor mindful monitoring — minimize mishaps. Ultimately, sensible selection of skills, supplies, and solutions secures sustained service, saving stress, spare cash, and significant structural sacrifice.