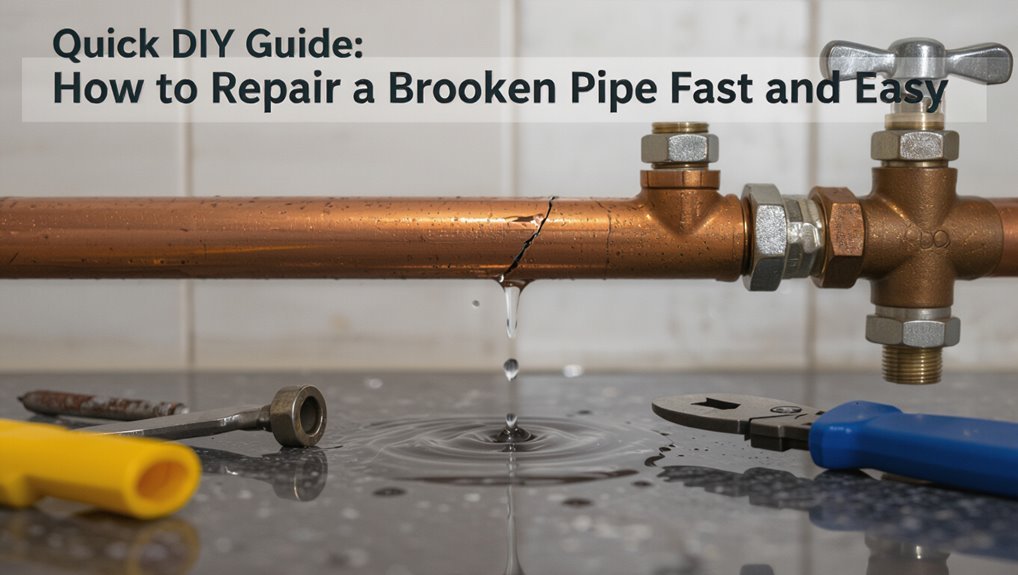
Quick DIY Guide: How to Repair a Broken Pipe Fast and Easy
When a pipe breaks, quickly shut off the main water valve and open nearby faucets to relieve pressure. If water reaches electrical outlets, turn off the power and avoid standing water near any electrical panels. Remove rugs and electronics from the area, take photos of the damage for insurance purposes, and use towels, a wet/dry vacuum, or buckets to contain any leaking water. Identify the pipe material—copper, PVC, or PEX—to ensure you use compatible repair patches. For a temporary fix, apply a clamp, epoxy putty, or a rubber-and-hose-clamp solution. Plan for a permanent repair by gathering the appropriate fittings and tools; further practical steps will follow.
What to Do First When a Pipe Bursts
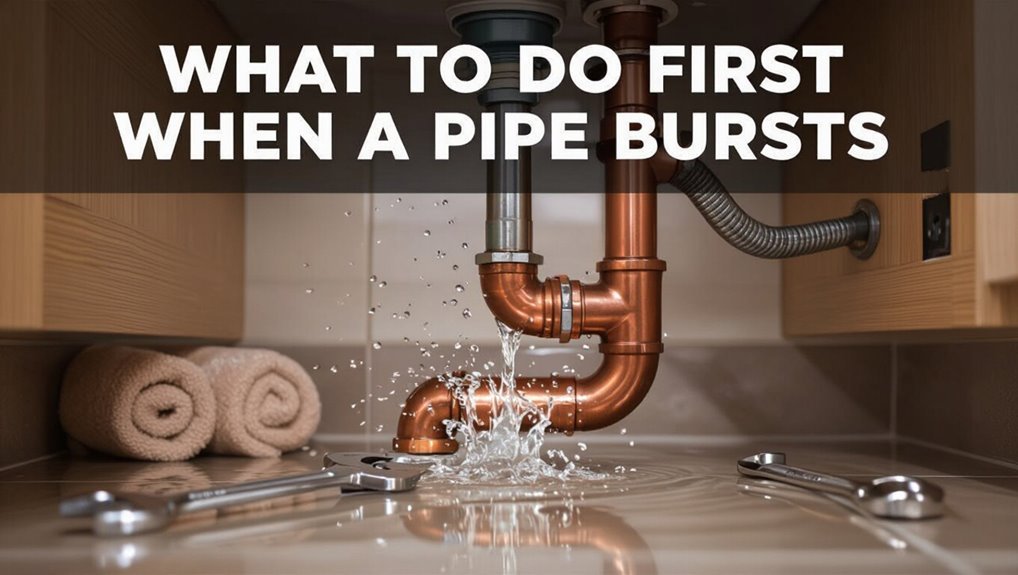
At the first sign of a burst pipe, shut off the main water valve immediately to stop additional flooding.
The observer assesses visible damage, noting location, flow rate, and affected fixtures without entering electrical hazard zones.
Water removal begins with towels, buckets, and a wet vacuum if available, prioritizing safety and preventing structural soak.
Valves to individual fixtures are closed to isolate the section if possible.
Photographs document damage for repair planning and insurance.
Temporary containment—placing pans under drips and redirecting flow with hoses—limits spread.
Professional help is summoned when leaks exceed simple temporary fixes or when hidden damage is suspected.
Shut Off Your Home Water Supply Fast
Locate and close the main shutoff valve immediately to stop water flow and limit damage. The homeowner checks the valve location—basement, crawlspace, or near the water meter—then turns it clockwise or uses pliers if stiff. After closing, open faucets to drain remaining water and verify flow stopped. Notify household members and record valve condition for repair needs.
| Location | Valve type | Action |
|---|---|---|
| Basement | Gate valve | Turn clockwise |
| Meter box | Ball valve | Quarter-turn |
| Crawlspace | Gate valve | Use wrench |
Cut Power Safely Near a Leaking Pipe
Before working near a leaking pipe, cut power to any nearby circuits to prevent electrocution and electrical fires.
The homeowner locates the main breaker or individual circuit breakers serving the affected area and switches them off. If unsure which breakers control the space, turn off the main breaker.
Use a noncontact voltage tester to confirm power is absent at outlets, switches, and fixtures before approaching the leak. Post a visible note to warn others and keep the breaker panel closed.
If the panel is wet or damaged, avoid touching it and call a qualified electrician immediately for safe de-energization.
Contain Water: Floors, Rugs, and Valuables
With a leaking pipe, the immediate priority is to confine water to the smallest area possible to limit damage.
The person moves rugs, shoes, papers, electronics and furniture away from the spread, lifting items to higher, dry surfaces.
They place waterproof barriers—plastic sheeting or trash bags—under affected zones and use towels or a wet/dry vacuum to remove pooling water.
Hardwood and laminate surfaces are wiped and raised with blocks to allow airflow.
Area rugs are hung to dry or taken outside.
Valuables are inventoried, photographed for insurance, and stored in a dry container until repairs and drying are complete.
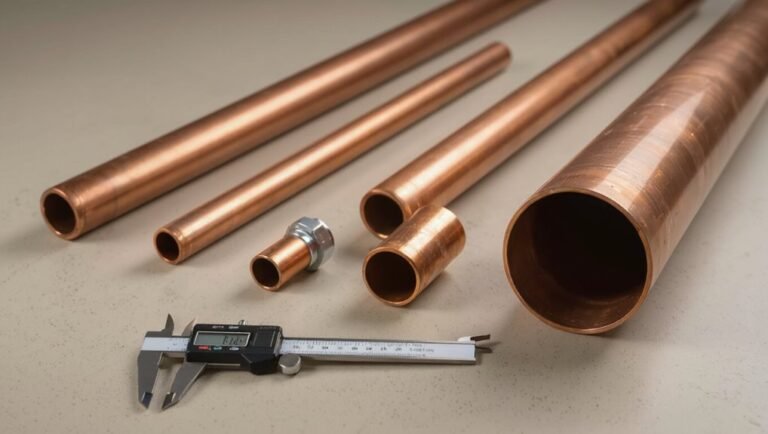
Identify Pipe Type Quickly: Copper, PVC, or PEX?
A quick inspection of visual clues and color helps distinguish copper (reddish-brown), PVC (white or gray rigid plastic), and PEX (often red, blue, or white flexible tubing).
Feeling the pipe for rigidity or flexibility provides an immediate confirmation.
Examining the joints and fittings—soldered copper, glued PVC solvent joints, or crimped/expansion PEX connections—identifies the system definitively.
Visual Clues And Color
Many homeowners can identify pipe materials quickly by noting basic visual cues: copper presents a metallic reddish-brown, PVC is smooth and white or gray, and PEX appears flexible and comes in solid colors (red, blue, or white) often marked with manufacturer printing. Visual markers help determine fittings and appropriate repair parts. Look for solder joints and tarnish on copper, molded seams and glued joints on PVC, and printed codes or ridges on PEX. Surface condition—corrosion, cracking, or UV discoloration—indicates age and urgency. Use visual evidence to choose compatible connectors and replacement sections.
| Feature | What to look for |
|---|---|
| Copper | Reddish-brown, solder joints |
| PVC | Smooth white/gray, glued seams |
| PEX | Colored tubing, printed codes |
Touch And Flexibility
Visual cues alone do not tell the whole story; touch and flexibility offer quick, reliable confirmation of pipe type.
Copper feels cool, rigid, and metallic; it resists bending and emits a faint ringing when tapped.
PVC is smooth, lightweight, and hard plastic; it bends minimally and feels warmer to the touch than metal.
PEX is noticeably flexible and slightly rubbery; it can be bent by hand in small radii and springs back without cracking.
Gloves may obscure subtle differences, so bare or thin-gloved fingers accelerate identification.
Combined with weight and sound, tactile assessment speeds accurate, safe material recognition.
Joint And Fitting Types
For identifying copper, PVC, or PEX quickly, the shapes and attachment methods of joints and fittings provide clear, reliable clues.
Copper uses soldered or compression fittings—smooth, metallic joints with visible solder beads or threaded nuts.
PVC displays solvent-welded joints: plastic fittings glued into place with a slightly bulbous changeover and often white or gray coloring.
PEX employs crimp, clamp, or push-fit fittings: plastic or brass fittings with distinct rings or collars and minimal surface changeover.
Push-fit connectors work across types but look different by material.
Visual inspection of joint style, presence of adhesive, solder, or crimp rings identifies pipe material fast.
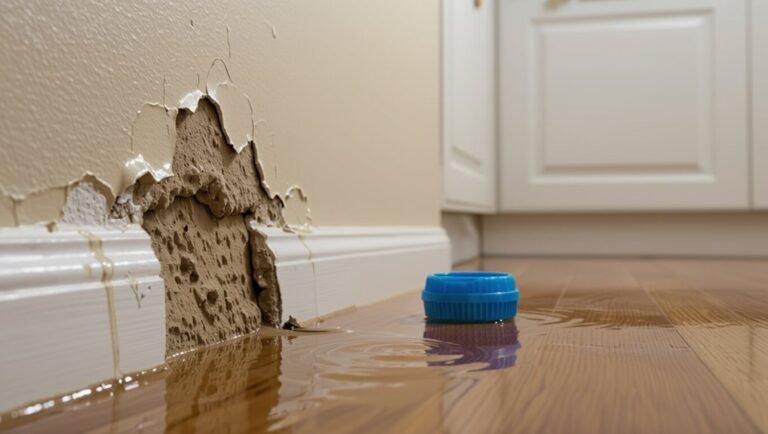
Find Hidden Leaks in Walls, Ceilings, and Floors
Hidden leaks often show themselves as water stains on walls, ceilings, or floors and should be inspected promptly.
A musty or moldy odor can help locate damp areas not yet visible to the eye.
Moisture meter sensors provide a precise way to confirm and map wet spots before opening surfaces.
Check Visible Water Stains
Often overlooked, water stains on walls, ceilings, and floors serve as the most direct indicator of an active or past leak; detecting their location, size, color, and pattern helps pinpoint the affected pipe or fixture and guides further inspection.
Inspect edges for spreading, note concentric rings that suggest chronic seepage, and compare stain color—yellowing often signals older damage, dark brown indicates prolonged saturation.
Measure softness or warping in adjacent surfaces; softened drywall, buckling floorboards, or peeling paint identify compromised material needing replacement.
Photograph and mark stains, then trace plumbing lines above and behind the area to locate likely leak sources before cutting access.
Detect Dampness With Smell
After locating visible stains, attention should shift to odors that betray moisture behind walls, ceilings, and floors.
A musty, earthy, or sour smell often indicates hidden dampness and possible mold growth.
Systematically walk rooms, close doors, and sniff near baseboards, vents, closets, and attic entries.
Pay special attention after rain or high humidity; odors may intensify then.
Compare scent strength between adjacent spaces to narrow the source.
If an unusual chemical or sewage smell appears, prioritize safety and ventilation.
Document locations and intensity for targeted inspection and for professionals if the source remains unclear or persistent.
Use Moisture Meter Sensors
A handheld moisture meter provides a quick, objective way to detect elevated water content behind walls, ceilings, and floors without tearing materials apart. The user scans suspect areas, compares readings to baseline dry values, and maps hotspots for targeted access. Pin meters measure direct conductivity; non‑invasive models sense moisture through surfaces. Calibrate per material, note ambient humidity, and mark readings for repair planning. Results guide whether to cut drywall, dry cavities, or call a pro. Record locations to monitor progress during drying and after pipe repair to confirm remediation success.
| Meter type | Best for |
|---|---|
| Pin | Precise core moisture |
| Non‑invasive | Quick surface mapping |
When to Call a Plumber (Vs. DIY)
When a leak is small and accessible, a homeowner may handle the repair with basic tools and parts. However, professional intervention is advisable if water flow cannot be stopped, pipes are corroded or hidden in walls/floors, multiple leaks exist, or sewage is involved.
Call a plumber for gas-line proximity, frozen or burst mains, or when water damage is extensive and structural risk appears. Uncertain diagnoses, persistent low water pressure, or failed temporary fixes also warrant a pro.
Licensed technicians guarantee code compliance, reliable permanent repair, and mitigation of mold and secondary damage that DIY attempts might overlook.
Tools You Must Have for Fast Pipe Repairs
For rapid, effective pipe repairs, homeowners should assemble a compact kit of essential tools and materials that address the most common leaks and fast fixes.
A reliable adjustable wrench and a pair of channel-lock pliers allow secure gripping and nut removal.
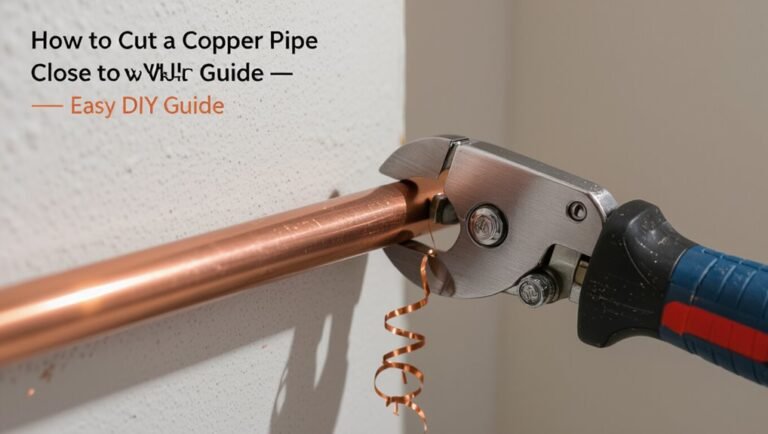
A pipe cutter or hacksaw provides clean cuts on copper, PVC, or PEX.
A tubing reamer and deburring tool prepare ends for fittings.
A roll of plumber’s tape prevents thread leaks.
A compact flashlight and work gloves improve visibility and safety.
A battery-powered leak detector or moisture meter helps locate hidden drips.
A small tool bag keeps items organized.
Essential Materials and Quick Temporary Fixes
The section lists the basic tools and materials commonly kept on hand for pipe repairs, such as tape, epoxy, clamps, and replacement fittings.
It then outlines quick temporary patch methods—wrapping with rubber and hose clamps, using epoxy putty, or applying repair tape—that can stop leaks until a permanent fix is made.
The goal is to match each common leak scenario with the fastest, safest temporary solution.
Tools And Materials
Against a ticking clock, preparing the right tools and materials determines whether a broken pipe repair is effective or merely temporary.
The checklist should include adjustable wrench, pipe cutter or hacksaw, emery cloth or sandpaper, plumber’s tape, pipe joint compound, appropriate replacement pipe or coupling, and a bucket to catch water.
Protective gloves and safety glasses are essential.
For soldered joints, a propane torch and lead-free solder are required.
For plastic pipes, solvent cement or push-fit fittings work.
A flashlight and towel aid visibility and cleanup.
Having proper, quality items reduces mistakes and speeds shift from emergency fix to lasting repair.
Temporary Patch Methods
Having assembled the listed tools and materials, attention shifts to quick temporary patch methods that stop leaks until a permanent repair can be made.
Clean and dry the area, then apply epoxy putty, kneading until uniform and pressing it over the breach; it cures quickly and resists water.
For small pinholes, wrap self-fusing silicone tape tightly, stretching as it overlaps to create a waterproof seal.
Hose clamps plus rubber from an old inner tube make a durable clamp patch for larger cracks.
Make sure water is shut off and test for leaks after curing; these measures are stopgaps until professional repair or replacement.
Use a Pipe-Repair Clamp: Step-by-Step
Begin by shutting off the water supply and relieving pressure in the pipe before fitting a repair clamp; this guarantees a safer, drier work area and prevents further leakage.
Inspect the damaged section, clean and dry the surface, and remove loose debris or corrosion.
Select a clamp sized to fully cover the leak and align its gasket over the breach.
Position the clamp halves around the pipe, seat the gasket evenly, and tighten bolts incrementally in a crisscross pattern to guarantee uniform compression.
After installation, restore water slowly, check for leaks, and retighten if necessary.
Replace the clamp with a permanent repair when feasible.
Wrap a Leaking Joint With Epoxy Putty
When a threaded or soldered joint starts to weep, wrapping it with epoxy putty provides a fast, water-resistant temporary seal while a permanent repair is planned.
Surfaces are dried and cleaned of corrosion, oil, and loose debris. The putty is kneaded until uniform and pliable, then pressed firmly over the leak, extending onto sound pipe on both sides to secure adhesion. Smooth and compress the edges to eliminate voids.
Allow the recommended cure time before restoring pressure. The repair is temporary; inspect periodically and replace the joint or fitting with a proper mechanical or soldered repair as soon as feasible.
Stop a Pinhole Leak With Rubber & Hose Clamps
For a small pinhole leak in a copper or plastic pipe, a short-term fix using a piece of rubber and one or two hose clamps provides a quick, watertight seal until a permanent repair can be made.
The area should be dried and cleaned; a strip cut from an inner tube or heavy rubber gasket is ideal. Center the rubber over the hole, then place a hose clamp on each side and tighten evenly until the leak stops.
Check for drips and avoid over-tightening which can damage the pipe.
This method is temporary; schedule a proper replacement or professional repair soon.
Solder a Copper Pipe Repair Safely
After shutting off the water and draining the line, the repairer prepares to solder a copper joint by cleaning the pipe and fitting thoroughly, fluxing the surfaces, and arranging a safe work area free of combustibles.
Wearing eye protection and heat-resistant gloves, the repairer supports the joint, applies a propane torch evenly until flux sizzles, and feeds lead-free solder to the heated seam, allowing capillary action to draw metal into the gap.
After cooling, excess flux is wiped away and the joint inspected for continuous fillet and full penetration.
Finally, the supply is restored slowly while checking for leaks and secure connections.
Replace a Short PVC Section With Solvent Weld
With the water shut off and the damaged section removed, the technician measures and cuts a replacement PVC piece to length, ensuring square ends and a slight chamfer to aid insertion.
Dry-fit the new piece with appropriate couplings, confirming alignment and gap for solvent.
Clean mating surfaces with PVC cleaner, then apply primer where required.
Spread solvent cement evenly on pipe and fitting, insert quickly with a quarter-turn to distribute adhesive, and hold for the manufacturer’s set time.
Wipe excess cement, allow full cure per instructions before restoring water, and check joints for leaks under normal pressure.
Cut and Join PEX With Crimp or Push-Fit
A technician preparing to join PEX selects either crimp fittings with copper rings or push-fit couplings based on tools available and access constraints.
For crimp, the PEX is cut square, deburred lightly, and a ring slid onto the pipe before inserting the fitting fully. A calibrated crimp tool compresses the ring evenly; excess ring deformation indicates rework.
For push-fit, the pipe end must be clean, straight, and inserted to the shoulder until felt resistance confirms engagement; marking depth assures correct seating.
Both methods require pressure testing after assembly and trimming or replacement if leaks appear.
Use SharkBite/Push-Fit Couplings for Fast Fixes
Push-fit couplings like SharkBite are chosen for their speed, tool-free installation, and reliable seals on copper, PEX, and CPVC.
Installation typically requires cutting the pipe square, deburring and marking insertion depth, then pushing the coupling onto the pipe until it seats.
These fittings allow a fast, temporary or permanent repair without soldering or glue.
Why Choose Push-Fit
Many homeowners and plumbers now prefer SharkBite-style push-fit couplings because they dramatically reduce repair time and skill required for a secure joint.
They offer reliable seals on copper, PEX, and CPVC without soldering, glue, or special tools, minimizing disruption and permitting immediate pressure testing and return to service.
Durability and code acceptance make them suitable for permanent or emergency repairs.
Fewer mistakes and less prep lower labor costs and anxiety.
For DIYers, the clear visual stop and reusable nature simplify planning and future changes.
- Works with multiple pipe materials
- No heat, flux, or solvents
- Instant pressurization
- Reusable and removable
- Code-listed for many applications
Installation Step Overview
Starting the repair by shutting off water and draining the line guarantees a safe, dry workspace before any fittings are touched.
The installer measures and marks the damaged section, then cuts squarely with a pipe cutter, deburring and cleaning pipe ends.
A push-fit coupling is slid onto one end, aligning piping for straight insertion; the other pipe is pushed into the opposite side until it seats fully.
After seating, the joint is checked for proper engagement and pipe depth via visible markings.
The water is slowly restored while inspecting for leaks.
Final checks confirm a secure, watertight repair and system readiness.
Convert a Temporary Clamp Into a Permanent Repair
With the temporary clamp in place and water flow controlled, attention turns to converting that quick fix into a durable, code-compliant repair.
The writer describes evaluating the clamp site, noting material type and damage extent, then selecting an appropriate permanent solution—sleeve, coupling, or section replacement.
Proper fittings and pressure-rated components are emphasized.
Testing under normal pressure follows installation, and documentation of materials and work for permits or future maintenance is advised.
- Confirm pipe material and compatible repair parts
- Remove clamp only when prepared to install permanent piece
- Use pressure-rated couplings or replace the damaged section
- Tighten and torque per manufacturer specs
- Pressure-test and inspect for leaks
Dry and Prep Pipe Surfaces for Repairs
Before applying a permanent repair, the area around the leak must be thoroughly cleaned to remove debris and residues.
Any rust or corrosion should be removed to expose solid metal and prevent future failure.
Surfaces are then sanded and degreased to guarantee proper adhesion of sealants or patches.
Clean Around The Leak
Around the leak, surfaces must be dried and freed of grime so repair materials can bond reliably.
The area is wiped with a clean cloth, allowed to air or blow-dried, and checked for residual moisture.
Oils, grease, and loose debris are removed without scraping into the breach.
Cleaning products compatible with pipe material are applied sparingly, then rinsed and fully dried.
A dust-free, well-lit workspace reduces contamination during patching.
Once prepared, the pipe is ready for adhesive, tape, or clamp application per manufacturer instructions.
- Use lint-free cloths
- Apply solvent sparingly
- Avoid abrasive scraping
- Inspect for hidden residue
- Work in good light
Remove Rust And Corrosion
Remove loose rust and flaking corrosion from the pipe surface to guarantee repair materials adhere and to reveal any underlying metal damage.
Work with a wire brush or stiff-bristled scraper to remove scale until firm metal shows. For tight spots, use a rotary brush on low speed.
After mechanical removal, blow away particles with compressed air or a dry cloth; avoid introducing moisture.
Inspect exposed metal for pitting, cracks, or thin areas that may need section replacement rather than patching.
Collect and dispose of rust debris properly.
Make sure the pipe is completely dry before proceeding to further surface preparation steps.
Sand And Degrease Surfaces
With loose corrosion cleared and the pipe surface dry, the next step is to sand and degrease to create a clean, profile-ready substrate for repair materials.
The technician sands with medium-grit abrasive to remove remaining scale and create mechanical bite, then wipes with a lint-free cloth.
A solvent or degreaser removes oils, residues, and dust; allowed to evaporate fully.
Surface texture is inspected for uniformity and repeat sanding performed where needed.
Proper preparation guarantees adhesives, epoxies, or patch compounds bond reliably, preventing early failure.
- Use 120–220 grit sandpaper
- Wear gloves and eye protection
- Apply acetone or isopropyl alcohol
- Clean in a circular motion
- Verify dryness before bonding
Working in Tight Spaces and Behind Walls
When accessing a broken pipe behind a wall or in a cramped crawlspace, the technician must plan movements and tool selection to minimize damage and maximize efficiency.
Assess access points, locate shutoffs, and clear debris before cutting. Use compact tools: stubby wrenches, right-angle drills, telescoping mirrors, and flexible shaft cutters.
Protect surroundings with drop cloths and patch panels to preserve finishes. Work methodically: support pipe ends, catch water with absorbent pads, and label removed fittings for accurate reassembly.
Ventilate enclosed spaces, maintain steady lighting, and avoid excessive force that could widen openings or damage nearby wiring and insulation.
Repair a Frozen, Cracked Pipe Safely
Facing a frozen, cracked pipe, the technician first isolates the water supply and assesses the extent of the damage before any heat or cutting is applied.
The frozen section is gently thawed with safe heat sources, avoiding open flames; cracked areas are cleaned, dried, and supported.
Temporary measures such as pipe clamps or rubber sleeves stabilize the breach.
When replacing a segment, compatible materials and correct fittings are used; joints are pressure-tested before restoring full flow.
Disposal of burst remnants follows local codes.
Safety gear and shutoff knowledge minimize risk throughout.
- Use controlled electric heat, not torches
- Support pipe ends before cutting
- Dry thoroughly before adhesives
- Test fittings at low pressure
- Wear gloves and eye protection
Check for Hidden Water Damage After Repair
Technicians should always inspect for hidden water damage after a pipe repair to make certain lingering moisture or structural compromise is identified early. A systematic check limits unseen deterioration: probe drywall, baseboards, insulation, and subflooring for softness, staining, or musty odors; use moisture meters and thermal imaging to detect residual dampness; document findings and mark affected zones; schedule follow-up inspections to confirm drying and stabilization; consult a structural specialist if framing shows compromise.
| Area checked | Indicator |
|---|---|
| Drywall | Soft spots, stains |
| Flooring | Buckling, discoloration |
| Insulation | Wet, compacted |
| Joists | Rot, sagging |
| Cabinets | Swelling, odor |
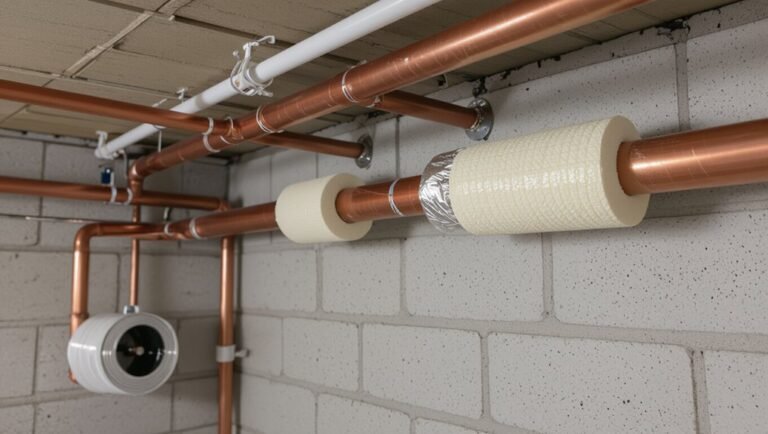
Prevent Mold After a Leak: Drying & Remediation
After a leak repair, prompt and thorough drying is critical to prevent mold growth; remaining moisture in building materials can support colonies within 24–48 hours.
The area should be ventilated, water removed, and wet insulation or drywall assessed.
Use fans and dehumidifiers; monitor moisture levels with a meter.
Porous materials saturated for long periods often require removal.
Cleaning hard surfaces with appropriate antimicrobial solutions reduces spores.
Document conditions and progress for accountability.
- Remove standing water quickly
- Increase airflow with fans and open windows
- Run dehumidifiers until readings are normal
- Replace soaked insulation or drywall
- Clean and disinfect nonporous surfaces
Test Your Repair Before Restoring Full Water Pressure
Once drying and any necessary remediation are complete, the repaired section should be tested under controlled conditions before full system pressure is restored. The technician isolates the section, slowly reintroduces low pressure, inspects joints for leaks, and confirms fittings remain secure. A short soak period reveals hairline leaks. If none appear, pressure is incrementally increased to normal operating levels while monitoring. Any seepage requires tightening or redoing the repair. Document outcomes and note time tested. Only after passing these steps should the system be returned to full service to reduce risk of recurrence and downstream damage.
| Step | Action |
|---|---|
| 1 | Isolate section |
| 2 | Apply low pressure |
| 3 | Inspect joints |
| 4 | Increment pressure |
| 5 | Document results |
Pressure-Test Repaired Sections for Reliability
Carefully pressurizing the repaired section validates its integrity under operational conditions. The technician isolates the segment, applies manufacturer-recommended test pressure, and monitors for pressure decay and visible leaks.
Hold time matches material standards; sudden drops indicate faults. Record readings and inspect joints, fittings, and surrounding areas.
If pressure remains steady, gradually return to normal service while observing.
- Use a calibrated gauge and note baseline pressure
- Maintain test pressure for the specified duration
- Inspect seams and connections with a clean cloth
- Release pressure slowly to avoid shock
- Document results and corrective actions for records
Estimated Cost & Time for Common Pipe Repairs
When planning repairs, estimating cost and time requires evaluating pipe material, access difficulty, damage extent, and required parts, since these factors directly influence labor hours and material expenses. Typical scenarios: small pinhole patches take 15–45 minutes and low-cost clamp or epoxy; joint replacements need 1–3 hours with modest fittings; section replacements vary 2–6 hours depending on walls or crawlspaces; cast-iron or copper work raises costs for specialized tools and disposal. Use the table below for rough ranges.
| Repair type | Typical time & cost |
|---|---|
| Pinhole patch | 15–45 min; $10–$50 |
| Joint repair | 1–3 hr; $50–$200 |
| Section replace | 2–6 hr; $100–$600 |
| Cast-iron/copper | 3–8 hr; $200–$1,200 |
Choose the Fastest Repair Method for Your Leak
Select the fastest repair method by matching the leak’s location, pipe material, and severity to available techniques: temporary clamps or epoxy patches for small pinholes, joint wraps or threaded coupling swaps for accessible fittings, and cut-and-replace sections only when damage is extensive or inaccessible to simpler fixes.
The homeowner assesses access, water pressure, and tools on hand, then chooses the least invasive effective option. Speed favors temporary fixes that stop flow quickly; permanence requires appropriate materials and skill. When unsure, isolate the section and consult professional guidance to avoid worsening damage.
- Match repair to pipe material and access
- Prioritize quick-stop measures for active leaks
- Use proper clamp or epoxy ratings
- Reserve replacement for structural failure
- Prepare correct tools before starting
Avoid 8 Common DIY Pipe-Repair Mistakes
Why do many DIY pipe repairs fail or cause bigger problems? Common errors include misidentifying the leak source, using incorrect materials, skipping surface preparation, and neglecting proper sealing techniques.
Over-tightening fittings, relying on temporary fixes as permanent solutions, and ignoring pressure testing invite recurrence.
Inadequate support or improper alignment stresses joints. Failure to shut off water fully risks contamination and damage.
Each mistake escalates repair complexity, costs, and potential property harm. Recognizing these eight pitfalls — diagnosis, materials, prep, sealing, torque, permanence, testing, and support — helps a DIYer choose correct methods or seek professional help when necessary.
Maintain Repaired Pipes to Prevent Future Leaks
Regularly inspecting and maintaining repaired pipes keeps small issues from becoming major leaks.
A homeowner should check joints, seals, and surrounding areas monthly, feel for moisture, listen for drips, and make sure clamps and tapes remain tight.
Seasonal checks before freezing weather and after heavy use help spot stress.
Simple maintenance extends repair life and prevents water damage.
- Check seals and joints for stiffness or gaps
- Look for corrosion, discoloration, or mineral buildup
- Tighten fittings and replace worn clamps
- Flush lines periodically to clear debris
- Monitor water pressure for sudden changes
Document Damage for Insurance Claims (Photos, Notes)
After completing repairs and routine checks, homeowners should document the original damage and the repair process to support any insurance claims.
Clear photographs capture wide views, close-ups of affected fittings, timestamps, and scale references like a ruler or coin.
Record concise notes: date discovered, suspected cause, steps taken, materials used, and any professional assistance.
Preserve receipts, packaging, and before-and-after images in a dedicated folder or cloud storage with backup.
Label files consistently and maintain a chronological log to streamline insurer review.
Prompt, organized documentation increases claim accuracy and reduces disputes about extent and timeline of damage.
Where to Source Parts Fast: Local Vs. Online
When time is critical, the choice between local and online sources affects repair speed and part compatibility. Local hardware stores and specialty plumbing suppliers can provide immediate pickup or expert guidance, while many retailers and courier services offer same-day delivery for common fittings.
Evaluating part availability, delivery windows, and the need for specialized components helps determine the fastest and most reliable option.
Local Hardware Stores
For quick plumbing repairs, local hardware stores offer immediate access to fittings, pipe sections, and common tools often stocked for same-day pickup. Staff can confirm sizes, recommend compatible materials, and suggest basic repair supplies, saving time versus waiting for shipments.
Shoppers benefit from inspecting parts before purchase and asking about return policies or small-quantity sales. Pricing can be higher than online but is offset by immediacy. Independent stores may carry specialty items for older systems.
Consider calling ahead to confirm stock and bring a sample or measurements for accurate matching.
- Measure pipe diameter and bring a sample
- Ask about material compatibility
- Check return policy
- Inquire on temporary repair kits
- Verify stock before travel
Same-Day Delivery Options
In contrast to a quick trip to a neighborhood hardware store, same-day delivery services bridge the gap between immediate availability and the convenience of online ordering by bringing parts to the doorstep within hours.
These services aggregate inventory from local stores and warehouses, offering filters for brand, size, and compatibility.
Expectations include delivery fees, limited evening slots, and occasional substitution of equivalent parts.
Buyers should verify return policies and installation guidance provided digitally.
For urgent repairs, curated kits and emergency connectors are often prioritized.
Same-day delivery complements, rather than replaces, in-person purchases when speed and specific part matching matter most.
Specialty Plumbing Suppliers
Amid urgent repairs, specialty plumbing suppliers offer a middle ground between big-box convenience and generic online marketplaces: they stock professional-grade fittings, obscure parts, and brand-specific components that general retailers often lack.
They provide knowledgeable staff, immediate availability at local branches, and expedited shipping from niche online vendors. Decision factors include part rarity, time constraints, price, and return policies. For DIYers, verifying part numbers and compatibility before purchase avoids delays. Combining local pickup for emergency items with online specialty orders for rare components balances speed and selection, ensuring repairs proceed without compromising quality or fit.
- Local branches with expert assistance
- Same-day pickup options
- Niche online catalogs and fast shipping
- Warranty and return clarity
- Price comparison for specialty parts
Upgrade Vulnerable Pipes to Reduce Emergencies
Homeowners should identify and replace aging or high-risk pipes—such as galvanized, lead, and corroded steel—to sharply reduce the likelihood of sudden failures and costly water damage.
A targeted upgrade plan prioritizes sections near foundations, under slabs, and in freezing-prone areas.
Modern materials—PEX, CPVC, and copper—offer improved corrosion resistance, flexibility, and longevity; selection depends on local codes and water chemistry.
Professional inspection using camera diagnostics and pressure testing pinpoints weak spots.
Phased replacement minimizes disruption and cost, while documenting upgrades increases property value and simplifies future maintenance planning.
Licensed installation guarantees warranties and code compliance.
Quick Reusable Checklist for Future Pipe Breaks
What steps should be taken immediately and kept on hand for future pipe breaks? A concise reusable checklist guarantees fast, effective response. It lists immediate shutdown actions, basic tools, temporary repair materials, safety gear, and contact info. Stored accessibly, the checklist speeds decisions and limits damage. Review and restock after each incident.
- Turn off main water valve and electricity to affected area
- Gather tools: pipe cutter, wrench, pliers, flashlight
- Temporary fixes: rubber patch, hose clamp, epoxy putty
- Safety items: gloves, goggles, bucket, absorbent towels
- Emergency contacts: plumber, insurance, utility company
Conclusion
Investigating whether every pipe break could be prevented by a single quick fix sparks curiosity: it’s not that simple. The truth is a mix—shutoffs and temporary clamps buy time, but material, age, and installation matter. Homeowners who act fast, document damage, and keep basic parts on hand cut losses; those who upgrade vulnerable plumbing reduce future emergencies. Practical vigilance, not one miracle solution, is the real key to fewer sudden, costly failures.