How to Remove Water Stains on Faucets Fast: 7 Proven Methods That Work
To quickly remove water stains from faucets, dissolve mineral deposits using safe methods like soaking in white vinegar for 15–30 minutes, applying a gentle baking soda paste, or using lemon juice or citric acid for natural descaling. For stubborn buildup, consider non-abrasive commercial limescale removers or a toothpaste rub for light polishing. For tougher spots, a hydrogen peroxide and baking soda paste can be effective. Always rinse and dry the faucet afterward. Regular maintenance will help restore shine and prevent future stains.
Fast Overview: How to Remove Water Stains from Faucets
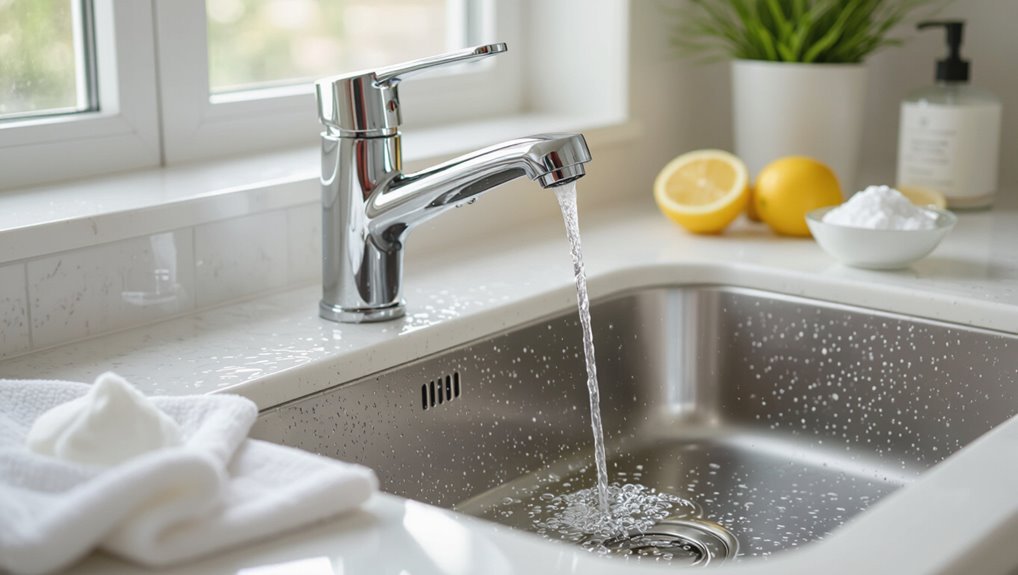
Water stains and limescale form when mineral-rich water evaporates and leaves calcium and magnesium deposits on faucet surfaces.
Before cleaning, one should check for finish compatibility (chrome, brass, brushed stainless) and test cleaners on an inconspicuous spot while wearing gloves and ensuring good ventilation.
For quick action, a vinegar-soaked cloth applied briefly and gently rubbed usually loosens fresh deposits without specialized tools.
What causes water stains and limescale on faucets
Mineral-rich tap flow and leftover droplets combine to form the whitish crust and cloudy film seen on faucets.
Hard water minerals—mainly calcium and magnesium—accumulate, crystallize, and bond with soap residues and metals, producing limescale and staining.
Corrosion, oxidized finishes, and prolonged dampness worsen buildup.
Understanding these causes helps target how to remove water stains on faucets effectively without unnecessary effort.
Quick safety and surface-compatibility checklist before cleaning
Before beginning any cleaning, a quick checklist guarantees safety and protects finishes:
Verify water is off and area ventilated; wear gloves and eye protection for chemical use; identify faucet finish (chrome, brass, nickel, plated) and consult manufacturer guidance; test cleaner on an inconspicuous spot; avoid abrasive pads on delicate coatings; gather soft cloths, mild cleaners, and a soft brush; keep pets and children away.
Best immediate-action method for time-pressed situations
Act quickly: for a near-instant fix, dampen a soft microfiber cloth with white vinegar, wring it lightly, and rub the stained areas in gentle circular motions until deposits loosen.
Follow with a clean damp cloth to remove residue, then dry with a dry microfiber to prevent streaks.
For stubborn spots, repeat briefly or apply a vinegar-soaked cloth for five minutes, then rinse and dry.
Method 1 White Vinegar Soak (Easy and Effective)
The white vinegar soak method requires only common supplies—white vinegar, a soft cloth or sponge, plastic wrap or a bag, and a soft-bristled brush—and will be described step by step for chrome, stainless steel, and brass.
Guidelines will cover recommended soak times, how to rinse and buff away residue, and signs that indicate the process was effective.
The section will also note finishes and situations where vinegar should be avoided to prevent damage.
Materials and tools needed
A few basic items are all that’s required for Method 1: white vinegar soak.
Required materials include distilled white vinegar, spray bottle or small bowl, soft microfiber cloths, non-abrasive sponge, and rubber gloves.
Optional tools: cotton swabs for crevices, painter’s tape to protect nearby finishes, and a plastic bag for prolonged soaking.
Confirm gentle, non-abrasive supplies only.
Step-by-step application for chrome, stainless steel, and brass
Begin by preparing the work area and selecting the appropriate vinegar delivery: a spray bottle for light buildup or a small bowl/plastic bag for heavier deposits.
Apply vinegar to chrome, stainless steel, or brass, ensuring coverage of stained areas. Allow contact, then gently agitate with a soft cloth or nylon brush.
Rinse thoroughly and dry with a microfiber cloth to restore shine.
How long to soak and how to remove residue
Several minutes to several hours is typically sufficient for a white vinegar soak, with light deposits needing 15–30 minutes and heavy mineral buildup benefiting from 1–3 hours (or overnight for very stubborn scale).
After soaking, rinse thoroughly, then gently scrub with a soft brush or microfiber cloth to remove loosened residue.
Dry and buff to restore shine, repeating if deposits persist.
When to avoid vinegar (surface-sensitive finishes)
Polished chrome and brass can be damaged by prolonged exposure to acidic solutions, so vinegar should not be used on fixtures with plated, lacquered, or matte finishes.
Instead, test a hidden area first. For sensitive surfaces use pH-neutral cleaners, mild soap with water, or manufacturer-recommended products.
Rinse thoroughly and dry to prevent spotting. Avoid abrasive pads or prolonged soaking to protect finish.
Method 2 Baking Soda Paste (Abrasive-Free Scrub)
This method outlines the simple materials and tools needed, the correct baking soda-to-water proportions for a paste, and the gentle application technique.
It also covers thorough rinsing and polishing to prevent streaks, plus guidance on which finishes tolerate baking soda and which should avoid it.
The instructions remain concise and practical to help achieve a clean, scratch-free faucet.
Materials and tools needed
Before beginning, gather only the essentials for the baking soda paste method: baking soda, water, a small mixing bowl, a soft microfiber cloth or non-scratch sponge, an old toothbrush for crevices, and optional white vinegar in a spray bottle for stubborn deposits. Also prepare gloves to protect skin, paper towels for drying, and a soft towel to buff the faucet after cleaning.
Mixing proportions and application technique
Mix a thick, toothpaste-like paste by combining about three parts baking soda with one part water in a small bowl, adjusting gradually until it holds shape without running; for delicate finishes, use slightly less baking soda and add water dropwise to minimize abrasiveness.
Apply with a soft microfiber or foam pad, work in gentle circular motions, target stains, let sit briefly, then agitate lightly before removal.
Rinsing and polishing for a streak-free finish
After the paste has been worked into the stained areas and lightly agitated, rinse away residue thoroughly with warm running water to prevent white baking soda film.
Use a gentle stream and a soft cloth to lift remaining particles rather than splashing.
Dry immediately with a microfiber cloth, buffing in circular motions to restore shine.
Inspect for streaks and repeat gentle polishing until uniform, streak-free finish.
Surfaces that tolerate baking soda and those that don’t
Identify which faucet finishes can safely tolerate baking soda paste and which require gentler care.
Durable finishes like stainless steel, chrome, and uncoated brass generally tolerate a mild baking soda paste.
Avoid using it on soft, decorative, or porous finishes—oil-rubbed bronze, lacquered brass, matte or powder-coated surfaces, and antique patinas—as abrasion or pH can dull or strip protective coatings.
Test inconspicuous areas first.
Method 3 Lemon Juice or Citric Acid (Natural Descaler)
This method outlines the simple materials and tools—fresh lemons or powdered citric acid, a spray bottle or bowl, soft cloths, and a toothbrush—needed to remove mineral deposits.
It explains how to apply juice from a halved lemon versus a diluted citric acid solution, when to let the acid work, and how to neutralize with baking soda or rinse and buff to a shine.
It also notes best uses, such as spot treatments on chrome or stainless, and limitations, including caution on porous or plated finishes and stronger solutions for heavy buildup.
Materials and tools needed
For Method 3, gather a few simple, natural items: fresh lemons or powdered citric acid, a spray bottle or small bowl for mixing, a soft microfiber cloth, an old toothbrush or soft-bristled brush, and rubber gloves to protect skin.
Also include a non-abrasive sponge, cotton swabs for crevices, a towel for drying, and a small plastic or glass container to hold leftover solution safely.
How to apply fresh lemon vs. powdered citric acid
When choosing between fresh lemon and powdered citric acid, consider concentration, contact time, and ease of rinsing: lemon juice is milder and releases natural oils that can help lift light mineral deposits, while a citric acid solution allows precise strength control for tougher buildup.
Apply lemon by rubbing or soaking a cloth; dissolve citric acid in water, apply with a cloth or spray, and allow brief dwell time.
Neutralizing and buffing afterward
Rinse the treated area thoroughly with clean water to neutralize any remaining acidity, then blot dry with a soft microfiber cloth to prevent new mineral spots.
If a mild alkaline residue is preferred, follow with a quick wipe of a 1:10 baking soda solution and a final water rinse.
Polish gently in circular motions using a dry microfiber or chamois to restore shine and remove streaks.
Best uses and limitations
After neutralizing and buffing, attention shifts to where lemon juice or citric acid performs best and where it should be avoided.
Ideal for light mineral deposits on stainless steel, chrome, and durable finishes, it dissolves scale quickly and rinses clean.
Avoid porous stones, delicate plated surfaces, and painted or antique fixtures, as acidity can etch, discolor, or remove protective coatings when overused.
Method 4 Commercial Limescale Removers (When Home Remedies Fail)
When home remedies do not remove stubborn limescale, a commercial remover selected for the faucet’s finish can be more effective.
Users should follow label instructions, wear gloves, and guarantee good ventilation to minimize chemical exposure.
A spot test on an inconspicuous area is recommended to confirm compatibility and prevent surface damage.
Choosing the right product for finishes ()
Select a commercial limescale remover based on the faucet’s finish to prevent damage and guarantee effective cleaning. The manufacturer’s label and finish-specific formulas—chrome, stainless, brass, or plated—guide selection; choose non-abrasive, pH-appropriate products. Test inconspicuous areas first and prefer cleaners labeled safe for the specific finish to avoid discoloration or corrosion.
| Finish | Recommended type |
|---|---|
| Chrome | Mild acidic |
| Brass | Neutral cleaner |
Safe-use steps and ventilation precautions
With the appropriate product chosen for the faucet finish, attention turns to safe-use steps and ventilation precautions for commercial limescale removers.
Read label instructions, wear chemical-resistant gloves and eye protection, and apply sparingly with a soft cloth or applicator.
Confirm windows are open or use exhaust fans to ventilate fumes.
Rinse thoroughly after treatment and store products sealed, away from children and pets.
How to test and avoid damage
Begin by performing a discreet spot test on an inconspicuous area—such as the underside of the spout or behind the handle—using the chosen commercial limescale remover diluted per label directions.
Observe for discoloration, finish dulling, or corrosion for several minutes. Rinse thoroughly and inspect.
If no damage occurs, proceed cautiously, using short contact times, soft cloths, and neutralizing rinse to prevent finish degradation.
Method 5 Toothpaste or Non-Gel Toothpaste (Polishing Trick)
This method lists simple materials and tools—non-gel white toothpaste, a soft cloth or toothbrush, and water—followed by clear steps for polishing light stains and minimizing fine scratches.
It explains whether to rub gently or buff more firmly depending on the severity and how to rinse and dry afterward.
It also notes when toothpaste is inappropriate, such as on delicate plated finishes or deep pitting that requires professional repair.
Materials and tools needed
A simple kit of household items is all that’s required for the toothpaste polishing method: non-gel white toothpaste (no abrasive baking soda varieties), a soft toothbrush or clean microfiber cloth, warm water, and a soft towel for buffing. Optional items include cotton swabs for crevices, a small bowl for diluting toothpaste, and disposable gloves to protect hands and prevent residue transfer.
Application steps for light stains and scratches
With materials assembled, the toothpaste polishing method proceeds to address light water stains and minor surface scratches on faucet finishes.
Apply a pea-sized non-gel toothpaste to a soft cloth, rub gently in circular motions over affected areas, then buff until stains diminish.
Rinse with warm water, dry thoroughly with a microfiber cloth, and inspect.
Repeat once if necessary.
When toothpaste is inappropriate
When is toothpaste not the right choice for cleaning a faucet?
Toothpaste should be avoided on porous, painted, or lacquered finishes, delicate vintage plating, and heavily corroded areas.
Abrasive paste can remove protective coatings, worsen scratches, or expose metal to rust.
For large deposits, mineral buildup, or active corrosion, use specialized cleaners or consult a professional to prevent damage.
Method 6 Hydrogen Peroxide and Baking Soda Combo (Tough Stains)
Recommended materials, appropriate protective gear, and ventilation are outlined before use to guarantee safety when combining hydrogen peroxide and baking soda.
A clear sequence of mixing, application, and specified contact time is then provided to treat persistent mineral deposits.
Finally, precise rinsing and neutralization steps are given to remove residues and protect faucet finishes.
Materials and safety precautions
Because hydrogen peroxide and baking soda can be reactive and abrasive, appropriate materials and precautions are essential before attempting this method. Required items include 3% hydrogen peroxide, baking soda, a nonmetallic bowl, soft-bristle brush, microfiber cloths, and nitrile gloves. Work in a well-ventilated area, avoid mixing with bleach or acids, protect surrounding finishes, and wash hands after use.
Step-by-step application and contact time
With materials and precautions in place, the operator prepares the paste by mixing enough baking soda with 3% hydrogen peroxide in a nonmetallic bowl to form a spreadable, toothpaste-like consistency.
They apply a thin, even layer to stained areas with a soft cloth or brush, allow it to sit undisturbed for 10–20 minutes depending on stain severity, then agitate gently to loosen deposits.
Rinse and neutralize instructions
Rinse thoroughly using lukewarm water to remove all paste residue and any loosened mineral deposits, directing the flow to avoid splashing onto surrounding surfaces.
Wipe dry with a soft microfiber cloth. If faint peroxide odor persists, neutralize by wiping with a 1:10 vinegar-to-water solution, then rinse again.
Inspect for remaining stains; repeat spot treatment if necessary and dry to prevent reformation.
Method 7 Mechanical Cleaning: Soft Brushes, Microfiber, and Ultrasonic Options
Mechanical scrubbing can remove residues that chemical cleaners leave behind, but selection of non-scratch tools—soft nylon brushes, fine-bristle toothbrushes, and microfiber pads—is essential to protect finish.
Removable components such as aerators and trim pieces respond well to ultrasonic cleaning for thorough residue removal without abrasive contact.
If pitting, deep etching, or widespread finish loss is present, a professional refinisher should be contacted rather than continuing aggressive home methods.
Best brushes and pads to use (non-scratch)
Select tools that lift mineral deposits without abrading finishes: soft nylon brushes, non-abrasive sponges, microfiber cloths, and silicone-tipped detail brushes are the safest choices for most faucets.
Choose fine-bristle toothbrushes for crevices, foam pads for curved surfaces, and microfiber for polishing.
Avoid steel wool, abrasive pads, and harsh scrubbing.
Test a hidden area first to confirm the finish remains intact.
Using an ultrasonic cleaner for removable parts
For deposits that resist gentle brushing, removable faucet components can be placed in an ultrasonic cleaner to loosen mineral buildup without scratching finishes.
Small parts should be degreased, placed in a mesh basket, and processed with a mild alkaline or specialized ultrasonic solution per manufacturer instructions.
Rinse thoroughly, air-dry, and reassemble.
Avoid prolonged cycles and harsh chemicals that could damage seals or plating.
When to call a professional refinisher
When should someone escalate from home cleaning to a professional refinisher? A professional is recommended when stains are deep, plating is pitted or peeling, DIY methods risk voiding warranties, or repeated cleaning fails.
Also call a refinisher for valuable or vintage fixtures where preservation matters, complex finishes requiring specialized stripping and recoating, or when corrosion compromises function and safety beyond routine repair.
How to Identify Faucet Finish and Match the Right Cleaning Method
Identification of the faucet finish guides selection of safe cleaning techniques: chrome and stainless steel are shiny and cool to the touch, brass shows a warm yellow tone or patina, nickel has a muted, slightly warm sheen, and plated finishes may reveal a base metal at worn edges.
Before applying any cleaner, a test-spot should be performed in an inconspicuous area to check for discoloration or finish damage.
If the test produces adverse effects, a milder method or professional advice should be used.
Visual clues for chrome, stainless steel, brass, nickel, and plated finishes
A quick visual inspection helps determine whether a faucet is chrome, stainless steel, brass, nickel, or a plated finish by noting color, surface sheen, and signs of wear.
Chrome appears mirror-bright and highly reflective; stainless steel shows muted silver with fine grain; brass ranges warm yellow to brown patina; nickel offers soft, warmer silver; plated finishes reveal base metal at chips or exposed edges.
Test-spot protocol to avoid finish damage
Because finishes can react unpredictably to cleaners, always perform a discreet test-spot before treating the entire fixture.
Select an inconspicuous area, apply the chosen cleaner with a cotton swab, wait the manufacturer’s recommended dwell time, then blot and inspect for discoloration, etching, or sheen loss.
If unchanged, proceed; if damaged, switch to a gentler method or consult the finish maker.
Preventive Measures to Keep Faucets Spot-Free
Preventive care begins with a simple daily routine of wiping and drying faucets after use to prevent mineral spots from forming.
For homes with hard water, installing softening or filtration systems greatly reduces mineral buildup on fixtures.
Applying protective coatings and following a periodic maintenance schedule further preserves finishes and minimizes the need for heavy cleaning.
Daily wiping and drying routine
Wipe faucets dry after each use to prevent mineral deposits from forming and to keep finishes gleaming. A soft microfiber towel quickly removes droplets from handles, spouts, and base.
Establish a short, consistent routine: dry immediately, buff gently to restore shine, and inspect for early spots. Consistent attention minimizes buildup and reduces the need for intensive cleaning later.
Water-softening and filtration options to reduce mineral buildup
After establishing a habit of drying fixtures, homeowners can further reduce mineral buildup by addressing the water itself.
Installing a whole-house water softener replaces calcium and magnesium with sodium or potassium, preventing scale.
Point-of-use filters (activated carbon, reverse osmosis) reduce specific minerals and impurities at faucets.
Choose systems sized for flow rates, maintenance needs, and local water-hardness levels to maximize effectiveness.
Protective coatings and periodic maintenance schedule
Several simple protective coatings and a regular maintenance schedule can greatly reduce spotting and extend a faucet’s finish.
Apply a thin layer of carnauba wax, silicone-based sealant, or commercial metal protectant every few months.
Wipe dry after each use, perform weekly light cleaning with a microfiber cloth and mild detergent, and descale monthly where minerals accumulate to prevent stains and corrosion.
Common Mistakes and How to Avoid Them
Homeowners often make preventable errors that worsen faucet finishes, such as using abrasives or strong chemicals that etch metal and coatings.
Leaving acidic cleaners on too long or over-soaking parts can cause discoloration and corrosion.
Skipping or ignoring the manufacturer’s care instructions further increases the risk of irreversible damage.
Abrasives and harsh chemicals that cause permanent damage
Scrubbing vigorously with scouring pads or pouring harsh chemicals onto fixtures may remove stains quickly but often leaves irreversible scratches, dulling, or corrosion on faucet finishes.
Using nonabrasive cleaners and soft cloths prevents surface damage. Strong acids, bleach, and abrasive powders can strip protective coatings and pit metal.
Opt for pH-neutral products and test in inconspicuous spots before full application to preserve finish.
Over-soaking and leaving acidic solutions too long
Allowing acidic cleaners to sit on faucet surfaces for extended periods can quickly damage finishes and underlying metal.
Professionals warn against over-soaking; acids strip protective coatings, etch chrome, and accelerate corrosion.
Apply solutions briefly, monitor progress, then rinse thoroughly. Neutralize residues with water or a mild baking soda paste.
Test on an inconspicuous area first and follow recommended contact times.
Ignoring manufacturer care instructions
After cautioning against prolonged exposure to acidic cleaners, attention should turn to another frequent error: ignoring the manufacturer’s care instructions.
Ignoring recommended cleaners, finishes, or application methods can void warranties and damage finishes. Users should consult product guides, use suggested pH-safe solutions, and follow drying and polishing advice.
When unsure, contact the manufacturer or choose neutral, nonabrasive cleaners to protect faucets.
Troubleshooting: When Stains Won’t Come Off
When stains resist normal cleaning, it is important to distinguish hard mineral deposits from surface corrosion or worn plating, since each requires a different response.
For persistent or deeply embedded buildup, progressively stronger methods—soaking with mild acids, mechanical removal with nonabrasive pads, or targeted chemical treatments—should be tried while monitoring finish integrity.
If damage is extensive or restoration risks further harm, replacement of the faucet may be the most practical and cost-effective solution.
Distinguishing mineral deposits from corrosion or plating wear
Although mineral deposits, corrosion, and worn plating can all produce similar-looking spots on faucets, they require different identification and treatment approaches.
Mineral scale is chalky, white, and often removable with acid cleaners.
Corrosion appears pitted, discolored, and may feel rough.
Plating wear reveals base metal or thin, smooth patches and resists chemical removal, indicating surface failure rather than simple residue.
Steps to take for persistent or deeply embedded stains
Start by evaluating the stain’s nature and extent: the person should determine whether the mark is surface-scale, etched metal, or worn plating.
Note its size and depth, and check surrounding finishes for vulnerability before attempting stronger treatments.
For persistent stains, use concentrated vinegar or citric poultices, nylon-bristled brushes, and mild abrasives cautiously, rinsing and testing inconspicuous areas.
Repeat cycles and consider professional polishing if needed.
When to replace the faucet instead of restoring it
Sometimes restoration efforts reach a point of diminishing returns, and replacement becomes the most practical option.
Consider replacement when corrosion has compromised structure, finishes peel beyond cleaning, mineral deposits clog internal passages, repair costs approach new faucet price, or leaks persist after seal and cartridge replacement.
Choose replacement for consistent water quality, updated function, or long-term reliability rather than repeated temporary fixes.
Tools, Supplies, and Comparison of Effectiveness ()
The section compares cost, speed, safety, and suitability across seven stain-removal methods and ends with a quick shopping checklist to streamline preparation. A concise table highlights emotional responses tied to choice and outcome. Readers are guided to balance practicality and caution when selecting tools and supplies.
| Choice | Hope | Relief |
|---|---|---|
| Vinegar | Affordable | Gentle |
| Commercial cleaner | Fast | Effective |
| Paste or scrub | Hands-on | Thorough |
Cost, speed, safety, and suitability comparison of all 7 methods
A concise comparison of the seven methods evaluates cost, speed, safety, and suitability to help readers choose the best approach for their faucet type and household constraints. Summary: budget options like vinegar are cheap and safe but slower; commercial cleaners act fast but can be harsher; gentle polishes suit plated finishes. Choose by finish, stain severity, and household sensitivities.
| Method | Cost | Speed |
|---|---|---|
| Vinegar | Low | Moderate |
| Commercial | Medium-High | Fast |
| Polish | Medium | Moderate |
Quick shopping checklist
Several essential tools and supplies make tackling faucet water stains efficient and safe: microfiber cloths, soft-bristled brushes, non-abrasive sponges, rubber gloves, and targeted cleaners (white vinegar, mild dish soap, commercial lime remover, or metal polish) should be on hand, with optional items like an old toothbrush, cotton swabs, and a spray bottle for diluted solutions.
- Soft cloths glinting with clean chrome
- Vinegar spray in a labeled bottle
- Small brush detailing crevices
- Gloves and a non-scratch sponge
Step-by-Step Routine for Fast Restoration (30-Minute Plan)
A concise 30-minute routine breaks the restoration into three timed phases: prep and safety (0–5 minutes), active cleaning (5–20 minutes), and rinse, polish, and dry (20–30 minutes).
First, the surface is cleared and protective measures are taken.
Then a targeted cleaner is applied and worked on, followed by thorough rinsing and final polishing to restore shine.
Prep and safety (0 to 5 minutes)
Begin by gathering protective gloves, safety glasses, a mild cleaner, and soft cloths to prevent skin irritation and protect surfaces.
Inspect the faucet and surrounding area for finish type and damage.
Clear the sink and remove jewelry.
Ventilate the room and test the cleaner on an inconspicuous spot.
Keep paper towels and a bucket handy to catch drips and dispose of waste safely.
Active cleaning (5 to 20 minutes)
Move quickly but deliberately: the active cleaning phase focuses on removing mineral deposits and water spots with minimal agitation to protect the faucet finish.
Apply a mild acidic solution (vinegar or commercial descaler) to affected areas, let sit briefly, then gently scrub with a soft brush or nonabrasive pad.
Target crevices and aerators; repeat spot treatments until stains lift.
Avoid harsh scrubbing.
Rinse, polish, and dry (20 to 30 minutes)
Following active cleaning, the faucet should be thoroughly rinsed to remove loosened mineral residue and any acidic solution before polishing.
A soft microfiber cloth and a gentle, nonabrasive metal polish restore shine; apply sparingly in circular motions. Rinse again to remove polish residue, then dry completely with a clean microfiber to prevent new spots.
Inspect fixtures and repeat spot treatment if necessary.
Maintenance Tips for Long-Term Shine
A concise maintenance plan keeps faucets bright after restoration.
It recommends a once-weekly micro-routine for busy households, a seasonal deep-clean checklist for more thorough care, and a simple stain-monitoring log for homes with hard water.
Following these steps reduces buildup and makes future restorations faster.
Once-weekly micro-routine for busy households
Once weekly, a short targeted micro-routine keeps faucets free of mineral buildup and maintains their shine with minimal effort.
A microfiber cloth dries surfaces, a vinegar wipe removes faint spots, and toothbrush bristles clean joints and aerators.
Quick rinsing and buffing restore luster. Tasks take five minutes, prevent stubborn stains, and reduce the need for intensive seasonal deep-cleaning.
Seasonal deep-clean checklist
Seasonal deep-clean sessions build on the once-weekly micro-routine by tackling stubborn mineral deposits, hidden buildup, and wear that quick touch-ups miss.
Every three months, disassemble removable faucet parts, soak in vinegar or descaling solution, brush aerators and crevices, polish surfaces, replace worn seals, and reassemble.
Inspect finish for corrosion and address spots promptly to prevent permanent damage and maintain long-term shine.
Stain-monitoring and log for hard-water homes
Because hard water leaves patterns that worsen over time, homeowners benefit from a simple stain-monitoring log that tracks where deposits form, how quickly they grow, and which cleaning methods work best.
A concise entry records date, location, deposit size, cleaner used, and result to guide maintenance and reduce buildup.
- Faucet base: rings forming
- Spout tip: mineral crust
- Aerator: flow reduction
- Handles: discoloration
Conclusion
Like a quick polish that turns a fogged mirror back to glass, these seven methods cut through mineral build-up and restore faucet shine. Start with gentle options—vinegar, baking soda, lemon—escalating to commercial descalers only if needed. When stubborn stains persist, follow the troubleshooting steps and use the right tools to avoid damage. With the 30-minute routine and simple maintenance tips, regular care keeps faucets looking new and prevents future buildup.