
How to Remove a Stuck Plastic Nut From a Toilet Tank Without Breaking Anything
To safely remove a stuck plastic nut from a toilet tank without damaging any parts, follow these steps:
- Shut Off Water: Turn off the water supply and fully drain the tank.
- Protect Surroundings: Use towels to safeguard the porcelain and nearby components.
- Apply Lubricant: Spray a penetrating lubricant on the threads and let it sit for a few minutes.
- Attempt Manual Removal: Try turning the nut by hand. If it doesn’t budge, use a strap or basin wrench for controlled torque.
- Avoid Sudden Force: If it’s still stuck, alternate between slight tightening and loosening while reapplying lubricant as needed.
- Use Caution: If necessary, consider using a small rotary tool, but stop immediately if you notice any cracking.
For further details on extraction methods and preventive tips, please refer to the complete guide.
What to Do When a Toilet Tank Nut Is Stuck Without Breaking Anything
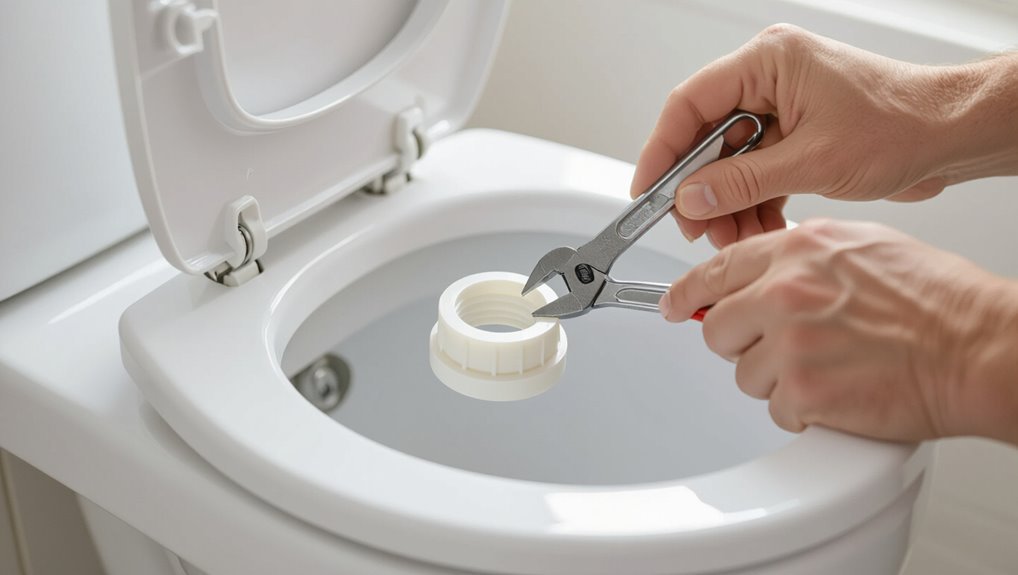
Before attempting any repair, one should shut off the water supply and drain the tank to prevent spills and minimize pressure on fittings.
The safest approach combines gentle loosening with penetrating lubricant, heat if appropriate, and the correct-sized wrench or adjustable pliers.
If resistance remains, proceed incrementally to avoid cracking the tank or stripping the nut.
Quick safety reminder before starting
When tackling a stuck plastic nut in a toilet tank, safety and preparation are essential: the water supply should be shut off, the tank drained, and suitable tools laid out to avoid rushed, forceful actions that can crack porcelain or shear fittings.
The reader should wear gloves and eye protection, clear the area, keep a bucket and towels ready, and review how to remove plastic nut from toilet tank before proceeding.
One-sentence direct solution overview
After shutting off the water, draining the tank, and gathering safety gear and tools, the fastest way to free a stuck plastic tank nut without causing damage is to apply penetrating lubricant, gently loosen with a properly sized basin wrench or strap wrench, and, if it won’t budge, soften corrosion or mineral deposits with white vinegar before trying again.
Proceed patiently, alternate penetrating oil and vinegar, use slow steady force, and avoid excessive torque to prevent cracking.
Why Plastic Toilet Tank Nuts Get Stuck
Plastic tank nuts commonly seize from age, mineral buildup, overtightening, or plastic warping that changes thread engagement.
The composition of the tank and the chemistry of the water—hard, acidic, or chlorinated—can accelerate mineral deposits or stress the plastic, making removal harder.
Understanding these factors helps diagnose why a particular fastener is stuck and which removal methods will work best.
Common causes (age, mineral buildup, overtightening, warping)
Many factors contribute to a stuck toilet tank nut, with age, mineral buildup, overtightening, and warping among the most common.
Plastic degrades and becomes brittle over years. Mineral deposits from hard water harden around threads.
Excessive torque strips or jams threads and compresses fittings. Warping from thermal or mechanical stress distorts mating surfaces, increasing friction and locking components together.
How different tank materials and water chemistry affect fastener corrosion
Because tank construction materials and local water chemistry interact directly at the interface where fasteners sit, the likelihood and type of corrosion or seizing vary widely.
Porcelain, plastic, and metal tanks present different electrochemical environments; hard water deposits calcium and magnesium, acidic or chlorinated water accelerates metal corrosion, and galvanic pairs promote crevice corrosion.
These factors determine adhesion, brittleness, and removal difficulty.
Tools and Materials You’ll Need
The next section lists the essential tools—such as adjustable and basin wrenches, pliers, and a strap wrench—needed to tackle a stuck plastic tank nut.
It also notes helpful accessories like penetrating lubricant, a heat source, rubber grips, and towels to protect surfaces and improve grip.
Guidance on when to replace damaged parts and which replacement nuts, gaskets, or bolts to buy is provided.
Essential tools (wrench types, pliers, strap wrench, adjustable wrench)
A small set of reliable hand tools makes removing a stuck plastic nut from a toilet tank far easier and less risky.
Recommended tools include an adjustable wrench for variable sizes, channel-lock or slip-joint pliers for grip and leverage, and a strap wrench to protect plastic surfaces.
A small basin wrench can access tight spaces. Choose quality tools sized to the tank fittings.
Helpful accessories (penetrating lubricant, heat source, rubber grips, towels)
Alongside hand tools, a few accessories speed removal and reduce damage: penetrating lubricant to loosen corroded threads, a compact heat source to gently expand plastic, rubber grips or a strap for extra purchase on slippery fittings, and towels to catch drips and protect porcelain.
Use lubricant sparingly, apply heat briefly and evenly, position grips for steady torque, and keep towels ready for spills.
When to use replacement parts and what to buy
Decide whether to replace parts when inspection reveals cracks, warped threads, excessive mineral buildup, or when a removed nut or bolt shows signs of significant wear that compromises a watertight seal.
Replace with quality nylon nuts, stainless bolts, rubber gaskets, and a universal flapper kit as needed.
Consider matching sizes and choosing corrosion-resistant materials.
- Relief
- Confidence
- Frustration turned to control
- Satisfaction
Step-by-Step Safe Removal Procedure
Before attempting removal, the water supply should be shut off and the tank emptied to prevent spills.
Porcelain and nearby fittings are then protected with towels or padding while a penetrating lubricant is applied and given time to soak.
Initial loosening is attempted by hand or with rubber-grip tools, progressing to a strap or basin wrench for controlled torque without damaging the fixture.
Step 1 Turn off water and drain the tank
Once the supply valve is located, shut it off to stop water flow into the tank.
Then flush the toilet to empty most of the water and hold down the handle to drain residual water from the bowl.
Close the valve firmly, then open the tank lid and use a sponge or small cup to remove remaining water from corners and around components, ensuring a dry, accessible workspace.
Step 2 Protect porcelain and fittings (towels, padding)
Lay protective layers over the tank and surrounding fixtures to prevent chips, scratches, or dents during the nut-removal process.
Use folded towels, foam padding, or a rubber mat around the tank lid, bolt area, and nearby porcelain. Secure coverings with painter’s tape to avoid slippage.
Protect metal fittings and flooring as well, creating a stable, cushioned work area before proceeding.
Step 3 Apply penetrating lubricant and let it soak
Spray a liberal amount of penetrating lubricant directly onto the stuck plastic nut, the threaded shank beneath it, and any visible corrosion or mineral buildup; allow the solvent time to penetrate by waiting at least 15–30 minutes while periodically reapplying to stubborn areas.
Inspect for softened deposits, wipe loosened debris, and repeat application if dryness returns.
Keep ventilation adequate and avoid excessive pooling that could contact painted surfaces.
Step 4 Try hand techniques and rubber-grip tools
Begin by attempting to loosen the plastic nut using only hand pressure and simple rubber-grip tools to minimize the risk of cracking the nut or damaging the tank.
Wear nitrile gloves for better grip.
Rock the nut back and forth, applying steady alternating turns.
Use a rubber jar opener or strap of silicone for added friction.
Stop if excessive resistance is felt.
Step 5 Use strap wrench or basin wrench for torque without damage
Apply a strap wrench or basin wrench to increase torque while protecting the plastic nut and tank surfaces.
Position the strap evenly, avoid sharp edges, and tighten gradually.
Use a basin wrench for confined spaces, ensuring the pivot clears the tank.
Apply steady, controlled force; stop if the nut deforms.
Alternate slight counter-rotations and inspections to prevent cracking or leaks.
Step 6 Apply controlled heat for plastic expansion (if safe)
Heat the nut cautiously only if the tank material and surrounding components can safely tolerate warmth.
Apply a hair dryer or low-heat heat gun in short bursts, keeping distance and moving continuously to avoid warping.
Monitor temperature with touch or infrared thermometer.
Warmth can expand plastic slightly, loosening the thread.
Stop immediately if any softening, cracking, or odor appears and allow cooling before proceeding.
Step 7 Alternate tightening and loosening to break the seal
If warming slightly helped soften the engagement but the nut still resists, alternating short turns clockwise then counterclockwise can break the seal without overstressing the plastic.
The technician applies controlled, incremental torque—quarter-turns—watching for movement and listening for clicks. After each attempt the nut is tested for looseness; lubrication is reapplied if needed.
Stop if cracking or excessive resistance appears.
Step 8 Cutting or drilling options as last resort (how to avoid tank damage)
Proceed carefully when cutting or drilling becomes the only option: choose the least invasive method that will remove the plastic nut while preserving the porcelain tank.
Use a small rotary tool with a thin cutting wheel or a carbide bit, low speed, minimal pressure, and steady cooling.
Shield surrounding glaze with tape and a rag.
Stop immediately at resistance change to avoid cracking.
Step 9 Inspect and clean threads after removal
Inspect the tank and fill-valve threads carefully once the stuck nut is removed to confirm a proper seal and prevent future leaks.
Using a soft brush and vinegar or mild detergent, remove mineral deposits, old sealant, and debris. Rinse and dry thoroughly.
Inspect for stripped threads or cracks; replace damaged components.
Apply appropriate plumber’s tape or new gasket before reassembling to guarantee a reliable seal.
If the Nut Breaks or the Bolt Fails Inside the Tank
If a plastic nut snaps or a bolt shears off inside the tank, the remaining fragments can often be extracted without replacing the tank by using purpose-made extractors, needle-nose pliers, or carefully improvised tools.
The article will outline safe extraction techniques that minimize damage to porcelain and seals, plus tips for working in the confined, wet space.
It will also explain clear signs that a professional plumber should be called to avoid worsening the problem.
How to remove a snapped nut or bolt remnant without replacing the tank
When a plastic nut or bolt snaps inside a toilet tank, the remaining remnant can usually be removed without replacing the tank by using targeted tools and steady technique; success depends on evaluating how much material remains exposed and whether the remnant is accessible from above or below.
Assess accessibility, clear corrosion or debris, stabilize the tank to prevent stress, and plan a controlled approach to extract the remnant while preserving surrounding fittings.
Using extraction tools and improvised methods safely
Begin by assembling the right tools and a clear plan: needle-nose pliers, small screwdrivers, a nut extractor or bolt-out set, a rotary tool with a cutting or grinding bit, rubber-jawed pliers, and a flashlight, plus towels and a bucket to catch water.
Work gradually: secure tank, remove water, use extraction bits gently, avoid metal-on-ceramic scraping, and retrieve fragments with magnet or tweezers.
When to call a plumber
Recognize the limits of DIY: a plumber should be called once the plastic nut shatters or the bolt disintegrates and fragments remain inaccessible inside the tank.
A professional prevents further damage, locates and extracts debris, repairs corroded or stripped fittings, and guarantees watertight seals.
Call when unsure about internal damage, when tools fail, or when leaks start, to avoid costly replacements or flooding.
Replacing the Nut and Reassembling the Tank
Selecting a replacement nut and washer requires weighing plastic’s corrosion resistance against brass’s strength and longevity.
The installer should tighten to manufacturer-recommended torque and use appropriate seals or thread tape to minimize future seizing.
After reassembly, the tank must be filled and inspected for leaks, with final adjustments made to the fill valve and tightness as needed.
Choosing the right replacement nut and washer materials (plastic vs brass)
Material choice affects long-term performance and ease of future repairs: plastic nuts resist corrosion and are less likely to damage porcelain but can crack under over-tightening.
In contrast, brass offers greater strength and durability at the cost of potential galvanic corrosion and a higher price.
Select washers to match: rubber or neoprene for seal flexibility with plastic; rubber, neoprene, or gasketed metal for brass to cushion and prevent metal-to-porcelain contact.
Proper torque and sealing to prevent future seizing
When reinstalling the tank, apply consistent, moderate torque to the nut—tighten until the gasket compresses and the tank seats evenly, then give a final quarter-turn.
Over-tightening risks cracking plastic or distorting the gasket, while under-tightening invites leaks and movement that lead to seizing.
Use a compatible lubricant or anti-seize on threads sparingly, confirm clean mating surfaces, and align components before final tightening.
Testing for leaks and final adjustments
Begin by refilling the tank and cycling the flush to pressurize the system.
Observe joints and the replaced nut for drips over several minutes. Tighten slightly if minor seepage appears, then retest.
Check bowl and floor for hidden leaks.
Verify proper fill level and float adjustment.
Confirm quiet refill and absence of slow leaks before final cleanup and reinstallation of lid.
Preventive Measures to Avoid Future Stuck Nuts
A brief preventive approach can reduce the chance of future stuck plastic nuts in toilet tanks.
This includes a simple routine inspection schedule, selecting appropriate lubricants or anti-seize compounds for plastic-to-metal fittings, and following proper installation techniques that avoid overtightening.
Adopting these measures during repairs and replacements minimizes corrosion, binding, and repeated emergencies.
Routine maintenance and inspection schedule
Because small issues compound over time, a simple routine of periodic inspections and maintenance prevents most occurrences of stuck plastic nuts in toilet tanks.
A concise schedule reduces surprise repairs and preserves parts.
- Weekly visual check: calm reassurance
- Monthly tighten/clear: steady confidence
- Quarterly parts inspection: quiet vigilance
- Annual full service: lasting relief
Best lubricants and anti-seize compounds for toilet fittings
Select lubricants and anti-seize compounds designed for plumbing plastics and potable water areas to prevent corrosion, jamming, and chemical degradation of toilet fittings.
Recommended options include silicone grease, NSF‑61‑approved food‑grade lubricants, and PTFE-based anti‑seize formulated for plastic threads.
Apply sparingly to threads and mating surfaces; avoid petroleum solvents that swell plastics.
Reapply during inspections to maintain ease of future disassembly.
Proper installation tips to prevent overtightening
Prevent torque and stress on plastic nuts by tightening them only to the manufacturer’s recommended specification—usually hand‑tight plus a quarter turn with a wrench—and by using a calibrated torque driver or marked wrench to avoid guesswork.
Use new rubber gaskets, hand‑fit components before final tightening, support the assembly to prevent bending, and inspect threads for debris or damage.
Recheck after initial water run.
Common Mistakes to Avoid
The most frequent errors involve using excessive force or improper tools, which can strip threads or shear plastic.
Applying unsafe heat or working carelessly can crack porcelain or warp components.
Installing incompatible replacement hardware often leads to leaks or repeat failures.
Using excessive force or wrong tools
Applying excessive force or the wrong tools often turns a simple toilet tank repair into a larger problem. The technician may strip threads, crack fittings, or deform the nut.
Improvised wrenches, pliers with poor grip, or cheater bars increase risk. Instead, one should use proper-size adjustable wrenches, strap wrenches, and steady incremental turns, avoiding sudden twists that damage plastic components.
Applying unsafe heat or damaging porcelain
Avoid using open flames, high-heat torches, or boiling water near the tank, as rapid temperature changes can crack porcelain and warp plastic fittings.
Applying heat to loosen a stuck nut risks hairline fractures and deformed components, creating leaks or necessitating full replacement.
Use gentle mechanical methods and approved heat-free lubricants; if unsure, consult a professional to prevent irreversible damage.
Replacing with incompatible hardware
After warning against heat and force that can crack porcelain or warp fittings, attention should shift to the equally risky practice of swapping original parts for incompatible hardware.
Using metal nuts, undersized bolts, or mismatched washers can stress threads, cause leaks, or crack tanks. The correct replacement matches original material, thread pitch, and size to preserve seal integrity and prevent future damage.
Troubleshooting Scenarios and Solutions
Troubleshooting covers common stubborn conditions and clear, practical responses for each.
| Scenario | Recommended approach |
|---|---|
| Mineral-crusted nut | Soak with vinegar or CLR, brush, then gently work free. |
| Stripped nut edges | Use pliers with rubber grip or a nylon strap wrench; consider cutting grooves for better bite. |
| Corroded metal bolt with plastic nut | Apply penetrating oil, protect plastic, then back off bolt; replace both if seized. |
The following steps explain how to apply these methods safely and when to stop and replace parts.
Scenario: Mineral crusted nut recommended approach
When mineral deposits fuse a plastic nut to a toilet tank fitting, loosening it with standard twisting can damage the nut or the tank.
The recommended approach is to dissolve and loosen the crust first using a penetrating descaler (vinegar or a commercial lime remover). Allow adequate dwell time, then apply steady, controlled torque with a strap wrench or pliers padded to protect the plastic.
After loosening, rinse thoroughly and inspect for cracks.
Scenario: Stripped nut edges recommended approach
If the plastic nut’s edges are stripped and gripping tools slip, first assess how much material is missing and whether the nut can still be turned without further damage.
If rotation is possible, use a rubber jar opener or slip-resistant pad to improve grip.
If not, carefully cut a shallow slot for a flathead screwdriver or use a nut-splitting tool; avoid excessive force to prevent tank damage.
Scenario: Corroded metal bolt with plastic nut recommended approach
After addressing stripped plastic nut edges, attention often shifts to cases where the metal bolt has corroded against a plastic nut.
Recommended approach: apply penetrating oil around the junction, allow soak time, then gently tap the bolt head to break corrosion.
Use adjustable pliers on the nut while holding the bolt steady.
If seized persists, cut the bolt flush and replace both bolt and nut.
Quick Reference Checklist Before You Start
Prepare a compact checklist to confirm tools, safety measures, and tank conditions before attempting to remove a stuck plastic nut from a toilet tank.
Verify water shutoff, dry workspace, and leak containment.
Gather pliers, adjustable wrench, penetrating lubricant, and protective gloves.
- Fear of damage? Recall patience and light force.
- Frustration? Pause and reassess.
- Confidence? Proceed cautiously.
- Relief? Celebrate minimal damage.
Conclusion
When the plastic nut finally yields, it is less a victory over hardware than a quiet truce with time and care. Like untying a stubborn knot in an old rope, the patient hands and steady tools restore harmony between water and home. This small repair quietly preserves larger peace, a reminder that attention and gentle persistence can loosen what once seemed immovable, keeping everyday life flowing without rupture or regret.
