How to Install a Water Closet Flange: Step-by-Step Guide for DIY Success
To install a water closet flange, follow these essential steps: shut off the water supply, remove the toilet, inspect and repair any subfloor damage, select a flange that matches your pipe material, and install it securely at the correct height. Next, fit a wax or rubber seal and reinstall the toilet, ensuring there are no leaks. This guide will take you through each step for a successful DIY installation.
What a Water Closet Flange Is and Why It Matters
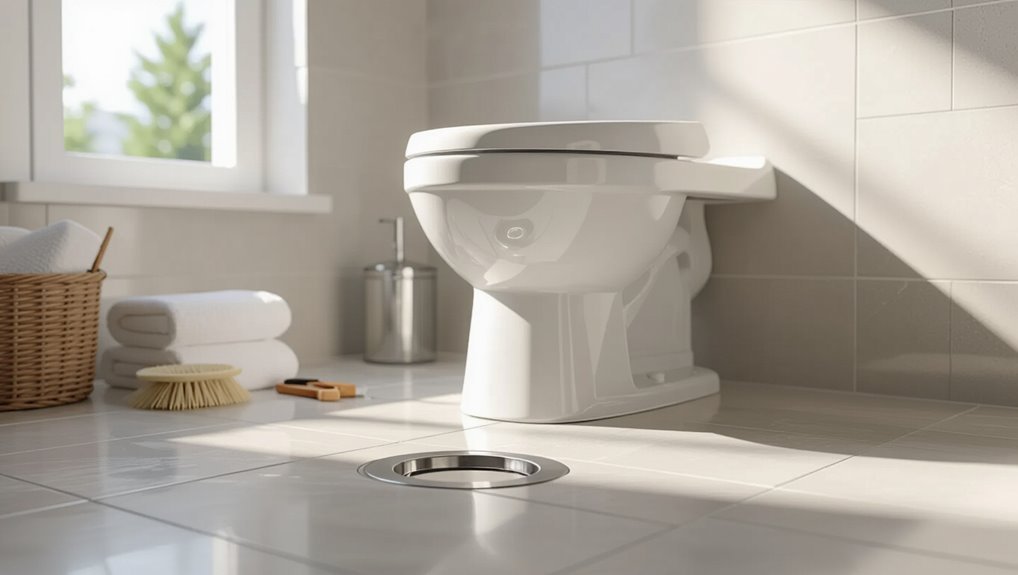
A water closet flange is the fitting that secures a toilet to the drain and creates a watertight connection between the fixture and the waste pipe.
Flanges come in various types and materials—PVC, ABS, cast iron, brass, and stainless steel—chosen for compatibility with the piping and installation conditions.
Proper flange selection and installation directly affect toilet stability and the integrity of the wax or rubber seal, preventing leaks and movement.
Definition and purpose of a toilet flange
The water closet flange, often called the toilet flange, is the rigid fitting that secures the toilet to the drain pipe and the finished floor while creating a seal to prevent sewer gas and leaks.
It centers the fixture, transfers weight, and aligns the waste outlet. Understanding its role is essential for how to install water closet flange correctly and for long-term leak prevention.
Common flange types and materials (PVC, ABS, cast iron, brass, stainless)
Different flange materials—PVC, ABS, cast iron, brass, and stainless—offer distinct combinations of strength, corrosion resistance, and compatibility with plumbing systems.
So selecting the right type affects installation method, longevity, and leak prevention.
PVC and ABS are lightweight and corrosion‑resistant for plastic drainpipes; cast iron matches older systems and resists crushing.
Brass and stainless provide durable, corrosion‑resistant options where metal connections or enhanced longevity are required.
How the flange affects toilet stability and seal integrity
Secures the toilet to the drain and establishes the watertight connection between bowl and waste line, the water closet flange serves as the mechanical and sealing interface whose condition directly determines both stability and leak performance.
A warped, loose, or corroded flange permits wobble, broken bolts, and uneven pressure on the wax or rubber seal, causing leaks, odors, and premature seal failure requiring repair or replacement.
Tools and Materials You’ll Need
Before beginning the installation, the necessary tools should be laid out, including wrenches, a flange cutter or saw, sealant, and a torque wrench.
Replacement parts and consumables—such as a new flange, wax ring or rubber gasket, bolts, and PVC or ABS primer and cement—must be confirmed on hand.
Appropriate safety gear and preparation supplies, like gloves, eye protection, drop cloths, and a bucket, complete the checklist.
Essential tools list
A concise set of hand and power tools, plus a few plumbing supplies, will make installing a water closet flange straightforward and safe.
Recommended essentials include a drill with bits, adjustable wrench, and screwdriver set. Safety and measurement gear assist accuracy. Minimal specialty tools reduce complexity; select quality items for reliable results.
- Drill, bits, driver
- Wrenches, pliers
- Tape measure, level
Replacement parts and consumables
After gathering the basic tools, attention shifts to the replacement parts and consumables that complete a successful water closet flange installation.
Required items include flange bolts, wax or rubber seals, and PVC or ABS adaptors. Choose sizes matching the drain and toilet. Quality and compatibility prevent leaks and rework.
- Flange bolts and washers
- Wax ring or rubber gasket
- Pipe adaptors and sealant
Safety gear and preparation supplies
Several essential items protect the installer and prepare the workspace for a flange replacement.
Protective gear, surface coverings, and basic plumbing tools minimize risk and simplify tasks. Recommended items include a mask, gloves, eye protection, knee pads, drop cloths, bucket, plumber’s putty, wrench set, and flashlight.
- Personal protective equipment
- Workspace protection
- Basic tools and consumables
How to Determine If Your Flange Needs Replacement or Repair
A simple inspection can reveal common signs of flange failure such as wobbling, visible cracks, persistent leaks, or a sewer smell at the base of the toilet.
Measurements and visual checks determine whether the flange is too low, misaligned, or otherwise improperly seated. Based on those findings, the reader can decide whether a localized repair will suffice or if a full replacement is necessary.
Signs of flange failure: wobbling, leaks, sewer smell, cracked flange
Many common failure indicators point to a compromised toilet flange: noticeable wobbling of the fixture, recurring leaks at the base, persistent sewer odors in the bathroom, and visible cracks or corrosion in the flange itself.
Additional signs include water stains on the floor, loosened toilet bolts, intermittent gurgling from drains, and mold or mildew growth near the base, all signaling repair or replacement.
Diagnosing flange height and alignment issues
Determining whether a toilet flange requires repair or replacement begins with evaluating its height and alignment relative to the finished floor and the toilet base.
Inspect for gaps above or below the finished floor, uneven seating, and tilting. Measure flange height (should sit flush or slightly above floor), check bolt hole positioning, and confirm the flange is centered over the drain and securely fastened.
When to repair versus replace
Having confirmed flange height and alignment, the next step is to decide whether repair will suffice or a full replacement is required.
Minor cracks, corroded screws, or a slightly warped flange can often be repaired with epoxy, reinforcing rings, or flange extenders.
Severe rust, extensive cracking, broken bolt tabs, or compromised subflooring indicate replacement for a reliable, long-term seal and proper toilet function.
Preparing the Work Area and Removing the Toilet
First, the water supply is shut off and the tank and bowl are drained to prevent spills and reduce weight.
Next, the supply line is disconnected and the closet bolts are removed to free the fixture from the flange.
Finally, the toilet is lifted straight up with help as needed and set aside on a protective surface to expose the flange for inspection or replacement.
How to turn off water and drain the tank and bowl
Shut off the toilet’s water supply at the angle stop located on the wall or floor behind the bowl, then flush to empty the tank and hold the lever down to drain as much water as possible; use a sponge or towel to remove remaining water from the tank and bowl to prevent spills during removal.
Verify tank and bowl are dry, mop up residual dampness, and keep a bucket nearby for any stray water.
Steps to disconnect supply line and remove toilet bolts
Begin by placing a towel or small bucket beneath the supply line and loosening the compression nut at the tank or angle stop with an adjustable wrench; this captures any remaining water and prevents drips.
Disconnect the line, cap the valve if desired, then remove bolt caps and nuts from the closet bolts at the base.
Keep hardware together and inspect bolt condition before proceeding.
Safely lifting and setting aside the toilet
With the supply line disconnected and closet bolts removed, attention turns to lifting the toilet clear of the flange.
Two people should grasp the bowl near its base and lift straight up to break the wax seal; avoid twisting.
Set the toilet upright on cardboard or a drop cloth to protect floor and porcelain.
Label and store hardware for reinstallation.
Inspecting the Subfloor and Existing Flange
The inspector examines the subfloor for soft spots, water stains, or other signs of rot that could compromise a secure flange installation.
The existing flange is evaluated for cracks, corrosion, and whether it sits squarely and centered over the drain.
Finally, the flange height is measured relative to the finished floor to confirm it will seal properly with the wax ring or require adjustment.
Checking subfloor condition and rot indicators
Before removing the existing flange, inspect the surrounding subfloor for soft spots, discoloration, and mold growth that indicate moisture damage.
These signs, along with loose or squeaking boards and visible gap deterioration around the drain, determine whether repair or replacement is required.
Probe suspect areas with a screwdriver, note sagging or crushed plywood, and document the extent of rot to plan targeted repairs or replacement.
Assessing existing flange for cracks, corrosion, and alignment
After documenting subfloor damage, attention shifts to the flange itself: inspect for hairline or through cracks, surface pitting or flaking metal from corrosion, and any bending or gaps that prevent a snug seal against the toilet base.
Verify bolt slots are intact, screw holes are sound, and the flange sits flat without rocking. Note any deformities for repair or replacement.
Measuring flange height relative to finished floor
One clear measurement establishes whether the flange will sit at the correct height relative to the finished floor: measure from the top surface of the subfloor or finished floor up to the flange lip, aiming for the flange to be 1/4 inch above the finished floor or flush at minimum.
Record measurements at several points around the flange; unevenness indicates shimming, flange replacement, or floor adjustment before installation.
Step-by-Step Guide to Installing a New Toilet Flange
The next section outlines a clear sequence for installing a new toilet flange, beginning with selecting the correct flange type and size for the pipe material.
It then covers preparing the pipe (PVC, ABS, or cast iron), setting the flange height relative to the finished floor, and securing the flange to the drainpipe.
Finally, it addresses anchoring the flange to the subfloor, including bolt patterns and suitable adhesives or fasteners.
Choosing the correct flange type and size
Selecting the correct flange type and size assures a secure, leak-free connection between the toilet and drain.
The installer assesses drain material, floor height, and toilet outlet diameter. Choose materials (PVC, ABS, cast iron-compatible, or brass) and mount style (ring, spud, offset) that match conditions.
Measure bolt spacing and inner diameter to guarantee alignment and proper wax ring seating.
Preparing the pipe (PVC, ABS, cast iron) for the new flange
Begin by clearing and inspecting the existing drain pipe to confirm a clean, concentric surface for the new flange.
Remove debris, old wax, corrosion, or glue.
For PVC/ABS, square and deburr the cut end; test-fit the flange.
For cast iron, clean rust, cut back deteriorated sections, and file a smooth edge.
Ascertain proper fit and alignment before sealing.
Setting flange height: flush with finished floor or 1/8 above
Measure the flange height carefully to confirm a proper seal and prevent leaks or toilet rocking.
The flange should sit either flush with the finished floor or up to 1/8 inch above to assure wax ring compression and support. Choose slightly above when tile or thin flooring is present; flush works for thicker flooring.
Verify level and alignment before proceeding to the next step.
Securing the flange to the drainpipe
With the flange height set flush or slightly above the finished floor, attention shifts to securing the flange to the drainpipe to create a rigid, leak-free connection.
The installer verifies fit, applies appropriate sealant or gasket, and fastens per pipe type:
- Inspect and clean mating surfaces.
- Use solvent weld, compression adaptor, or rubber sleeve with clamps.
- Test alignment and seal before finalizing.
Anchoring flange to the subfloor: bolt patterns and adhesives
Secure the flange to the subfloor using a combination of correct bolt placement and appropriate adhesive to guarantee stability and prevent movement over time.
Align flange so bolt slots match toilet base, space bolts evenly (typically two opposing pairs). Use corrosion-resistant closet bolts and washers.
For uneven or hollow substrates, apply construction adhesive or polyurethane sealant and optional screw anchors into joists or blocking for solid clamping.
Installing wax ring or wax-free seal options
Choose the appropriate seal—traditional wax ring or a modern wax-free gasket—based on flange height, pipe condition, and preference.
Then prepare the flange and toilet base so the chosen seal seats evenly and forms a watertight, odor-proof connection.
Center the seal over the outlet, confirm proper flange height relative to finished floor, compress evenly during seating, and inspect for gaps or misalignment before proceeding.
Reinstalling the toilet and torquing bolts to spec
After confirming the wax ring or wax-free gasket is properly seated and the flange sits at the correct height, the toilet can be lowered into place and the mounting bolts torqued to specification.
Align the bowl over bolts, press down evenly to compress the seal, install washers and nuts, then tighten alternately in small increments. Torque to manufacturer’s recommended value to prevent cracking or leaks.
Reconnecting water supply and testing for leaks
Turn the water supply back on slowly and observe each connection for any signs of leakage.
The fill valve, supply line, and shutoff valve are inspected; fittings are tightened incrementally if drips appear.
Flush multiple times while monitoring the base and supply.
Dry paper towels reveal slow weeps.
If leaks persist, shut off water and reseat or replace faulty components before final cleanup.
Alternative Installation Scenarios
The guide briefly outlines common alternatives encountered when a standard flange installation is not possible.
Topics include fitting flanges to cast-iron pipe, using repair kits or spacers for low-flange conditions, and selecting offset or repair flanges for damaged piping.
It also covers flange extenders for raised finished floors and the scenarios in which each solution is appropriate.
Installing flange on cast-iron pipe
Installing a flange on a cast-iron soil pipe requires different tools and techniques than on PVC, because the pipe material, joint seals, and available adapters differ and often demand cutting, hub preparation, or the use of a no-hub or Fernco coupling to achieve a secure, watertight connection.
The procedure typically includes:
- Cutting and deburring the cast-iron hub.
- Fitting a hub adapter or Fernco coupling.
- Securing a stainless-steel no-hub clamp and aligning the flange.
Using flange repair kits and spacers for low-flange situations
When a toilet flange sits below finished floor level and cannot be raised by shimming the subfloor, a flange repair kit or spacer ring provides a reliable alternative to reposition the sealing surface without removing surrounding flooring.
The installer selects a kit sized to the pipe, cleans the flange, stacks spacers or installs a molded adapter, secures with recommended fasteners and sealant, then verifies flush alignment and wax-ring compression.
Installing an offset or repair flange for damaged pipes
Addressing a damaged or misaligned waste line often requires an offset or repair flange designed to bridge irregular pipe positions while restoring a secure, watertight toilet connection.
The installer measures offset distance, selects a compatible flange material and hub size, aligns and secures the flange to sound substrate, shims or seals gaps with gasketed adapters, and verifies level and bolt placement before final wax or rubber seal installation.
Using flange extenders for raised finished floors
If a repair or offset flange brings the toilet connection close to an already finished floor height, flange extenders provide a straightforward way to raise the flange to the new finished-floor plane without reworking the waste line.
Extenders stack onto the original flange, sealed with gasketed rings or silicone, and are secured with bolts.
Proper sizing, level alignment, and secure sealing prevent leaks and guarantee stable toilet mounting.
Common Problems During Installation and How to Fix Them
Common installation problems often stem from a compromised subfloor, damaged fastener holes, persistent leaks, or a rocking toilet.
Each issue requires targeted fixes—repairing or reinforcing rotted subfloor, using thread repair inserts or epoxy for stripped screw/bolt holes, locating and sealing leak sources, or stabilizing the toilet with shims or a repair ring without replacing the flange.
Clear diagnosis guides the correct repair method and prevents recurrence.
Dealing with uneven or rotted subfloor
Uneven or rotted subfloors compromise flange alignment and toilet seal integrity, so they must be assessed and repaired before proceeding.
Inspect for soft spots, mold, or water damage.
Remove decayed plywood and replace with treated, properly supported decking or sister joists as needed.
Use levelers or shims to correct minor unevenness.
Guarantee solid, level substrate before installing the flange and wax ring.
Fixing a stripped screw or broken bolt hole
Repair stripped screw holes or broken bolt slots promptly to guarantee a secure flange-to-floor connection and a watertight toilet seal.
Use larger diameter screws, nylon or brass threaded inserts, or epoxy-filled holes cured per manufacturer instructions.
For severely damaged wood, replace or sister a section of subfloor.
Reconfirm flange alignment and torque bolts evenly to prevent recurrence.
Addressing persistent leaks after installation
If persistent leaks appear after the flange and toilet are installed, diagnose the source before repeating any work: inspect wax ring seating, flange level, and bolt tightness.
Check closet flange connection to waste pipe and gasket integrity. Use dye or tissue to localize leaks.
Repair identified faults—replace wax ring, reseat flange, tighten bolts—or seal flange joints.
Retest for leaks before finishing.
Resolving toilet rocking without redoing flange
Stabilize a rocking toilet without replacing the flange by identifying the specific cause—worn mounting bolts, uneven floor, or a recessed or cracked flange—and selecting a targeted remedy such as shims, flange extenders, or thicker wax rings.
Tighten or replace bolts, insert corrosion-resistant shims beneath the base, use a flange spacer or extender for elevation, and verify level and seal integrity before final torque to prevent recurrence.
Maintenance Tips to Extend Flange Life
A concise maintenance routine helps preserve a water closet flange and prevent costly repairs.
Inspectors should follow a checklist that includes checking for cracks, loose bolts, corrosion, and signs of leaks, and note when wax rings show compression or deterioration.
Timely resealing or replacement of wax rings and simple preventive steps—such as avoiding overtightening bolts and keeping the flange area dry—can greatly extend flange life.
Routine inspection checklist
Regular inspections, performed at least twice a year and after any heavy use or plumbing work, help detect early signs of flange wear or failure.
A concise checklist guides assessment and timely action:
- Inspect for corrosion, cracks, and secure bolt condition.
- Check flange alignment and seating relative to the finished floor.
- Verify flange-to-pipe connection for leaks and odor evidence.
When to reseal and replace wax rings
Following inspection findings such as loose bolts, misalignment, or odor evidence, attention should turn to the wax ring, since its condition directly affects seal integrity and flange longevity.
Reseal when minor compression or slight leaks occur; replace when the ring is torn, flattened, or contaminated.
Also replace during toilet removal, flange repairs, or persistent odors despite tightening, ensuring a reliable watertight connection.
Preventive measures to avoid flange damage
Inspectors recommend routine checks and simple habits to prevent flange damage and extend service life:
Inspectors advise verifying toilet stability, avoiding overtightening bolts, and using proper anchors for substrate.
Maintain dry conditions, promptly repair leaks, and protect the flange during renovations.
Periodic cleaning prevents corrosion and buildup.
Replace deteriorated seals and damaged hardware immediately to preserve alignment and prevent costly flange failure.
Cost Estimates and Timeframe for DIY vs. Professional Installation
Typical material costs and initial tool investments are summarized to help readers budget for a DIY flange replacement.
Estimated time for each installation step is outlined so homeowners can plan the project schedule.
Guidance on when to hire a plumber covers complexity, hidden risks, and situations where professional expertise is recommended.
Typical material costs and tool investments
A basic materials list for replacing or installing a water closet flange generally includes the flange itself (PVC, ABS, brass, or stainless), a wax or wax-free seal, closet bolts and caps, appropriate screws or anchors, PVC primer and cement or suitable sealant, and any shims or repair rings for flooring adjustments; these parts typically range from $20 to $75 depending on material and quality.
| Item | Typical Cost | Notes |
|---|---|---|
| Flange | $10–$40 | Material affects price |
| Seal & bolts | $5–$20 | Wax vs wax-free choice |
| Tools | $0–$150+ | Basic vs specialty investments |
Estimated time for each step for DIY installers
With materials and basic tool choices outlined above, estimating time for each installation step helps DIYers plan labor and compare costs against hiring a pro.
Remove old toilet: 30–60 minutes.
Clean and prep flange area: 20–40 minutes.
Fit or replace flange: 30–60 minutes.
Secure flange and seal: 20–45 minutes.
Reinstall toilet and test: 30–60 minutes.
Total: 2–4 hours.
When to hire a plumber: complexity and risk factors
Evaluate risk and complexity before deciding whether to tackle a flange replacement or call a plumber.
If corrosion, cast-iron pipes, hidden cracks, sewer-gas leakage, or uncertain flange dimensions exist, professional assessment reduces failure risk.
Consider local code, tight timelines, and tool access.
DIY suits straightforward wax-ring swaps on accessible PVC; complex repairs, water damage, or multiple fixtures justify hiring a licensed plumber.
Quick Troubleshooting Guide
The guide outlines fast fixes for common problems like minor leaks and a rocking toilet, identifying quick checks and simple repairs that can restore function.
It also explains how to temporarily secure a flange—using shims, flange repair rings, or approved sealants—until a full repair can be made.
Safety precautions and when to call a professional are noted to prevent further damage.
Fast fixes for leaks and wobble
Address common leaks and a rocking toilet quickly by isolating the symptom, identifying the likely cause, and applying a targeted repair that restores seal and stability.
Check for loose bolts, damaged wax ring, cracked flange, or uneven floor.
Tighten or replace bolts, install a new wax or rubber ring, shim the base and retorque bolts, and reseal with appropriate caulk to stop leaks and wobble.
How to temporarily secure a flange until full repair
After quick checks for loose bolts, a damaged wax ring, or a cracked flange, a temporary securing method can keep the toilet stable and prevent leaks until a permanent repair is made.
Use flange repair rings or stainless steel band clamps to bridge cracks, pack a new wax or rubber gasket, tighten bolts evenly, and apply plumber’s tape or silicone for sealing.
Monitor and replace promptly.
Visual Reference and Measurement Guide
The section presents clear methods for measuring pipe diameter and flange bolt spacing to guarantee a proper fit.
It also includes diagrams that contrast correct and incorrect flange heights relative to the finished floor.
Readers are encouraged to compare measurements against the illustrations before proceeding with installation.
How to measure pipe diameter and flange bolt spacing

Measure carefully to guarantee a proper fit: determine the pipe’s outside diameter and the flange bolt hole spacing before purchasing or installing a flange.
Use calipers or a tape measure to record the pipe OD at its widest point. Measure bolt hole center-to-center across the flange or between opposing holes.
Note pipe material and any sleeves or adapters that affect final fit before ordering.
Diagrams showing correct and incorrect flange heights

A clear set of diagrams distinguishes acceptable flange heights from problematic ones by showing the flange rim relative to finished floor level and wax ring compression.
Illustrations label correct elevation flush with or slightly above finished floor, ideal wax ring deformation, and incorrect scenarios: recessed flange causing leaks, over-elevated flange stressing the bowl, and uneven mounting.
Measurements and tolerance callouts clarify acceptable ranges.
Conclusion
A secure water closet flange prevents leaks that cause costly damage. Studies show plumbing failures account for roughly 20% of household water loss, underscoring flange importance. With basic tools, careful inspection of the subfloor and proper sealing, most DIYers can replace a flange in an hour or two; complex damage may require pro help. Routine maintenance—tightening bolts, replacing wax rings—extends service life and reduces the 20% risk of water-related expense.