How to Plumb a Bathtub Drain: Step-by-Step Guide for DIYers and Pros
This guide provides a straightforward approach to plumbing a bathtub drain, perfect for both DIY enthusiasts and professionals. It details how to remove an old tub drain, select a compatible new assembly, and connect the tailpiece and trap to the house waste line. Key steps include inspecting the flange, overflow, and trap, choosing parts suitable for PVC, ABS, brass, or cast iron systems, and utilizing the right tools, putty, and tape. The instructions cover extraction, dry-fitting, sealing, and leak testing, while also offering troubleshooting tips, maintenance advice, and guidance on when to seek professional help.
Overview of Bathtub Drain Plumbing
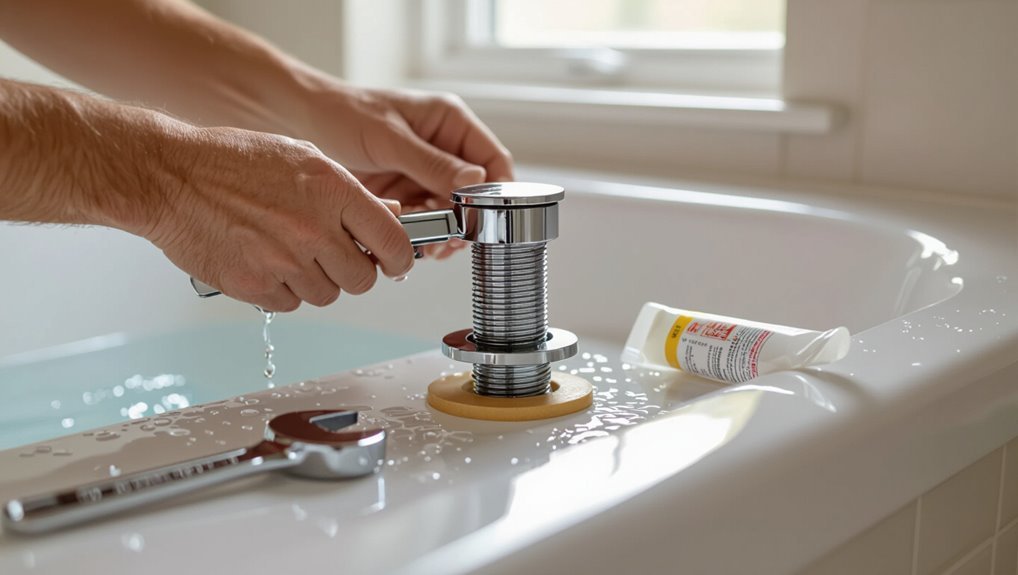
Bathtub drain plumbing covers removing the old drain, fitting new drain assemblies, and connecting trap and waste lines to the house plumbing.
The topic also notes when replacement or new installation is warranted, lists essential tools and materials, and outlines safety precautions.
Preparatory steps include shutting off water, protecting the work area, and ensuring proper ventilation and lighting.
What plumbing a bathtub drain involves
Installing a bathtub drain requires connecting several components—strainer, stopper, trap, and drain line—so water flows away efficiently while preventing sewer gases and debris from entering the tub.
The process covers measuring and aligning parts, selecting compatible fittings and seals, cutting and joining pipes, ensuring proper trap pitch and venting, and testing for leaks.
This summarizes how to plumb a bathtub drain.
When to replace or install a bathtub drain
Recognize that a drain should be replaced or newly installed when persistent leaks, slow drainage, recurring clogs, foul odors, visible corrosion, or damaged components impair function or risk water damage; likewise, remodeling, fixture upgrades, or changes in layout or venting justify installing a new drain to guarantee proper fit and code compliance.
Decisions also hinge on recurring repairs, age-related wear, improperly sized fittings, and insurance or inspection requirements.
Tools and materials required
A concise kit of hand tools, plumbing-specific fittings, and suitable sealants is essential before starting any bathtub drain work.
Necessary items include a drain wrench, adjustable pliers, plumber’s putty, PVC or ABS fittings and adapters, pipe cutter, Teflon tape, and replacement drain assemblies.
Confirm correct sizes and materials match existing pipes.
- Drain wrench
- Adjustable pliers
- Plumber’s putty
- PVC/ABS fittings
Safety precautions and preparing the work area
Before any fittings are loosened or sealants applied, the workspace should be secured and hazards mitigated.
The plumber confirms water and electrical sources are isolated, ventilates the area, and uses PPE: gloves, eye protection, and a mask for dust or fumes.
Tools are organized, slips and tripping risks removed, and a drain pan and towels positioned to control spills and protect finishes.
Types of Bathtub Drains and Components
The section outlines common bathtub drain assemblies—pop-up, trip lever, toe-touch, and lift-and-turn—highlighting how each operates.
It then describes essential components such as the strainer, flange, tailpiece, trap, and overflow and their functions in directing and sealing wastewater.
Finally, it compares typical pipe materials and fittings, including PVC, ABS, cast iron, and brass, and notes how material choice affects installation and durability.
Common drain types (pop-up, trip lever, toe-touch, lift-and-turn)
Bathtub drain assemblies come in several common actuator styles—pop-up, trip lever, toe-touch, and lift-and-turn—each with distinct mechanisms and installation considerations.
Pop-up uses linkage and an overflow lever; trip lever connects externally to a shaft.
Toe-touch toggles by pressing the stopper.
Lift-and-turn requires manual rotation.
Selection depends on user preference, maintenance access, compatibility with existing overflow, and valve clearance.
Key drain components and functions (strainer, flange, tailpiece, trap, overflow)
A drain assembly consists of several distinct components—strainer, flange, tailpiece, trap, and overflow—each serving a specific function in water flow control and backflow prevention. The strainer catches debris; the flange seals to the tub; the tailpiece channels flow; the trap retains a water seal; the overflow prevents spills and links to the drain.
| Component | Function |
|---|---|
| Strainer | Catches debris |
| Flange | Seals to tub |
| Tailpiece | Channels flow |
| Trap | Maintains water seal |
| Overflow | Prevents overfill |
Pipe materials and fittings (PVC, ABS, cast iron, brass)
Materials and fittings for bathtub drains vary by durability, cost, and installation method, with PVC, ABS, cast iron, and brass each offering distinct advantages and limitations.
PVC is affordable, easy to solvent-weld, and common in remodels.
ABS is similar but used regionally.
Cast iron is durable and sound-dampening but heavy and costly.
Brass provides corrosion resistance and longevity for fittings and trim.
Assessing Your Existing Drain and Plumbing Layout
The inspector first examines the drain flange, overflow assembly, and visible seals for proper fit and obvious leaks.
Next, the trap type and pipe routing are noted and checked for corrosion, damage, or signs of recurring blockages.
If structural damage, extensive corrosion, or complex rerouting is found, a licensed plumber should be engaged rather than attempting a DIY repair.
How to inspect the drain and overflow assembly
Before removing any components, the inspector should visually and physically assess the drain and overflow assembly to determine condition, alignment, and accessibility.
Check for corrosion, cracks, mineral buildup, loose or missing fasteners, and proper gasket seating.
Operate the stopper and overflow plate to confirm movement and seal integrity.
Note mounting type, clearances, and any evidence of past repairs or leaks for replacement planning.
Identifying trap type and pipe routing
Identify the trap type and trace the pipe routing to guarantee compatibility with replacement parts and to plan access for repairs.
Examine whether a P-, S-, or drum trap exists, note trap orientation, inlet and outlet sizes, and materials (PVC, ABS, cast iron).
Follow visible runs to wall or floor penetrations, locate cleanouts and vent connections, and sketch the layout for parts ordering and service planning.
Signs of damage, corrosion, or blockages
When inspecting a bathtub drain, look for visual and functional cues that indicate damage, corrosion, or blockage.
Check for greenish or reddish discoloration on metal fittings, pitting, flaking, or soft spots.
Note slow drainage, gurgling, persistent odors, or recurrent backups.
Inspect accessible joints and traps for leaks, mineral buildup, or hair and soap scum accumulation indicating partial obstructions.
When to call a plumber vs. DIY
How should one decide between tackling a bathtub drain oneself or calling a professional?
Assess layout complexity, pipe condition, and access. Simple plug, clog, or replaceable trap suits DIYers.
Multiple fixtures, cast iron, hidden leaks, sewer-line issues, or code-sensitive work requires a plumber.
Consider tools, permits, and confidence; err toward professional help when risk of water damage or improper installation exists.
Step-by-Step: Removing an Old Bathtub Drain
Before beginning, the water should be shut off and the work area cleared to protect fixtures and floors.
The procedure then moves from removing the stopper and trim to extracting a threaded drain body or, when present, addressing glued or soldered drains with appropriate tools and precautions.
Finally, the flange and surrounding surface are cleaned and inspected to prepare for a replacement.
Shutting off water and clearing the area
Shut off the water supply and clear the work area to prevent accidents and water damage.
The technician isolates the bathtub’s supply at the main or local shutoff, then opens faucets to drain residual water.
Protective coverings shield floors and fixtures.
Remove clutter, mats, and toiletries; position towels and a bucket for spills.
Good lighting and a clear path improve safety and efficiency.
Removing the drain stopper and trim
Begin by removing the visible stopper and trim to access the drain assembly.
Unscrew or unclip the stopper mechanism per its type—lift-and-turn, pivot, or pop-up—keeping small parts organized.
Remove escutcheon or trim plate screws, gently pry away any caulking, and set trim aside.
Inspect the exposed drain flange for corrosion or damage before proceeding to the next extraction step.
Extracting a threaded drain body
Using a drain wrench or adjustable pliers, the technician loosens the old threaded drain body by turning it counterclockwise while holding the tub flange steady.
Once loose, the body is unscrewed fully and lifted from the drain opening. Corroded threads may require penetrating oil and steady force.
Remaining sealant and debris are scraped clean to prepare the surface for the new threaded drain installation.
Removing a glued or soldered drain (special considerations)
If a threaded drain body could not be unscrewed because it is permanently bonded, the technician must switch to methods for glued or soldered drains that require more force and care.
Use heat cautiously for soldered joints, protecting surrounding finishes and plumbing.
For glued fittings, apply controlled mechanical extraction, cutting wedges or using an internal puller.
Inspect for damage and plan replacement parts accordingly.
Cleaning the flange and surrounding surface
After the drain body is removed, the technician clears away old putty, caulk, and mineral deposits from the flange and surrounding tub surface to guarantee a clean, even mating area for the new assembly.
A scraper, plastic putty knife, and mild solvent remove residues; a brass brush addresses corrosion.
The area is rinsed, dried, and inspected for cracks or pitting before proceeding with sealant and installation.
Step-by-Step: Installing a New Bathtub Drain
The installer selects a replacement drain that matches the tub type and overflow configuration.
Components are dry-fitted to verify alignment before final assembly, with distinct procedures for threaded, slip-fit, and glued bodies.
Finally, the tailpiece is connected to the trap, observing proper tools, torque, and seal methods.
Choosing the correct replacement drain
Selecting the correct replacement drain starts with measuring the existing assembly and matching its type—trip lever, push-and-pull, or twist-and-turn—to guarantee compatibility with the tub’s overflow and waste configuration.
Verify flange diameter, thread type, and material (brass, stainless, or plated). Confirm finish to match fixtures.
Check valve linkage orientation and purchase a gasketed seal or appropriate plumber’s putty recommendation for watertight installation.
Dry-fitting components and checking alignment
Begin by loosely assembling the new drain components above the tub without sealing or permanently tightening anything to confirm fit and orientation.
Inspect flange, gasket, tailpiece, and slip nut alignment with the waste outlet. Verify threads and seals line up, clearances allow access, and the overflow linkage operates unobstructed.
Adjust positions until parts mate cleanly and sit flush before final installation.
Installing a threaded drain body (tools and torque)
Install the threaded drain body using appropriate hand and adjustable tools, applying controlled torque to seat the flange and create a watertight seal without deforming gaskets or tub material.
Tighten progressively, alternating sides if needed, until snug. Use a torque-limiting tool or feel to avoid overtightening.
Verify alignment, check for visible gaps, and confirm threads are fully engaged before final testing.
Installing a slip-fit or glued drain assembly
For a slip-fit or glued bathtub drain assembly, the technician prepares the mating surfaces, selects the correct size tailpiece and solvent or adhesive, and dry-fits components to confirm alignment before applying any bonding material.
They apply primer where required, spread solvent or adhesive evenly, insert the tailpiece fully with a quarter-turn twist, hold to set, and wipe away excess for a neat, watertight joint.
Connecting the tailpiece to the trap
With the tailpiece secured to the drain body, the next step is to join it to the trap so wastewater flows correctly and the seal remains watertight.
Align tailpiece with trap inlet, trim to proper length, and slip nut and washer onto tailpiece.
Insert tailpiece into trap inlet, hand-tighten nut, then snug with pliers.
Check alignment; avoid overtightening to prevent cracking.
Reinstalling stopper and testing operation
Reattach the stopper assembly and verify operation before completing the job.
Seat the stopper, secure mounting screws or clip, and reconnect linkage or lift rod per manufacturer instructions.
Operate the mechanism through full travel, checking for smooth movement, proper sealing, and absence of leaks.
Adjust linkage or tighten fittings as needed.
Perform a water fill and observe drainage and seal integrity for several minutes.
Installing or Replacing the P-Trap and Waste Pipes
The procedure for installing or replacing a P-trap and associated waste piping begins with safely removing the old trap and inspecting the drain outlet for damage or obstructions.
Next, measured cuts and proper fittings for PVC or ABS pipe are prepared, using the appropriate joining method—solvent cement for glued joints, threaded or compression fittings where specified—to secure connections.
Finally, the new assembly is aligned with the correct slope and tied into the vented system to guarantee reliable drainage and trap seal.
Removing and replacing a P-trap safely
Begin by shutting off the water supply and placing a bucket under the trap to catch residual water and debris.
Using pliers, loosen slip nuts, supporting the trap to prevent sudden drops. Remove trap, inspect for clogs, corrosion, or damage.
Replace with a matching trap, hand-tighten slip nuts, then snug with pliers.
Restore water, check for leaks, and retighten if necessary.
Cutting and fitting PVC/ABS pipes and adapters
Measure and mark each pipe precisely before cutting to confirm proper alignment and trap seal when installing or replacing PVC/ABS P-traps and waste lines.
Use a square cut with a fine-tooth saw or PVC cutter, deburr and chamfer edges, test-fit adapters and trap components dry, maintain correct slopes and lengths, and guarantee proper clearances to walls and fixtures prior to final assembly and securement.
Joining techniques: solvent cement, threaded fittings, compression
Joinery choices determine the durability and serviceability of a bathtub P-trap assembly, so installers must select between solvent-weld PVC/ABS, threaded metal or plastic fittings, and compression connections based on material compatibility and access for future maintenance.
Solvent cement yields permanent, watertight joints; threaded fittings allow disassembly but require tape or paste; compression fittings suit mixed materials and tight spaces yet need periodic retightening.
Ensuring proper slope and venting
Several key checks assure a bathtub drain functions reliably: correct slope of the waste run, a properly sized and installed P-trap, and adequate venting to prevent siphonage.
Assure 1/4 inch per foot slope for horizontal waste piping, verify P-trap diameter matches fixture outlet, maintain trap arm length within code, and connect to a vent or wet venting system to preserve trap seal and prevent odors.
Working with Overflow Assemblies and Trip Levers
The next step addresses overflow assemblies and trip levers, starting with removal and replacement of overflow plates and gaskets to guarantee a watertight seal.
It then covers installing a trip-lever mechanism, focusing on proper alignment and adjustment for smooth operation.
Finally, common overflow leaks are described with straightforward fixes for gasket replacement, misalignment, and corrosion.
Removing and replacing overflow plates and gaskets
Begin by locating the overflow plate and examining its attachment method—typically two screws, a single screw behind a decorative cap, or a threaded assembly—so the correct tools and approach can be chosen.
Remove screws or unscrew the plate, note orientation, then extract the gasket.
Replace with matching gasket, seat evenly, reinstall plate to original alignment, tighten securely without over-torquing to prevent leaks.
Installing a trip-lever mechanism (alignment and adjustment)
Install the trip-lever assembly so the lever, linkage, and overflow plate align smoothly with the drain tailpiece and stopper; proper alignment prevents binding, guarantees a tight seal, and allows reliable operation.
Position linkage without kinks, secure set screws finger-tight, then test motion and stopper travel.
Adjust linkage length and plate orientation for full open/close travel, then tighten fasteners and recheck for smooth, consistent operation.
Common overflow leaks and how to fix them
Once linkage alignment and set-screw adjustments are confirmed, attention shifts to diagnosing and repairing common overflow leaks around the assembly and trip lever.
Inspect gasket, faceplate, and overflow tube for cracks or misseating.
Tighten or replace the rubber gasket, torque faceplate screws evenly, and reseal threads with plumber’s putty or silicone.
Replace corroded tubes or faulty trip-lever units as needed.
Testing, Leak Checking, and Finishing Touches
A thorough water test of the drain and overflow confirms watertight connections before finishing.
Any leaks should be traced to the flange, gaskets, or joint sealant and corrected with proper wax rings, replacement gaskets, or approved sealants.
Once sealed, installed trim and escutcheons are aligned, old parts are disposed of responsibly, and the area is cleaned for a final inspection.
Water test procedure for drain and overflow
Several simple steps verify that the drain and overflow are watertight before finishing trim and wall closures.
Fill tub to just below overflow, observe for leaks at joints and trap for several minutes.
Plug overflow access and inspect behind wall or access panel for moisture.
Drain full tub while watching seals and trap connections.
Repeat after tightening any fittings; document results.
How to locate and seal leaks (flange wax, gaskets, sealants)
Many homeowners and plumbers trace leaks by isolating likely joints and fittings, then testing each sealing surface systematically.
They inspect the flange-wax ring, slip-joint gaskets, and threaded connections.
Water tests reveal seepage; dye or dry-paper methods pinpoint sources.
Repairs include replacing wax or neoprene seals, tightening or rethreading fittings, and applying appropriate plumber’s sealant or silicone, then retesting until dry.
Final trim installation and cosmetic considerations
Once leak checks pass and drainage functions smoothly, attention shifts to final trim and cosmetic work: installing the overflow and drain covers, securing escutcheons, and fitting any access panels or decorative surrounds.
Tighten fittings evenly to avoid stress, apply plumber’s putty or silicone where manufacturer recommends, align visible components for symmetry, and confirm smooth operation of stoppers.
Inspect for leaks and wipe away excess sealant.
Proper cleanup and disposal of old parts
After confirming leak-free operation and finishing visible trim, attention moves to cleanup and disposal of removed components.
All used parts, sealant residues, and debris are collected, separated by material—metal, plastic, and hazardous waste.
Salvageable items are cleaned and stored; corroded or damaged pieces are recycled or discarded per local regulations.
Work area is wiped, drains flushed, and tools inspected before storage.
Common Problems and How to Fix Them
Common bathtub drain issues include slow drainage from clogs, persistent flange or trap leaks, corroded or seized drain bodies, and misaligned piping that prevents proper slope.
Recommended fixes cover mechanical and chemical clog removal, resealing or replacing faulty flanges and traps, extraction techniques for stuck drain assemblies, and pipe realignment to restore correct pitch.
Each problem is addressed with practical, step-by-step remedies and tools appropriate for the task.
Slow drainage and clog removal methods
Slow drainage in a bathtub typically signals a partial clog in the drain line or trap, often caused by hair, soap scum, or mineral buildup restricting water flow.
Recommended fixes: remove and clean the stopper, snake the drain with a hand auger, flush with hot water, use enzyme-based cleaners, or disassemble the P-trap for manual removal.
Test flow and repeat if necessary.
Persistent leaks at the flange or trap
When drainage problems are ruled out but water continues to appear around the tub base or under the sink cabinet, the leak often originates at the tub flange or the P-trap connection.
Inspect flange sealant and flashing, tighten or replace corroded screws, and reseal with proper marine-grade caulk.
For P-trap leaks, tighten slip nuts, replace worn washers or gaskets, and swap distorted trap sections.
Corroded or stuck drain bodies extraction tricks
Extracting a corroded or stuck tub drain body requires patience and the right tools to avoid damaging the tub or plumbing. Seized drains are usually the result of decades of mineral buildup, rusted threads, or degraded plating that fuses components together.
Techniques include applying penetrating oil, gentle heat, tapping to break corrosion, using a proper drain extractor or pipe wrench with protection, and replacing the flange and basket promptly.
Misaligned pipes and poor slope corrections
Many bathtub drainage problems stem from misaligned pipes or incorrect slope in the waste line, which impede flow and cause standing water or slow drainage.
Inspect runs for sagging, high spots, or off-angle joints. Correct by re-pitching to 1/4″ per foot, realigning fittings, and adding short straight sections or hangers.
Test flow and adjust until free-draining.
Time, Cost Estimates, and Material Recommendations
A concise breakdown of typical DIY time by task helps set expectations, from removing the old drain (30–60 minutes) to fitting new trap and connections (1–2 hours).
Cost ranges for parts are outlined alongside guidance on when full replacements are more economical than repairs.
Recommended brands and materials for longevity—brass fittings, PVC or ABS piping as appropriate, and well-reviewed drain assemblies—are noted to inform purchase decisions.
Typical DIY time breakdown by task
Breaking the project into discrete tasks helps set realistic expectations for time, cost, and materials.
Inspection and planning: 15–30 minutes.
Removing old drain and trim: 30–60 minutes.
Cutting and fitting new drain/P-trap: 45–90 minutes.
Sealing, soldering or solvent-welding joints: 30–60 minutes.
Testing for leaks and adjusting: 15–30 minutes.
Cleanup and final trim: 15–30 minutes.
Tools and parts prep: 10–20 minutes.
Cost ranges for parts and when replacements are cost-effective
Once task times are estimated, the next consideration is material cost and whether repair or replacement yields better value.
Typical parts: gaskets and seals $5–20, drain assemblies $20–80, tubs or extensive trap work $150–600.
Small fixes usually justify replacement parts; corroded drains, warped flanges, or repeated leaks often warrant full replacement due to labor and longevity savings.
Recommended brands and materials for durability
Several reliable brands and specific materials consistently deliver long-lasting bathtub drain performance and are worth prioritizing when planning repairs or replacements.
Choose corrosion-resistant metals and quality plastics, balance cost and longevity, and verify warranties.
- Brass drains (half-inch threads) — Moen, Delta
- Stainless steel assemblies — Kohler, Toto
- PVC/Schedule 40 traps — Charlotte Pipe
- Silicone seals and neoprene gaskets — Superior
Tips to Avoid Mistakes and Ensure Long-Term Performance
Careful attention to sealing—using plumber’s putty for metal-to-metal connections and silicone for wet-area joints—prevents leaks and long-term damage.
Ensuring the trap remains accessible simplifies future repairs and inspections.
Regular preventive maintenance, such as clearing hair and checking seals, preserves performance and avoids costly failures.
Proper sealing techniques and when to use plumber’s putty vs. silicone
Proper sealing of a bathtub drain prevents leaks, stops mold growth, and preserves fixtures; choosing between plumber’s putty and silicone depends on materials, exposure to water, and whether a watertight but removable seal is desired.
Use plumber’s putty for metal drains and removable fittings; use silicone for porous surfaces, constant submersion, or where flexibility and long-term adhesion matter.
Apply evenly and cure fully.
Maintaining access to traps and future serviceability
Maintaining unobstructed access to the bathtub trap and drain assembly is essential for quick repairs and preventing costly water damage; plan installations so fittings can be reached without removing large sections of flooring or cabinetry.
Include accessible cleanout panels, removable trap adapters, and straight runs where possible.
Label shutoffs, avoid permanent adhesives on service fittings, and document layout for future technicians.
Preventive maintenance practices
Establish a routine of simple inspections and preventative steps to keep the bathtub drain reliable and reduce emergency repairs.
Check for slow drainage, odors, leaks, and loose fittings monthly.
Clear hair traps and use enzyme cleaners quarterly.
Tighten slip nuts and reseal exposed joints as needed.
Record maintenance dates and any parts replaced to spot patterns and plan timely upgrades.
Additional Resources and When to Hire a Professional
The article briefly outlines where to check local plumbing codes and permit requirements before beginning work.
It also suggests criteria for finding a qualified plumber and sample questions to assess experience and licensing.
Finally, it points to reliable tutorials, videos, and reference guides for step‑by‑step help and troubleshooting.
Local plumbing codes and permit considerations
Local plumbing codes and permit requirements vary by municipality and can affect scope, materials, and inspection schedules for a bathtub drain installation.
The guide recommends verifying local code for trap type, venting, slope, fixture units, and approved materials.
Permit needs and inspection timelines should be confirmed with the authority having jurisdiction.
Noncompliance risks fines, failed inspections, and required rework.
How to find a qualified plumber and questions to ask
How should a homeowner identify a qualified plumber for a bathtub drain job?
A qualified plumber holds proper licensing, insurance, and local code familiarity.
Verify references, recent job photos, and online reviews.
Ask about experience with bathtub drains, estimated timeline, materials, warranty, permits, and charge structure.
Request a written estimate and confirm liability coverage before hiring to guarantee accountability and compliance.
Useful tutorials, videos, and reference guides
After verifying credentials and gathering estimates, homeowners can supplement that vetting with targeted learning resources to better evaluate bids and know when to hire a pro.
Concise, reputable tutorials and manufacturer guides clarify scope, costs, common pitfalls, and safety limits.
Recommended resources include:
- Official plumbing code summaries
- Manufacturer installation manuals
- Step-by-step video tutorials from trade schools
- Forum threads with verified contractor feedback
Conclusion
Like a well-tended stream finding its course, a properly plumbed bathtub drain guides water away without hesitation, reflecting both skill and care. The steps outlined form stones laid across a river—each placement steadying the flow, preventing leaks and future erosion. For DIYers and pros alike, attention to parts, fit, and seal is the bridge between effort and lasting performance. When uncertainty rises, calling a professional steadies the current.