How to Pull a Gas Stove Away From the Wall Safely: Step-By-Step Guide
To safely pull a gas stove away from the wall, first shut off the gas supply and electrical power. Ensure all fittings are cool and depressurized. Clear the area, protect your floors, and gather necessary tools like wrenches, sliders, and a gas detector. Have a helper assist you. Disconnect any flexible connectors or cap the lines according to the manufacturer’s instructions. Check for gas leaks using soap or a detector. Then, carefully slide the stove out, supporting any connections. The following steps will guide you through inspection, reconnection, and when to seek professional help.
How to Safely Pull a Gas Stove Away from the Wall: Quick Overview
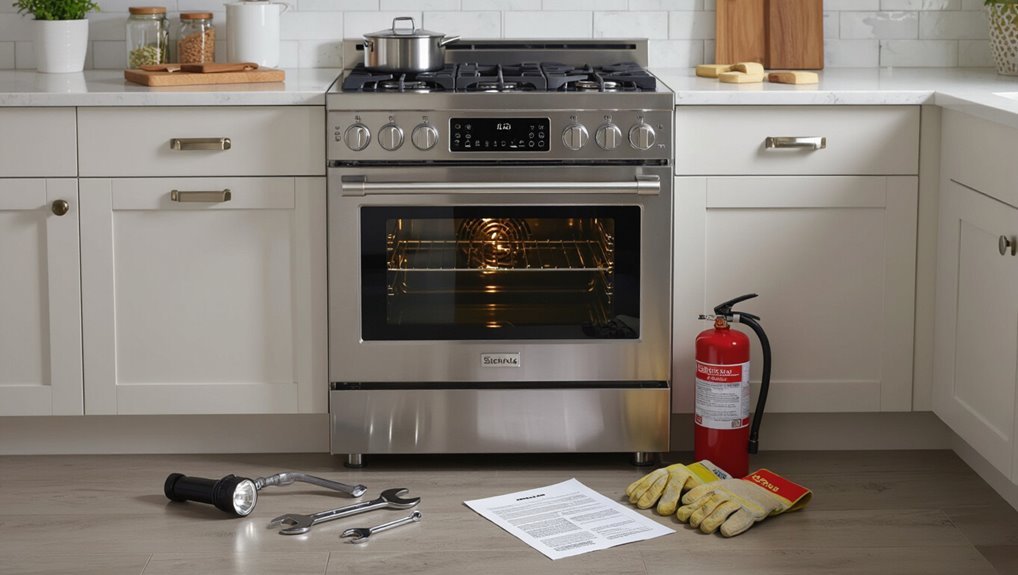
A brief overview explains common reasons to pull a gas stove away from the wall, such as cleaning, inspecting connections, or making repairs.
It notes that this task should be planned and approached with safety as the primary concern.
A concise pre-start checklist—shutting off the gas, turning off electrical power, clearing the area, and having tools and a spotter—precedes any movement of the appliance.
When and why you might need to pull a gas stove away from the wall
Several common situations require pulling a gas stove away from the wall: cleaning accumulated grease and debris, inspecting or replacing the gas connection, addressing uneven leveling or wheel issues, and accessing behind-appliance wiring or ventilation components. The homeowner reviews reasons and steps for how to pull gas stove away from wall, prioritizing inspection, maintenance, and appliance access.
| Reason | Action | Benefit |
|---|---|---|
| Cleaning | Pull back | Remove grease |
| Gas line | Inspect/replace | Prevent leaks |
| Leveling | Adjust wheels | Stability |
| Wiring | Access | Safety |
| Ventilation | Clean/repair | Efficiency |
Quick safety-first checklist before you start
Begin by confirming that gas and electrical supplies are off.
Then make certain the work area is clear, well-lit, and ventilated.
Verify gas shutoff at the supply valve, unplug the stove, and move combustibles away.
Wear gloves and eye protection.
Keep a flashlight, wrench, and gas detector nearby.
Have a phone ready and an emergency contact for the gas utility.
Proceed methodically.
Tools and Materials You’ll Need
A concise list of basic tools and optional protective supplies helps guarantee the stove is moved without damage or injury.
Essential items include adjustable wrenches, a flashlight, and a stove dolly or moving pads, while optional protective equipment covers gloves, safety glasses, and knee pads.
Clear preparation reduces risks and speeds the process.
Basic tools list
Essential tools and materials for safely pulling a gas stove out from the wall include an adjustable wrench or two open-end wrenches to disconnect the gas line, a set of screwdrivers (flat and Phillips) for removing trim or brackets, a pair of slip-joint pliers for gripping fittings, a flashlight or work light to inspect connections, and a movable appliance dolly or furniture sliders to support and shift the range.
- Adjustable wrench(s)
- Screwdriver set
- Appliance dolly or sliders
Optional protective equipment and supplies
Several useful pieces of protective equipment and supplies can reduce risk and make pulling a gas stove safer and cleaner.
Protective gloves, safety glasses, and knee pads protect the person; a tarp and painter’s tape contain debris; a flashlight and adjustable wrench aid inspection and quick adjustments. Useful extras minimize spills, scratches, and unexpected hazards.
- Heavy-duty gloves
- Protective eyewear
- Drop cloth/tarp
Verify Gas and Power Status
Before moving the stove, the technician locates the gas shutoff valve and closes it using the correct wrench or handle to stop the fuel supply.
They switch off electrical power to the appliance at the circuit breaker and guarantee any pilot light is extinguished and cooled.
Finally, they confirm the stove and surrounding surfaces are cold to the touch and safe to handle.
Locating the gas shutoff valve and how to turn it off safely
Where is the gas shutoff valve, and how should it be turned off safely?
The valve is typically on a rigid pipe behind the stove or nearby on a wall or floor.
Using an adjustable wrench, rotate the valve perpendicular to the pipe to shut gas flow.
Confirm closure by smelling for gas and listening; use a gas detector or call the gas company if unsure.
Turning off electrical power to the stove and pilot light considerations
Cut power to the stove at the circuit breaker or disconnect switch to eliminate electrical hazards and prevent automatic ignition while the appliance is moved.
Confirm the pilot light is extinguished or the unit’s ignition disabled; if uncertain, consult the manufacturer’s instructions.
Use a non-contact voltage tester to verify de-energized terminals, and tag the breaker or switch to prevent accidental restoration during removal.
Confirming the appliance is cold and safe to move
After confirming power is de-energized and tagged, the next step is to verify that the appliance and surrounding surfaces are cool and that all gas sources are secured.
Inspect burners, oven cavity, and nearby walls for residual heat. Confirm the gas valve is closed and capped if applicable.
Use a thermometer or cautious touch with an insulated tool. Guarantee adequate ventilation before moving the stove.
Prepare the Work Area
Before moving the appliance, surrounding surfaces and flooring should be cleared and protected with drop cloths or cardboard to prevent scratches and spills.
Oven racks, drawers, and any loose items must be removed to reduce weight and prevent shifting.
A helper should be positioned and the movement path planned and communicated so the stove can be pulled straight out without obstruction.
Clearing and protecting surrounding surfaces and flooring
Clear the area around the stove of loose items—dish towels, cleaners, grocery bags, and decorative objects—so nothing can snag or fall when the appliance moves.
Lay down a sturdy protective layer: cardboard, a moving blanket, or thick drop cloths to shield flooring and baseboards. Tape edges to prevent tripping.
Protect adjacent countertops and walls with scrap plywood or folded blankets to guard against scratches and dents.
Removing oven racks, drawers, and loose items
With surrounding surfaces secured and floors protected, attention shifts to removing movable items inside and beneath the stove to prevent damage and reduce weight during the pull-out.
Remove oven racks, broiler pans, and any loose trays; slide out and set aside storage drawers.
Place removed items on a protected, stable surface and label if needed.
Check for loose screws or debris before proceeding.
Positioning a helper and planning the movement path
Though the stove is now lighter, a second person should be positioned to assist: one person steadies and guides the front while the helper supports the rear and watches for gas and electrical connections.
They agree on commands, designate who leads movement, and clear a straight path, removing rugs, obstacles, and tripping hazards.
Plan pauses to check lines and reposition feet for controlled, synchronized steps.
Disconnecting the Gas Line Safely
Before touching fittings, the technician visually inspects the gas connector to determine whether a flexible hose or a rigid hard-piped connection is present and assesses condition and type.
For flexible connectors, disconnecting proceeds with the correct wrench technique on the fittings, while hard-piped lines require special procedures and typically a licensed plumber.
After separation, the line is sealed and a basic leak check is performed to confirm a gas-tight closure.
Inspecting the gas connector and flexible hose types
A careful inspection of the gas connector and flexible hose is the essential first step when preparing to disconnect a gas line; this guarantees any damage, improper fittings, or unsuitable hose types are identified before work begins.
The inspector notes material (stainless steel, corrugated stainless, rubber with stainless braid), visible cracks, kinks, loose fittings, and stamped ratings.
Replace noncompliant or aged connectors.
Steps to disconnect a flexible gas connector (with wrench use)
Begin by shutting off the gas supply at the appliance valve and the household shutoff.
Then verify the line is depressurized using a gas detector or soapy water at the connection.
Place a backup wrench on the appliance fitting, use a second wrench to turn the flexible connector nut counterclockwise, and support the hose to prevent twisting.
Remove the nut, cap or plug the appliance fitting, and recheck for leaks.
What to do if you encounter a hard-piped connection
Encountering a hard-piped gas connection requires a different approach than a flexible connector: the line must be depressurized, isolated at the household shutoff, and treated as a permanent plumbing joint rather than a simple nut to loosen.
The appliance should remain disconnected until a qualified plumber or gas technician performs proper disassembly, using pipe wrenches, thread sealing standards, and code-compliant fittings to avoid damage.
Sealing the gas line after disconnection and leak-check basics
After the gas supply has been shut off and the appliance disconnected, the exposed line must be sealed and tested before leaving the area. A qualified person caps or plugs the line, applies thread sealant or appropriate cap, then conducts a soap solution or electronic leak test. Ventilate and recheck until zero reading confirmed.
| Cap type | Sealant | Test method |
|---|---|---|
| Threaded cap | PTFE tape | Soap bubble |
| Mechanical cap | Pipe dope | Electronic |
| Removable plug | Flare nut | Reinspect |
Move the Stove Away from the Wall
Attention to proper lifting and sliding techniques reduces the risk of the stove tipping during movement.
Appropriate aids—such as furniture sliders, a dolly, or a folded towel—can ease relocation across flooring while protecting surfaces.
Throughout the move, the gas connector should be kept under control and prevented from bearing the stove’s weight.
Proper lifting and sliding techniques to avoid tipping
Begin with a steady, controlled motion: the person positions their feet shoulder-width apart, braces the back against the stove, and uses leg strength—never the lower back—to initiate the lift. Hands stay low and centered, one person holds each side, slow small steps maintain balance while the stove slides. Communicate, pause, and set down gently to prevent tipping.
| Action | Purpose |
|---|---|
| Feet stance | Stability |
| Hands low | Center of gravity |
| Slow steps | Control |
| Communicate | Coordination |
| Gentle set down | Prevent tip |
Using furniture sliders, dolly, or towel methods
Slide the stove a few inches using furniture sliders, a dolly, or a folded towel to protect flooring and reduce strain.
The operator positions sliders beneath sturdy points, or centers the appliance on a dolly with straps, or folds a towel for low-friction sliding. Move slowly, keep feet clear, and pause to adjust alignment.
- Place sliders under feet or corners
- Center and strap on dolly
- Fold towel for controlled glide
Maintaining control of the gas connector while moving
Keep a firm, steady hand on the gas connector assembly as the stove is moved, ensuring the line neither kinks nor stretches; this prevents abrupt stresses that can loosen fittings or cause leaks. The handler watches connector angle, supports weight, and signals movers. Stop immediately if resistance or smell appears; recheck fittings and shut off gas before proceeding.
| Task | Action | Cue |
|---|---|---|
| Support | Hold connector | Steady |
| Monitor | Angle/kinks | Visual |
| Respond | Stop/check | Smell |
Inspecting and Servicing Behind the Stove
Once the stove is pulled away, the area behind it should be inspected for gas leaks, corrosion, and any visible appliance damage.
Grease, accumulated debris, and pest droppings should be carefully cleaned to reduce fire and hygiene risks.
If there is any sign of a gas leak, significant corrosion, or uncertainty about the gas line, a licensed plumber or gas technician should be contacted.
Checking for leaks, corrosion, and appliance damage
Inspecting behind the stove begins with a careful visual and tactile survey for gas smell, loose fittings, corrosion, dents, and distortion of the supply line or connector. Any suspect odor or visible damage prompts immediate shutoff and professional service. Document findings, note dates, and avoid using the appliance until repaired.
| Fear | Relief | Urgency |
|---|---|---|
| Visible corrosion | Safe repair | Shut off gas |
Cleaning grease, debris, and pest detritus behind the stove
Pulling the stove forward reveals accumulated grease, crumbs, and pest detritus that can fuel odors, pests, and fire hazards. These residues should be removed promptly with appropriate cleaners, disposable towels, and a vacuum with a hose attachment to minimize airborne particles.
Work systematically: dry-vacuum loose debris, degrease surfaces, wipe with disposable cloths, clean crevices with brushes, and dispose of waste in sealed bags.
When to call a professional plumber or gas technician
If any signs of a gas leak, damaged or corroded supply lines, malfunctioning shutoff valves, or unclear connections are present, a licensed plumber or gas technician should be contacted immediately; routine cleaning and minor adjustments are acceptable for homeowners, but anything involving gas fittings, persistent leaking odors, hissing sounds, visible rusted fittings, or unknown modifications requires professional inspection and repair to guarantee safety and code compliance.
| Indicator | Action |
|---|---|
| Smell of gas | Evacuate, call technician |
| Hissing noise | Shut off, call pros |
| Corroded line | Do not touch |
| Faulty valve | Replace professionally |
| Uncertain work | Inspect and certify |
Reconnecting and Returning the Stove
When ready to return the stove, the technician should reattach the flexible connector or redo hard‑pipe joints using the correct fittings and torque to prevent leaks.
After connections are made, all joints must be tested with soapy water and, where available, an electronic gas detector to confirm there is no leakage.
Finally, electrical power can be restored and the pilot or electronic ignition relit following manufacturer procedures.
Reattaching flexible connector or reworking hard-pipe connections
Reconnect the gas line with care, choosing the appropriate method for the installation: a flexible connector for ease and vibration isolation, or a properly fitted hard-pipe joint for a rigid, permanent connection.
Align fittings, replace damaged parts, and hand-start connections before final securing. Confirm the connector has the correct length and support; route piping to avoid kinks or stress.
Perform a leak test afterward.
Proper torque and fittings to avoid leaks
After aligning and hand-starting the chosen connector or hard-pipe joint, attention shifts to proper torque and fitting selection to prevent gas leaks as the stove is returned to service.
Use manufacturer-specified fittings, thread sealant rated for gas, and calibrated torque values for flare, compression, or NPT joints.
Overtightening and undertightening both risk leaks; when in doubt, consult a certified gas technician.
Leak testing with soapy water and electronic gas detector
Begin leak testing by turning the gas supply on slowly and observing for any audible or tactile signs of escaping gas before applying test methods.
Then use soapy water applied to joints and an electronic gas detector to confirm integrity. Any bubbling or detector alarm requires immediate shutdown and inspection by a qualified technician.
- Inspect all fittings visually
- Watch for soap bubbles
- Scan with detector across connections
Restoring electrical power and lighting pilot or ignition
Restore electrical power and confirm the stove’s controls are set to off before re-energizing the circuit. After restoring power, check indicator lights and electronic ignition. Light pilots per manufacturer instructions, using a long lighter if required. Observe burners for normal ignition and stable flames. If issues persist, shut off gas and call a professional.
| Step | Action |
|---|---|
| 1 | Power on |
| 2 | Check lights |
| 3 | Light pilot |
| 4 | Verify flame |
Safety Checks After Reinstallation
After reconnection and positioning, the technician performs a final operational test of each burner and the oven to confirm proper ignition and heat output.
They then monitor for any smells, hissing sounds, or irregular flame patterns that could indicate a leak or improper flow.
A recommended wait time and periodic rechecks after the first use are observed to guarantee continued safe operation.
Final operational test of burners and oven
With the range reconnected and all fittings tightened, a systematic operational test confirms that burners and oven function safely and correctly.
Each burner is lit individually to verify steady blue flames and full ignition, flame control responsiveness, and proper simmer settings.
The oven is heated to a set temperature, with controls cycling normally and the broiler tested briefly.
All controls return to off reliably.
Monitoring for smells, hissing, or irregular flame patterns
Having confirmed that burners and oven operate correctly, the next step is to watch carefully for any odors, hissing sounds, or abnormal flame behavior that could indicate a leak or improper combustion. Observe for persistence, document anomalies, and evacuate if strong gas scent or loud hissing occurs. Notify a professional for repairs; do not use the appliance until cleared.
| Signal | Response |
|---|---|
| Smell | Leave |
| Hiss | Call |
| Irregular flame | Shut off |
| Panic | Stay calm |
Recommended wait time and rechecks after first use
Once reconnected and checked for leaks, allow the stove to sit unused for the manufacturer-recommended soak period—typically 30 to 60 minutes—before powering burners or the oven for normal use.
After initial operation, perform a focused recheck: inspect connections, test each burner and oven cycle, confirm steady blue flames, and verify no odors or hissing.
Repeat leak test within 24 hours.
Common Problems and How to Handle Them
Common issues that may arise when pulling a gas stove include stuck or seized gas fittings, damaged flexible connectors or gas lines, and hazards related to stove weight, uneven floors, or tipping.
Each problem requires a specific approach—careful loosening or professional assistance for seized fittings, immediate replacement of any compromised gas components, and safe handling or shimming to address stability concerns.
Identifying these problems early reduces risk and informs whether a homeowner can proceed or should call a qualified technician.
Stuck or seized gas fittings
Stuck or seized gas fittings can prevent a stove from being moved and pose safety risks if force is applied blindly. Corrosion, overtightening, or years of paint and grime can fuse connections together.
Assess visually, turn off gas, and ventilate. Apply penetrating lubricant, allow dwell time, then try gentle, controlled motion with proper wrenches.
If resistance persists, stop and call a licensed gas technician.
Damaged flexible connector or gas line
Inspect the flexible connector and visible sections of the gas line for kinks, cracks, corrosion, loose fittings, or signs of gas odor and staining, since any of these indicate a compromised connection that requires immediate attention.
If damage or leakage is suspected, stop, shut off the supply, ventilate, avoid ignition sources, and contact a qualified gas technician to replace the connector or repair piping.
Stove too heavy, uneven floor, or tipping risk
Addressing a heavy or unstable stove requires planning and caution to prevent injury or damage: uneven floors, concentrated weight, or small contact points can make pulling a range hazardous and increase tipping risk.
Assess stability, level floor with shims or adjustable feet, use appliance straps or a dolly rated for the stove, enlist at least one helper, disconnect gas properly, and move slowly to maintain control.
Preventive Measures and Maintenance Tips
A regular inspection schedule for the gas connector and valves helps catch wear, leaks, or corrosion before they become hazards.
Keeping the area behind the stove clear and accessible simplifies inspections and any required service.
Where appropriate, upgrading to a quick-disconnect or easier-access connector can reduce strain on fittings and make routine maintenance safer and faster.
Regular inspection schedule for gas connector and valves
Several simple, routine checks carried out every few months can catch wear or leaks in the gas connector and valves before they become hazards.
Inspect connections visually, feel joints for looseness, and sniff for odor. If corrosion or damage appears, schedule professional service immediately.
Maintain a log of inspections and repairs to track component age and interventions.
- Visual connection check
- Leak/odor test
- Professional service when needed
Best practices to keep the area behind the stove accessible
Keep the area behind the stove clear and accessible by establishing simple, regular habits: store seldom-used items elsewhere, leave a 2–3 inch clearance for ventilation and access, and avoid grounding heavy or fixed obstructions that would hinder pulling the appliance out for inspection or service. Regular cleaning, labeling, and unobstructed access reduce risks and simplify maintenance.
| Action | Frequency |
|---|---|
| Clear items | Weekly |
| Clean debris | Monthly |
| Inspect space | Quarterly |
Upgrading to a quick-disconnect or easier-access connector
Once regular clearing and inspections are established, homeowners may consider upgrading the gas connection to a quick-disconnect or other easier-access fitting to simplify routine checks and reduce strain during service.
A licensed plumber or gas technician should perform the conversion, selecting rated components and installing shutoff valves. Proper installation improves safety, speeds maintenance, and minimizes risk of flex line damage while preserving code compliance and leak integrity.
When to Hire a Professional
If a gas line, ignition system, or electrical wiring shows damage or requires adjustment, a licensed gas technician or electrician should be called.
Homeowners should verify credentials, insurance, and relevant experience before hiring.
Clear questions about permits, cost estimates, safety procedures, and warranty policies help guarantee a qualified professional is chosen.
Scenarios requiring licensed gas technician or electrician
Recognize that certain situations exceed homeowner skill and require a licensed gas technician or electrician to avoid serious hazards and code violations. Emergencies, gas leaks, appliance electrical fault, complex shutoffs, or code-related modifications demand professional assessment and repair; do not proceed without certified help.
| Scenario | Reason |
|---|---|
| Persistent odor | Possible leak |
| Damaged flex line | Unsafe connection |
| Tripped breaker | Electrical fault |
| Altered gas valve | Code issue |
| New installation | Permits required |
How to choose a qualified professional and what to ask
Who should be called when a gas or electrical issue exceeds DIY scope? A licensed gas technician or certified electrician with local permits and insurance.
Verify credentials, ask about experience with gas stoves, request written estimates, inquire about safety procedures, permit handling, and warranty on work.
Confirm emergency availability and references. Choose professionals with clear communication and documented proof of training and licensure.
Useful Resources and Reference Materials
A concise list of authoritative resources helps guarantee the stove is moved in compliance with safety standards and local regulations.
Manufacturer manuals and local code references provide model-specific requirements and legal guidance. Emergency gas leak contact numbers and safety hotlines offer immediate assistance if a problem arises.
- Manufacturer manuals and local code references for model-specific instructions and legal requirements
- Emergency gas leak contact numbers and local utility safety hotlines
- Steps for locating certified inspectors and licensed technicians in the area
Manufacturer manuals and local code references
Manufacturer manuals and local building or gas codes provide the definitive guidance for safely pulling a gas stove away from the wall. The manuals list clear steps, torque limits, and connector types; codes dictate clearance, ventilation, and permitted procedures. Consult both before starting and record referenced sections for compliance.
| Source type | Example item | Why it matters |
|---|---|---|
| Manual | Installation steps | Prevents damage |
| Code | Clearance | Guarantees safety |
| Spec | Connector rating | Matches parts |
| Local | Permit rules | Legal compliance |
Emergency gas leak contact numbers and safety hotlines
After consulting manuals and codes, keep a concise list of emergency gas leak contacts within easy reach for quick action.
Include the local gas utility emergency number, national gas emergency hotline, fire department, and poison control.
Add the appliance service line and building manager or landlord contact.
Store numbers near the stove, on the refrigerator, and in the phone for immediate access.
Conclusion
In the end, pulling a gas stove from the wall becomes less like a nerve-wracking odyssey and more like a routine ballet—if that ballet involves wrenches, shutoff valves, and vigilant common sense. With the right tools, clear steps, and a calm approach, mishaps shrink to absurdity. Yet the stakes remain real: respect the gas, call a pro for anything weird, and maintain the appliance so future maneuvers feel gloriously, safely ordinary.