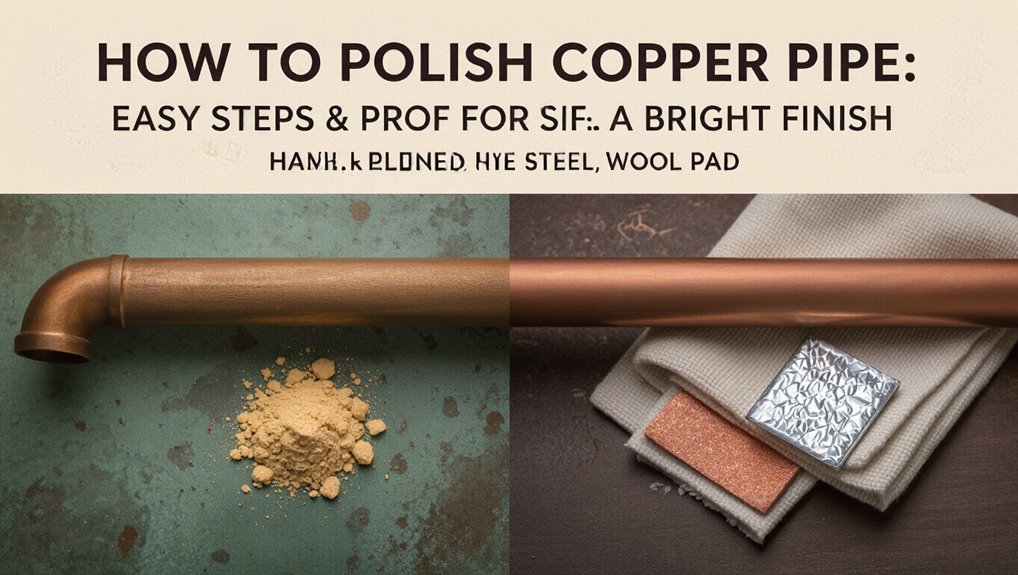
How to Polish Copper Pipe: Easy Steps & Pro Tips for a Bright Finish
To polish copper pipe effectively, start by cleaning it to remove any dirt and oxidation. Then, use fine-grit pads or sanding sticks to smooth the surface. Secure the pipe and work along the grain, transitioning from a mild abrasive polish to a jeweler’s compound for a bright finish. Employ non-marring pads, protective jaws, and microfiber cloths for optimal results. When working on potable or concealed systems, adhere to codes, avoid thinning the pipe walls, and ensure thorough flushing. Follow these detailed steps, safety checks, and professional tips for the best outcome.
What Finish Levels to Expect on Copper Pipe
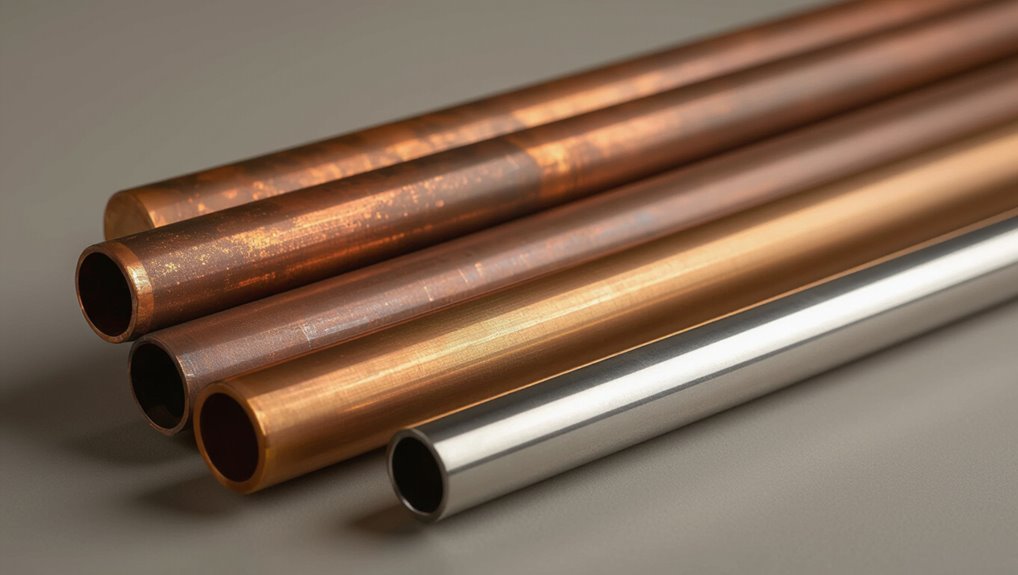
When examining copper pipe finishes, one should expect a range from mill (as-drawn) surfaces through progressively finer polished levels: mill finish shows visible tooling marks and a matte appearance; brushed or satin finishes reduce abrasions and produce a uniform directional grain; bright polished finishes reflect light and reveal a smooth, near-mirror surface; and mirror-polished or chromed copper attains the highest reflectivity and minimal surface imperfections.
Observers can distinguish stages by luster, tactile smoothness, and patterning. Each level responds differently to cleaning and patination: rougher surfaces hide minor defects, while higher polishes emphasize scratches and require careful maintenance to retain their visual quality.
When You Should or Should Not Polish Copper Pipe (Safety & Code)
Polishing should be avoided on pipes installed in concealed or potable-water systems where surface removal could breach protective coatings or violate local plumbing codes.
When polishing is appropriate, operators must wear eye and respiratory protection, use appropriate abrasives, and make certain no heat build-up that could alter temper or solder joints. Compliance with code requirements and manufacturer recommendations should guide any decision to polish.
When Not To Polish
In some situations, removing the natural patina from copper pipe is inappropriate or unsafe. Polishing should be avoided on service lines, buried or hidden plumbing, and components subject to code-mandated protective coatings. Do not polish grounding conductors or pipes used as electrical bonds.
Refrain when pipes have protective linings, manufacturer-applied finishes, or are part of historic systems where patina preserves value. Avoid polishing if corrosion indicates structural compromise—inspection and replacement take precedence.
When soldered joints require flux residue for inspection, leave them intact. If uncertainty about code or warranty exists, consult a professional before altering the pipe surface.
Polishing Safety Precautions
Having established situations where polishing is inappropriate, attention now turns to safety and code considerations that determine when copper pipe may be cleaned or left alone.
Professionals should verify local plumbing codes; polished surfaces can mask defects and may be prohibited on concealed or pressure-bearing sections.
Avoid polishing active systems—shut off water, depressurize, and drain before work.
Use protective gear: gloves, eye protection, and masks for particulate or chemical exposure.
Keep chemicals away from potable-water fittings unless approved.
When in doubt, consult a licensed plumber or inspector to confirm compliance and preserve system integrity before polishing proceeds.
Polishing Copper Used for Gas or Drinking Water: Precautions
When copper tubing will carry gas or drinking water, extra caution is required to prevent contamination and maintain system integrity: only cleaning methods and compounds approved for potable or fuel systems should be used, abrasive polishing that alters wall thickness or leaves embedded grit must be avoided, and any residues from cleaners or polishing compounds must be fully removed and neutralized before commissioning.
Use nonreactive, certified cleaners; avoid acids or harsh abrasives unless procedures specify neutralization and testing.
After polishing, flush and pressure-test lines per code, inspect joints for damage, and document materials and methods so future maintenance preserves safety and compliance.
Required Safety Gear Before Polishing Copper Pipe
Donning appropriate personal protective equipment is essential before polishing copper pipe to guarantee inhalation of dust and fumes, protect skin from abrasive compounds, and shield eyes from flying particles. The operator should wear respirators rated for fine particulates, chemical-resistant gloves, safety goggles with side protection, long sleeves, and closed-toe shoes. Proper fit and inspection of gear beforehand reduce risk. Ventilation and local exhaust complement PPE. Avoid jewelry and loose clothing. Keep first aid and eyewash accessible. Inspect the work area for trip hazards and guarantee fire safety when using polishing tools near flammable compounds.
| Item | Purpose |
|---|---|
| Respirator | Prevent inhalation |
| Gloves | Skin protection |
| Goggles | Eye protection |
| Protective clothing | Prevent contact |
| Footwear | Foot protection |
Tools Checklist: Hand-Polishing Supplies
A concise selection of hand tools is critical for effective copper pipe polishing, including files, sandpaper, emery cloths, and small brass or nylon brushes.
Appropriate polishing compounds and a variety of soft, lint-free cloths complete the kit and determine the achievable shine and durability of the finish.
The following checklist outlines recommended tools, compounds, and cloth types for different levels of surface restoration.
Essential Hand Tools
Hand-polishing copper requires a compact kit of reliable hand tools that deliver control, consistency, and surface safety.
A set of fine-grit sanding sticks or micro-abrasive pads removes oxidation in tight areas.
Soft-bristled nylon brushes clean seams without scratching.
A selection of non-marring polishing pads and felt wheels mounted on a pin vise allows detailed work.
Small files and jeweler’s hammers correct burrs and dents gently.
Precision clamps or a bench vise with protective jaws secure pipe during work.
Disposable nitrile gloves protect hands and prevent oils transferring to the metal.
A scratch-free microfiber cloth finishes and inspects the surface.
Polishing Compounds & Cloths
Several small, purpose-specific compounds and lint-free cloths are essential for achieving a durable, high-luster finish on copper pipe.
A mild abrasive polish removes oxidation without excessive metal loss; a tripoli or rouge paste refines scratches and builds shine; a final non-abrasive jeweler’s compound protects and enhances gloss.
Use soft, lint-free cotton or microfiber cloths for application and buffing to avoid fibers embedding in the metal.
Keep separate cloths for cutting, polishing, and finishing to prevent cross-contamination.
Small wooden or plastic applicators help control compound amount.
Store compounds tightly sealed and label cloths for consistent, repeatable results.
Tools Checklist: Machine-Polishing Equipment
For efficient machine polishing, the essential equipment includes a bench grinder or rotary polisher, variable-speed motor, polishing wheels (cloth, sisal, and felt), a selection of compounds from coarse cutting to fine finishing, and appropriate mounting accessories.
Also recommended are safety gear—eye protection, respirator, and cut-resistant gloves—plus a sturdy workbench and secure clamps to hold pipe sections.
A spindle adapter and mandrels fit different wheel sizes; backing plates and spacers guarantee correct wheel alignment.
A tack rag, lint-free wipes, and a small brush aid cleaning between steps.
Regular wheel dressing tools preserve wheel performance and balance for consistent results.
Best Polishing Compounds for Bright Copper Finishes
Polishing compounds are chosen for type—cutting, polishing, or jeweler’s—and for abrasive grit, which determines how aggressively tarnish and scratches are removed versus the final sheen achieved.
Matching compound grit to the pipe’s condition and polishing stage reduces work and prevents surface damage.
After achieving the desired brightness, a suitable protective sealant should be applied to preserve the finish and slow re-tarnishing.
Polishing Compound Types
A handful of compound types reliably produce bright, mirror-like copper finishes: rouge bars and pastes, fine abrasive polishes, and chemical-brightening formulations.
Rouge offers controlled polishing for final luster; pastes combine lubricant and fine abrasive for hand or buffing-wheel use.
Fine abrasive polishes remove light oxidation without aggressive metal removal, suitable before final rouge.
Chemical brighteners restore sheen by dissolving oxides and enhancing reflectivity, often used as a pre-polish or maintenance step.
Choice depends on desired shine, application method, and safety preferences. Always match compound to equipment and follow manufacturer instructions to avoid uneven results or surface damage.
Abrasive Grit Levels
Select abrasive grit carefully to balance removal speed and final mirror-like finish when preparing copper for bright polishing. Coarser grits (120–220) remove heavy tarnish and scratches quickly but leave visible swirl marks; they suit initial cleanup.
Medium grits (320–600) refine the surface, reducing deep abrasions and preparing metal for finer work.
Fine grits (800–1500) produce a smooth, reflective surface ready for polishing compounds.
Ultra-fine abrasives (2000+) or polishing cloths achieve near-mirror sheen before compound application. Progress through grits sequentially, inspect under good light, and avoid skipping steps to prevent reworking or uneven luster.
Protective Sealant Options
Having progressed through progressively finer abrasives to achieve a near-mirror copper surface, attention turns to preserving that finish with a suitable protective sealant and the right polishing compound. Options include waxes, clear lacquers, microcrystalline coatings, and specialized copper lacquers. Polishing compounds containing fine rouge or jeweler’s rouge restore luster before sealing; non-abrasive metal polishes remove fingerprints and oils. Choose sealants based on exposure: lacquer for long-term indoor protection, microcrystalline wax for removable maintenance, and clear polyurethane for handled items.
Apply thin, even coats, allow full cure, and re-polish lightly between reapplications to maintain a bright, tarnish-resistant finish.
Eco-Friendly Cleaners and Polish Alternatives
Often overlooked, eco-friendly cleaners and polish alternatives provide effective, low-toxicity methods for restoring copper without harsh chemicals. Natural ingredients remove tarnish, protect patina, and reduce risk to skin and plumbing.
Appropriate techniques balance mild abrasives with gentle acids and oils.
- Lemon juice and salt: dissolves oxidation; rinse promptly to prevent corrosion.
- Vinegar and baking soda paste: lifts grime; apply briefly and buff with a soft cloth.
- Olive oil or beeswax finish: seals and enriches sheen; apply thinly to avoid buildup.
These options suit routine maintenance and sustainable practices for bright, long-lasting copper surfaces.
How to Choose Sandpaper Grits for Copper-Pipe Prep
After using gentle, eco-friendly cleaners to remove surface grime and restore sheen, attention turns to choosing sandpaper grits for prepping copper pipe where mechanical smoothing or paint removal is necessary.
Selection depends on condition: start with coarser 220–320 grit to remove light corrosion or thin coatings, move to 400–600 grit for smoothing scratches and blending joints, then finish with 800–1200 grit for a fine, even surface ready for polishing. Use wet sanding with higher grits to minimize heat and embedment.
Always test on an inconspicuous area, change pads frequently, and work with the grain or around curves for consistent results.
When to Remove Old Lacquer or Coatings
If the lacquer shows cracking, peeling, yellowing, or cloudiness, it should be considered for removal before polishing.
Old coatings that prevent polish from bonding or produce patchy results warrant stripping to restore uniform adhesion.
Any signs of corrosion or greenish verdigris beneath the coating indicate removal is necessary so the metal can be cleaned and treated.
Visible Lacquer Degradation
Exhibiting flaking, clouding, or ambering, degraded lacquers and coatings on copper pipe indicate that the protective layer has failed and should be removed before polishing. Visible deterioration signals loss of barrier properties and traps dirt, accelerating corrosion beneath the coating. Removal restores access to the bare copper for inspection and proper finishing.
- Safety: fragmented lacquer can contain contaminants requiring gloves, mask, and containment.
- Assessment: check for pitting, discoloration, or chemical stains once coating is stripped.
- Method selection: choose solvent, heat, or mechanical removal based on coating type and pipe condition.
Hindered Polish Adhesion
Visible lacquer failure often coincides with areas where new polishes will not adhere, so determining when to remove old coatings hinges on adhesion testing and surface inspection.
Small tape pull tests reveal loose or flaking lacquer; if polish lifts, strip the coating. Discoloration, patchy gloss, or bubbling indicate compromised adhesion even when the surface seems intact.
Light sanding can confirm firmness; if abrasion exposes bare copper uniformly, polish may bond without full removal. However, intermittent adhesion or mixed-coated areas require complete stripping for consistent results.
Use appropriate chemical strippers or mechanical methods, then degrease and rinse before polishing.
Corrosion Beneath Coating
When corrosion develops under an existing lacquer, the coating can mask pitting, verdigris, or active spread that will continue to damage the copper unless removed.
The article advises inspection for lifting, discoloration, or soft spots; these indicate trapped moisture or chemical activity.
Removal of old coatings is recommended when damage is visible, when adhesion of new finish is compromised, or when preservation requires stable substrate.
Gentle strippers, heat, or careful mechanical abrasion expose the metal for assessment and treatment.
After removal, neutralize residues and treat pits before polishing and re-lacquering to prevent recurrence.
- Visible lifting or discoloration
- Poor adhesion of new finishes
- Evidence of active corrosion
How to Clean Oxidation and Green Patina Effectively
For copper pipe owners facing discoloration, cleaning oxidation and green patina requires selecting methods that match the metal’s condition and the pipe’s function; light surface tarnish can be removed with mild acids or abrasives, while deep verdigris often needs more controlled chemical treatment to avoid damage.
Use a vinegar-salt or lemon-salt paste for light soiling, applying gently with a soft cloth, then rinse and dry. For heavier patina, use a commercially formulated copper cleaner following label instructions and protective gear. Test any method on an inconspicuous area first.
Finish by neutralizing residues and thoroughly drying to prevent rapid re-oxidation.
Dealing With Solder Residue and Flux Before Polishing
Remove solder residue and flux before polishing to guarantee a clean, durable finish and prevent chemical damage during subsequent treatments. The pipe should be inspected for visible flux, solder beads, and scorched areas. Residue is corrosive and will undermine polish longevity if left.
Effective removal uses mechanical and chemical methods appropriate for copper, avoiding abrasives that gouge the surface. After degreasing and neutralizing flux, rinsing and drying are essential to prevent streaks or spots.
- Neutralize acid flux with a baking soda solution.
- Use a soft brass brush for light residue.
- Apply flux remover for stubborn deposits.
Step-by-Step: Prepping Copper Pipe for Polishing
Preparation begins with a thorough surface cleaning to remove dirt, grease, and lingering flux.
Next, the stubborn oxidation layer is treated with chemical or mechanical methods to expose bare copper.
Finally, sanding and smoothing progress from coarse to fine grits to erase imperfections and ready the pipe for polishing.
Surface Cleaning Prep
Before polishing begins, the copper pipe must be cleaned to remove oils, dirt, oxidation, and any loose scale that would interfere with an even finish.
The operator inspects for grease, labels, and loose debris, then selects appropriate mild detergent and lint-free cloths.
Gentle scrubbing with a soft brush dislodges particulate without scratching.
Rinse thoroughly, then dry immediately to prevent water spots.
For crevices, use cotton swabs or compressed air.
Final surface assessment guarantees uniform cleanliness before abrasive or chemical steps.
- Remove surface contaminants methodically
- Preserve metal integrity during cleaning
- Verify dryness and visual uniformity
Removing Oxidation Layer
Begin by evaluating the extent and type of oxidation on the copper surface—patina, verdigris, or light tarnish—to choose the appropriate removal method.
For light tarnish, apply a mild acid solution (vinegar with salt or lemon juice) with a soft cloth, rub gently, then rinse and dry.
For localized verdigris, use a paste of baking soda and water or a commercial copper cleaner, working carefully with a nonabrasive pad to avoid gouging.
For heavy patina, repeat gentle chemical treatments rather than aggressive actions.
Always wear gloves, work in a ventilated area, test a small spot first, and neutralize residues before proceeding.
Sanding And Smoothing
Smoothing the copper surface with progressively finer abrasives removes remaining oxidation, scratches, and tool marks to create an even base for polishing.
The operator begins with coarse sandpaper (around 220–320 grit) to level deep marks, then moves to medium (400–600 grit) to refine the texture, and finishes with fine (800–1200 grit) or abrasive pads for a satin sheen.
Work along the pipe’s grain, keep motions even, and avoid overcutting edges.
Clean between grits to prevent cross-contamination.
Final sanding should leave a uniform surface ready for polishing compounds.
- Remove visible scratches progressively
- Preserve pipe geometry and joints
- Clean grit before advancing
Hand-Polishing Technique for Small-Diameter Pipe
For work on small-diameter copper pipe, hand-polishing emphasizes control and consistency to avoid gouges or uneven sheen. The technician uses fine-grit cloth, light pressure, and short strokes along the pipe’s axis, rotating the workpiece for uniform coverage. Abrasive compounds are applied sparingly; excess residue is wiped with a lint-free rag. Protective gloves improve grip and reduce oils transferring to the metal. Final inspection checks for streaks or high spots under direct light. Small-diameter pieces benefit from steady hand speed and minimal material removal to preserve wall thickness.
| Tool | Purpose |
|---|---|
| Micro-cloth | Surface finish |
| Polishing paste | Remove fine tarnish |
| Cotton swab | Tight spots |
| Lint-free rag | Clean residue |
Hand-Polishing Technique for Larger-Diameter Pipe
Moving from small-diameter work, hand-polishing larger-diameter copper pipe requires adjusted technique to maintain even contact and avoid surface waviness.
The polisher should use broader strokes, support the pipe so it rotates slowly under the pad, and apply uniform pressure across a wider area. Work progressively with medium then fine abrasive, checking for consistent sheen. Edges and seams need particular attention to prevent ridges. Finish with light buffing and a protective lacquer if desired.
- Use a soft backing to distribute pressure evenly
- Rotate the pipe, not just the pad, for uniformity
- Inspect frequently under good light
Using a Rotary Tool to Polish Copper Pipe Quickly
When using a rotary tool to polish copper pipe, the choice of tool and bit determines finish quality and material removal rate.
Proper speed selection and light, consistent pressure prevent gouging and excessive heat buildup.
The operator should match bit type to tarnish level and adjust RPMs and pressure for controlled, efficient polishing.
Tool And Bit Selection
Tool selection and appropriate rotary bits determine both the speed and finish achievable on copper pipe; choosing the right combination reduces work time and minimizes surface damage.
A variable-speed rotary tool with a secure collet is advised; smaller, high-RPM units offer control in tight areas while larger models handle broader surfaces.
Match bit type to task: abrasive wheels for oxidation removal, felt or cloth for polishing, and brass or nylon brushes for crevices. Use appropriate shank sizes to prevent wobble. Replace worn bits promptly to avoid scratches and uneven results.
- Abrasive wheels: fast removal
- Felt/cloth: final shine
- Brushes: detail cleaning
Speed And Pressure Control
Start at a moderate speed and light pressure to let the abrasive do the work, increasing RPMs only to remove stubborn oxidation and reducing them for polishing stages. The operator maintains steady, controlled passes; excessive pressure scratches the copper and overloads bits. Short, overlapping strokes yield even removal; slower speeds with soft cloth wheels produce the mirror finish. Monitor heat—pause to cool the pipe. Change to finer wheels as shine appears. Visual and tactile checks guide adjustments; quieter resistance signals readiness for polishing. Safety goggles and gloved hands complete the methodical approach.
| Speed | Effect |
|---|---|
| Low | Finishing |
| High | Cutting |
Bench Grinder & Buffing Wheel Method for Long Runs
For long runs of copper pipe, a bench grinder fitted with a buffing wheel delivers fast, consistent results by combining controlled rotation with variable pressure along the length of the tube.
The operator mounts the pipe on steady supports, advances it slowly against the wheel, and aligns motion to avoid gouging.
Choose abrasive to match initial condition, then finer compounds for finish.
Maintain steady feed and inspect frequently for uniformity.
Safety gear and wheel balance are essential.
- Use steady supports to prevent flexing and vibration
- Progress from coarse to fine compounds in stages
- Check alignment and wheel condition regularly
How Heat Affects Copper During Machine Polishing
When polished mechanically, copper’s surface and microstructure respond quickly to heat generated by friction: localized temperatures can soften the metal, alter oxide layers, and change how compounds bond to the surface. Heat raises ductility, risking smearing rather than cutting; it accelerates oxidation, producing dark tarnish; and it can drive polishing compounds into pores, affecting luster. Operators monitor feed rate, pressure, and wheel speed to limit temperature rise. Controlled cooling and intermittent passes preserve finish. Below summarizes common thermal effects and mitigation.
| Effect | Mitigation |
|---|---|
| Softening/smearing | Lower speed, lighter pressure |
| Oxidation | Short passes, cooling |
| Compound embedding | Clean and flush |
| Color shift | Reduced heat, polishing sequence |
Polishing Thin-Walled vs Thick-Walled Copper Pipe
Polishing thin-walled and thick-walled copper pipe requires different handling because wall thickness affects rigidity, heat dissipation, and susceptibility to deformation.
Thin-walled tubing needs gentler pressure, lower speeds, and softer abrasives to avoid denting and heat warping; support under the workpiece prevents collapse.
Thick-walled pipe tolerates firmer contact and more aggressive abrasives, but still benefits from staged grit progression to avoid surface chatter.
Temperature monitoring matters for both; overheating softens annealed sections.
Choose polishing compounds and pads appropriate to thickness to balance material removal and finish quality.
- Thin-walled: light pressure, support, fine abrasives
- Thick-walled: firmer pressure, staged grits
- Both: monitor temperature and avoid overheating
Polishing Inside Bends and Elbows Without Scratching
When addressing inside bends and elbows, technicians recommend using small-diameter abrasives to reach tight radii without removing excess material.
Flexible polishing tools, such as scalloped abrasive strips or nylon-bonded bits, conform to curved surfaces for even finish.
Protective buffing techniques—light pressure, incremental grit progression, and backing guards—minimize scratching and preserve the pipe profile.
Small-Diameter Abrasives
For tight bends and elbows, small-diameter abrasives provide the reach and control needed to access interior curves without gouging the copper.
They are chosen for diameter, grit, and material compatibility; finer grits remove light tarnish while stiffer filaments shape tight radii.
Use light, consistent pressure and short passes to prevent heat buildup or uneven removal.
Inspect frequently and finish with a polishing compound matched to final sheen.
- Choose brass or nylon brushes sized to fit clearance.
- Match grit to oxidation level before aggressive work.
- Work progressively from coarse to fine for uniform results.
Flexible Polishing Tools
After selecting appropriate small-diameter abrasives for tight radii, attention turns to flexible polishing tools that reach inside bends and elbows without scratching the copper. Spring-steel mandrels, silicone-bonded polishing points, and cloth-wrapped flex-shaft attachments conform to curves while distributing pressure evenly.
Choose soft backing and fine-grade compounds to minimize abrasion; test on scrap tubing first. Operate at moderate speeds to avoid heat buildup that can discolor copper. Keep tools aligned with the pipe axis to prevent edge gouging. Regularly inspect consumables for embedded debris and replace when contaminated. This approach preserves shape and produces a consistent, scratch-free inner surface.
Protective Buffing Techniques
In confined curves and elbow sockets, protective buffing combines low-pressure contact, soft backing materials, and staged abrasive grades to remove tarnish without cutting into the metal. The practitioner selects narrow foam-tipped wheels, micro-abrasive sticks, and flexible polishing cloths. Pressure is modulated; motion is constant and along the contour to avoid gouging. Clean between stages to prevent cross-contamination. Final compound application restores luster while a gentle flannel wheel refines the finish. Surface protection follows: a light lacquer or microcrystalline wax prevents rapid re-tarnish, extending results with minimal maintenance.
- Match tool diameter to bend radius
- Use progressively finer abrasives
- Keep pressure light and consistent
How to Work Seams and Joints for a Uniform Shine
Along seams and joints, consistent pressure and motion are essential to blend the surrounding metal into a uniform shine. The worker uses small, controlled strokes along solder lines and butt joints, keeping the polishing pad or cloth aligned with the seam.
Abrasive grades progress finer as the area evens out, avoiding gouging or overworking thin edges. Accessory brushes clean crevices before final buffing.
Heat-sensitive solder joints receive light passes to prevent softening. Frequent inspection under directional light reveals low spots or tool marks to address immediately. The result is a seamless visual shift between joint and pipe surface.
Matching Polish Method to Pipe Finish Goal
For a desired pipe finish—whether matte, satin, or mirror-bright—the polisher selects methods and materials that align with both aesthetic goals and practical constraints. Choice depends on surface condition, time available, and long-term maintenance plans.
Coarse abrasives remove heavy oxidation for subsequent finer work; medium grits yield a uniform satin; fine abrasives and compounds prepare for high gloss. Protective coatings may preserve a chosen look.
Consider access around fittings and the intended environment (decorative versus functional plumbing) when planning technique and products.
- Matte: scouring pad or 400–600 grit
- Satin: 800–1200 grit, light polishing
- High gloss: progressive fine abrasives
Achieving Mirror-Bright Results: Final Buffing Tips
When preparing a copper pipe for mirror-bright buffing, the polisher must make certain the surface is uniformly clean and progressively smoothed to the finest abrasive before applying compound. Final passes use light pressure, consistent speed, and a soft cloth wheel to remove haze and fine scratches. Inspect under angled light, rework any streaks with lighter compound, then finish with a clean, lint-free buff. Avoid overheating. Cool water dips or pauses prevent tempering. The result should reflect detail sharply. Maintain wheel cleanliness and replace when glazing occurs to preserve finish quality.
| Step | Purpose |
|---|---|
| Light pressure | Prevents new scratches |
| Consistent speed | Ensures even sheen |
| Angled inspection | Reveals imperfections |
| Clean wheel | Prevents contamination |
How to Apply Protective Lacquer After Polishing
After achieving a mirror-bright finish, the next step is to protect that shine with a durable lacquer coating.
The surface must be dust-free, cool, and oil-free; use tack cloth and allow solvents to evaporate.
Apply thin, even coats—spray or brush—holding a steady distance to avoid runs.
Lightly sand between coats with very fine grit if needed, then remove debris before the final application.
Cure fully per manufacturer instructions to guarantee adhesion and hardness.
- Choose a lacquer rated for metals and indoor use.
- Test compatibility on a scrap piece first.
- Work in a ventilated, dust-controlled area.
Clear Wax and Oil Finishes: Pros and Application Tips
Offering a softer, more natural alternative to hard lacquers, clear waxes and penetrating oils seal and enrich polished copper without forming a brittle film, making them ideal for interior pieces where a warm patina and easy maintenance are desired.
They enhance color, add subtle sheen, and slow oxidation while remaining repairable. Application requires a clean, dry surface; thin, even coats applied with a lint-free cloth or brush; short flash times for oils; buffing wax to a smooth finish.
Reapplication frequency depends on use and exposure. Choose food-safe products for culinary items and test finishes on inconspicuous areas first.
How to Maintain a Polished Copper Pipe Over Time
Regularly inspecting and lightly cleaning a polished copper pipe preserves its sheen and prolongs any protective finish applied. The practitioner should remove dust with a soft cloth, wipe fingerprints promptly, and address spots before they set.
Use pH-neutral cleaners or diluted mild soap; avoid abrasive pads that dull polish. After cleaning, dry thoroughly and apply a thin layer of approved wax or oil if desired to repel moisture. For repairs, gently buff small scratches with fine-grade pads and reapply finish. Monitor joints and supports for corrosion to prevent damage that undermines surface maintenance.
- Inspect visually and by touch weekly
- Clean with gentle, pH-neutral solutions
- Reapply protective layer sparingly
How Often to Re-Polish High-Touch Copper Elements
Typically, high-touch copper elements require re-polishing based on usage and environment rather than a fixed calendar interval. Frequency depends on contact frequency, exposure to oils, moisture, and airborne contaminants; surfaces handled daily or installed in kitchens and bathrooms often need attention every 1–3 months.
Less-used fixtures in dry, clean locations may go 6–12 months. Inspect for dulling, fingerprints, or early tarnish and schedule re-polish when appearance degrades rather than waiting for deep corrosion.
Gentle, routine cleaning extends periods between polishes. Record observations and adjust intervals to balance maintenance time and desired shine.
Quick Touch-Up Techniques for Spot Polishing Damage
After establishing an inspection rhythm for high-touch copper, attention turns to quick touch-up methods that restore small blemishes without a full re-polish.
The technician assesses scratch depth, cleans with a mild solvent, and matches polishing direction to surrounding grain.
Small abrasions receive light rubbing with a fine abrasive pad; tiny pits are filled with a minimal polish compound and buffed.
Final step applies a thin protective layer to blend tone.
- Use directional strokes to preserve finish
- Test compound on an inconspicuous spot first
- Work incrementally to avoid over-polishing
How to Remove Stubborn Stains Without Harming Copper
The author outlines safe chemical cleaners and gentle abrasive methods for removing stubborn stains from copper pipe without causing damage.
Emphasis is placed on pH-neutral or mild acid solutions used sparingly, and on soft nonmetallic pads or fine-grit abrasives applied with light pressure.
Safety and testing on inconspicuous areas are recommended before full treatment.
Safe Chemical Cleaners
When dealing with stubborn stains on copper, choosing cleaners formulated to remove contaminants without etching or discoloring the metal is essential; mild acids like diluted citric or acetic solutions, commercially labeled copper cleaners, and ammonia-free metal polishes are effective options when used according to instructions.
The recommended approach emphasizes testing in an inconspicuous spot, following dilution ratios, and limiting contact time. Protective gloves and ventilation reduce exposure. Rinse thoroughly and dry to prevent spotting. Avoid harsh alkaline or chlorine-based products that accelerate corrosion.
- Test cleaner on hidden area first
- Adhere to manufacturer dilution/contact times
- Rinse and dry completely after cleaning
Gentle Abrasive Methods
Using fine, controlled abrasion can lift stubborn stains from copper without scratching or removing the metal’s protective layer. The method employs nonwoven pads, fine steel wool (#0000) or micro-abrasive powders applied gently with circular motions. Pressure and grit selection matter: start mild, inspect, then increase only if needed. Rinse and neutralize residues promptly to prevent discoloration. Finish with a soft cloth and a protective coat like wax or lacquer to slow re-tarnish. Avoid coarse wheels or aggressive compounds that remove copper. The table below summarizes common tools, grit levels, and typical uses.
| Tool | Grit/Type | Use |
|---|---|---|
| Nonwoven pad | Very fine | Light tarnish |
| #0000 wool | Ultra-fine | Moderate stains |
| Micro-powder | Variable | Spot treatment |
How to Fix Scratches After Polishing Copper Pipe
Addressing scratches after polishing requires evaluating their depth and pattern to choose the correct repair method.
Surface scratches respond to fine abrasive pads or jeweler’s rouge applied gently along the grain. Deeper gouges need light sanding with progressively finer grits, finishing with a polishing compound. For localized marks, buffing wheels or hand-polishers restore continuity without overworking the metal.
- Assess severity: shallow, moderate, or deep.
- Match abrasive: start fine; escalate only if necessary.
- Finish uniformly to blend repair.
After repair, clean and apply a thin protective wax or lacquer to preserve the restored finish.
Troubleshooting Uneven Shine and Swirl Marks
After repairing scratches, attention often shifts to achieving an even reflective finish; uneven shine and swirl marks are common issues that can undermine prior work.
Diagnosing causes begins with lighting and inspection at oblique angles to reveal irregularities.
Swirls often result from improper pad selection, contaminated polishing media, or inconsistent pressure and motion. Correct by cleaning or replacing pads, switching to finer abrasives, and using uniform overlapping strokes along the pipe’s length.
Finish with light, even passes and frequent inspection. If persistent, remove the affected layer and repeat gradual grit progression.
Consistent technique and contamination control prevent recurrence.
Tools and Consumables Checklist for a Polishing Session
For an efficient polishing session, assemble a compact kit that covers cutting, abrasives, power delivery, and protection: a selection of sandpapers and pads (progressing from coarse to ultra-fine), polishing compounds and rouge, a variable-speed rotary or dual-action polisher with appropriate backing plates, brass or nylon brushes, clean lint-free cloths and microfibers, a set of files and fine grit sticks for edge work, masking tape and clamps to protect fittings, safety gear (glasses, respirator, gloves), and a supply of solvent and de-greaser for contamination control.
Tools should be organized for sequence and maintenance.
- Choose abrasives by cut and finish.
- Match compound to metal state.
- Prioritize PPE and ventilation.
Budget-Friendly Polishing Supplies That Work
A handful of well-chosen, low-cost supplies can yield professional-looking copper polish without expensive specialty gear. The writer notes basic items: white vinegar or lemon, coarse then fine steel wool or abrasive pads, baking soda paste for neutralizing, and soft microfiber cloths. Gloves and masking tape protect hands and adjacent finishes. These choices balance cost, availability, and effectiveness for most home projects.
| Supply | Purpose |
|---|---|
| White vinegar/lemon | Removes tarnish |
| Steel wool/abrasive pads | Mechanical polishing |
| Baking soda | Neutralize acid |
| Microfiber cloths | Final buffing and shine |
Professional-Grade Products Worth the Extra Cost
Several specialized products justify their higher price by delivering faster results, longer-lasting protection, and reduced labor compared with household remedies. Professional-grade polishes, micro-abrasive pads, and corrosion inhibitors are formulated for consistent finish and durability on copper pipe. Their chemistry removes tarnish without pitting, while protective coatings slow reoxidation. Contractors favor concentrated cleaners that dilute predictably and buffing compounds compatible with power tools. For projects demanding repeatable appearance and minimal touch-ups, investing in quality supplies reduces total cost over time.
- Industrial-strength polish for uniform shine and longevity
- Micro-abrasive pads that preserve metal integrity
- Corrosion inhibitors designed for plumbing environments
How to Estimate Time Needed by Pipe Length & Condition
When gauging time requirements, consider both pipe length and surface condition together, since longer runs increase total sanding and polishing time while heavy tarnish or corrosion raises per-foot effort. Estimate baseline minutes per foot for clean, light, moderate, and heavy conditions; multiply by length and add setup/cleanup buffer. Allow extra time for joints, bends, and tight spots. Track progress on the first section to refine estimates for the rest.
| Length (ft) | Condition | Minutes/ft |
|---|---|---|
| 1–5 | Light | 3 |
| 6–15 | Moderate | 5 |
| 16+ | Heavy | 8 |
Cost Examples: DIY vs Professional Polishing
Estimating time from the previous section naturally leads to comparing costs: polishing can be handled by a homeowner with basic tools or by a professional service, and the choice affects material, labor, and risk-related expenses.
A concise cost comparison frames decisions: DIY often saves on labor but requires time, consumables, and potential rework; professionals charge higher upfront rates but offer speed, equipment, and warranty. Typical ranges depend on length and finish desired.
- DIY: polishing cloths, compound, pads — low material cost, higher time investment.
- Pro: hourly rates, travel, finish guarantee — predictable outcome.
- Hybrid: hire for difficult sections, DIY remainder.
Polishing Copper Pipe In Place (Installed Plumbing)
In tight quarters and active systems, polishing copper pipe in place requires techniques that protect adjacent materials, maintain plumbing integrity, and limit debris. The operator uses fine abrasives, polishing pads, or cloths with appropriate metal polish, working along the grain to avoid scratches.
Surfaces nearby are masked; fittings and valves are wrapped to prevent compound ingress. Low-speed rotary tools reduce heat and vibration near joints. Intermittent cleaning removes residue to assess progress.
For hard-to-reach sections, hand files and brass brushes provide controlled action. Final wiping with a clean, lint-free cloth restores shine without leaving abrasive particles behind.
Safety Checklist for Polishing On-Site
After completing surface work on installed copper pipe, attention shifts to a concise safety checklist that governs on-site polishing operations. The team reviews ventilation needs, PPE requirements, and secure workspace protocols before any abrasive or chemical work begins.
Tools and compounds are inspected; electrical cords and battery levels are checked. Work zones are cordoned off and slip hazards removed.
One person monitors for leaks and nearby combustible materials. Communication protocols are confirmed for emergencies and client notification.
A final inspection guarantees no residue or dust remains on adjacent finishes, protecting occupants and preserving workmanship.
- Guarantee proper PPE and ventilation
- Isolate and secure workspace
- Verify tool and compound safety
Polishing for Exposed (Decor) vs Concealed Plumbing
The article contrasts finishing approaches for exposed decorative copper, where appearance and protective coatings are primary concerns, with concealed plumbing, where durability and joint integrity take precedence.
It outlines finish options and maintenance considerations for visible runs, and specifies surface preparation and masking practices for pipes that will be hidden.
Guidance emphasizes selecting techniques that suit the aesthetic requirements of exposed work while streamlining preparation for concealed systems.
Exposed Pipe Finishes
For exposed copper piping used as a decorative element, surface finish becomes a key design decision distinct from the priorities of concealed plumbing; polished, lacquered, or intentionally aged finishes each affect appearance, maintenance, and longevity differently.
The choice balances aesthetics with protection: high gloss shows fingerprints and requires frequent polishing, lacquer reduces upkeep but can yellow, and patina offers character while concealing wear.
Consider traffic, humidity, and desired visual impact when selecting a finish.
Maintenance routines and repair approaches should match the finish to preserve intent and performance.
- Polished: bright, high maintenance
- Lacquered: protected, less tactile
- Patina: low upkeep, evolving appearance
Concealed Pipe Preparation
In preparing concealed copper pipe, attention centers on functional cleanliness and surface suitability rather than visual finish: pipes should be free of grease, burrs, and scale to guarantee reliable joints and corrosion resistance, while any polishing is limited to removing fabrication marks and smoothing fittings where necessary to aid sealing.
The focus is on deburring cut ends, removing oxidation at joint surfaces, and ensuring consistent diameters where fittings seat.
Light abrasive or chemical cleaning may be used sparingly to improve solder or compression connections.
Protective coatings or sleeving are applied where contact with dissimilar metals or aggressive environments could cause corrosion.
How to Restore Antique Copper Pipe Without Destroying Patina
When preserving antique copper pipe, balancing cleaning and patina retention requires careful technique and gentle materials; aggressive polishing can erase historical character while light cleaning restores appearance without damage.
The restorer assesses corrosion, targets active verdigris, and chooses mild agents—dilute vinegar, baking soda paste, or specialized conservation cleaners—applied with soft cloths and cotton swabs.
Abrasives and power tools are avoided.
After cleaning, neutralize residues, rinse thoroughly, and dry completely.
Stabilize patina with microcrystalline wax or clear lacquer if permanence is desired.
- Treat only problem areas, not entire surfaces.
- Test methods in inconspicuous spots first.
- Document condition before and after.
How to Intentionally Age Polished Copper for a Vintage Look
Achieve a controlled vintage patina on polished copper by using predictable chemical and mechanical techniques that simulate years of natural aging; this process allows craftsmen to tailor color, contrast, and texture while preserving desired highlights.
Practitioners selectively apply liver of sulfur, ammonia fuming, or vinegar-salt mixtures to induce greens, blues, and browns, testing on scrap first. Masking preserves bright areas and creates contrast.
Light abrasion with steel wool or scotch-brite softens sheen and blends tones. Neutralize acids, rinse thoroughly, and dry between steps to prevent run-on reactions.
Sealant choice—wax, lacquer, or microcrystalline—fixes the finish and controls future development.
Storage and Transport Tips to Keep Pipes Polished
After the patina is set and sealed, proper handling during storage and transport preserves the designed finish and prevents new discoloration or abrasion.
Pipes should be individually wrapped in soft, breathable materials and kept dry; avoid plastic that traps moisture.
Cushioning prevents contact scratches and denting when stacked or jostled.
Control environment: stable temperature and low humidity reduce tarnish risk.
Secure loads to prevent shifting and inspect protective layers before shipment or storage.
- Wrap each pipe in lint-free cloth or paper.
- Use foam or corrugated separators when bundling.
- Store horizontally on racks with padding and ventilation.
How to Document Before-and-After Results for Clients
The technician photographs pipes from fixed angles and distances to establish reliable before photos setup.
Lighting is standardized across shots to guarantee consistent lighting conditions and accurate color and sheen comparison.
Images are then named, dated, and stored in a structured archive for organized file archiving and easy client access.
Before Photos Setup
Before starting work, technicians should create a consistent, well-lit set of before photos that clearly document the pipe’s condition, location, and any identifying features.
Photos should show context and detail: wide shots for placement, medium for connections, close-ups for corrosion, dents, or markings.
Include a scale or ruler and a dated reference in each frame to prevent disputes.
Use stable angles and note orientation for repeatability.
Store images with descriptive filenames and brief metadata: time, technician, and task ID.
Share a selection with the client before work begins to confirm scope and expectations.
- wide, medium, close
- scale and date
- consistent filenames
Consistent Lighting Conditions
Maintaining consistent lighting guarantees that before-and-after photos accurately reflect changes to a copper pipe rather than variations in illumination. Photographers should use the same light sources, positions, color temperature, and intensity for both shots. Diffused lighting minimizes harsh reflections on polished surfaces; avoid mixed daylight and artificial light.
Fix camera settings—white balance, exposure, and ISO—to manual to prevent automatic shifts. Mark tripod placement and pipe orientation to replicate framing. Record lighting setup notes for reproducibility.
Consistency enables objective comparison, highlights genuine polish improvements, and builds client trust by eliminating misleading shadows, glare, or color casts across documented results.
Organized File Archiving
In a tidy digital system, clear file organization makes before-and-after documentation reliable and easy to retrieve for clients.
The process records dates, services, and image settings so comparisons remain objective.
Files are named consistently, backed up, and linked to client records to support transparency and follow-up.
Short notes capture products and techniques used, enabling repeatability and trust.
- Use YYYYMMDD_clientname_stage.jpg naming for instant sorting.
- Store a simple CSV or spreadsheet with metadata: date, location, lighting, products.
- Maintain one backup on cloud and one local copy, rotated monthly.
When to Stop DIY and Call a Professional
When should a homeowner stop polishing copper pipe and call a professional? A professional is advised when corrosion is deep, pinholes or leaks appear, solder joints are compromised, or structural integrity is uncertain.
If pipes are part of a central heating, pressurized, or concealed system, expert assessment prevents mistakes. Call a pro when corrosion returns quickly despite proper cleaning, or when chemical cleaners cause unexpected reactions or damage.
If access requires cutting drywall, rerouting, or special tools, trained plumbers or metal restorers guarantee safe, code-compliant repairs. For time-constrained or risk-averse homeowners, professional service saves time and reduces liability.
Common Polishing Mistakes and How to Avoid Them
The section outlines frequent polishing errors and practical ways to prevent them.
It warns against using abrasive pads that can scratch and remove copper, and advises selecting gentler tools instead.
It also cautions against overusing harsh chemicals, recommending measured application or milder alternatives.
Avoid Abrasive Pads
Frequently, hobbyists reach for abrasive pads to speed up copper polishing, not realizing those pads can remove more than tarnish. Abrasive pads abrade the metal, thin plating or patina, and create uneven finishes. Instead, choose softer tools and gentler techniques to preserve integrity and appearance.
- Use non-abrasive cloths to lift oxidation without scratching.
- Select fine-grade polishing compounds formulated for copper.
- Test methods on hidden sections before full application.
Maintaining controlled pressure and directional strokes prevents gouging. Conserving surface material guarantees a consistent, bright finish and reduces the need for corrective work or replacement.
Skip Chemical Overuse
After avoiding abrasive pads to preserve surface integrity, attention must turn to chemical use; excessive or inappropriate cleaners can strip protective layers, pit the copper, or leave residues that accelerate re-tarnish.
One should choose mild, copper-safe polishes and dilute concentrated solutions per instructions. Test any product on an inconspicuous area first. Apply sparingly with soft cloths, rinsing thoroughly and neutralizing acidic traces to prevent ongoing corrosion.
Avoid mixing cleaners; residues can react unpredictably.
After polishing, apply a thin protective coating—wax or lacquer—if long-term shine is desired. Regular gentle maintenance beats frequent heavy chemical treatments.
Final Quality Checks to Ensure a Lasting Bright Finish
Regularly, a systematic inspection confirms that polishing produced an even, mirror-like surface free of scratches, residue, or dull spots.
The inspector checks adhesion of any protective coating, verifies uniform color and reflectivity, and guarantees fittings and joints remain clean.
Photographic records document condition and spot locations needing touch-up.
Attention to tactile feel and edge blending prevents future corrosion pockets.
Final notes include recommended maintenance intervals and approved cleaning agents.
- Verify coating adhesion and continuity; note lift or bubbles.
- Confirm uniform reflectivity; mark low-luster areas for rework.
- Record maintenance schedule and acceptable cleaners for preservation.
Step-by-Step Workflow to Polish Multiple Pipe Sections
The workflow begins with inspecting and preparing the pipe ends to remove burrs and ensure smooth joints.
A consistent sanding sequence is then applied across all sections, progressing through grit grades to achieve an even surface.
Finally, a protective coating is applied to preserve the polished finish and prevent oxidation.
Inspect And Prepare Ends
Before working on multiple pipe sections, the inspector should examine each end for burrs, dents, corrosion, or uneven cuts that will affect fit and finish.
Attention focuses on cleanliness, square cuts, and wall integrity; neglected ends compromise joints and final polish.
Clean with a solvent, remove burrs with a deburring tool, and dress damaged edges with a fine file.
Measure and mark any out-of-spec sections for re-cutting.
Document defects before polishing to prioritize work and avoid wasting effort on unusable pieces.
- Make certain square, clean cuts for uniform joins.
- Remove all sharp burrs to protect fittings.
- Mark and segregate compromised sections.
Consistent Sanding Sequence
Typically, a consistent sanding sequence organizes work by grit progression, station setup, and rotation order so each pipe section passes through identical steps and achieves uniform surface finish.
The process assigns stations for coarse, medium, and fine grits arranged sequentially.
Operators label sections and move pipes one station at a time, applying equal pressure and timed passes per face.
Rotation order flips and rotates pipes between passes to avoid directional bias.
Inspect after each grit; rework any uneven areas before advancing.
Record cycle counts and note abrasive wear, replacing pads when finish quality drops to maintain repeatable, predictable results.
Protective Coating Application
After consistent sanding produces uniform surface texture, operators proceed to protective coating application to preserve the polished finish and prevent oxidation.
The workflow addresses multiple pipe sections in sequence: clean each segment with solvent, mask joints, and apply coating evenly.
Drying times and environmental controls guarantee adhesion.
Quality checks follow: thickness, continuity, and visual uniformity.
For throughput, work in parallel batches, staging cleaned, coated, and cured sections.
- Prioritize solvent wipe, tack removal, and alignment before coating.
- Use thin, even passes with specified coating to avoid runs.
- Record cure time and inspection results for traceability.
Post-Job Safety Checklist and Cleanup Procedures
Usually, the technician completes a concise post-job safety checklist and cleanup sequence to confirm the work area is secure and the polished copper pipe meets all safety and finish standards. Tools are wiped, chemical residues neutralized, and ventilation confirmed. Inspections verify no sharp edges, secure fittings, and consistent luster. Waste is disposed per local regulations; used cloths stored in sealed containers. Records note products used, safety data sheets referenced, and any follow-up required. Final photos document the finish. The technician signs off only after all items pass.
| Item | Action |
|---|---|
| Tools | Cleaned & stored |
| Waste | Disposed safely |
| Inspection | Visual & tactile |
| Documentation | Logged & photographed |
Conclusion
In polishing copper pipe, patience and proper technique yield the best results; aftercare preserves the shine. As the adage goes, “Measure twice, cut once”—meticulous prep prevents setbacks. When safety, code, and suitability are confirmed, follow the stepwise workflow, use appropriate PPE and tools, avoid common mistakes, and complete final quality checks. A thorough cleanup and post-job safety review make certain a durable, bright finish and safe, compliant installation.