How to Plumb Pipe Strap: Step-by-Step Guide for Secure, Code-Compliant Installations
To plumb a pipe strap securely and in compliance with building codes, follow these steps:
A pipe strap is essential for securing plumbing to framing, preventing sagging and movement that can stress joints. Begin by selecting the appropriate strap type and material based on the pipe—copper, PVC/CPVC, PEX, or steel. Next, mark the supports according to code spacing, prepare the mounting surfaces, and choose suitable anchors and cushioned straps if necessary. Fasten the straps snugly without crushing the pipes, allowing for thermal expansion. After installation, test for stability and any leaks. Regular inspections are crucial to spot corrosion or loose fasteners.
Continue reading for detailed guidance on spacing, fastener options, and troubleshooting tips.
What a Pipe Strap Is and When You Need One
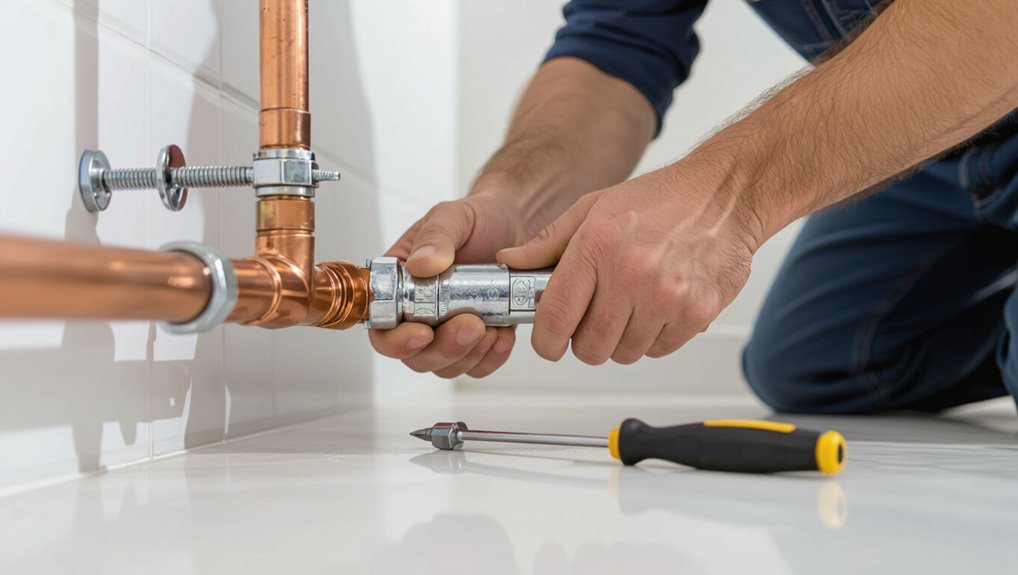
A pipe strap is a simple fastening device—commonly U-shaped, saddle, or band types—used to secure plumbing lines to framing.
Typical materials include galvanized steel, stainless steel, and plastic in sizes matched to nominal pipe diameters and local load requirements.
Building codes often mandate strapping at regular intervals, within specific distances from fittings, and where seismic or vibration protection is required.
Definition and common types of pipe straps
Pipe straps are simple metal or plastic clamps designed to secure pipes to structural members, preventing movement, vibration, and sagging.
Common types include single-loop, double-loop, cushioned, hinge-style, and saddle straps, each suited to specific pipe profiles and environments.
Guidance on how to plumb pipe strap emphasizes selecting the proper type for support requirements, accessibility, and code compliance to guarantee reliable installations.
Typical materials and sizes for plumbing applications
Building on the selection of strap styles, material and size choices determine performance and longevity in specific plumbing contexts.
Common materials include stainless steel for corrosion resistance, galvanized steel for general use, and plastic or nylon for nonmetallic piping.
Sizes range to fit 1/2″ to 4″ nominal pipe diameters, with wider or cushioned straps for insulated or vibration-prone runs.
Building code scenarios that require pipe strapping
Many plumbing codes require secure strapping at specific intervals and locations to guarantee system stability, prevent sagging, and limit stress on joints.
Code scenarios include horizontal runs, long unsupported lengths, changes in direction, service connections, roof and attic penetrations, seismic or wind zones, and exposed outdoor piping.
Compliance specifies strap type, spacing, and anchoring to support weight, thermal movement, and vibration.
Code and Safety Basics for Securing Pipes
The section outlines applicable plumbing code requirements for securing horizontal and vertical runs, noting that spacing and support methods vary by orientation.
It summarizes maximum spacing intervals based on pipe material and diameter and highlights when closer support is required.
It also covers seismic anchoring, allowances for thermal expansion, and measures to prevent freeze damage.
General plumbing code requirements for horizontal and vertical runs
Several codes set clear spacing and support requirements for horizontal and vertical plumbing runs to prevent sagging, undue stress, and movement during temperature changes or seismic events.
Installers must follow manufacturer instructions and local codes for support type, anchor location, lateral restraint, and movement allowance.
Supports shall be corrosion‑resistant, sized for load, and secured to structural members to maintain alignment, prevent joint strain, and allow required thermal movement.
Maximum spacing intervals by pipe material and diameter
Having established support types and anchorage locations, attention shifts to the maximum spacing intervals specified for different pipe materials and diameters. Codes prescribe intervals to prevent sagging and stress. Common guidance follows:
| Material | Diameter Range | Max Spacing |
|---|---|---|
| Copper | 1/2″–1″ | 6 ft |
| CPVC/PVC | 1/2″–1″ | 3 ft |
| Steel | 1/2″–1″ | 8 ft |
Seismic, thermal expansion, and freeze-protection considerations
Address seismic, thermal expansion, and freeze-protection needs when securing pipes to guarantee system integrity under movement and temperature extremes.
Use seismic bracing, anchored straps, and lateral restraints per code in seismic zones.
Provide expansion loops, slip supports, or spring straps for thermal movement.
Insulate and heat-trace vulnerable runs, increase strap spacing where insulation reduces support, and allow drainage to prevent freeze damage.
Tools and Materials Required
A concise inventory of essential tools—measuring tape, level, drill, and strap-cutting tools—sets the stage for proper installation.
The discussion then covers choosing strap materials and fasteners matched to metal, PVC, or copper piping.
Finally, required personal protective equipment and basic site preparation steps are outlined to guarantee a safe, code-compliant job.
Essential tools checklist
Several basic tools and materials are required to install pipe straps correctly and safely.
The checklist lists essential items for accurate, secure work without covering strap selection specifics.
- Tape measure, level, and marker for layout.
- Drill with appropriate bits for substrate.
- Screwdriver or impact driver and fasteners.
- Safety glasses, gloves, and hearing protection.
Selecting the right strap material and fasteners for different pipe types
Material choice and compatible fasteners determine strap performance and longevity for each pipe type.
Steel straps with corrosion-resistant coatings suit metal pipes; stainless straps for corrosive or wet environments.
Plastic or cushioned straps prevent abrasion on PVC and CPVC.
Use appropriate anchors for substrate—masonry anchors for block, wood screws for studs—and match fastener size to strap rating and pipe diameter for secure support.
Personal protective equipment and site preparation
Before work begins, the team should assemble and inspect required personal protective equipment—safety glasses, gloves, hearing protection, hard hats where overhead hazards exist, and steel-toed or puncture-resistant footwear—alongside tools and site-prep materials such as tape measures, levels, pipe straps, appropriate fasteners, anchors, drill and driver, masonry bits, and barrier/marking tape.
Then verify permits, identify utilities, secure work area, and confirm illumination.
Preparing Pipes and Mounting Surfaces
Before installing pipe straps, the condition of pipes and supporting structures is inspected for damage, corrosion, and secure attachment points.
Strap locations are measured and marked to meet code spacing and alignment requirements.
Existing insulation, vapor barriers, and concealment are handled carefully to preserve thermal and moisture protection while allowing proper strap installation.
Inspecting pipes and supports for damage or corrosion
A careful inspection of pipes and mounting surfaces identifies damage or corrosion that can compromise strap performance and the system’s integrity.
Visual and tactile checks reveal pitting, flaking, dents, threaded damage, and galvanic corrosion.
Verify supports, hangers, and anchor points for looseness, rust-through, or substrate weakness.
Replace or repair compromised components before fastening straps to guarantee durable, code-compliant installations.
Measuring and marking strap locations for code compliance
Measure strap locations carefully to confirm pipe support spacing, alignment, and code compliance.
Technicians verify pipe type, diameter, and applicable code spacing. They mark mounting points using level and tape, noting distances from joints, anchors, and changes in direction.
Marks align with structural members to guarantee secure fastening. Clear, accurate markings minimize rework and support long-term integrity.
Handling existing insulation, vapor barriers, and concealment
Inspects insulation and vapor barriers along the run to determine what must be preserved, removed, or modified for strap installation.
Removes or rewraps insulation neatly to expose clean mounting surfaces, protecting thermal continuity.
Cuts vapor barriers only where straps penetrate, sealing joints with compatible tape or mastic.
Selects low-profile straps or insulation spacers for concealment, restoring barrier integrity after fastening.
Step-by-Step Installation for Metal and Plastic Pipes
The section outlines clear step-by-step sequences for securing copper and steel pipes, and for routing PVC, CPVC, and PEX with appropriate straps.
It also covers fastening methods for wood studs, concrete, and metal framing and when to use anchors or self-drilling fasteners.
Guidance on selecting hangers or cushioned straps addresses vibration and noise control.
Installing straps on copper and steel pipes step sequence
Begin by locating the pipe runs and marking strap positions at regular intervals, typically every 4–6 feet for horizontal copper and steel lines and closer near changes in direction or supports.
The installer then follows these steps:
- Verify pipe alignment and clearance from combustibles.
- Select metal straps sized to pipe diameter.
- Anchor straps to framing with appropriate screws.
- Tighten straps snugly without deforming the pipe.
Installing straps on PVC, CPVC, and PEX step sequence
Position straps on PVC, CPVC, and PEX runs at regular intervals—typically every 3–4 feet for horizontal lines and closer at bends or junctions—ensuring each strap and fastener type is compatible with the plastic material to avoid crushing, chemical conflict, or thermal restriction.
- Measure runs and mark strap locations.
- Select plastic-compatible straps and cushioned inserts.
- Secure straps without overtightening; allow axial movement.
- Inspect alignment, clearances, and thermal expansion allowances.
Best practices for fastening into wood studs, concrete, and metal framing
Several common substrate types—wood studs, concrete, and metal framing—require distinct fastener choices and preparation to guarantee secure, code-compliant pipe support without damage to the pipe or structure.
Use wood screws or ring-shank nails for timber; masonry anchors or sleeve anchors for concrete with proper drill bit and depth; self-tapping Tek screws or thin‑gauge anchors for metal studs.
Match fastener length and corrosion resistance to application.
Using hangers and cushioned straps for vibration and noise reduction
Install vibration‑damping hangers and cushioned straps to minimize noise transmission and protect pipe integrity for both metal and plastic lines.
Select neoprene or rubber‑lined straps sized to pipe OD, spacing per code and manufacturer recommendations.
Allow for thermal movement on plastic with spring or slotted hangers.
Secure attachments to structure with appropriate anchors, inspect for compression, and replace degraded cushions to maintain isolation.
Special Situations and Advanced Techniques
The guide next addresses atypical scenarios and techniques encountered on the job, including securing long horizontal runs and unsupported spans to control sag and movement.
It covers methods for strapping around valves, tees, and unions without imposing stress on fittings, and strategies for working in tight spaces, crawlspaces, and above ceilings.
Guidance is also provided on choosing temporary versus permanent strapping during repair work to balance support and accessibility.
Securing horizontal long runs and unsupported spans
Long horizontal runs and unsupported spans demand careful planning to prevent sagging, reduce stress on joints, and maintain proper slope. Engineers and experienced plumbers evaluate span length, pipe material, thermal expansion, and load to determine strap spacing and support type.
They specify intermediate supports, continuous hangers where needed, and stiffening clamps for long plastic or thin-walled metal runs, ensuring alignment and preventing undue deflection.
Strapping near valves, tees, and unions without stressing fittings
Position straps carefully around valves, tees, and unions to support piping without transmitting force into the fittings.
Place straps on the pipe body adjacent to fittings, leaving a short gap and using protective padding or split clamps where needed.
Anchor to stable structure, avoid over-tightening, and allow slight movement for thermal expansion.
Inspect periodically for distortion, leaks, or loosening.
Working in tight spaces, crawlspaces, and above ceilings
When straps must sit close to fittings in confined areas, installers should adapt techniques to limited access while still protecting joints and allowing movement.
Use low-profile straps, offset saddle pieces, and cushioned spacers to prevent abrasion. Secure to structural members with accessible fasteners; forego excessive tightening.
Measure clearances, plan routing to avoid insulation and wiring, and verify code-required support intervals despite restricted reach.
Temporary vs. permanent strapping during repair work
Although temporary strapping can expedite repairs and stabilize piping during work, installers must distinguish it clearly from permanent support to guarantee safety and code compliance.
Temporary straps should be labeled, inspected, and removed or replaced promptly with code-approved hangers.
Permanent straps must meet load, spacing, and material requirements.
Documentation of temporary measures and final corrections preserves accountability and permits inspections to verify compliance.
Common Mistakes and How to Avoid Them
Common installation errors include over-tightening that crushes or deforms pipes, incorrect spacing or wrong fastener choices, and failure to account for thermal expansion and movement.
Each mistake can compromise system integrity or cause leaks over time.
The following sections explain how to identify and prevent these issues.
Over-tightening, crushing, or deforming pipes
Over-tightening pipe straps can crush or deform the pipe, compromising flow, weakening joints, and creating stress points that lead to leaks or failure.
Install straps snugly but not compressive, using torque limits or finger-tight plus a small turn.
For plastic pipes, include protective padding or saddle clips to distribute pressure.
Inspect after tightening and adjust if any distortion appears.
Incorrect spacing or improper fastener selection
After addressing strap tension and avoiding pipe deformation, attention turns to spacing and fastener selection, since both directly affect support, movement, and long-term integrity.
Incorrect spacing concentrates load, allows sag, and violates codes. Wrong fasteners corrode, pull out, or split substrates.
Choose code-specified intervals, corrosion-resistant straps and anchors appropriate for material and load, and verify embedment depth and thread engagement for secure, lasting attachment.
Neglecting thermal expansion and movement allowance
Many installations fail because they ignore thermal expansion and movement needs, causing straps to bind, pipes to buckle, or joints to stress as temperatures change.
Installers must allow sliding support, use expansion loops or anchors, and choose straps with appropriate clearance or spring clips.
Accounting for expected temperature ranges prevents noise, leaks, and premature failures while maintaining code compliance and system longevity.
Inspection, Testing, and Maintenance After Installation
A concise visual inspection should confirm straps are secure, correctly spaced, and meet code requirements.
Simple tests for strap movement and nearby pipe leaks help verify installation integrity.
Scheduled maintenance intervals and clear replacement indicators—such as corrosion, loosening, or material fatigue—ensure long-term performance.
Visual inspection checklist for secure, code-compliant straps
A concise visual inspection verifies pipe straps remain secure and code-compliant by identifying loose fasteners, incorrect spacing, corrosion, deformation, and improper strap type or orientation.
- Verify fasteners are tight and seated against substrate.
- Confirm spacing matches code/manufacturer requirements.
- Inspect straps for rust, cracks, bends, or elongation.
- Validate correct strap size/material and proper orientation relative to pipe and movement.
How to test for movement and leaks related to strap installation
Begin by observing the installed straps while applying controlled movement to the piping system to reveal any looseness, binding, or abnormal play.
Record any displacement and retighten per torque specifications.
Pressurize the system gradually, inspect joints and strap contact points for leaks, using soapy solution or electronic detectors.
Note persistent movement or seepage for corrective action and recheck after adjustments.
Routine maintenance intervals and replacement signs
Establish clear maintenance intervals based on pipe material, service conditions, and local codes—typically quarterly visual checks for high-vibration or corrosive environments, semiannual inspections for general building plumbing, and annual thorough assessments that include strap torque, fastener condition, and leak testing.
Document findings, tighten or replace degraded straps, corroded fasteners, or damaged insulation, and prioritize replacement when persistent movement, metal fatigue, or recurring leaks are detected.
Cost, Time Estimates, and Material Comparisons
A brief comparison of cost and time helps determine whether a DIY or professional strap installation is appropriate, with DIY labor usually reducing expenses but extending project duration.
Material choices—such as stainless steel, galvanized steel, or plastic straps—and fastening methods affect longevity, corrosion resistance, and ease of installation.
Clear trade-offs between upfront cost, maintenance needs, and installation time should guide the final selection.
Typical labor and material cost ranges for DIY vs. professional install
Cost clarity helps homeowners decide whether to tackle pipe strap installation themselves or hire a pro: DIY expenses center on nominal material purchases and the value of time, while professional quotes bundle labor, expertise, and indirect costs like travel and disposal. Typical ranges follow concise comparison:
| Item | DIY | Professional |
|---|---|---|
| Materials | $5–$30 | Included/ $5–$30 |
| Labor | Value of owner time | $50–$120/hr |
| Total | $5–$150 | $150–$600 |
Comparative pros and cons of strap materials and fastening methods
Several common strap materials and fastening methods offer distinct trade-offs in price, durability, and installation time. Metal straps: durable, higher cost, longer install. Plastic: cheap, faster, less durable. Adhesive mounts: quick, variable holding. Nails/screws: reliable, moderate speed.
| Material | Cost | Install Time |
|---|---|---|
| Steel | High | Long |
| PVC | Low | Short |
| Adhesive | Medium | Very Short |
| Screw | Medium | Moderate |
Quick Reference: Strap Spacing and Fastener Guide
A concise table follows listing common pipe sizes and their recommended strap spacing to guarantee proper support and compliance with code.
Guidance also covers fastener types suited to typical substrates—wood, concrete, metal studs, and drywall—highlighting screw, anchor, and toggle options.
This quick reference aims to simplify selection of strap spacing and fasteners for reliable installations.
Common pipe sizes with recommended strap spacing
When installing pipe straps, matching strap spacing to pipe size guarantees secure support and prevents undue stress on joints and hangers. Recommendations list common nominal pipe sizes with typical horizontal strap intervals; vertical runs and specific codes may alter spacing. Use the table as a quick guide and confirm local code.
| Pipe Size | Max Spacing | Notes |
|---|---|---|
| 1/2″–3/4″ | 6–8 ft | copper/PEX |
| 1″–1¼” | 6 ft | larger loads |
| 1½”–2″ | 4–6 ft | mains and risers |
Fastener type recommendations by substrate
Following the spacing guidelines, proper fastener selection for pipe straps depends on the substrate to guarantee secure anchorage and long-term performance.
Recommended fasteners by substrate:
- Wood: #8 or #10 wood screws with washered straps.
- Metal studs: Self-drilling tek screws or nut/bolt through metal straps.
- Concrete/masonry: Wedge anchors or concrete screws with proper depth.
- Drywall: Toggle anchors with screw and washer for hollow cavities.
Practical Tips and Trade Secrets from Plumbers
Experienced plumbers often share simple layout and marking tricks that speed installation and reduce rework.
They also recommend specific strap choices and anti-vibration methods to quiet rattling or movement in piping runs.
For unfamiliar situations, code questions, or complex systems, they advise calling a licensed plumber to guarantee compliance and safe performance.
Time-saving layout and marking tricks
Save time and reduce errors by adopting a few simple layout and marking tricks that pros use: pre-measure common strap spacings, mark repeat points on a sacrificial ruler or tape, and use a pencil adjusted to the pipe diameter for quick centerlines.
Work sequentially from a fixed baseline, clamp a spacing jig for runs, and use contrasting marks for different pipe sizes to speed installation.
Solutions for noisy or vibrating systems
After laying out straps and marks accurately, attention shifts to the less visible problem of noise and vibration in pipe runs.
Install cushioned straps, neoprene pads, or rubber-lined clamps at regular intervals to dampen movement.
Isolate pipes from structural members with resilient mounts, maintain correct strap spacing per code, and avoid overtightening which can transmit vibration while allowing secure restraint.
When to call a licensed plumber for compliance or complex jobs
When projects involve changes to water, gas, or drainage that affect code compliance, a licensed plumber should be engaged to guarantee permits, inspections, and proper materials are used;
likewise, call a pro for complex layouts (multi-story stacks, buried lines, or roof penetrations), system alterations that risk health or property, or when local ordinances require certified work.
Professionals also handle liability, warranty, and nuanced diagnostics beyond DIY scope.
Conclusion
Like a gardener staking young trees, the plumber shores up wandering pipes so systems grow straight and true. Each strap, like a careful hand, steadies motion, controls stress, and keeps the unseen waters from turning turbulent. When code, spacing, and fastening work in concert, the network becomes an orchard of dependable runs—resilient, serviceable, and safe—rewarding attention with years of quiet performance and fewer emergency digs.