How to Move Bathroom Sink Plumbing: A Step-by-Step DIY Guide for Beginners
Relocating a bathroom sink is a manageable DIY project for beginners. Start by planning the new position and checking for studs, vents, and necessary permits. Next, turn off the water supply and carefully remove the old sink. Install new supply lines (either PEX or copper) and ensure the drain is properly sloped with an accessible trap arm. Don’t forget to install shutoff valves and securely mount the sink. Finally, pressure-test the system for leaks. Adhering to local codes and using the right fittings and pipe supports will help you complete the project confidently. For detailed steps, tools, and troubleshooting tips, refer to the full guide.
Moving a Bathroom Sink: Quick Overview and When to Do It
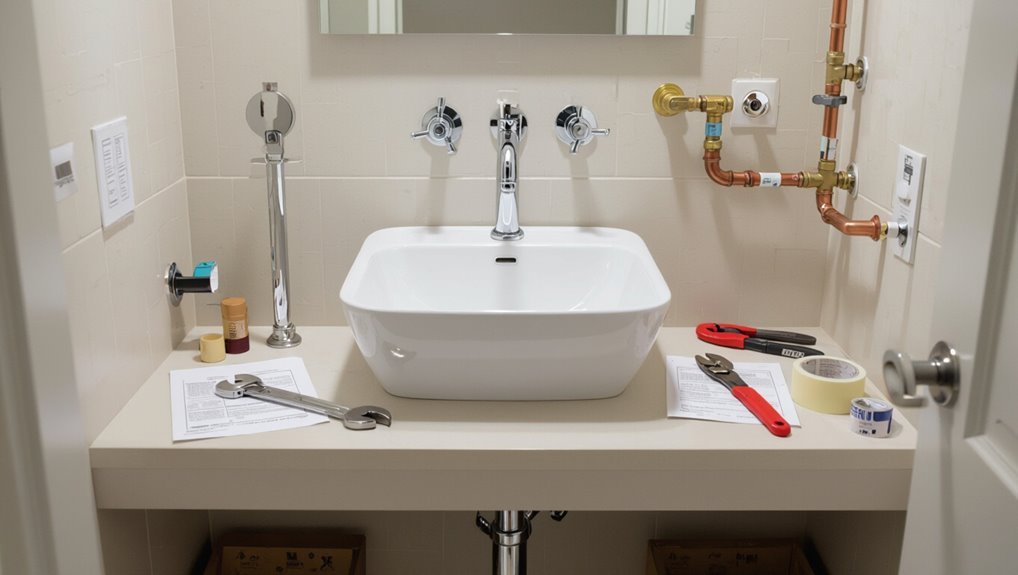
Common reasons for relocating a bathroom sink include improving layout, increasing accessibility, or resolving persistent plumbing faults.
Guidance is given on when a professional plumber is advisable versus a DIY approach, with a checklist of skill, tools, and complexity factors.
Readers are also briefed on typical timeframes, cost ranges, and when permits may be required.
Typical reasons to relocate a sink (layout, accessibility, plumbing issues)
When a bathroom layout feels cramped, fixtures hinder movement, or persistent leaks and poor drainage recur, relocating the sink becomes a practical solution.
Typical motivations include improving traffic flow, creating counter or storage space, meeting accessibility standards, correcting faulty drain or supply alignments, and addressing recurring plumbing problems.
Guidance on how to move bathroom sink plumbing helps prioritize positioning, venting, and connection feasibility.
When to hire a pro vs. DIY feasibility checklist
How should one decide between hiring a professional and tackling a sink relocation as a DIY project? Assess skill, code complexity, structural obstacles, and risk tolerance. If soldering, rerouting drains, or cutting joists is required, hire a pro. Use this quick checklist:
| Factor | DIYable? | Action |
|---|---|---|
| Skill level | Yes/No | Evaluate |
| Tools needed | Yes/No | Acquire |
| Structural changes | No | Hire |
| Code/permits | No | Consult |
| Time available | Yes/No | Plan |
Estimated time, cost range, and permit considerations
After weighing skill level, tools, and structural constraints, homeowners should estimate how long the relocation will take, what it will cost, and whether permits are required before starting.
Typical DIY moves take 4–12 hours; professional jobs span a day.
Materials range $50–400; labor adds $200–800+.
Permit needs vary by jurisdiction and scope—verify local codes; factor inspections and possible contractor licensing.
Required Tools, Materials, and Safety Precautions
Before beginning the move, a clear checklist of required tools and replacement parts helps prevent delays and improper connections.
The section also outlines necessary personal protective equipment and straightforward safe-work practices to reduce injury and damage.
Finally, it explains how to shut off water, drain the lines, and test all fittings for leaks before restoring normal use.
Tools list
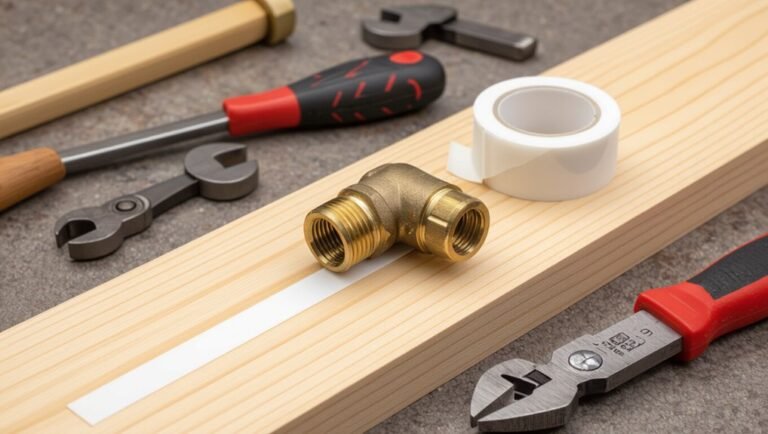
A concise list of required tools, materials, and safety items guarantees the sink relocation proceeds efficiently and without preventable hazards; typical essentials include an adjustable wrench, pipe cutter, plumber’s tape, PVC or copper fittings sized to the existing system, a basin wrench, a bucket, solvent or soldering supplies as appropriate, shims and sealant for the sink mount, and personal protective equipment such as gloves and safety glasses.
- Wrenches and cutters
- Sealants and tape
- PPE and containment
Materials and parts list
Materials and parts must match the existing plumbing type and layout to guarantee a secure, code-compliant installation; commonly required items include appropriate lengths of copper or PVC pipe, matching fittings (elbows, couplings, traps), a P-trap assembly, shutoff valves, compression or sweat connectors, plumber’s tape, thread sealant, mounting brackets or sink tailpiece, and drain flange with gasket.
- Pipes and fittings
- Valves and connectors
- Drain assembly components
Personal protective equipment and safe-work practices
With the correct pipes, fittings, and valves on hand, attention must shift to personal protective equipment and safe-work practices to protect both the installer and the work area. Gloves, goggles, mask, knee pads, and proper footwear minimize injury. Follow ventilation, lighting, and tool-use protocols. Maintain workspace cleanliness and secure loose fixtures.
| PPE | Purpose | Use |
|---|---|---|
| Gloves | Cut/chemical protection | Always |
| Goggles | Eye protection | During cutting |
| Mask | Dust/fumes | When sanding |
| Knee pads | Comfort/protection | Kneeling tasks |
| Boots | Foot protection | Throughout job |
How to shut off water and test for leaks safely
Before beginning any plumbing work, the installer must shut off the water supply and prepare to test for leaks using the proper tools and safety gear.
Locate and close the main or local shutoff valve, relieve pressure by opening faucets, and plug drains.
Use adjustable wrenches, plumber’s tape, pressure gauge, bucket, and flashlight.
After repairs, slowly restore water and inspect joints for leaks.
Understanding Bathroom Sink Plumbing Basics
A clear grasp of sink plumbing helps plan supply lines, the drain and trap, and proper venting to guarantee reliable flow and odor control.
Typical materials include PVC, ABS, copper, and PEX, each with specific fittings and connection methods that affect relocation choices.
Proper water line sizing, pressure, and correct trap arm slope relative to the vent determine drainage performance and prevent siphoning or backups.
Overview of supply lines, drain, trap, and venting
Several fundamental components comprise a bathroom sink’s plumbing: the hot and cold supply lines, the drain assembly, the P-trap, and the venting system.
Supply lines deliver water and include shutoff valves.
The drain collects wastewater, leading to the P-trap which prevents sewer gas entry.
Venting equalizes pressure, ensuring proper flow and preventing trap siphoning.
Understanding roles guides relocation planning.
Common pipe types and fittings (PVC, ABS, copper, PEX)
Having outlined supply lines, drains, traps, and venting, the discussion now shifts to the materials and fittings commonly used to connect those elements. Common choices: PVC/ABS for drains, copper for durable supply, PEX for flexible lines. Use appropriate fittings: solvent-weld, threaded, compression, or push-fit. Match materials and adapters to code and avoid mixing incompatible metals.
| Material | Typical Use |
|---|---|
| PVC/ABS | Drain, waste |
| Copper/PEX | Supply lines |
Water line sizing and pressure considerations
When sizing water lines for a bathroom sink, pressure and flow demand dictate pipe diameter and fixture fittings to guarantee reliable performance.
Too small a line causes weak flow and pressure drop, while oversized piping can be unnecessarily costly and slow to respond.
The installer should assess available static and dynamic pressure, run length, simultaneous fixture demand, and choose appropriate pipe size and pressure-rated valves to maintain proper flow.
How venting and trap arm slope affect drain performance
Proper venting and a correctly sloped trap arm are essential for reliable sink drainage: vents prevent negative pressure that can siphon traps and allow sewer gases into the room, while the trap arm slope controls runoff speed to avoid clogs or air locks.
Incorrect venting or improper slope causes slow draining, gurgling, odors, and trap failure; follow local code for vent placement and a 1/4″ per foot slope.
Planning the New Sink Location
The installer first inspects wall studs, floor joists, and cabinetry to identify structural constraints and mounting options.
Next, they map existing supply and drain lines and draft a relocation plan that preserves required slopes and measures run distances.
Finally, permit requirements and bathroom-specific code regulations are verified before work begins.
Assessing wall studs, floor joists, and cabinetry constraints
A stud finder, tape measure, and a clear view into the cabinet cavity are essential starting points for locating a new sink position; understanding stud and joist layouts prevents costly rerouting of supply and waste lines.
Check stud spacing, note load-bearing walls, and locate joists to avoid cutting critical members.
Verify cabinet back panel access and drawer/door clearances before finalizing placement.
Mapping existing plumbing and creating a relocation plan
Before any cutting or cap-off, document every visible supply and drain line—location, pipe material, diameter, and elevation—so the planned sink position aligns with existing runs or shows exactly what rerouting will require.
Create a scaled sketch noting shutoff valves, nearby vents, cleanouts, and access panels.
Identify obstacles, required fittings, and code-necessary clearances.
Prioritize minimizing new joints and preserving access.
Measuring distances for supply and drain runs and required slope
Several key measurements determine whether the new sink location will tie into existing supplies and the drain without excessive rerouting. Measure horizontal distance to hot/cold lines, vertical offsets, and drain centerline; compute required trap arm slope (1/4″ per foot). Plan fittings and length to minimize joints.
| Distance | Emotion |
|---|---|
| Short | Relief |
| Long | Frustration |
| Precise | Confidence |
| Uncertain | Anxiety |
Permit and building-code checks specific to bathroom plumbing
Permits and local plumbing codes dictate where and how a bathroom sink may be moved, so homeowners should verify jurisdictional requirements before altering supply or drain lines.
Confirm required permits, inspection timelines, trap arm and venting rules, fixture clearances, and approved materials.
Note restrictions for multi-family or historic properties.
When uncertain, consult the local building department or a licensed plumber to guarantee compliance.
Step-by-Step: Preparing and Removing the Existing Sink
Before any work begins, the water supply and drain lines are shut off and bled to prevent leaks and spills.
Supply hoses, shutoff valves, and the P-trap are then disconnected with care to avoid damaging fittings or finishes.
The sink, vanity, and surrounding wall materials are removed safely and the existing plumbing is inspected to determine what can be reused or must be replaced.
How to turn off water and drain lines properly
Shut off the water supply and relieve pressure before disconnecting any fittings to prevent spills and water damage.
Verify both hot and cold shutoffs are fully closed. Open faucet to drain residual water.
Locate and cap or plug drain lines at the trap or branch to stop sewer gas.
Inspect valves and drains for leaks, then place towels and a bucket to catch remaining moisture.
Disconnecting supply lines and trap without damaging fixtures
Loosen the supply line nuts and unclip the P-trap with steady, controlled movements to prevent strain on the faucet tailpieces and drain assembly. Support fixtures, catch residual water with a bucket, and use two wrenches to avoid twisting fittings. Inspect washers and threads; label lines for reinstallation. Handle chrome and plastic gently to avoid scratches or cracks.
| Task | Tip |
|---|---|
| Support fixtures | Use one hand |
| Catch water | Place a bucket |
| Use two wrenches | Prevent twisting |
| Inspect parts | Replace damaged seals |
Removing sink, vanity, and wall finishes safely
With supply lines and the P‑trap removed and excess water drained, the procedure moves on to detaching the sink, vanity, and any surrounding wall finishes.
Remove mounting clips or countertop fasteners, lift sink or basin straight up, and support it to avoid chipping.
Unscrew vanity from studs, pry off trim and backsplash carefully, and label debris for disposal or salvage.
Inspecting existing plumbing for reuse or replacement
Before deciding what to salvage, the existing supply lines, drain assembly, shutoff valves, and any visible fittings should be inspected for corrosion, leaks, thread damage, and compatibility with the planned new layout.
Document measurements, materials, and connection types.
Replace brittle PEX or galvanized sections, worn compression fittings, and corroded shutoffs.
Verify trap alignment and floor/wall access for rerouting or installing new shutoff valves.
Step-by-Step: Installing Water Supply to the New Location
The installer chooses and routes hot and cold supply lines—common choices include PEX, copper, or CPVC—planning paths through walls or floors to the new sink location.
Shutoff valves are installed and connected to the faucet with secure fittings and appropriate adapters.
Before closing walls, the system is pressurized and checked for leaks to verify all joints and valves hold.
Routing hot and cold supply lines (options: PEX, copper, CPVC)
Several viable methods exist for routing hot and cold supply lines—PEX, copper, and CPVC—each with distinct trade-offs in cost, flexibility, durability, and installation complexity.
PEX offers flexibility, simple connections, and corrosion resistance.
Copper is durable and heat-resistant but requires soldering and is costlier.
CPVC is inexpensive and easy to glue but less flexible and sensitive to high heat; code and fittings influence final choice.
Techniques for running supply through walls and floors
Begin by tracing the shortest, most direct route from the existing shutoff valves to the sink location, accounting for wall studs, floor joists, and any obstructions. This route planning determines whether supply lines will pass vertically through studs, horizontally in cavities, or beneath the subfloor.
Use drill guides, protective plates, and properly sized holes. Secure runs with clamps, maintain slope where needed, and avoid kinks or chafing.
Installing shutoff valves and connections to faucet
Install shutoff valves and make faucet connections after confirming the main supply is off and the planned routing is in place.
Mount quarter-turn shutoffs to accessible studs or blocks, solder or crimp fittings as required, then attach flexible supply lines to faucet tails.
Tighten connections to manufacturer torque specs, orient valves for easy access, and open main supply briefly to check for immediate leaks before proceeding.
Pressure-testing supply lines before finishing walls
With shutoffs and faucet connections secured and the main supply briefly opened to verify no immediate leaks, the next step is to pressure-test the routed supply lines before closing the walls. A hand pump or compressor with gauge confirms integrity at working pressure; monitor for 10–15 minutes. Repair any drips, retest, then drain and cap lines prior to wall completion.
| Tool | Pressure | Duration |
|---|---|---|
| Hand pump | 40–60 psi | 10 min |
| Compressor | 40–60 psi | 10–15 min |
| Gauge | display psi | continuous |
Step-by-Step: Extending and Reconnecting the Drain and Vent
The drain and vent extension begins with planning a route that preserves a 1/4 inch per foot slope to guarantee proper drainage.
Next, a new trap arm is installed and tied into the existing drain/vent using appropriate fittings while avoiding common leak points at slip joints and connections.
Finally, venting is assessed and added or modified as required to meet code and prevent siphoning.
Planning drain route and maintaining proper slope (1/4 per foot)
Begin by mapping the new drain path from the sink tailpiece to the existing branch, keeping the run as straight and short as possible while accounting for studs, joists, and access panels.
Guarantee a consistent 1/4 inch per foot slope toward the branch, mark high and low points, measure pipe lengths, plan gentle bends only where necessary, and verify clearances to maintain flow and avoid traps.
Installing new trap arm and connecting to existing drain/vent
Attach the new trap arm to the sink tailpiece and run it toward the existing branch, maintaining the planned 1/4 inch per foot slope and keeping joints accessible for future service.
Measure carefully, cut piping square, and dry-fit components to confirm alignment with the branch and vent.
Secure hangers to prevent sagging, then finalize connections, checking for smooth fall and adequate venting before testing.
Using appropriate fittings and avoiding common leak points
Select fittings that match pipe material, size, and local code, and prioritize those that create straight, accessible joints—properly sized wyes, long-sweep 90s, and solvent-weld or threaded adapters where permitted reduce turbulence and leak risk.
Inspect all joints, use correct primer/sealant, tighten to spec, support runs to prevent strain, and avoid excessive compression fittings or misaligned couplings that commonly cause drips and slow failures.
When to add or modify venting to meet code
When relocating a sink drain or extending a waste line, determine whether the existing vent serves the new configuration and complies with local code; inadequate venting causes slow drains, siphoning of traps, and code violations. If vent distance, slope, or fixture unit load exceed limits, add or reroute a vent or install an air admittance valve where permitted. Consult code and inspector.
| Issue | Action |
|---|---|
| Excess distance | Add vent |
| High fixture load | Upsize vent |
| Clearance conflict | Reroute vent |
Mounting the Sink and Final Connections
With the rough plumbing in place, attention turns to securing the fixture and completing all final connections.
The sink or vanity is mounted per manufacturer instructions, the faucet and flexible supply lines are attached, the pop-up drain is installed, and the P-trap is reassembled, aligned, and sealed.
Finally, all wall penetrations and the sink perimeter are caulked and inspected for proper function and leaks.
Installing vanity or wall-mounted sink securely
Begin by positioning the vanity or wall-mounted sink at its final location and verifying that mounting points, anchor hardware, and wall studs line up with the sink’s brackets or keyholes.
Level the unit, mark fastener locations, and remove.
Install appropriate anchors or lag bolts, secure the sink, and tighten incrementally while checking level.
Reinstall any trim and verify rigid, wobble-free mounting before proceeding.
Connecting faucet, supply lines, and pop-up drain
Attach the faucet, connect the water supply lines, and install the pop-up drain in a logical sequence to guarantee watertight seals and proper operation.
Tighten fittings by hand, then finish with a wrench—avoid overtightening. Use plumber’s tape on threaded joints and compression fittings for supply lines.
Test connections for leaks by briefly opening water valves. Adjust pop-up linkage for smooth operation.
Reinstalling and sealing P-trap and checking alignment
Reinstall the P-trap under the sink, ensuring the trap arm lines up with the wall drain and the slip nuts seat squarely against the tailpiece and wall stub-out.
Hand-tighten, then snug with channel-lock pliers—do not overtighten. Align so the trap has proper fall toward the wall.
Apply thread sealant tape or appropriate plumber’s putty on threaded joints if required, then inspect for level and leaks.
Caulking and finishing wall penetrations
With the P-trap aligned and leak‑tested, attention shifts to sealing and finishing the sink’s wall penetrations before final mounting and hook‑ups. Apply silicone around escutcheons and supply lines, smooth beads, and let cure. Inspect for gaps, then mount sink and reconnect faucets. Final pressure test confirms integrity.
| Item | Action |
|---|---|
| Escutcheon | Seal |
| Supply line | Smooth silicone |
| Gap | Inspect |
| Mounting | Secure |
| Test | Pressure check |
Testing, Troubleshooting, and Final Inspections
Once the sink is secured and connections are made, the installer should perform systematic leak checks on both supply lines and the drain by pressurizing the system and observing all fittings.
If water drains slowly, gurgles, or backfills, the technician should assess trap alignment, pipe slope, and venting, and tighten or replace loose fittings as needed.
Any persistent leaks, drainage failures, or doubts about venting should prompt either a formal inspection or a call to a licensed plumber.
How to perform leak checks for supply and drain
Begin by pressurizing the water supply and filling the drain while visually inspecting every joint and connection for signs of moisture, seepage, or spray.
Check supply lines, shutoffs, and faucet base under steady pressure, then with faucets cycled.
Run water into the sink and observe trap, tailpiece, and trap adapter for leaks.
Tighten fittings, replace seals, and retest until dry.
Diagnosing poor drainage, gurgling, or slow flow
Diagnose slow or gurgling sink drainage by systematically isolating the problem: run water at varying flow rates while listening for air noises.
Observe how quickly the basin empties, and inspect the trap and tailpiece for visible blockages or poor seals.
Check for backup from other fixtures, test with and without the stopper, and note whether noises occur only during discharge or continuously.
Document findings before repair.
Fixes for common problems (slope issues, loose fittings, venting)
Address common sink-plumbing faults by methodically correcting slope, tightening or replacing fittings, and ensuring proper venting before final testing.
Adjust trap and waste run to achieve 1/4″ per foot fall; re-seat joints, replace worn washers or threaded connectors, and secure hangers.
Confirm vent lines are unobstructed and pitched correctly.
Perform leak and flow tests, observing for gurgles or slow drainage to verify repairs.
When to schedule an inspection or call a licensed plumber
When should a homeowner seek a professional inspection or call a licensed plumber?
A licensed plumber is warranted if leaks persist, drainage remains slow after adjustments, venting problems occur, new piping crosses structural elements, or local codes require permits.
Also call for gas or multi-fixture changes, unusual odors, water damage, or inability to pass pressure or trap tests.
Final inspection guarantees compliance and safety.
Cost-Saving Tips and Time-Saving Shortcuts
When deciding whether to reuse existing fittings or replace them, the homeowner should weigh short-term savings against long-term reliability.
Choosing corrosion-resistant, easy-to-join materials like PEX or brass can reduce install time and future repairs.
Preparing documentation and following local inspection checkpoints minimizes the risk of rework and unexpected costs.
Reusing existing components vs. replacing for reliability
Evaluating which plumbing parts to reuse versus replace balances upfront savings against long-term reliability.
Inspect valves, traps, fittings, and flexible connectors for corrosion, leaks, and wear; reuse only components meeting pressure and seal standards.
Prioritize replacing compromised parts to prevent future failures and costly repairs.
Keep receipts and label reused pieces to guarantee compatibility and simplify future maintenance decisions.
Best materials for durability and ease of installation
After deciding which existing parts can be kept, attention turns to selecting materials that balance durability with straightforward installation.
PVC drain lines, PEX supply tubing, brass or chrome-plated brass fittings, and compression fittings reduce leak risk and ease assembly.
Choose corrosion-resistant valves and a quality silicone sealant.
Prioritize readily available components to save time and lower replacement costs during the project.
Preparing for inspections and avoiding rework
Plan inspections early to prevent costly rework by scheduling permit reviews and final checks before cutting or sealing any new connections.
The homeowner confirms local codes, gathers required documentation, and arranges inspector visits at key milestones.
Photographic records and test runs (pressure/leak) accompany requests.
Early corrections minimize demolition, labor, and material waste, preserving budget and project timeline.
Common Mistakes to Avoid When Moving a Bathroom Sink
Common errors when relocating a bathroom sink include an improper slope or using an undersized drain line, which can cause slow drainage and backups.
Inadequate venting, poorly supported supply lines and fittings, and neglecting required permits each create functional, safety, or legal problems.
Addressing these issues early prevents costly rework and code violations.
Improper slope or undersized drain line
Many DIYers misjudge the required fall or use a drain diameter too small when relocating a bathroom sink, which leads to slow drainage, frequent clogs, and sewer gas entry.
A proper 1/4-inch per foot slope and minimum 1-1/4-inch trap/drain for sinks guarantee reliable flow.
Inspect runs for low spots, excessive horizontal length, and avoid tight bends that trap debris and water.
Inadequate venting and its consequences
Understanding how a sink is vented is essential when relocating bathroom plumbing.
Failure to maintain or connect a proper vent can cause slow drains, gurgling traps, siphoning of water seals, and sewer gas odors.
Traps must retain water; vents equalize pressure.
Before finalizing a relocation, confirm vent continuity or install an approved alternative to prevent odor and drainage problems.
Poorly supported supply lines and fittings
A frequent error when relocating a bathroom sink is failing to properly support supply lines and fittings, which leads to stress at joints, leaks, and premature valve or hose failure.
Unsupported lines transmit movement and vibration to connections, causing loosening and wear.
Secure piping with clips, straps, or brackets near fixtures, maintain gentle bend radii, and avoid tension on hoses to guarantee reliable, long-lasting connections.
Failing to obtain required permits
Failing to secure required permits before relocating a bathroom sink can lead to costly fines, forced work removal, and complications when selling the property.
Homeowners should check local codes, submit plans, and obtain inspections before altering water or drain routes.
Skipping permits risks safety violations, insurance denial, and expensive corrective work; proper permitting guarantees legal compliance, verified workmanship, and smoother future transactions.
Example Projects and Scenarios
Typical projects range from moving a sink a few inches along the same wall, which usually requires minimal adjustments, to relocating it to an adjacent wall, which involves moderate rerouting of drain and supply lines.
More complex cases include moving the sink across the room or to a new wall, requiring significant plumbing rerouting and possible framing changes.
The following examples illustrate scope, common challenges, and rough effort estimates for each scenario.
Moving sink within same wall minimal work case
Several common small-scale projects involve relocating a bathroom sink a few inches to a couple of feet along the same wall, where existing water supply and drain lines can be reused with minimal modification. The task typically requires short pipe extensions, minor drywall access, and re-securing fixtures. Risks are low with basic plumbing skills and proper valve shutoff.
| Task | Typical scope |
|---|---|
| Supply extension | Short runs, flexible lines |
| Drain offset | Minor trap adjustment |
| Wall access | Small patching |
| Fixture reset | Reanchoring |
| Time | Few hours to a day |
Moving sink to adjacent wall moderate rerouting case
Moving a bathroom sink to an adjacent wall usually requires moderate rerouting of water supply and drain lines, entailing longer runs of pipe, new shutoff placements, and a relocated trap that may need a vent extension or an internal waste line tie-in.
Tasks include opening wall cavities, installing PEX or copper supply runs, extending the PVC/ABS drain with correct slope, and testing for leaks and proper venting.
Moving sink across room or to new wall advanced plumbing and framing case
Relocating a bathroom sink across a room or to a new exterior wall represents an advanced plumbing and framing project that often combines long supply runs, full drain reroutes, new venting solutions, and structural modifications to wall studs and floor framing.
It requires planning return runs, trap placement, permit review, possible jack stud installation, subfloor cutting, and coordinating with a licensed plumber and inspector for code-compliant venting and connections.
Checklist Before You Finish the Job
Before closing up the cabinet and calling the inspection, a concise checklist guarantees the relocated sink meets code and will perform reliably.
- Verify trap alignment, venting, and water supply shutoffs meet local code.
- Pressure-test connections and check for leaks under load.
- Note maintenance tips: accessible shutoffs, periodic drain clearing, and fixture support.
Final walk-through items to confirm code compliance and functionality
Once rough-in work and fixture installation are complete, a concise final walk-through checklist verifies the sink meets code and functions reliably.
Verify trap slope, vent connection, and proper P-trap placement; confirm water supply shutoffs operate and are leak-free; ascertain hot/cold labeling and anti-scald devices where required; check fixture anchoring, access panels, and GFCI protection; run long-duration leak and drain tests.
Maintenance tips for long-term reliability
After completing the final walk-through and confirming functional and code-compliant installations, a short maintenance checklist helps preserve performance and prevent future failures. Periodic inspections, leak checks, trap cleaning, aerator service, and verification of shutoff function extend system life. Document dates and actions; schedule annual reviews. Replace worn seals promptly to avoid damage.
| Task | Frequency |
|---|---|
| Inspect for leaks | Monthly |
| Clean trap | Quarterly |
| Service aerator | Quarterly |
| Test shutoffs | Annually |
| Replace seals | As needed |
Conclusion
The guide concludes that relocating a bathroom sink is achievable for a careful beginner who plans, measures, and follows plumbing basics. Investigating the theory that small preparatory steps prevent major problems proves true: meticulous layout, leak tests, and correct trap alignment consistently reduce rework. While some jobs need a professional, many moves succeed with the right tools, permits, and patience. Ultimately, thoughtful preparation—not haste—determines whether the project remains a satisfying DIY success.