How to Measure Sink Drain Size: A Simple Step-by-Step Guide
To measure the size of a sink drain, you’ll need to determine the inside diameter of the visible drain opening. This can be done by clearing the area and using a ruler or calipers. Here’s a step-by-step guide:
- Measure the inside diameter of the drain opening.
- Record the flange’s outer diameter and lip thickness.
- Underneath the sink, measure the tailpiece’s outside diameter and the length of the threaded body.
- Check for the presence of an overflow and measure center-to-center distances for any fittings.
Common drain sizes are 1¼”, 1½”, and 3½”. It’s a good idea to photograph your measurements for future reference and compare them with replacement specifications. Follow these steps for accurate measurements and troubleshooting tips.
How to Quickly Determine Your Sink Drain Size
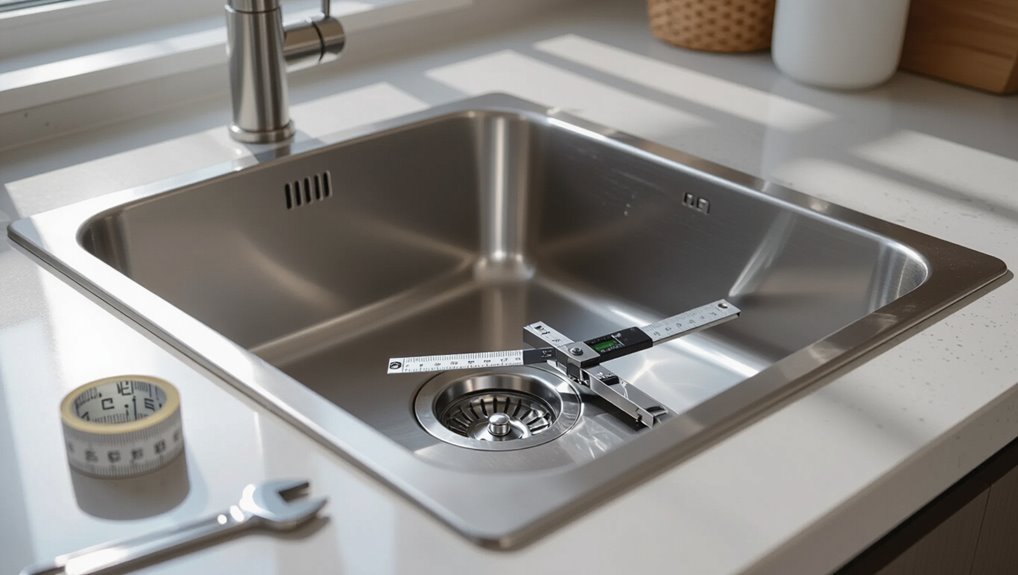
A quick way to estimate sink drain size is to compare the drain opening to a common object, such as a quarter (roughly 1 inch) or a half dollar (about 1.2 inches), for a fast one-sentence measurement.
For projects requiring exact fit—replacing parts or buying a new drain—one should measure with a ruler or caliper.
For casual checks or troubleshooting, a visual estimate is usually sufficient.
One-sentence method for a fast estimate
For a quick estimate, measure the widest point of the drain opening with a tape measure or ruler and read the nearest whole inch—the result will match common sink drain sizes (typically 1¼”, 1½”, or 3½”).
The method helps anyone learning how to measure sink drain size to get a fast, practical approximation without removing fittings; confirm with exact calipers or manufacturer specs when precision is required.
When to measure vs. when to estimate
When should someone estimate and when should they measure?
Estimation suits quick checks: matching replacement strainers, ordering basic parts, or evaluating fit before a store visit.
Measure when accuracy matters: buying custom fittings, confirming pipe diameters, or troubleshooting leaks. Measuring prevents returns, installation delays, and compatibility issues.
Estimation saves time for low-risk, temporary, or non-critical decisions.
Tools and materials you need
A few basic measuring tools make sink drain sizing straightforward: a tape measure, calipers, and a ruler cover most needs.
Optional items such as a drain gauge, plumber’s wrench, and rubber stopper can speed the job or help with stubborn fittings.
Before measuring, the sink should be cleared and surfaces protected to prevent damage and guarantee accurate readings.
Tape measure, calipers, and rulers
Although simple tools can suffice, accurate sink drain measurement depends on using the right instruments: a retractable tape measure for general dimensions, a caliper for precise inner and outer diameters, and a ruler or straightedge for short, hard-to-reach spans.
The tape handles center-to-center and flange-to-wall distances; vernier or digital calipers read bore diameters; a rigid ruler verifies lip thickness and short clearances.
Optional tools: drain gauge, plumber’s wrench, rubber stopper
Optional specialty tools can speed up measurement and installation tasks without being strictly necessary.
A drain gauge reads inner and outer diameters quickly; a plumber’s wrench provides torque for loosening tailpieces and locknuts without damaging fittings.
A rubber stopper helps block flow during measurements or testing seals.
These tools streamline work, reduce measurement errors, and protect fixtures.
Safety and prep: clearing the sink and protecting finishes
Begin by clearing the sink and surrounding area of dishes, toiletries, and loose items to create an unobstructed workspace and prevent damage or contamination.
Protect countertops and fixtures with soft towels or painter’s tape to avoid scratches.
Wear gloves and safety glasses when handling tools.
Keep a small bucket and rags nearby for drips.
Confirm good lighting and stable footing before measuring or disassembling.
Key measurements to take and why they matter
Accurate sink drain sizing begins with a few specific measurements that determine fit and function. These include the drain opening diameter (inside and outside), tailpiece and pipe diameters, and flange and lip thickness.
Additionally, dimensions for pop-up assemblies and overflow compatibility guarantee proper sealing and alignment with existing hardware.
Measuring the drain opening diameter (inside and outside)
Measure both the inside and outside diameters of the sink drain opening to guarantee replacement parts fit and seals function properly.
Using calipers or a tape, record the interior lip measurement where the basket sits and the exterior rim across the top.
Note whether measurements are metric or imperial.
These dimensions determine compatible strainers, gaskets, and flange sizes for a leak-free installation.
Measuring the tailpiece and pipe diameter
After noting the drain opening diameters, attention turns to the tailpiece and connecting pipe dimensions, which determine fit with traps, extensions, and adapters.
Measure outer diameter (OD) across the tailpiece, inner diameter (ID) if wall thickness matters, and length from flange to trap connection.
Note material (metal/plastic) and threads or slip-joint fittings to guarantee compatible replacements and adapters.
Measuring flange and lip thickness
Several small but critical dimensions around the sink opening affect seal integrity and trim compatibility: flange outer diameter, visible lip thickness, and the depth of the recessed bead where the sink meets the countertop.
Measure flange OD for gasket fit, lip thickness to guarantee trim rings sit flush, and bead depth to confirm sealant clearance.
Record measurements to match replacement parts and avoid leaks.
Measuring for pop-up assemblies and overflow compatibility
A pop-up drain and its overflow link require a few precise dimensions to guarantee smooth operation and a watertight fit: tailpiece diameter and length, pop-up body thread size, height from the sink bottom to the overflow opening, and the clearance behind the faucet for the lift rod and clevis.
Measure thread pitch and gasket seating depth, verify overflow alignment, and confirm lift-rod travel to avoid leaks, binding, or installation failure.
Step-by-step guide to measuring a sink drain
A clear, methodical approach guarantees accurate sink drain measurements and avoids costly mistakes. The following steps guide the user from initial inspection through checking visible and hidden dimensions to verifying compatibility with strainers or pop-up assemblies.
Precise measurements of each component help determine the correct replacement parts.
- Inspect and clear the drain area; measure the inside (visible) opening.
- Measure the outer diameter, flange dimensions, and tailpiece under the sink.
- Confirm all measurements against the strainer, basket, or pop-up parts before ordering.
Step 1: Clear and inspect the drain area
Begin by removing any debris, plugs, or strainers from the sink and wiping the area dry to reveal the drain opening clearly.
Then visually inspect the flange, surrounding seal, and any corrosion or damage.
Note material type and whether a stopper or basket remains.
Record obstructions, irregular shapes, or mounting hardware that could affect measurement or replacement compatibility.
Step 2: Measure the visible drain opening (inside diameter)
One clear measurement needed is the inside diameter of the visible drain opening, which determines the size of replacement parts and fittings.
Using a caliper or ruler, measure straight across the widest interior point of the exposed hole. Record the dimension in millimeters or inches.
Repeat measurement twice for accuracy. Note whether the edge is beveled or straight to guarantee proper fit.
Step 3: Measure the outer diameter and flange dimensions
After confirming the inside diameter, attention turns to the outer diameter and the flange, which determine how the drain assembly fits the sink surface and connects to the tailpiece.
Measure the metal rim across its widest external point.
Then record flange thickness and visible lip width.
Note any irregular shapes, mounting holes, or recessed profiles to guarantee replacement compatibility with the sink’s countertop or basin.
Step 4: Measure the tailpiece diameter under the sink
Locate the tailpiece beneath the sink and prepare to measure its diameter where it connects to the trap; this measurement confirms the new drain fittings mate properly with the existing plumbing.
Use calipers or a ruler to record the outside diameter in millimeters or inches.
Note whether the tailpiece is straight or tapered and measure at the widest point to guarantee correct coupling and washer fit.
Step 5: Confirm measurements for strainer, basket, or pop-up parts
A careful check of the strainer, basket, or pop-up assembly confirms all replacement parts will fit and function together.
Inspect visible dimensions: top flange diameter, threaded body length, and socket or snap-fit features.
Measure basket lip, pivot rod hole placement, and gasket thickness.
Note material type and any integrated overflow connections.
Compare parts to original before purchase to verify compatibility and seal integrity.
Step 6: Record measurements and common sizes to reference
With the strainer and pop-up dimensions verified, the next step is to record those measurements and compare them to common drain sizes for future reference.
Note inner diameter, outer flange, thread pitch, and overall length. Log values, date, and sink model.
Typical kitchen drains are 3.5 inches, bathroom drains 1.25–1.5 inches.
Keep measurements with photos for accurate replacement or ordering.
Common sink drain sizes and standards
Common sink drain sizes and accepted standards help users match parts and avoid leaks. Typical kitchen and bathroom diameters, common tailpiece and waste pipe dimensions, and how to spot metric versus imperial measurements are summarized below for quick reference. The following table highlights the most frequent sizes and standards.
| Component | Common Sizes/Standards |
|---|---|
| Kitchen drain diameter | 3.5 in (standard strainer) / 90 mm variants |
| Bathroom drain & tailpiece | 1.25–1.5 in (32–40 mm) / 32 mm common metric measurement |
Typical kitchen and bathroom drain diameters
Plumbing standards dictate that most residential kitchen sinks use 1.5- or 1.75-inch tailpiece diameters and 3.5-inch top-of-drain openings, while bathroom sinks typically feature 1.25- or 1.5-inch tailpieces with 1.25- to 1.5-inch drain openings or 1.25-inch threaded fittings for pop-up drains.
Manufacturers may list nominal sizes; installers confirm measurements before ordering strainers, gaskets, or decorative trim.
Standard tailpiece and waste pipe sizes
Many residential sink systems rely on a small set of standardized tailpiece and waste pipe diameters—typically 1¼”, 1½”, and 1¾” for tailpieces, and 1½” to 2″ for trap and waste lines—so components from different manufacturers will usually connect without custom adapters.
Installers select matching sizes for fittings, P-traps, and slip nuts; adapters exist for minor mismatches.
Correct sizing guarantees proper flow and leak-free joints.
Identifying metric vs. imperial sizing
How can one tell whether a sink drain measurement is metric or imperial?
One inspects markings, packaging, or uses calipers to measure diameter. Metric sizes are in millimeters (e.g., 40 mm tailpiece), imperial in inches or fractions (e.g., 1-1/2″).
Adapters and fittings may list both. Local plumbing standards and part codes often indicate the system, preventing mismatched components.
How to choose replacement parts based on measurements
Choosing replacement parts begins with confirming the drain opening diameter and flange thickness to verify strainers and baskets seat correctly.
Tailpiece and P-trap connections must match the measured pipe diameter and thread type for a leak-free fit.
Pop-up drains, grid drains, and disposal flanges are selected by matching their mounting dimensions and seal styles to the sink’s measured specifications.
Matching strainers and baskets to drain opening
Start by measuring the visible diameter of the drain opening and the depth of the flange to determine which strainers or baskets will fit; these two dimensions typically dictate compatibility with common replacement parts.
Compare these measurements to product specifications, noting lip design, mounting method, and gasket thickness.
Confirm material and finish for corrosion resistance and aesthetic match before purchasing a replacement strainer or basket.
Choosing the right tailpiece and P-trap connections
After confirming the drain opening and strainer fit, attention shifts to the tailpiece and P-trap, which must match both the sink outlet and the existing waste line dimensions.
Measure tailpiece diameter and length from outlet to trap inlet, note slip-joint versus threaded connections, and confirm trap arm diameter and wall clearance.
Select materials and compression fittings compatible with measured sizes and local codes.
Selecting pop-up drains, grid drains, and garbage disposal flanges
Selecting the correct pop-up drain, grid drain, or garbage disposal flange hinges on matching measured dimensions and connection types rather than on brand alone.
Installers compare tailpiece diameter, flange opening size, thread pitch, and stopper type. Measure sink hole diameter, countertop thickness, and mounting hardware spacing.
Verify compression versus threaded connections and guarantee gasket, flange, and bolt alignment for a watertight, code-compliant fit.
Troubleshooting measurement challenges
When flange edges are uneven or corroded, the inspector should record multiple measurements and note the condition to determine usable reference points.
Concealed or glued fittings require careful access or documentation of visible connections before removal to avoid damage.
If measurements do not match standard parts, the technician should compare tolerances, consider adapters or custom fittings, and consult supplier specifications.
Measuring uneven or corroded flanges
Many sinks show uneven or corroded flanges that obscure true dimensions and complicate direct measurement; accurate assessment requires focusing on intact reference points and using methods that average or bypass damaged areas.
Inspect for undamaged rim sections, measure multiple diameters across sound points, then average results.
Use calipers for precision and note corrosion depth to decide if flange replacement or measurement adjustment is necessary.
Dealing with concealed or glued fittings
Probe concealed or glued fittings carefully to avoid damaging surrounding materials while determining true drain dimensions.
Use non‑marring tools and gentle vibration or solvent recommended for the adhesive type.
Expose enough of the joint to measure inner and outer diameters, and note alignment or offsets.
Photograph configurations and mark reference points before disassembly to preserve orientation and aid accurate measurement.
What to do if measurements don’t match standard parts
If exposed measurements from a concealed or glued fitting do not correspond to standard sizes, the technician should systematically troubleshoot to identify the discrepancy.
Verify measurement points, remeasure with calipers, check for nonstandard or metric parts, examine thread pitch and gasket thickness, and compare to manufacturer specifications.
When uncertain, test-fit adjustable adapters or consult plumbing supply with photos and dimensions before cutting or replacing.
Common mistakes and how to avoid them
Common errors in measuring sink drains include confusing inside and outside diameters, which leads to mismatched fittings.
Overlooking flange or lip thickness can produce incorrect measurements even when diameters seem right.
Failing to check downstream pipe sizes may cause incompatibility with existing plumbing.
Confusing inside vs. outside diameter
Why does it matter whether a measurement is taken from the inside or the outside of a pipe? Confusing inside (ID) and outside diameter (OD) yields incompatible fittings and leaks.
Measure ID when matching inner seals or flow capacity; measure OD for slip fittings and outer threads.
Note plumbing standards list both; record which was used and recheck before purchasing parts to prevent install errors.
Ignoring flange and lip thickness
When measuring a sink drain, overlooking the thickness of the flange or lip leads to parts that sit too high, too low, or fail to seal properly.
Measure flange thickness and account for any decorative rim when selecting fittings or gaskets.
Record combined depth from underside of countertop to top of drain.
Verify chosen drain assembly specifies compatibility with that thickness to guarantee proper alignment and sealing.
Not checking downstream pipe sizes
If the downstream pipe size is not verified, an otherwise correct drain assembly can be incompatible with the plumbing it connects to.
Installers often assume standard dimensions; this overlooks older, nonstandard, or remodel-altered piping. Measure the outlet diameter and pipe inside diameter, check for slip-joint or threaded fittings, and match adapters or reducers accordingly to guarantee a leak-free, code-compliant connection.
Practical tips for an easier measurement process
The section outlines practical shortcuts for measuring sink drains, including using improvised gauges or simple paper templates to match diameters.
It also recommends photographing measurements and key fittings to show to hardware staff or a plumber.
Guidance is provided on signs that a professional should be called when measurements are unclear or fittings are nonstandard.
Using improvised gauges and templates
Many simple household items can serve as effective improvised gauges and templates for measuring sink drains, saving time and avoiding the need for specialized tools.
Cardboard, coin stacks, jar lids, and paper circles help confirm diameters and fit. Cut a cardboard ring to match the drain opening, mark edges, and test clearance.
Label templates for future reference and consistent replacement checks.
Photographing dimensions for hardware stores or plumbers
After creating cardboard or paper templates, photographing the drain and surrounding fittings provides a clear, shareable record for hardware staff or plumbers.
Capture close-ups of the template aligned with the opening, a wider shot showing fixture context, and an angled view of threads or slip-joint connections.
Include a ruler or coin for scale, note material and finish, and timestamp or label images before sending.
When to call a professional
Consider calling a professional when measurements are unclear, access is restricted, or the drain connects to complex plumbing.
A technician guarantees accurate sizing, identifies hidden issues, and prevents improper replacements.
Professionals have proper tools for tight traps, corroded fittings, or unusual adapters.
If DIY attempts risk damage or time loss, scheduling a plumber saves effort and avoids costly mistakes.
Quick reference checklist before buying or replacing a drain
Before heading to the store, the reader should assemble a compact set of measurements and notes to guarantee the replacement drain fits and functions correctly.
A concise checklist prevents returns and saves time during purchase or installation. The following items summarize the essentials to bring along.
- Exact drain diameter, tailpiece length, and any overflow configuration.
- Photos of the existing sink underside and current drain connections.
- Model numbers or brand names of sink and faucet, plus any unusual fittings.
Essential measurements to have on hand
A concise checklist of measurements guarantees the correct sink drain is selected and simplifies installation: sink hole diameter, tailpiece diameter, drain flange thickness and outer diameter, overflow compatibility, trap arm diameter and center-to-center distances, and overall tailpiece length.
Additional essentials include flange-to-countertop height, gasket and mounting lip dimensions, pop-up assembly length, and distance from sink bottom to existing trap inlet.
Notes to bring to the hardware store or supplier
Several compact, clearly labeled measurements and a few photos suffice to guarantee the correct drain parts are chosen; bring sink hole diameter, tailpiece diameter and length, flange outer diameter and thickness, overflow type (if any), trap inlet diameter and center-to-center distances, and a photo of the underside showing mounting details.
Also include any existing gasket or flange material, fastener type, finish preference, and model or manufacturer marks for exact matches.
Conclusion
By chance, the measurements taken in the quiet kitchen matched the replacement part still boxed in the garage, a coincidence that saved time and doubt. The guide’s clear steps, essential tools and common pitfalls gave confidence; precise diameter and tailpiece checks prevented last-minute returns. With common sizes recognized and troubleshooting noted, the reader can proceed calmly. Practical tips and the quick checklist guarantee accuracy, turning an awkward DIY task into a small, certain success.