
How to Fix an Underground Pool Pipe Leak: Step by Step Repair Guide for Homeowners
To fix an underground pool pipe leak, start by diagnosing the issue through signs like unexplained water loss, soggy ground, air in the lines, or pressure gauge fluctuations. Perform dye and bucket tests for initial checks, then use sectional pressure or tracer-gas methods to locate the leak. Once identified, safely excavate the area, cut out the damaged PVC, and use solvent to cement new couplings. Conduct a pressure test on the repair before backfilling with appropriate bedding. For temporary solutions, clamps or epoxy can be effective. The guide also covers essential tools, safety tips, costs, and advice on when to hire a professional.
How to Tell If an Underground Pool Pipe Is Leaking
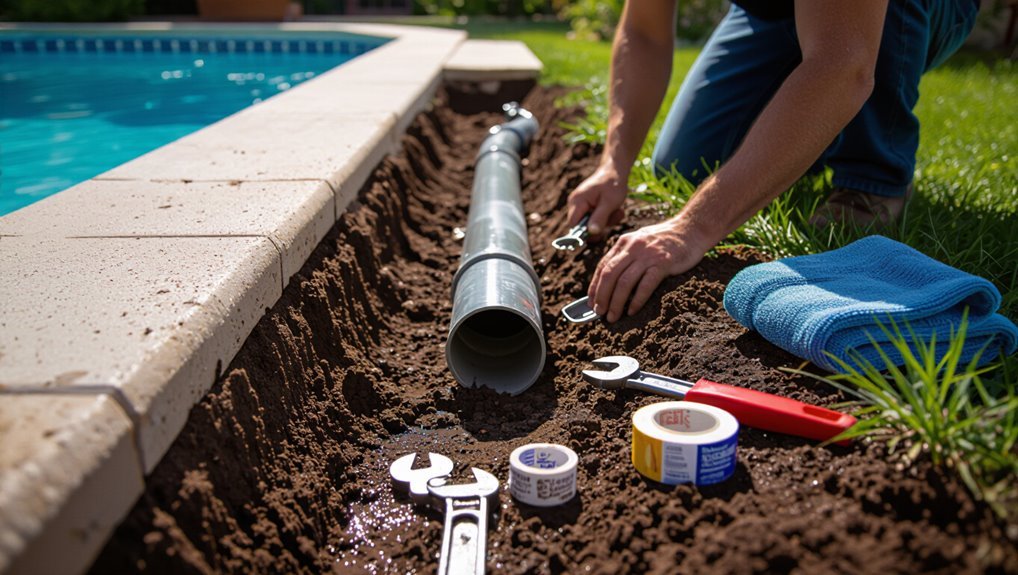
Visible clues such as a steadily falling waterline, soggy patches or sinkholes near the pool, and unexpectedly wet landscaping can signal a buried pipe leak.
Equipment indicators — persistent air in the suction lines, unusual pressure fluctuations, or a noisy pump — often corroborate an underground problem.
If these signs appear or cannot be conclusively traced, a professional leak detection service should be called.
Common signs above ground (low water level, soggy spots, sinkholes)
How can one spot an underground pool pipe leak from surface clues?
Visible signs include steadily low water level unexplained by evaporation, persistently soggy or lush areas near the pool, muddy runoff after minimal rain, and small sinkholes or depressions forming in the yard.
Noting these signs early aids diagnosis and informs decisions about how to fix underground pool pipe leak and when to call professionals.
Pool equipment indicators (air in lines, pressure changes, noisy pump)
A pool’s equipment often gives the earliest mechanical clues to an underground pipe leak: air appearing in the skimmer or return lines, unexplained drops or spikes on the filter pressure gauge, and a pump that runs louder, cycles differently, or struggles to maintain flow.
Persistent air bubbles, fluctuating pressure during normal operation, or cavitation/noisy bearings suggest suction or return line breaches needing inspection and isolation.
When to call a professional leak detection service
When should a homeowner stop troubleshooting and call a professional leak detection service?
If leaks persist after basic checks, water loss exceeds normal evaporation, or repairs require digging, a specialist is warranted.
Situations involving shared lines, unclear source, structural concerns, repeated equipment failures, or inability to locate the leak despite dye tests justify professional intervention to avoid costly damage and guarantee accurate, code-compliant repairs.
Quick Assessment: Confirming the Leak Before You Dig
Before excavating, a quick assessment narrows the problem: a dye test in the skimmer and around fittings can reveal visible ingress, while a bucket test distinguishes normal evaporation from an actual leak.
For buried lines, pressure testing the plumbing identifies loss in a closed system, and tracer gas or acoustic detection can pinpoint hidden breaks without immediate digging.
These steps help prioritize targeted repairs and avoid unnecessary excavation.
Dye test in skimmer and near fittings
Start by introducing a small amount of pool-safe dye into the skimmer throat and around visible fittings while observing from several vantage points. The dye’s movement reveals whether water is being drawn from a leak near those components.
Watch for steady suction toward cracks, joints, or return fittings. Repeat tests with the pump off and on, note consistent flow paths, and mark suspicious areas for targeted inspection.
Bucket test for evaporation vs leak
If the dye tests point away from skimmer or visible fittings, a simple bucket test provides a quick, objective comparison of pool water loss versus ordinary evaporation.
Fill a bucket with pool water, mark internal water level, place it on the first or second pool step, then mark pool level.
After 24–48 hours, compare drops: equal loss suggests evaporation; greater pool loss indicates a leak needing further investigation.
Using pressure testing for plumbing lines
Pressure testing plumbing lines provides a definitive, noninvasive way to confirm whether a leak exists in underground piping before any excavation begins.
Technicians isolate sections, cap fittings, and introduce air or water to a specified pressure, monitoring for drops on gauges. A sustained pressure loss indicates a leak location for targeted repair; stable pressure suggests the pool’s underground plumbing is intact and digging isn’t needed.
Tracer gas and acoustic detection overview
After confirming a pressure loss or ruling out obvious failures, technicians often turn to tracer gas and acoustic detection to pinpoint underground leaks without excavation.
They use nondestructive methods to locate and characterize leaks quickly.
- Inject inert tracer gas into the line
- Scan surface for gas emergence
- Use acoustic microphones and correlators
- Map probable leak zones
- Prioritize precise digging locations
Safety and Preparation Before Repair
Before beginning any excavation or repair, one should confirm required permits and arrange utility locates to avoid legal issues and hidden hazards.
Appropriate personal protective equipment and measures to protect the work area should be planned to prevent injury and contamination.
A concise tools and materials checklist guarantees the crew has fittings, pipe repair kits, shovels, and backfill supplies ready before work begins.
Required permits and utility locates
When planning a repair to an underground pool pipe, homeowners must confirm local permit requirements and arrange utility locates to avoid legal issues and hazardous strikes. Many municipalities require excavation permits and notification to utility companies before any digging begins.
Contact the local building department for permit scope and timelines.
Request professional utility marking (call-before-you-dig service) to identify gas, electric, water, and telecom lines prior to excavation.
Personal protective equipment and site protection
With permits secured and utility lines located, attention turns to personal protective equipment and site protection to keep workers and bystanders safe during excavation and repair.
Workers should wear hard hats, safety glasses, gloves, steel-toe boots, and high-visibility vests.
Erect barriers, caution tape, and signage to restrict access.
Shoring or trench boxes must be used for deeper excavations to prevent collapse.
Tools and materials checklist
A concise checklist of tools and materials guarantees the repair proceeds efficiently and safely: essential hand tools (shovels, pipe cutters, adjustable wrenches), excavation equipment (mini-excavator or manual digging tools), pipe fittings and replacement sections compatible with the pool plumbing (PVC/CPVC/PEX as applicable), solvent cement and primer or approved mechanical couplings, pipe primer and lubricant, replacement valves and unions, pressure-rated repair clamps, leak detection dyes, and appropriate replacement sealants and tapes.
- PVC/CPVC/PEX spare pipe and fittings
- Solvent cement, primer, couplings
- Pressure-rated repair clamps and valves
- Leak detection dye and pressure gauge
- Shovels, pipe cutters, wrenches
Locating the Exact Leak in Underground PVC or Polyethylene Pipe
Technicians begin by tracing the pipe runs from the pump and filtration equipment to the pool to establish where lines travel underground.
They then isolate sections and use pressure gauges and leak-detection equipment to narrow the fault to a specific run or segment.
Once located, excavation is planned precisely to expose only the affected area, minimizing how much soil must be removed.
Tracing pipe runs from equipment to pool
When a suspected leak lies somewhere between the equipment pad and the pool, tracing the pipe run precisely is the critical next step; it narrows search areas, minimizes excavation, and guides testing methods for underground PVC or polyethylene lines.
Technicians map visible fittings, valves and conduit, follow utility corridors, measure offsets from landmarks, probe with sondes or metal detectors where applicable, and mark the route for targeted inspection.
Using pressure gauges and isolation to pinpoint section
Begin by isolating the suspected run at accessible valves and fittings. Then attach calibrated pressure gauges to both the supply and return sides to establish baseline psi before testing individual sections.
Observe pressure stability, then sequentially isolate and repressurize short segments with valves or temporary plugs. A rapid drop identifies the affected segment; log psi changes, retest to confirm, and mark the precise area for repair.
Excavation planning: where to dig and how much
Having isolated the suspect run and narrowed the leak to a short segment via pressure testing, excavation planning focuses on pinpointing where to dig and how much soil to remove for safe access to PVC or polyethylene pipe.
Determine trench endpoints beyond the suspected zone, probe gently with short digs, mark utilities, allow clearance for tools and hands, and plan shoring for deeper excavations to prevent collapse and damage.
Step-by-Step Repair for a Leaking PVC Pool Pipe
First, the system is shut down and the affected lines are drained before excavating carefully to expose the damaged PVC.
The compromised section is cut out, pipe ends are squared and cleaned, and appropriate couplings and solvents are selected.
Solvent-cement technique and proper joining procedures are then applied to guarantee a secure, leak-free repair.
Shut down system and drain affected lines
Shut the pump and close the automated valves to isolate the circuit feeding the leaking line.
Then switch off power at the breaker to guarantee the system is fully de-energized.
Open manual bleed valves and remaining return/pressure faucets to relieve trapped water.
Use a submersible or shop vacuum to remove residual water from low points.
Cap or plug fittings to prevent backflow before cutting or repair.
Excavating down to the damaged pipe safely
Begin by marking the area above the suspected leak and establishing a safe perimeter to protect bystanders and equipment.
Probe soil gently with a shovel or hand trowel to locate the pipe, removing soil in layers.
Excavate enough clearance around the pipe for inspection and repair tools, avoid striking the pipe, and shore trench walls if deep to prevent collapse; keep spoil clear of the work zone.
Cutting out the damaged section and preparing pipe ends
With the pipe exposed and the area cleared, the next step is to remove the damaged section and prepare clean, square pipe ends for reconnection.
Measure and mark both cut points beyond visible damage. Use a pipe cutter or fine-toothed saw to make straight cuts.
Deburr and sand ends to remove burrs and dirt, wiping with a clean cloth to guarantee proper fit and adhesion.
Choosing the right couplings and solvents
Several factors determine the correct coupling and solvent for a PVC pool pipe repair, including pipe diameter, schedule (wall thickness), pressure rating, and whether the joint must be threaded or solvent-welded.
Select couplings rated for buried use and matching pressure.
For solvent-welded connections, choose a primer and cement formulated for PVC pressure pipe; for threaded joints, use compatible male/female adapters and thread sealant rated for potable water.
Gluing and joining PVC: solvent-cement best practices
Prepare the joint area carefully before applying solvent cement, since proper surface preparation and technique determine a durable bond in buried PVC pool piping.
Deburr and chamfer pipe ends, dry-fit components, then apply primer where required.
Use an appropriate solvent cement, coat both surfaces evenly, join with a quarter-turn, and hold alignment for the manufacturer’s set time to guarantee a leak-resistant, long-lasting connection.
Pressure testing repaired section before backfilling
Before backfilling, the repaired section should be pressure tested to confirm a watertight seal and detect any hidden faults.
A pump or pressure tester applies recommended system pressure; monitor gauges for at least 15–30 minutes.
Inspect joints and fittings for drops or bubbles using soapy water.
Hold pressure; if loss occurs, depressurize, locate and rework the leak before proceeding.
Backfilling and restoring landscape
Once the repaired section holds pressure without loss, the trench can be backfilled and the surrounding landscape restored.
Compact clean fill in 6–12 inch layers, avoiding sharp rocks near the pipe.
Reinstall topsoil, grade for proper drainage, and reseed or replace sod.
Restore hardscape, mulch, and irrigation.
Verify no settling over several days and recheck system pressure after final grading.
Step-by-Step Repair for Leaking Flexible or Polyethylene Pipe
When repairing flexible or polyethylene pool pipe, the technician first distinguishes damage at fittings from through‑pipe breaks to choose the proper method.
Common fixes include barbed or compression fittings and heat fusion for clean cuts, or repair couplings and stainless clamps for temporary or awkward joins.
After installing the chosen connection, the line is pressure‑tested and all fittings are secured and buried to prevent movement.
Identifying fittings vs through-pipe damage
Although both fittings and through-pipe breaches can cause visible wetness or pressure loss, distinguishing between them requires focused inspection of joints, fittings, and the pipe body along the affected run.
Look for concentrated drips, loose or corroded clamps, hairline cracks, abrasions, or bulges.
Tighten and dry-test fittings first; linear dampness or perforations along the barrel indicates through-pipe failure requiring section repair.
Using barbed fittings, compression fittings, or heat fusion
After isolating whether the leak originates at a fitting or along the pipe body, attention turns to repair methods appropriate for flexible or polyethylene pipe: barbed fittings, compression fittings, and heat fusion.
Barbed fittings require secure clamps and clean cuts; compression fittings compress a ferrule for a mechanical seal; heat fusion joins melted pipe ends for a permanent, pressure-rated bond.
Choose by access, skill, and longevity.
Repairing with repair couplings and clamps
Begin by preparing the work area and shutting off flow to the damaged line so pressure is relieved and water is drained from the section to be repaired.
Cut out the damaged portion, deburr and clean pipe ends.
Select appropriately sized repair coupling or stainless clamp sleeve.
Slide coupling/clamp into position, tighten evenly per manufacturer torque recommendations, and trim excess pipe.
Restore flow after basic visual inspection.
Pressure testing and securing connections
Conduct a controlled pressure test to verify the integrity of the repaired flexible or polyethylene pipe and then secure all fittings to prevent future leaks.
Isolate the section, pressurize to recommended psi, and monitor for drop or audible leaks for several minutes.
Tighten clamps, retorque couplings per manufacturer specs, and apply thread sealant where applicable.
Recheck pressure after backfill to confirm stability.
Temporary Emergency Fixes When Immediate Permanent Repair Isn’t Possible
When immediate permanent repair is not possible, temporary measures such as repair clamps and epoxy putty can stop or slow leaks long enough to allow for proper planning.
Repair clamps provide a fast mechanical seal but may not conform to irregular breaks or long-term pressure, while epoxy putty can fill small cracks but requires a dry surface and may not bond well under sustained flow.
Each option offers quick mitigation but carries limitations that should be weighed before relying on it as a long-term solution.
Using repair clamps and epoxy putty
For a quick, temporary seal on a leaking underground pool pipe, repair clamps and epoxy putty provide an immediate, stopgap solution until a permanent fix can be arranged.
They are applied as follows:
- Dry and clean the pipe surface.
- Cut power and stop flow.
- Mold epoxy putty over small cracks.
- Fit clamp over putty for reinforcement.
- Monitor and plan permanent repair.
Pros and cons of temporary solutions
Several temporary fixes—such as repair clamps, epoxy putty, and quick foam sealants—offer immediate containment of underground pool pipe leaks but carry trade-offs in durability, cost, and long-term system health.
Benefits include rapid installation, reduced water loss, and time to plan permanent repairs.
Downsides: limited longevity, potential pipe damage or blockage, masking underlying issues, and possible higher cumulative costs if not promptly replaced.
Replacing Long Sections or Rerouting Problematic Underground Lines
When leaks are widespread or pipe material is degraded, replacement of long sections may be more reliable than repeated spot repairs.
Proper planning for rerouting should prioritize routing away from tree roots, heavy traffic areas, and future landscaping to reduce repeat failures.
The decision to replace or reroute must weigh expected lifespan, labor and excavation costs, and project time against the risks and expense of ongoing repairs.
When replacement is better than repair
If leaks are frequent along a long run or repairs repeatedly fail to restore reliable flow, replacement of the affected section or rerouting the line often proves the more practical option.
Opt for replacement when pipe material is degraded, multiple joints have failed, or access costs for repeated fixes exceed replacement.
Permanent solutions reduce downtime, lower long-term costs, and restore system reliability more effectively than patching.
Planning a reroute to avoid future damage
Begin by mapping the existing plumbing run and surrounding conditions to determine a new route that minimizes future risk.
Identify utilities, root zones, slope, and drainage paths.
Select durable materials and shallow-to-deep shifts to ease future access.
Plan gentle bends, avoid high-traffic areas and tree roots, and verify permits.
Document the new alignment, marking surface indicators for maintenance and inspection.
Cost and time considerations for full replacement
After finalizing the reroute plan and marking the new alignment, owners must evaluate the cost and timeline for full replacement of long pipe runs or rerouting problematic underground lines.
Estimates should include excavation, pipe materials, fittings, permits, landscaping repair, and labor.
Timeline varies with soil conditions and access—typically one to five days for straightforward jobs, longer for complex reroutes requiring permits or utility coordination.
Preventing Future Underground Pool Pipe Leaks
Preventing future underground pool pipe leaks requires attention to installation details, including proper bedding and suitable backfill to minimize shifting and abrasion.
Keeping pipes clear of invasive roots, routing them away from areas of frequent heavy equipment use, and protecting vulnerable runs from freeze-related stress will reduce damage risks.
Routine inspections and seasonal preparations guarantee small issues are caught early before they become costly failures.
Proper bedding and backfill materials
A thin, well-graded layer of clean sand or pea gravel provides consistent support and minimizes point loads on underground pool pipes, reducing the risk of crushing and abrasion.
The pipe should rest on this bedding, with side and top fill composed of the same material to prevent settling.
Avoid using large rocks, debris, or uncompacted native soil directly against the pipe.
Compact in thin lifts.
Avoiding roots, heavy equipment, and freeze issues
Proper bedding and backfill reduce mechanical stress on underground pool pipes, but protection must also address external threats such as tree roots, construction traffic, and frost heave.
Install root barriers and keep large trees distant from pipe routes. Mark and avoid heavy equipment zones; use protective concrete encasements where traffic is unavoidable.
Bury lines below local frost depth and use insulation sleeves to minimize freeze-related movement.
Regular maintenance checks and seasonal preparations
Schedule routine inspections and seasonal preparations to catch small issues before they become pipe leaks.
The homeowner should document findings, perform simple tests, and address wear promptly to prevent costly repairs.
- Check pressure and flow monthly
- Inspect visible fittings and valves
- Monitor yard for wet spots
- Winterize lines in cold regions
- Replace worn seals and clamps on schedule
Estimated Costs and Timeframes for Common Repairs
A concise comparison outlines typical DIY expenses—parts and materials—and contrasts them with professional service fees, which include diagnosis, labor, and equipment.
Estimated timelines cover detection (hours to days), repair (a few hours to multiple days depending on complexity), and restoration of landscaping and system balance (days to weeks).
Clear cost ranges and expected schedules help homeowners weigh savings against reliability and time.
DIY repair cost breakdown vs professional service
Many homeowners weigh DIY repair costs against hiring a professional when fixing an underground pool pipe leak; understanding typical price ranges and timeframes helps inform that choice. DIY saves labor but risks misdiagnosis; materials $50–$400, few hours to a day. Professional service costs $300–$2,000+, includes diagnosis, warranty, and skilled labor.
| Option | Typical Cost |
|---|---|
| DIY materials | $50–$400 |
| DIY total | $50–$600 |
| Professional | $300–$2,000+ |
| Warranty/Extras | Varies |
Typical timelines for detection, repair, and restoration
After weighing DIY versus professional costs and what each option includes, homeowners typically want a clear timeline for detecting a leak, completing repairs, and restoring the pool to service.
Detection often takes 1–3 days with dye tests and pressure checks.
Minor DIY repairs may require 1–4 days; professional excavation and pipe replacement typically take 2–5 days.
Restoration and refilling add 1–3 days.
Troubleshooting Common Problems After Repair
After repairs are completed, the owner should monitor for persistent low pressure or reduced flow that may indicate partial blockage or air in the line.
Attention should be paid to fittings and joints for signs of new leaks, which often require tightening, resealing, or replacement.
If problems persist after basic checks, a timed re-test or prompt consultation with a professional is recommended.
Persistent low pressure or flow issues
Check the pump and filter first when low pressure or weak flow persists following a repair, since a clogged filter, trapped air, or a misadjusted valve often causes symptoms that resemble a leak.
Inspect pump basket, clean or backwash filter, bleed air from the system, verify skimmer/return valve positions, and confirm pump impeller rotation.
If unresolved, test pressure across the pump and consult a technician.
New leaks at fittings or joints
Inspecting fittings and joints promptly is essential when fresh dampness appears following a repair, because small alignment errors, improper adhesive curing, or uneven thread engagement commonly cause new leaks.
The homeowner should depressurize, expose the joint, and examine for cracked fittings, incomplete solvent welds, loose unions, or cross‑threading.
Tighten or reassemble correctly, replace damaged components, and guarantee proper adhesive cure times before pressurizing.
When to re-test or call a pro
Once fittings and joints have been corrected and allowed proper cure or torque, determine whether to re-test the system or call a professional based on observable performance and the homeowner’s skill level.
Re-test when flow, pressure, and visible joints remain stable for 24–48 hours.
Call a pro if leaks recur, pressure drops persist, equipment sounds abnormal, or the homeowner lacks tools, confidence, or access to excavation and specialty repairs.
Recommended Tools, Materials, and Suppliers
A concise list of essential tools, appropriate pipe types, compatible adhesives and fittings, and reliable supplier options helps guarantee a durable underground pool pipe repair.
Guidance should compare PVC, CPVC, and flexible pipe choices, specify solvent welds versus mechanical couplings, and identify common fittings needed for splices and changes.
Advice on selecting a qualified leak-detection or pool-plumbing contractor should include licensing, insurance, references, and evidence of specialized equipment and experience.
Essential tools for DIY underground pipe repair
Gathering the right tools and materials before digging prevents delays and reduces repair errors.
Essential items include durable tools, safety gear, and diagnostic equipment tailored for underground pool pipe work:
- Shovels and digging bar for trenching
- Pipe cutter and deburring tool
- Pressure gauge and leak detector
- PVC primer, cleaner, and replacement couplings
- Protective gloves, goggles, and knee pads
Recommended pipe types, adhesives, and fittings
Durability and chemical compatibility should guide the selection of pipe materials, adhesives, and fittings for underground pool repairs.
PVC Schedule 40 or 80, CPVC, and Ductile Iron resist pool chemicals; use NSF‑approved solvent cement for PVC and compatible primers.
Threaded stainless steel or brass fittings suit metal joins.
Include compatible gaskets, PVC unions, and pressure-rated valves; source from reputable pool supply or plumbing suppliers.
How to choose a qualified leak-detection or pool-plumbing contractor
When selecting a leak‑detection or pool‑plumbing contractor, prioritize verified experience with underground pool systems, clear proof of licensing and insurance, and documented familiarity with the specific pipe materials and fittings used at the site.
Check references, recent job photos, and written estimates detailing methods, parts, warranties, and cleanup.
Prefer technicians certified by industry organizations, offering transparent testing procedures, digital leak reports, and hourly versus flat-rate explanations.
Photo Guide: Key Repair Steps and What to Look For
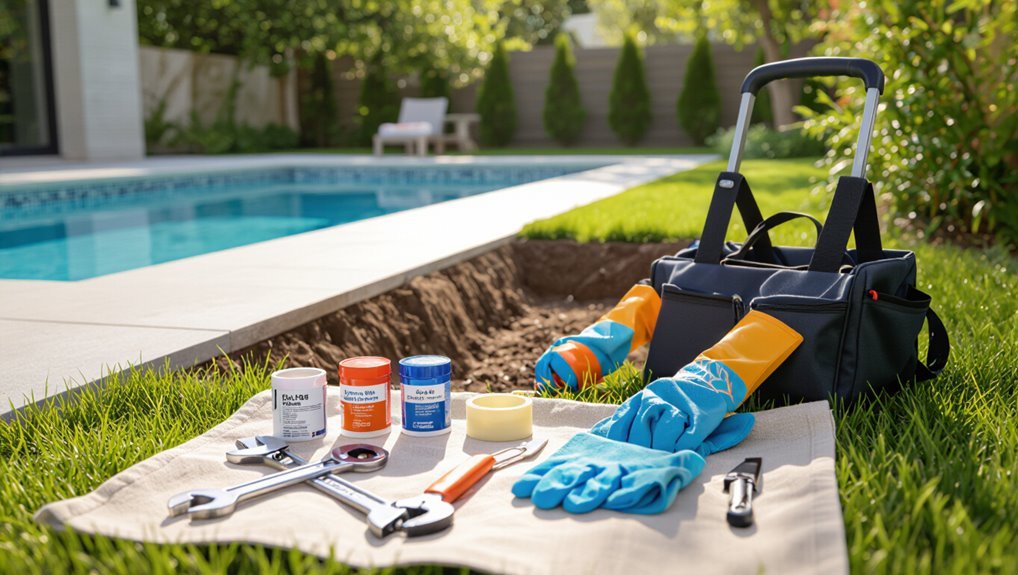
Begin by photographing the problem area from multiple angles and distances to document pipe orientation, soil conditions, and visible damage before any excavation or repairs commence.
Continue capturing steps: exposed pipe, leaking joint, excavation depth, pipe replacement, fittings, and backfill.
Note tool placement, material labels, and final pressure test readings.
Organize images chronologically for contractor review, warranty records, and future maintenance.
Conclusion
To conclude, the homeowner is left with a clear path: diagnose carefully, dig deliberately, and repair methodically. Like a detective following clues in the soil, they confirm leaks, gather the right tools, and choose fixes suited to PVC or polyethylene. With attention to safety, realistic time and cost expectations, and a checklist for post-repair troubleshooting, the pool can be restored efficiently and reliably, minimizing disruption and preventing future surprises.
